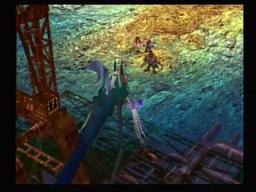
You have finally made it to the world map. One of my favorite parts and most rewarding of FF7 is having to be stuck in gross Midgar for the first 7 hours and then be rewarded with the open lands of the World Map.
Kalm Village
This is a calm village. Go to the Inn right away and lots of story stuff goes on here. This is the new Final Fantasy, where we take 30 minutes to divulge into backstory. You even get to be in a battle with Sephiroth. Well, after this, Cloud and Seph are at Nibelheim. You can go to Tifa’s house or Cloud’s house (both in the east part of town). It’s all pretty weird to be honest.
Return to the Inn and talk to Sephiroth. Speak with him a few times and choose to rest. The next morning, you get your picture taken and the party heads to the Mako Reactor in Mt. Nibel. The bridge goes down along the way.
You then gain control of Cloud and Sephiroth. Go to the cave and then run north through it. Eventually you’ll be at the reactor and Cloud and Seph go in. Look through when Sephiroth asks you to and you’ll see a horrific sight. Monsters are created by Hojo after being showered with mako energy. Sephiroth freaks out when he realizes this is probably what happened to him.
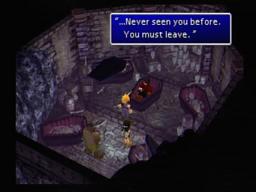
At this point (thankfully) the party takes a break and can save. The conversation picks up immediately afterwards. You’ll be in the Shinra Mansion in Nibelheim looking for Sephiroth. Go north up the stairs and east. You’ll see a blue-clad SOLDIER so talk to him and go in the room he’s by. If you have the cursor on you can see an exit opens up in that room with stairs leading down.
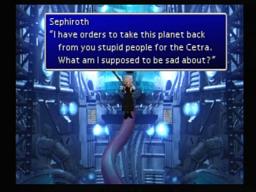
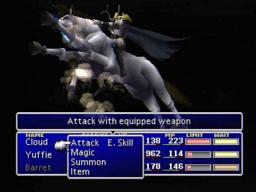
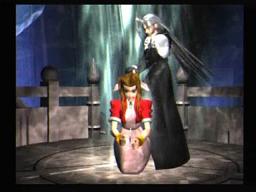
Sephiroth is going over documents. Go talk to him and then leave as he wants to stay here and go over some more things for a while. Cloud takes a nap and wakes up.When you regain control, head east into the main part of the mansion. Back east to where Sephiroth was. He’s gone insane and is upset that Cloud’s ancestors stepped over the ancients, the Cetra. Leave the Shinra Mansion to see Nibelheim on fire. It’s pretty obvious who did this.Check in the nearby house when given the opportunity, and then you are at the reactor again. Sephiroth has taken down Tifa’s dad and Tifa grabs a sword. She rushes Sephiroth with it, but he takes it and whacks her with it. Move Tifa out of the way then confront Sephiroth. He’ll take a much closer look at Jenova.Cloud is unsure of some of the facts and the party is confused generally. The story seems a bit off. Anyway, choose to move on and Barret gives you the PHS. You can now change members whenever you wish (on the world map at least).
Before you leave Kalm though, there are some things you can do here. New materia is for sale but it’s expensive. Try to get a Heal and Earth though. New weapons as well. In the west part of town is a house with a Peacemaker on the second floor, but no one can use this weapon.
Chocobo Farm
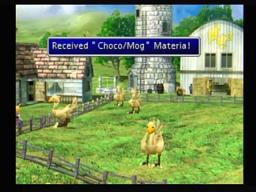
Southeast of Kalm is the Chocobo Farm. There are Chocobo Tracks along the way. Speak with the near Chocobo, and then all the Chocobos will dance. Afterwards, you’ll acquire the Choco / Mog summon. It’s your first summon and you need to equip it just like materia.
Inside the farm you’ll meet Choco Bill. Choco Bill advises you get a Chocobo if you wish to pass through the marsh (which you do). Otherwise, the Midgar Zolom will come after you and slaughter you (you can’t defeat it).
Exit this and run to the east and enter that building. Choco Billy is here and he’ll tell you about catching chocobo’s. He also conveniently will mention that you can buy the Chocobo Lure for 2000 gil and some greens to stall the chocobo when you see it. By some Gysahl Greens. Now you can leave.
With the Chocobo Lure materia equipped, you should meet chocobo’s around the tracks. The greens will stall them for a few turns (depending on the type of greens) and then you must defeat the enemies with them before they regain consciousness and run away. If you can do this you will capture the chocobo.
Mythril Mine
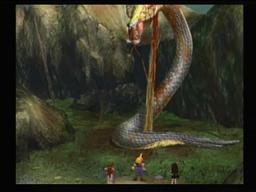
One you get the chocobo you can begin to run across the marsh. Watch out for the serpent shadow chasing you, this is what prevents you from crossing when on foot. As you get to the Mythril Mine you’ll see a dead serpent, obviously the work of Sephiroth.
As you enter the Mythril Mine, take the east path. Run northeast now and climb where you see the green arrow. You’ll come to the valuable Long Range Materia which allows any character to fight from long range. Especially good for someone like Aeris who should be in the back row based on her HP and defense but can’t because of her staff. Climb back down and go northeast for an Ether and Tent. Back southwest now.
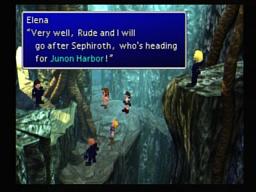
Grab the Mind Source after going west at the initial intersection and then southeast. West to meet the newest member of the turks, Elena. You’ll be needing to go to Junon. Anyway, go north for an Elixir and Hi Potion and then west to leave the Mythril Mine.
Fort Condor
Fort Condor is near you so go there and agree to help them fight. For now we won’t be fighting for them much but we can now rest there.You can buy some standard materia and items here, and at the very top you can begin to fight.
Junon
As the party says, this place is pretty rundown. A couple things – make sure someone has the long range materia equipped and have Barret (long range) in your party. Barret’s new weapon at Kalm is a short range weapon so have him stay with the Assault Gun. There is a “weapon shop” here that doesn’t sell any weapons.Go southwest to the Junon Beach. You’ll see Priscilla playing with a dolphin, then a huge fish swims buy. This is Bottomswell and as you can guess you need to be long range to attack it. Spells work fine though especially Bio and Choco Mog. The bubbles that Bottomswell creates suck your HP down. Another ally will have to cast a spell on that bubble (not the character) to destroy it. Other than that, just expect physical attacks and Big Wave. A Power Wrist is your reward.
A stupid minigame ensues afterwards. You have to breathe into the lungs of priscilla by pressing a button and then pressing it again when it’s near full capacity. Do this a few times and she’ll revive. Exciting.
Return back to town and to the southeast house. You should rest here and there is some commotion when you get up. Go to where the party is and up the stairs and priscilla will come out. Priscilla then gives you the Shiva Materia. Shiva is an ice based summon.
Once all the talking is done go back to the beach and talk to priscilla. She explains the whistle and dolphin calling. Once you get the Whistle the objective is to jump on that plank, so you’re going to need to learn how far the dolphin jumps and position yourself to land on the plank. Just use trial and error, it’s not too hard, just stay a decent distance away from the plank or you’ll keep hitting it.
Junon
Go south and more south to take that big lift (go by the switch on the ground). Further south and a little east for the exit.
A Shinra Soldier finds you and tells you to put a uniform on, it’s time for Rufus’ march. You get items based on how you do but you won’t miss out on anything really worthwhile. It’s another pointless FF7 minigame.
Heidegger and Rufus talk after this.
Yet another stupid minigame with the Shinra soldiers but this is a little more tolerable. As you are leaving to send Rufus off you’ll see Rude walk through an alley. A good weapon shop is here, and further is a bar where Rufus is getting high. The materia shop in Junon also has some goodies like Revive. Return back to the main road and continue southwest and then northwest in the next screen.
Eventually you’ll see your party members running towards the ship like Barret. Now it is time to send Rufus off. Just follow the directions, this is a lot easier. If you get over 100 you get the Force Stealer. Now it’s time to cross the continent in Shinra uniforms.
Junon Boat
As you are on the Junon Boat and regain control, go southwest for an Ether and northeast for All Materia. You’ll find Aeris down here, and after talking to everyone go up.
On the deck you can see Tifa and Red XIII. Talk to everyone and you’ll see the west exit is blocked by a soldier. Go back down and talk to everyone and back up, and the soldier will be gone and you can go west.
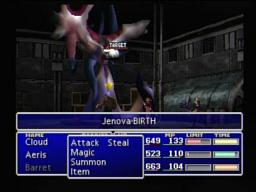
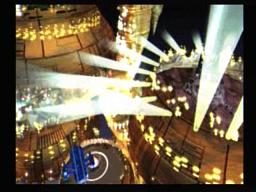
Barret is in this area so talk to him a few times and then an alarm sounds. It must be Sephiroth on board. Go east to meet up and form a party. Down into the lower part and you can go through that door that the soldier was previously blocking.You can fight soldiers around here and steal Shinra Beta armor from these Marines. You can hear a heartbeat around here. Climb the west ladder and walk around to get the Wind Slash for Yuffie if you have her.Back on the ground floor, the shinra soldiers passes away and Sephiroth comes through the ground. A battle with Jenova-Birth is about to begin. Jenova Birth is the first Jenova enemy obviously. It has nothing you can steal, and Bio doesn’t work on it. Your summons take off the most, and your limit breaks. Quake is pretty good too. Watch out for it’s double Tail Laser, this can be devastating. W-Laser is pretty damn powerful too. Last but not least, it’ll use Stop. The hardest part is the ridiculous amount of HP Jenova has for this point in the game. You’ll get a White Cape for outlasting her. Grab the Ifrit Materia and then leave.
Costa Del Sol
You finally made it. Thank god, you can take a vacation. The atmosphere is pretty light around here, you can mess around and shop. You might want to buy some Softs to prepare for stone-based enemies and also Revive Materia.
Mt. Corel
Since Costa Del Sol is pretty pointless, you may as well head out of it to the northwest. On the world map, take the only available route that goes through the mountains on the wood bridges. You’ll soon see a cave far away, but you can’t access this without a special chocobo. Instead look for Mt. Corel just around here. Just run north in the first few screens. You’ll then reach a reactor. As you go south past the reactor you’ll see another path to the east that you can’t get to yet. There is nothing here anyway. In the area south of the reactor, just travel southeast along the bridge to the next area.
Save at the save point you see. Take the higher route as you go east, but tap circle as you are running. The bridge will break but you’ll jump if you tapped O fast enough. Grab the W Machine Gun, a great long range double AP weapon for Barret. Take the lower path and continue pressing circle to avoid falling.
Once you get to the fourway, take the higher west path to get the Turbo Ether and Transform Materia. Take the upper east path now to exit. As you go east in the next area you’ll see your other members stuck at the draw bridge. Anyway, as you see a green marker you can go in that little shack to turn a switch to get your other characters across. Before returning to that drawbridge, go further along and you’ll hear some chirping. Try to climb up and you can to see some chocobos. You can take the damn treasure which is 10 phoenix downs or do the “right” thing and don’t.
Back to the far west and take the lower path going east at the train tracks. You can now pass through the bridge and you’ll eventually be close to getting out of Corel Mountain. First though go to the southwest of this area where it looks like it’s a dead end, but go near the mountain and you’ll find an alcove with a worker. Grab the Power Source and talk to him. Then grab Mind Source and Tent and split from this bum.
North Corel
Soon enough you’ll be in North Corel. Barret gets some trouble from the locals because of his past here. Go west to the Gold Saucer (there isn’t much to do here) and Barret will give a backstory and some flashbacks of North Corel when he lived here. Ride the Ropeway to the Gold Saucer now.
Gold Saucer
Nice visuals. The Gold Saucer is pretty extravagant. To get a full lifetime pass it’s 30000 gil! You’ll need this later, but for now just get the 3000 gil pass.
I hate this place though. You need GP to save. GP is basically game points in the Gold Saucer, but they cost money (you can buy GP). After you go to the center and split up,
Pick anyone (it does matter who you pick actually in terms of your relationship with that person and the ones that you didn’t pick) and then go to the Speed Square. You’ll meet the owner of this place, Dio, and he mentions sephiroth.
Go to the Wonder Square to see Cait Sith. He tells your fortune and then joins your party. Now go to the Battle Square to see a dead shinra soldier. Cloud goes further along to see several more dead shinra enemies. Dio finds you and your party gets framed for these murders.

Corel Prison
Another annoying place as you’ll fight lots of random battles and the enemies steal stuff from you. Kill them fast or you won’t get your stuff back if they flee.
To get out of here, you’re going to have to start by finding Barret so go to the southeast house. Everyone will confront Barret so he’ll tell the story of Dyne and why he left Corel. Eventually he’s going to join Cloud and someone else in a group to find Dyne. Head back north, past the save point, and towards where you came in. Keep going north and you’ll see a dead guy. Go through the northwest gate to the next area. Go north a little and then east through the gate to the next area. Northeast now and then soon you’ll find Dyne.
Dyne can be a nuisance especially if you have Barret in the front row. It’s best to have Long Range Materia and have him be in the back to reduce damage. Use your best spells and summons, and try to use a Hyper on Barret to get his Limits up fast for Grenade Bomb or Big Shot. You can’t steal anything but you get a Silver Armlet for winning.Back at the Corel Prison Barret will get permission from Mr Coates to go up to the Gold Saucer (or Cloud will get permission rather) and win a chocobo race to determine if you can leave. Ester will be your manager.Gold Saucer
As you ride up the elevator you’ll learn of Chocobo Racing. First of all, grab the Ramuh Summon (lightning based) in the room with the jockeys.Soon Ester comes back in and tells you how to ride again. This isn’t too hard, but it can be difficult for your first time. The key is to conserve your energy, saving the bursts only to get ahead when you’re being blocked or in the windmill area at the end where it’s slower. Most of the race you can just press square and run at a pretty fast pace just make sure to balance it. Holding R1 and R2 to restore energy is useful too.
After winning you can leave and Dio gives you a Buggy.
Gongaga Village
As you take the buggy further west across the river you’ll see a destroyed village. Don’t go in it yet, this is Gongaga Village. Instead, walk around the forest until you fight a mysterious ninja. This is Yuffie (note that you can recruit her the same way earlier in Junon). She is pretty easy to defeat with her low HP but she has some spells.
Afterwards a scene with Yuffie. You can’t go to the save point or say the wrong thing or you won’t recruit her and will have to do it over again. When you get a chance to answer her questions, choose the following – “not interested”, “petrified”, “wait a second”, “..thats right”, and “let’s hurry on”. Again, if you go to the save point or don’t say those answers you won’t recruit Yuffie. She is a ninja from Wutai.
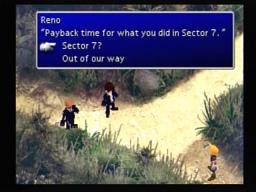
Before entering Gongaga try to put Aeris in your party. Seal Evil will be very useful in a bit. Elena, Reno and Rude are running around as soon as you enter. Fortunately only Reno and Rude fight you. They are extremely susceptible of paralysis from Seal Evil. After they are paralyzed, just use your best level 2 black magic spells and summons on them. There is nothing to steal but you do win an X Potion afterwards.
Take the right path as you go forward. You’ll see the reactor. As you get up there Scarlet and Tseng will examine the reactor and leave. When you regain control, search where Scarlet was looking to get the Titan Materia.
Return back to the previous path and go straight this time. Keep going straight for Deathblow Materia and then northeast to reach the town. Note that if you go northwest you’ll exit back to the world map.
In Gongaga town you can meet Zack’s parents. The materia / accessory shop is definitely worth a look especially for Time magic. A White M Phone is in the north building and west of this is the Inn which has an X Potion.
Cosmo Canyon
There really isn’t much else in Gongaga to do so leave and then travel on the buggy towards the mountains. If you go towards the southwest part of the continent you can find a spot to cross the river.
As you find an opening in the mountains and continue past a village, the buggy breaks down. Enter the Cosmo Canyon and Red XIII (Nanaki) will run up as it is his hometown. He is looking for the elder Bugenhagen. At first it seems you can’t come in but Red will allow you in.
The east part of town has an Inn and General Store and little else. To the northwest you can talk to Red XIII again, and then follow him through. Your party splits off, so save and buy some weapons if need be. Take the exit in the back to continue further up.
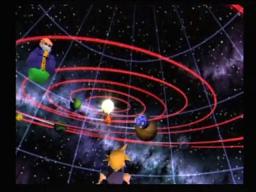
You’ll meet Bugenhagen and learn more about Red. After the talk, go talk to one of your party members and then bring two of them to Bugenhagen. You’ll look over the planet on the holographic system bugenhagen made. This is what Bugen means when he says he can feel the planet.
When you regain control, head to the beginning of the Cosmo Canyon. The party has gathered around the Cosmo Fire. Talk to everyone and then talk to Red XIII last. Bugenhagen will come up and ask Cloud and someone else to accompany Red. Get your party set, rest, get new weapons and head for behind the weapon shop.

Cave of the Gi
The door that Bugenhagen shut is now open. Bugenhagen accompanies you as he opens it.
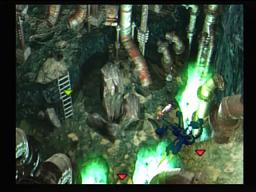
It is a long way down so expect lots of roping. At the end you’ll have an exit east. Lots of enemies cast death related spells around here so make your battles quick. There is a pretty good chance Red isn’t that well built up in terms of Limits so this would be a good place to get him in Fury condition and rack up some limits and kills.
You are to head east in the first area, and if you go in the little caverns you’ll find rocks that you can most of the time break open to reveal monsters. There is really nothing around here so take the path going north in the middle area. Go north and skip the west path. You’ll hit oil and slip if you run while going that way. Walk and then go south to get an Added Effect Materia. Go north and take the next west path, and go south when you can. Taking this lower route you can get a Black M-Phone. If you take the east path here and go north you get an Ether. Northwest to exit now.
You are at a room with 5 openings. The side ones connect to eachother and the middle is a dead end. The second and fourth lead to Stinger enemies. Their Sting Bomb is devastating. The fourth path leads to the aforementioned stinger and an X Potion.
The second path leads to the exit and a bunch of items. As you go north through this second path go west and south when you can. Lean to the east to get the Fairy Ring otherwise you’ll just reach a dead end. North now for one last Stinger. Past this and west for a Turbo Ether and then north to exit.
Rest up and search the mask to begin the battle against Gi Nattak. This battle is hard, with Gi Nattak using Fire2 and Drain and some decent physical attacks. He can also steal your MP. Obviously having Fire protection is most helpful, and using Ice and Shiva work best. Also, make sure your allies used a Hyper to be in Fury status so that their limits like Sled Fang and Climhazzard can run Gi Nattak into the ground. Have an All-Haste person might be nice to get the battle started off on the right foot. You get a Wizer Staff for this. Get the Gravity Materia after the battle and go north.
Bugenhagen and Red have a talk. Red is to continue on the journey with Cloud to save the planet. While Cloud and the others prepare to leave, Red will come to you at the exit. He joins you. And the buggy works again.
Nibelheim
It’s finally time to return to Nibelheim. It might be nice to bring Tifa along since she lived here too. Anyway, take the buggy towards the west part of the continent across a river and then north until you see some blue mountains.
As you enter, the town is littered with black sephiroth goons. They often give you items, mostly Luck Source but also Turbo Ether, Elixir and Platinum Fists. Not much else around town despite the fact that they’re all denying what’s going on.
Enemies are around the Shinra Mansion. Go up the stairs as you enter and left. Grab the Enemy Launcher. The south room has nothing but the north room has a suspicious safe. You probably won’t know how to open it until you figure out all the hints around the castle. Basically, look in every room carefully for numbers and such on the floor. Pressing circle everywhere you go helps.
Go to the upper floor east side now, and take the northeast path for a Magic Source. The southeast path is still open to the basement.
Down there you’ll find Sephiroth. He tells you about the reunion at Mt. Nibel and then he throws a Destruct Materia at you.
Back to the first floor now. Where you entered, go west to read two letters. You have 20 seconds to turn the dial to the correct digits and you can not go over when doing it. Check out all the hints (for the three numbers).
Take the left path on the first floor. There is nothing on this side but work your way to the northeast and east for a while. You’ll reach a Twin Viper for Yuffie. If you took the east path at the beginning you’d reach a Silver M-Phone.
Now for the safe combination, I’m not going to give the tips out but there are four numbers and here they are – right thirty six, left to ten, right to fifty nine, and then right to ninety seven. If you can do this without going past in 20 seconds you’ll open the safe.
Out pops a summon and a boss fight. It is against Lost Number who has some tough physical attacks, not to mention a ton of HP. You’ll know you’re getting close when it changes forms and starts casting Quake 2 and attacking for 700+ damage. Have Haste on, Hyper / Fury to abuse Limits, and Cure 2 all ready at all times. Lost Number like many bosses is susceptible to paralyze attacks like Seal Evil and Choco Mog. For winning you acquire Red XIII’s final Level 4 Limit Break, Cosmo Memory. You can’t use this yet, not until you get his second level 3 limit. Also, grab the Odin Materia, which is a powerful summon indeed. Last but certainly not least, get the Basement Key and go back downstairs.
Remember that weird locked door as you are in the basement going east before the library? With the Basement Key you can open it and disturb the coffin to the northeast. Talk to this guy about Sephiroth and then bug him one more time to ask him who he is. He’s Vincent formerly of the Turks. He asks about Lucretia at this point. Talk to him about but he wants to be left alone. Leave back upstairs and Vincent Valentine comes out and joins because he has a chance to see Hojo.
Mt. Nibel
As you enter, take the path to the east and go north when you can for a Rune Blade. Continue on to the west and again go north when you can up the mountain. It’s a tricky route up but you get the Plus Barrette at the top.
Further west and across the bridge to a new area. There are tough enemies around here like Dragons, but you can steal a Gold Armlet from them. Anyway, as you can see there are 5 pipes. Ignore them for now.
Go down the ladders until you can reach the west exit. Take this all the way to a green room where a Sniper CR is in the northwest. Take the southwest path now and follow this to an oasis like area where an Elemental is. Further south into another light green room. You’re going to want to walk through the west wall here through a cave to get that Elixir treasure. Run back to the pipes now.
Take the second tube to get a Powersoul for Tifa. The fourth tube leads to an All Materia. The other’s lead further down, so take the second one and walk to the save point. Use a tent to rest up and prepare for a tough battle. Materia Keeper has a ton of HP so this battle will be very long. Again, having Fury on will allow Climhazzard and your other Limits to be used pretty fast. Also, make sure someone has the Enemy Skill materia so that they learn Trine. This is a valuable attack all Lightning attack. Materia Keeper makes the battle even longer by casting Cure 2 to revive about 1000 HP. Your reward for victory is a Jem Ring. It even drops a Counter Attack Materia afterwards. Definitely save after this rough battle.
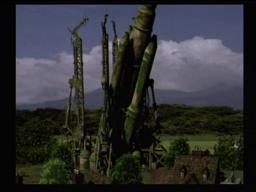

Rocket Town
Rocket Town has a rocket in the middle of it. It’s basically northwest once you get out of Mt. Nibel.
As you enter the party looks at the large tilted rocket. As you enter, go north and talk to the brown-clad guy a few times to look at the rocket with him. He gives you a Yoshiyuki for doing so. The weapon shop has some things, like Gold Armlet’s and some decent accessory’s. The item shop has Barrier and Exit magic which you haven’t seen so far. The building in the northeast has a Power Source. Enter the north house now and get the Drill Arm for Barret.
Go to the back and you’ll see the Tiny Bronco. After looking at it for a while, Shera comes out and talks for a bit. Now go to the rocket. Talk with Cid about the space exploration program and Shinra. Then, back to his house to talk to Shera some more but Cid comes in and yells at her. Soon Palmer shows up and Cid goes outside to talk to Rufus. Cid thinks the space program will start up again but instead Rufus just wants the Tiny Bronco.
Shera tells you to run to the back of the house as Palmer is stealing the Tiny Bronco. You have to fight him for it. There is nothing to steal and he’s easy, although his Mako Gun takes off a fair amount. Use Haste and cast your best level 2 black magic spells – Trine is very useful too. Physical attacks even work fine. You get an Edincoat and the Tiny Bronco.As the party escapes, they pick up Cid but the Bronco is hit by Shinra. The Bronco falls in the water fortunately and can still be moved around. The party starts off near the Wutai area.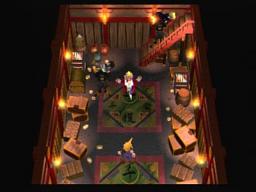
Wutai
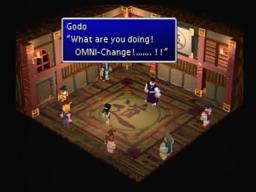
Get off on this west continent and travel north. A scene occurs with Yuffie and then a battle with two Shinra soldiers. You’ll notice your materia is gone. Defeat the soldiers and run north until you get to Wutai.As you get in, Yuffie runs away. Head to the northwest to exit. Take the east building and go north to rest. You can slip through the wall to the west for a Magic Shuriken. Go to the east part of this building and through the southeast trap door for a Hairpin. A little farther down and you’ll meet the leader, Godo. Talk to him several times until he gets up. Yuffie will jump out then.
You still don’t have your materia so leave this place. Go to the northeast towards Da Chao now. Return back to Wutai right away and talk to the little kid running around outside the nearby building. He’ll mention some pounding so go inside and grab the MP Absorb materia here. Yuffie will then steal it from you. Go to the first building in Wutai, the very southeast. Examine the blinds to the left to reveal Yuffie and she’ll run out. Run out to where the bar is and you can see the barrel in the southwest shake. Search it and your party will catch Yuffie. She’ll take you to a trap room and your party will fall for it.
Release your members and go to the northwest part of Wutai, and to the left thing. You can go up and ring the Gong by examining it, and a door below opens. Go down here but it looks like Corneo has captured Eleni and Yuffie. Grab the Swift Bolt and Elixir and go north to exit. Corneo dodges the shinra and you have to fight the shinra soldiers. Clear them out and then leave. Rest and then leave this building.Reno and Rude will agree not to bother you since they need Elena. Head southeast and save, and then northeast to Da Chao.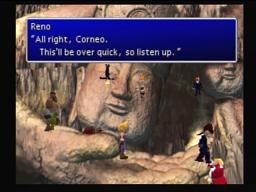
Da Chao Mountain
Da-Chao is the big stone structure. Take the path going north when you get to the fork. Take the right fork to see Reno. North to continue on and then take the southwest exit to reach Corneo, Elena and Yuffie.Corneo summons Rapps and this is one tough battle especially this early. You’re going to go through a lot of Phoenix Downs reviving from Aero3 so try to use Mindflow from Barret to get rid of his MP. Having Red around to cast Lunatic High to get your defence and Haste up is vital too. Other than that, make sure you equip the weapons with the highest attack power. You get a Peace Ring for winning.Back in town Yuffie returns the materia to the party finally. You can also buy stuff around here now, and the weapons are very good for every character. Yuffie can also engage in another sidequest (a sidequest within a sidequest).
At the very northwest part of Wutai Yuffie can go in the temple of Pagoda and climb it. She has to fight several enemies by herself along the way. Essentials include Counter Attack materia, Time for Haste, Restore for Cure2, Heal for status ailments, Enemy Skill for Trine and Added Effect Poison is useful on some of the bosses (and Bio 2 is good in general). If you want more spots to equip materia give her the Gold Armlet and Razor Ring from Wutai, if you want the highest ATP and highest DEF take the Adaman Bangle (steal from Adamantoise on beach near Wutai) and Magic Shuriken. The downside for the latter two is that they have a combined 5 materia slots. Always have Yuffie in Fury Mode by giving her a Hyper so that her limits get up faster.
The first fight is against Gorky, or Gorkii. He puts up a Barrier right away so your limits like Bloodfest and physical attacks will be halved. Trine works well too. Watch out for Demi2 though as that takes about half your HP. Either cure or have elemental – gravity armor. Gorkii will also cast reflect so you’ll be forced to use physical attacks. Fortunately since this makes the battle last longer, Gorkii will have run out of his skill points before soon enough. An X Potion is your reward. Rest at Godo’s and save and return.
Next is Shake. Cast Haste right away and then use Trine while Yuffie counterattacks Shake’s attacks. Continue to do this and heal until her limit break gets up, and then a Bloodfest or Landscaper should put him near death. You get a Turbo Ether.
Chekhov is the third battle as Staniv watches on. Get Haste off and then Trine. He’ll like counter with a Stare Down however. The way to counter this is to equip a Jem Ring, but the paralysis wears off after a few turns anyway especially with Haste. Chekhov uses Absorb but the Counter Attack should negate that and then some. You may also poison him as you attack if you have added effect equipped. His attacks are weak so get your Ice Ring and move on.
Staniv is annoying because of his sadness attack that ruins your Fury mode. Obviously cast Haste right away and then start throwing Trine at him until your limit goes up. Bio2 is decent but does about half the damage of Trine. He does have Iron Attack which takes off about 500. You get an Elixir for beating him, which you should be able to do after a Limit Break or two.
Now everyone will come to this floor and congratulate you. Definitely go back and rest and save. Your big worries in this final battle are Trine against you, so your HP needs to be a healthy amount over 1000 (hopefully 1400 +). Remember, Cosmo Canyon has HP Plus Materia. Either way, start the battle off with Haste and then Trine for 1000 damage. Watch out though because this jerk will cast small on you. When he gets close to death he’ll cast Cure2 on himself and Trine on you. Also, he’ll put you to sleep. If you can Poison him that will help during this otherwise he’ll keep restoring himself. Get your Limits off as much as possible and for winning, you’ll have 40,000 Gil, Yuffie’s final Limit the All Creation, and the powerful Leviathan Summon Materia.
Gold Saucer
It is kind of tricky to figure out what to do next. Take the Tiny Bronco and bring it to Nibelheim so you can get the Buggy. Now take the Buggy past Cosmo Canyon and towards Gongaga, and you’ll see a house by itself southeast of Gongaga. Go here and talk to the guy who sold the Key Stone to the Temple of Ancients to Dio at the Gold Saucer.
Go to the Gold Saucer with the Buggy. Go to the Battle Arena (probably should buy a permanent pass too). Take a right as you enter to look at Dio’s stuff and then he’ll come in. Cloud will have a talk and then Dio has Cloud enter the Battle Arena. It doesn’t matter how many battles you win but if you do manage to win them all you get a Protect Vest and Choco Feather. Either way you get the Keystone from Dio. As you go to leave though, the tram to North Corel is broken and you’ll have to stay the night.
Cloud gives a summary of the story (if you want). After this someone will walk in (likely Aeris unless you’ve been unkind to her) and ask to go on a date. After the date you see Cait Sith leaving with the Keystone! He must be a traitor. Follow him to the battle square, speed square, wonder square, Chocobo Square, and then Cait Sith will throw the Keystone to Tseng. Cait then blackmails you into forcing him to continue along.The next day Cait gives a summary of how to get there, traveling east to the Temple of Ancients with the Tiny Bronco. Choose your party, it has to include Cloud and Aeris though.
Temple of Ancients
This is a fun place to get to. You’re going to have to get into your Buggy and go back to Nibelheim to get the Tiny Bronco. Then, travel north and east all the way past Midgar and Choco Farm. Then start working southwest past Fort Condor and you’ll eventually see the Temple of Ancients pyramid as you pass through a thin river. Save and enter.
Aeris can sense something is here. As you enter you’ll see a wounded Tseng. He just gives you the Keystone and use it at the altar to enter the Temple of Ancients.Take the west path when you get a chance amd then take the ladder down. Grab the Trident just to the east and take the vines going up just further east. You can’t take this exit because “it just brings back memories”.Walk west up the ladder and south for a Turbo Ether but return north and climb the vines. Grab the Mind Source and enter the room. Get the Silver Rifle and talk to the blue ancient. You can buy basic items from him, get your hp / mp restored and save.
Return down the vine and go south past where the Turbo Ether was. Go down the vine at the end and east for Rocket Punch. Go further east and you’ll see an ancient disappear into the exit. Ignore this and go east and north up the vine. West for a Lucky Plus materia. Return back to where that ancient exited.
This part is a little tricky. Boulders are rolling towards you but as you can see, there is a hole in each of them that allows you to duck. You need to time this right but it should be no problem once you get out past the first one. Just duck one then run to the next. Take the left path for Morph Materia. Run to the end and then Aeris will get the party to return to that pit with the Morph Materia. Aeris will channel in to the knowledge of the ancients and you can see beforehand when Tseng looked into the promised land and Sephiroth came and attacked him. Run along the path and rest and save with the ancient.
There is a clock like structure here and you can control it. Line it up with the IV and go through for a Princess Guard. Now work it to V for the almighty Ribbon which protects against every status ailment. Six oclock is the exit so skip that and go to VII and VIII first. VII is a Trumpet Shell and VIII is a Megalixir. Now go to VI.
You have to memorize the routes so that you can capture the ancient in this area. Jump down to the bottom to grab the Work Glove. This part isn’t too hard as there aren’t too many possibilities. You can rest and Save with him and then go up to enter.
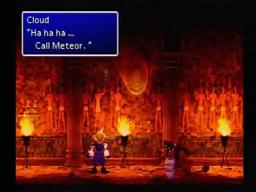
Talk to Sephiroth several times as you keep going east. Sephiroth is going to call Meteor it seems and destroy the planet. Soon a boss battle versus Red Dragon begins. Obviously it’s strength is fire. It’s attack and breath both take off around 1000. Your limits will be your best friend as usual although Trine and Ice do well too. After you Haste your party you should have no problem. You get a Dragon Armlet for winning. Also grab the Bahamut Summon Materia, and of course Bahamut is a top summon. Try to leave but you’re locked in, and going east will result in you looking at the Black Materia. You can’t just take it though because the person who grabs it will die.
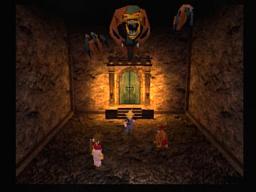
Of course Cait Sith hears the whole thing (somehow) and calls your PHS. He’ll sacrifice his body so leave. Rest and save with the ancient and then go to the clock and then you’ll see a door. An enemy named Demon’s Gate pops through the door. This is one tough boss, much harder than the Red Dragon. It has a Cave In attack that does 700+ damage and a single person attack for about 1000. It also prepares a Demon Rush attack and you can tell when this happens as it has it’s head and hands up. Use your best limits, have Haste and Regen on, and Barrier and M Barrier too. A Gigas Armlet is your reward. After the battle Cait Sith comes and reads your fortune then goes into the Ancient Temple. Soon the temple disappears.
Something unfortunate happens and Sephiroth now has the Black Materia. Cloud then has a vision of Aeris at the Sleeping Forest near the City of the Ancients. When Cloud finally regains his senses, leave Gongaga and get on the Tiny Bronco.
Bone Village
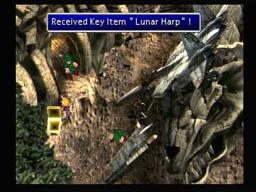
You’re going to have to travel east, north, and west past Midgar. Soon you’ll see a snowy region to your north and you can land near a forest. There is a big bone here so enter, it’s a village.Inside you can talk to the head guy to the north about excavating the Lunar Harp. You need this to pass through the Sleeping Forest. Anyway, talk to the worker (you can buy nice defensive gear btw) and order a search. Each worker costs 100 gil to run out there but you might as well put 4 or 5 out on the first time to get a better chance to find it. Spread them out and put them at different angles so it’s easier to tell where to search. You want to search where they are all looking so do your best to line it up – it seems to be picky sometimes in finding the Lunar Harp but eventually you will.
Sleeping Forest
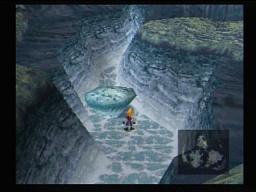
Exit through the northwest of Bone Village to find the Sleeping Forest. With the Lunar Harp you can go through without being sent back. As you look around you’ll see a red summon floating through the air. It then disappears and re-appears – it is Kjata. Just continue through the north.
In this new rocky area you can go north the east way for a Water Ring. Follow the linear path and you’ll be outside.
City of Ancients
As you walk up there are three paths. Take the right one first and get the Guard Source in the first building to the right that you see. Enter the next building for an Elixir and go near the beds for an Enemy Skill Materia.
Take the left path now and enter the first building. Get the Magic Source and save. Continue east. Take the lower stairs going east for Aurora Armlet. Return to the second building on the east side to rest.
Overnight Cloud realizes Sephiroth and Aeris are both here. Go to the very beginning and take the center path. Continue it to a building and go to the top for Comet Materia. It’s a dead end though so go down a little and go down the blue path in the middle. You’ll reach a save point eventually. Might want to equip that Water Ring on someone.
Up ahead you’ll jump to where Aeris is. It looks like Cloud is going to kill her, but he regains his senses. Unfortunately, Sephiroth is here.

He summons Jenova Life to battle you. Jenova-Life has all sorts of Water based attacks. There is really no secrets here besides using your best spells (until she puts reflect up) and then using your limits like Meteorain. A Wizard Bracelet is your reward.
Jenova – “Beacause you’re a puppet”. Great quote. Watch the ending to disc 1.
Hmm, very helpful to me when I was in Mt. Nibel and didn’t have the brains to figure out you could actually use the pipes to get those items. Also helped me get Vincent, my favorite character. I’ve played the game so many times and could never get the code on my own.
Nice job :] Thanks. If you got Disc 2 written out, I’ve just started on it!
haha, Good to hear lawlly! Yea I’ve got the full guide for this one, finished it up a few years back.
Disc 2
http://www.lordyuanshu.com/final-fantasy-vii-7-jenova-ultima-weapon-faq
After wutai when you go back for the buggy, the house is North East not south east gongaga.
Awesome guide. Thanks.
Man u are Awsome..I totally got lost wen i first got the plane because i was just cruising it LOL but this guide has helped me get thru it with extras.I’m glad u have disc 2 ready.
Thanks man, glad you got it figured out :) It’s fun getting the plane and being able to fly all over.
Hey I took a tube down skipping the mansion ans am stuck moving on am I going to run into trouble not having that done ans how could I go back?
Great Guide! Been helping me out a lot! :D thanks for it!