Final Fantasy X 10 Guado Seymour
Miihen Highroad
Now with Chocobo Eater gone you’ll be offered to ride a Chocobo for free. If you get you pushed off the cliff you’ll be at the lowroad instead. Both go to the same ending so get on your chocobo.
Assuming you’re coming on the chocobo up top, go north and search the first of a few feathers laying on the ground. This gives the chocobo an idea to jump and grab a Heat Lance. Near that Shelinda girl that you talked to earlier will be the Al Bhed 9 primer. Next area for a few hi potions and some people to talk to in this central area. Actually you might as well bring the chocobo down the lowroad now and get the Scout and Thunder Blade. Further down and east for a Fortune Sphere and thats all for the chocobo only accessible treasures. Oaka is down here but there isn’t much to do with him, but at the very end of the path is the Mars Crest, useful much later for Auron I believe.
Back at the central crusader’s area where you can save and talk to Dona. No need to donate to Miihen but you get a Scout, Ice Lance, or Moon Ring for 100 gil, 1000 gil and 10,000 gil respectively. As you try to leave you can’t, but backtrack out and Seymour will come.
Mushroom Rock Road
Mushroom Rockroad starts off with a disturbing scene involving Seymour. Continue along the path talking to everyone for petty items. Clasko will veer you in a new direction, to the left. Oaka is here again if you need the help.
Take the elevator in this area after the hi potion gift. The monsters are a tad harder, or at least different. A pretty straightforward path, you’ll eventually get to a larger area with stone stairs leading down and a treasure and guy in plain view. The guy gives you ten potions and the treasure is 1000 gil. Lucil and a Remedy a little farther down in this area. Shelinda up ahead will refresh you if you talk to her three times. A Hi Potion is the next treasure you see along the path and then you’ll be at the elevator.
In the new area with high mountains, go left first and down the elevator for a Serene Armlet and then north and west along the skinny path for the Al Bhed 10 Primer. Go along and hit the elevator going up this time. Up here is a guy with a mega potion and Luzzu and Gatta. Talk to them and then go up the lift to the Control Center of Mushroom Rockroad.
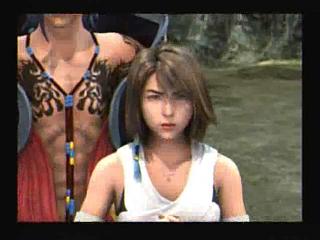
 You’ll be by some machina, just run by it until you get to a scene. Maester Kinoc wants to talk to summoner yuna. You are now in another centralized area with lots of characters like Oaka and a guy by a chocobo who will explain some things to you. Save your game of course and then talk to Gatta. Depending on what is said here, Gatta will either die or Luzzu will die, depending on which goes to war. Further into the tent area and you can get a good Serene Bracer for Auron and a Megapotion. This is all after speaking to Maestor Kinoc and Seymour. Save and talk to the guy in the southeast if you’re ready for a tough fight.
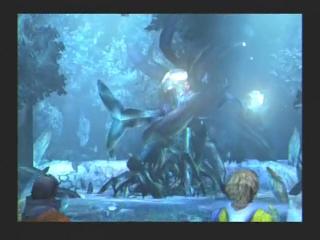
Sinspawn Gui
Okay you probably haven’t fought a battle this hard yet. As you will be able to tell early on, you need to destroy the 800-HP arms before you start working on the core. The head should also be a target of yours but only Wakka can do damage and it’s minimal. Instead try to build up a Valefor or especially Ifrit overdrive, that’d be a help. The head can spit Venom on you. Hopefully you have Lulu built up enough to use multiple enemy magic attacks like Fira but if not you’ll have to take it slow and kill the hands one by one as they continue to regenerate. The core will take a while to slow down but your party Hasted with it’s best attackers and Lulu should eventually get the job done. Crazy war scenes happen after the battle.
And uh oh you have the same battle to fight again. This time it’s Auron, Yuna and Seymour. Seymour should dominate this battle with Fira and whatever else you want to use. Not that the more overkills you get the better likelihood you have of getting a ton of L1 Key Sphere’s and the Staff of Thorns. More crazy machina destruction scenes after the battle.
On the beach talk to everyone and you’ll probably see Gatta unless you told him to go to the front lines, in which case he’ll be dead. Otherwise he’ll be going insane on the beach. Grab the treasures on the beach and talk to Auron and others to learn Tidus’ role in Sin’s appearance. On to Djose.
Djose Highroad
Talk to everyone on the road to pick up some items. Having something to protect from Stone Gaze is smart as the Basilisk will use that on you, and of course Kimahri can Lancet the move. You’ll see two Phoenix Down treasures and some of the later passer-byers will hand off more stuff even a Mega Potion. The Al Bhed Primer XI is on the right side behind a wall. The rest of the way leads to the lightning elemental summon but someone has beat your party to the punch. You can rest or buy some stuff in the east and behind that building are 4 Ability Spheres. Gatta was here for me, I’m assuming if Gatta dies then Luzzu is here instead. On the opposite end of this is a 4000 gil treasure and the crusaders.
Inside the Djose Temple is Isaaru , another summoner. Check the sides, and the right has a Mega Phoenix and the left an Ether and Remedy. Head inside the Djose Cloister of Trials.
Djose Cloister of Trials
The first room is quite simple, putting the two Djose Spheres in the door. The second wall straight north will have two more spheres that you should put just a little east into the two empty holes. Now the pedestal should be lined up so that you can push it directly east to get it charged up. Put that charged up sphere on the pedestal into the right side of the wall to open but then take the two spheres to your right that you put in the wall and put them in the nearby pedestal. Touching the floor switch on the left side will get that pedestal to teleport to the middle of the second room. Push it into the pit in the third room to allow Tidus to cross.
Push that pedestal in front of you in to light up a floor glyph. Return back and you can press the floor switch to reset the first pedestal again. Use the two Djose Spheres in this first pedestal to fill up the holes in the very first room. Now take that charged sphere on the right side of the second room and move it to the left side to open up an elevator of sorts. Get on it and up you go.
Push all the pedestals to open up a bunch of things. First take the first elevator that brought you up here and then go left and touch the white blinking spot on the wall to get a Destruction Sphere. Go up the floor again and put it in the middle pedestal for a Magic Sphere. Further along and it’s Donna and Barthelow again. Yuna will come out with the thunder using Ixion summon.
Outside of Djose you should enter the Inn and get the Switch Hitter for Wakka. Go inside the temple now and enter the left chamber to see Yuna. Talk to the lady attendant and Yuna will get apologetic. Run out of Djose when you get the chance.
Moonflow
Talk to Shelinda and behind her are 3 L1 Key Spheres. Further along for Biran and Yenke scenes. In the next area will be another 3 L1 Key Spheres. Belgemine will be up ahead. Again, having Valefor and Ifrit with full overdrives gives you your best opportunity to win. Actually those two alone should do it otherwise Ixion will cast Haste and probably slaughter them shortly after their overdrives. You get Dragon Scale x 2 and Summoner’s Soul from Belgemine.
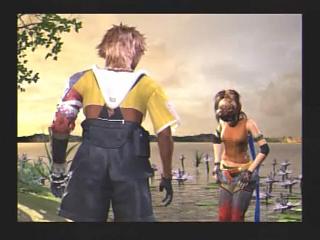
Past her is a path with a quick left that has a Magic Def Sphere. Now you’ll be at Moonflow part of the Moonflow. In the next area is a Shoopuf. There are two phoenix downs in the first area, and then you can buy from several shops including Oaka. Furthest west is an argument with the crusaders and their chocobos. A chest with 6000 Gil and a Save Point are here. All of these salesmen have different stuff so wade through all of them. Lightning based weapons for Wakka or Tidus would be smart. Talk to the rider to start going across.
The Al Bhed attack with an Extractor machine. Of course, it’s weak against lightning. Just use Haste on both and attack, healing when necessary. It’s likely to spend most of it’s turns hovering above you to attempt a tough attack if used but if you do enough damage (if you have haste, you will) it’ll go back down and have wasted a turn.
On the other side talk to Oaka and then go east a little, up the ramp and left for Al Bhed Primer Volume XII. Left is an Ether chest. Further along and you’ll see Rikku take her clothes off and meet up with Tidus. She is later accepted as a guardian despite her Al Bhed status and despite the fact that you just beat her up in the previous boss battle (it was her in the machina). More treasures along the way like a Mega Potion at the end and Antidote x 4 before that. Also some Rikku introduction battles, Mix is a great overdrive.
Guadosalam
You will meet Tromell Guado, a shady character at best. Rikku shows you how to customize your equipment then. Rest in the Inn and then go near the big red door but not in, there is a mega potion and then follow the west wall for a room with 3000 gil treasure chest and Al Bhed Primer XIII by some Guado Glories and then the path wraps around to three more guados and an Elixir chest. Up to the right is the Farplane but you can’t go here yet so go by the big red door again but go east to see a shop and more guados. Probably should go see Seymour now.
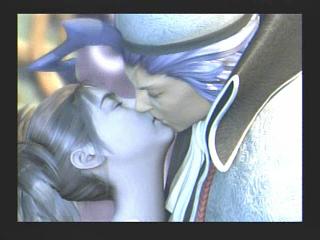
Go up the stairs inside to get Hi Potion x 2. He’ll bring you through a lifelike Zanarkand. Then he asks Yuna to marry him. Hmm…after all the scenes you’ll have more talking on the way to the Farplane.
Talk to Wakka up here to get the Brotherhood Sword to increase it’s abilities with Strength + 10%. Speak with Lulu and then Yuna and then you can leave after she sends Lord Jyscal. Talk to Lulu a few times and then Rikku. Try to enter the shop to see Kimahri and then leave to Thunder Plains to see Shelinda. Return to the others and then it’ll be time to go.
Thunder Plains
A scary place, for Rikku that is. Later on you’ll have to dodge this Lightning 200 times to get an important Venus Sigil for Lulu. This will have you on the edge of your seat.
Get the Phoenix Down x 2 to your left and Save. Further north is a Qactuar stone and a treasure of 5000 gil behind that. Down more and there is Shelinda once again and east of her is a Waterball.
The Travel Agency is led by Rin and he will give you the Al Bhed Primer XIV if you talk to Rikku and choose the top option for Rin. Go to Yuna’s room to burst in and then it’s time to go whether rikku is still scared or not. Halfway through this second part of Thunder Plains Yuna will say she’s getting married. An Ether is near the tower here and then to the right is a 2000 gil treasure.
Macalania Woods
You come upon these woods after a bit. The lower path here goes to Bevelle and will be blocked off for now so take the left path going up after you Save. As you go up and then west continue to search against the tree all the way to the west and you’ll find a Sleepy Cait Sith treasure hiding. Further east for a 2000 gil chest and the exit of this area.
You’ll probably fight a Chimera in the next area so use Lancet to get Aqua Breath. Hiding behind a tree on the east part of the area is a Phoenix Down x 3. Further along for a hidden Remedy behind a tree on your left and then at the end is the Butterfly Game. This is for Kimahri’s Sun Sigil. Note that the amount of time you’re given is ten seconds less after you leave for Macalania Lake and that more red butterflies come out later in the game, making it harder.
Save in the icy area and ignore Oaka for now. Wrap around the east end of here and keep tapping X to find the Al Bhed Primer XV near the east exit. Oaka has some things you may like. North and Auron will take you on a detour.
Time to battle the Spherimorph which is known to alter it’s elemental strengths and weaknesses. You can figure out what element it is by using the opposite of what it uses on you (generally as a counterattack for when you physically attack it). If it uses Fire on you, use Blizzara and so on. Haste on Auron and Kimahri to allow them to attack faster, and Shell to make the counter spells on you worthless. Not as hard of a battle as you think although it’ll do Press out of nowhere to do damage to your entire party. Heal from that and you should be fine.
Spherimorph drops a Jecht Sphere right in Macalania Lake. Jecht’s Sphere’s are all over Spira (okay, there are only a few) and you’ll watch some scenes on Jecht and then Auron gets a new Overdrive. Auron gets Shooting Star from this particular Jecht Sphere in Macalania. Return south to the Save Point and then go north to the Travel Agency.
Talk to Clasko and you can tell him what job to do with his life (and he’ll listen!). You can see a treasure behind him that you can get later. Oaka is here as well, and further left of him is the Al Bhed Primer Vol. XVI. Just be sure to save inside and then head on.
Tromell takes Yuna to Seymour but before that the Al Bhed attempt to capture Yuna so a boss battle ensues against the Crawler and the magic / summon sealing Negator. Kill off the Negator with Wakka and then start using Thundara on the Crawler. After defeating the Negator, the Crawler will just charge up to use the Mana Beam ability, which can take off a ton on everyone. Summoning an Aeon to use Shield will reduce the damage to a couple hundred on just the aeon. Ixion’s Thor’s Hammer ability will do 9999 on the Crawler, that might be a good move to try, you know. After the battle, Wakka learns Rikku is an Al Bhed. Then, the party gets on machina that hovers. You will ride with Rikku, Lulu or one of the guys, depending on who you talk to most, help the most, etc with Tidus. I had Rikku.
Grab the Mega Potion and go in, talking to the Al Bhed kid for 400 Gil. Follow your party in the temple. Talk to Tromell to get a Shell Targe and then save. Shelinda will talk to you, saying Yuna is in the Cloister of Trials with Seymour. Grab the X Potion x 2 in the southeast part of the chamber and then on the west is a 5000 gil treasure.
 You’ll hear a lady shout out and then you’ll have to watch a sphere with Lord Jyscal. This throws a major twist in the plot. The guy back here has a Hi Potion x 2 and there is a Remedy x 2 back here also. Talk to some guys in the northwest chamber (opposite chamber) for an Ether and Elixir. In the back is a Phoenix Down x 3. Return back and Save, and then go where Kimahri charged through. Auron will warn that even a Maester can be an enemy if he is at fault.
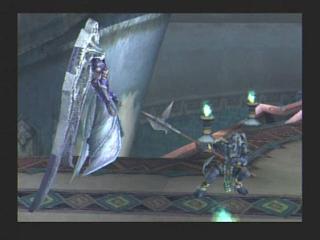
As you go along, Seymour finally admits the murder of his dad Jyscal. A battle begins against Seymour and his Guado Guardians. These Guado Guardian will cast protect on themselves and Seymour will use Shell. Steal from the Guado Guardians. Use the ‘Talk’ trigger commands by Tidus and Yuna both for Strength and Magic Defense help respectively. Wakka too later, for a Magic Defense upgrade.
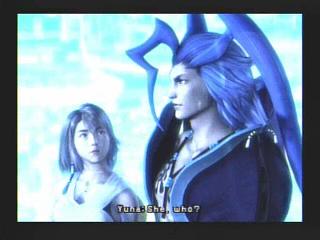
This battle will be one of the harder ones so far. Again, you have to steal the Hi Potions from the Guados so that they stop continually protecting Seymour. With them gone you can do massive damage to Seymour, but he’ll bring in Anima. Now I attacked him about five times and then brought in Yuna to summon ????, which turns out to be Shiva her new summon. Anima will use Pain, you should just attack as Anima is immune to the turn delay effect Heavenly Strike has. Be smart and use Blizzara on Shiva when you want to heal. Diamond Dust might take off 9999, or at least a very high amount. Anima will probably die after this. But then Seymour kills Shiva and then any other summon you bring forth. He now has full HP also. Just keep attacking, his 6000 HP and weak defense means you’ll cut through him fast with Tidus, Auron, and your other top attackers. Soon, Seymour will go down.
Afterwards some of the more impression conscious members like Wakka and Yuna will be worried about being looked at as traitors. Tromell will take Seymour away before Yuna can send him. Anima and Seymour were both overkilled and I acquired 2 Blk Magic Spheres, a Magic Targe, Glorious Bracer, Dream Lance and a Mage Masher. Save, and then as you try to leave a Cloister of Trials will bar your way.
Macalania Temple Cloister of Trials
You’ll now have a path to your left to start the cloister of trials. Go down this path and then turn south and search the pole for a Glyph Sphere. Put this on the pedestal south of you a little. Push this pedestal east now, and then north, into icycles each time. It’ll open up a path and go down to the bottom floor. Take the Glyph sphere and then put it in the far left wall to raise it up a little. Now go back up the path and then grab the Macalania Sphere that is now available to you.
Go back down the hill after you grab the Macalania Sphere, and then put it in the pedestal below. Push this pedestal to the right to match it up with the pole type structure – this completes a section of the ice.
Upstairs there is a Macalania Sphere you should take from the far right wall. Take this down the path again and to the left pole this time to complete another ice section. Finally, go to the top of the path and take the Macalania Sphere, which makes that path inaccessible for now. Take this Macalania Sphere to the center pole where you got the glyph sphere initially. This opens up the ice bridge again.
Go up and touch that floor switch that you see in the southeast part of the bridge area. First, take the Macalania Sphere off, then push it down the path. The pedestal gets teleported to an icycle and a Destruction Sphere is showing now. Step on the floor switch on the floor below and that will make the destruction sphere pedestal come down. Put the Macalania Sphere you have already and put it in the far right wall and those icycles will re-appear. Take the Macalania Sphere in the center pole and put it in the north recess so you can go down the path to the lower area again. Bring the Destruction Sphere down here and place it in the wall immediately to your left as you get down there, and grab the Luck Sphere that appears.
Back upstairs, push the pedestal into the icycles that reappeared. Grab the macalania sphere on the east wall and put it in the pedestal, and then push this pedestal to the north so it goes down the path. Push it into the right wall again to get that part of the ice bridge up, and then get the last part up by taking the ramp’s macalania sphere and putting it in the center pole structure. As you go up to exit don’t step on the floor switch.
 As you leave the Macalania Temple, Tromell will attempt to stop you and breaks the Jyscal Sphere. You can buy from Oaka but keep in mind that the fast guado’s will be chasing after you, and battles ensue if they catch you. Steal from the Guado so they dont heal themselves and then kill off the monsters. When you get outside, go south until the end when you can go right up some icycles for an L1 Key Sphere. Further south to save and get out of here.
Unfortunately more Guado’s are here and so is Wendigo. Wendigo is a physical attack machine. A good start is either stealing from the Guado’s or getting a summon in overdrive to wipe them out in the first turn. Actually Thor’s Hammer took off 9999 on Wendigo on turn one and then Ixion was able to build up another for a quick overkill. Yuna can cast Esuna to dispel some of the effects on Wendigo like Berserk, and you can limit him by using Dark Attacks.
You’ll be under the temple now, in the Macalania Lake. Talk to the right people in the right order and you’ll be able to grab an Avenger to the north and to the east an L2 Key Sphere. More scenes and eventually Sin takes Tidus for another spin and Tidus ends up alone in Sanubia Desert.
Sanubia Desert
Okay, go west and get the Remedy x 4 first. Save, and then go north. You’ll fight a battle against a Zu and Auron and Lulu will join you. Further north is Wakka and an Al Bhed Potion x 8.
Northeast in the next area to find poor Kimahri. Further north is Rikku who says we’re on Bikanel Island. Grab the 2 Ethers and 8 Al Bhed Potions and then save. Follow Rikku out into the new area. To north and west for 4 hi potions and then further north for a huge area.
Go directly north for Hi Potion x 4. West is another treasure, X Potion x 2. Further north is a save point and Al Bhed Potion x 8. Take the west path leading down. The first building you come across has an opening on the other side with 10,000 gil and an Lv. 2 Key Sphere. In the northwest part is the Al Bhed Primer XVII and the Al Bhed Primer Vol. XVIII in the northeast part.
In this new area go north and west for a hi potion x 8. The pit here has a treasure that falls in, Megalixir x 3, but you have to fight the Sandragora for it. West of this pit is a Mega Potion x 3 and X Potion x 2. North of here is a pit that you have to go through, and another Sandragora. Just use the Al Bhed Potions by Rikku to stay healed and it’s weak against Fire so that helps too.
Al Bhed HQ
At the Al Bhed Headquarters in Bikanel they will be getting attacked by monsters, Yevon and Guado. Rikku sees a friend and her dad. When you regain control go northwest for the Al Bhed Primer XIX. Go through the door and you’ll fight three Bomb and a Guado Guardian. Easy battle. Go through and then two Dual Horn and a Guado battle. A little harder but keep pressing on. Go to the save sphere you see on the mini map.
There is a tricky treasure chest if you go south from the save sphere and down the skinny hallway, taking the first left exit you can. You’ll be ambushed when you get in, but after you’ll see a treasure with a code. If you have enough Primers you can do this easily, otherwise just choose the Bottom Center option, Center Right option and then the Center option to open it. It’s a Friend Sphere. Al Bhed Primer XX is next to this treasure. The treasure next to this asks – What do I contain? Choose whatever you like but there are some monster battles, I choose the center left for a mega potion. Leave and go back north, down the stairs. At the bottom left of these stairs is a hidden treasure because of the smoke, it contains 4 al bhed potions. Further north all the way is Al Bhed Potion x 6, and then take the northeast path from the center.
Grab the Al Bhed Primer XXI on the ground. Go in the northeast green light door, but heal beforehand (two chimera’s and Guado Guardian in here). The treasure in the far east part of the room, partially hidden, has an Al Bhed code that you have to ‘verify’. You can go through this is many times as you like, it’s pretty simple though – you get a Skill Sphere when you open it. The next treasure is 5633, it is a Special Sphere. Okay, back to the Save Sphere in the central room, and go west in the door and be ready for a battle.
When things are quiet you’ll be able to go further down the stairs, so veer off to the left to get an Lv. 4 Key Sphere and to the right for a Lv. 2 Key Sphere. Enter the green lit room now and Rikku will fill you in on something with Yuna and the Final Aeon.
When you regain control go to the left first to grab a 10000 Gil treasure chest and then southeast to exit. A scene with Tidus and Cid now, and then you get control again.
Al Bhed Airship
Talk to Cid and then use the Square button on Brother to recruit him. He’s a good player for when you want to play blitzball (can’t now incidentally). Start exploring the ships, you’ll see the Al Bhed Psyches in one end, and then you’ll run into Rin who sells you stuff and Donna who asks you a question. Not much else to do so go to the front and overhear Auron and Cid. Talk to Brother and he’s found Yuna! She’s being forced into marriage with Seymour. It’s time to go into Bevelle. Talk to everyone and then try to leave the room but you’ll hear fiends are here.
Keep going south to the deck to get 4 al bhed potions. You’ll see the protector of Bevelle, Evrae is outside. Save and go outside to meet it. Now you can move the ship around if you want, keep it at long distance so Cid can attack it or up front so your physical attack specialists can take it down. I just keep it up front and have the powerhouses like Auron, Wakka and Kimahri Hasted while Rikku uses Al Bhed Potions to stay alive and cure the devastating Poison Breath Evrae uses. You get some Blk. Magic Spheres after you kill it.
Bevelle
After the battle you get to watch Seymour and Yuna get married. Maester Mika will see the ship and ready his fighters. Fortunately your party makes it in. You’ll have to fight some battles, against some tougher Monk Fighters that use Flame Throwers and machina. After several battles you’ll be in front of Seymour and Yuna, but you can’t go on. Yuna falls and is saved by Valefor, while Tidus and the rest of the party are at the Cloister of Trials.
Bevelle Cloister of Trials
Examine the panel to be taken down. Search around here for an Al Bhed Primer XXII. Continue to the Save Point and go into the Cloister of Trials. This Cloister is not fun. I’ll try to explain as best as I can.
Push the pedestal in. It begins to hover and it starts moving. When you can take a right (press x) do so. Keep going straight at the next intersection and you’ll get to an area where it stops. Get the Bevelle Sphere on the wall and place it on the pedestal.
You’re going back up now. Go straight again at this first intersection, and then you’ll turn right. Quickly take another right. Place a Bevelle Sphere in this recess now. Get back on the pedestal after you push it and it’ll loop. This time, take a left on this second turn. Take the Bevelle Sphere, put it on the pedestal and then loop again.
Take the right path and then take a left in this middle area. Go past all the turns until the final right turn. Okay, now take one of the Bevelle Spheres on your pedestal and put it in the recess where it stops. This opens a path to another recess.
As you can see when you go back, this floor is another loop. Take the second right and take the Glyph Sphere and put it in the recess on your pedestal. You should have one Glyph and one Bevelle Sphere now. Take the final right turn in this loop where the walkway is, and then put the Glyph Sphere in the recess. This opens a path to the Destruction Sphere for Bevelle. Put that Destruction Sphere in your pedestal and take the second right and put the Destruction Sphere in the recess. Get back on the second loop and take the last right, and swipe the Bevelle Sphere from the wall and put it in the recess on the pedestal.
Take the first right on this second loop now. Push the pedestal across and before you know it, you can walk around. Run up and get the HP Sphere then step on the floor switch to bring up the pedestal. Take a Bevelle Sphere from the pedestal and put it in the nearby recess, and then push the pedestal in the new area. Grab the Knight Lance and you’ll go back. Continue right and you’re done! Some scenes and you’ll get Bahamut Summon.
Bevelle Imprisoned
Save when you get the option to. You’ll go through some scenes and have control of Yuna, so run up and save again. Go east and then north as far as you can until you run into Kimahri. Get the Mega Potion near him and go north further to meet Auron eventually.
At the save point go west and then take a left at the T intersection. Skip the first path east but instead take the second one to find Lulu and Wht Magic Sphere. Go all the way south from here for a busted up room with an Elixir and a Glpyh that you should touch.
All the way back to the first area with the first save sphere. Take the middle path (north) and take the far north path until you can get east at the end. Grab the Blk Magic Sphere and hop on the glyph. Okay, now you have to go back south until you get to the initial save sphere, and then back east and north to where Auron was and eventually west from there to the locked door.
Now that glyph nearby is powered up. Sit by it until it points toward the locked door room, and then step on it. You’ll be transported there. You can get a Lucid Ring, 10,000 Gil and a Skill Sphere in this room. Teleport back out and then go to the save sphere by where you found Auron. This time, go north down the red light area.
 You’ll meet Isaaru. You have to fight him because your party are traitors, heh. Isaaru summons Ifrit first. Bring out Bahamut and use Blizzaga, and eventually Mega Flare. It’ll be a new battle and he summons Valefor. Bring Shiva out and use Heavenly Strike until you can build up your overdrive. Diamond Dust should be overkill for Ifrit. Last is Bahamut, so summon one of your best ones, preferably with an overdrive built up. After Countdown 1, be sure to Shield.
After this it’ll switch to Tidus underwater. Save right away and go to the blue chest for some miniscule items. Continue along to a save point. Save and further along is the Evrae Altana. Just use Phoenix Down on Evrae Altana for a quick kill. Grab the Rematch and Avenger along the way,and leave.
Your party meets up but now Seymour is here. He seems to have done in Maester Kinoc. Kimahri will hold off Seymour, but Yuna will decide to save him. First, Save your game and then talk to Oaka, who of course has made it here like every other obscure area in Spira. Try to get your overdrives up in these hard battles on the way back to Kimahri, especially your Aeon Overdrives. Further north past that second save point is a battle.
Seymour Natius and the Mortibody. As you damage the Mortibody and deplete it’s HP, it’ll take 4000 off of Seymour, and then 3000, and so on until it reaches 1000. So basically it is only useful to deplete the Mortibody a few times although with Aeon Overdrives you’ll likely do it several times. Use Mega Flare and watch it break the 9999 barrier. As you can see Seymour will banish the summons immediately. Auron, Tidus and Yuna have trigger commands that are useful to do. He has some powerful attacks when you attack him straight up but if you can use Al Bhed Potions and Cura you should be fine, along with the Aeon Overdrives.
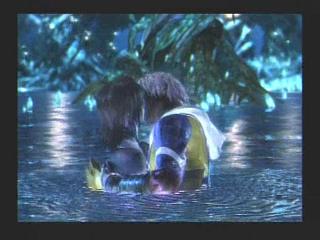
Your party will end up around Macalania. Save, talk to your friends and go south past where Kimahri is. Tidus and Yuna will have a scene. A long one.
seymore keeps on killing us in the game
Which Seymour? The one with the Mortibody that you damage that damages him?
Just let me know which one you are at then I can give you better advice as to how to beat him.
the machine one
the final fantasy to where u met all ur friends khimari yuna lulu auron rikku i can’t beat the hardest boss in the cuz when ever he uses he’s my guys dies for one hit
The machine Seymour? Just try to build up your levels / sphere grids and summon all of your Aeons to do damage. Seymour will kill them but they can get off one move at least and absorb an attack from Seymour.