Home › Forums › Other Video Games › Final Fantasy Magic Knight Guide
Tagged: Final Fantasy, Magic Knight Guide
- This topic has 32 replies, 8 voices, and was last updated 16 years, 4 months ago by
kain611.
-
AuthorPosts
-
September 27, 2006 at 8:50 pm #4179
Taishi Ci
ParticipantTHIS GUIDE IS BEING UPDATED DUE TO OBSCURE DEMAND
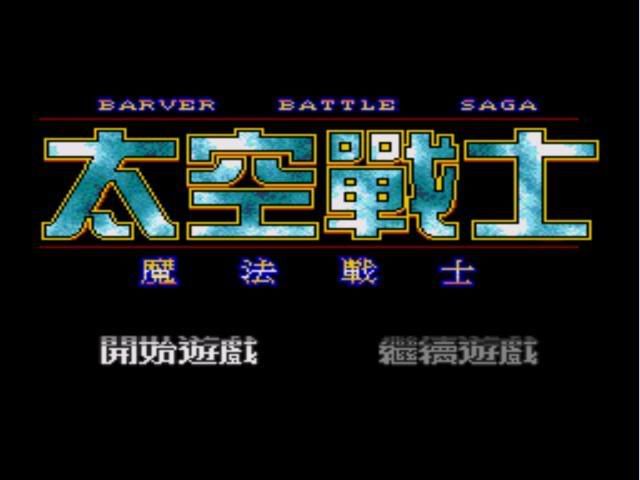
Final Fantasy: Barver Battle Saga is the proper name. For some reason a lot of places call it Barver Battle Saga: The Space Fighter. I don’t know what’s going on there. Most copies of the game will be in Chinese but there is a Russian version out there if you want to hunt for it.
The game is set up very similar to DOAE3 Genesis, so I guess SKOB made this one too. Again, all names are arbitrary, even more so since this is an original plot and not one based on ROTK.
NOTE: Anything marked as Remedy? is an item or spell that cures a status effect, but exactly which one I don’t know.
_________________________
Chapter 1: The Outcast Heroes
Starting Town
Shop List
Potion………………15G
Hi-Potion………….700G
Ether………………500G
Antidote……………..5G
???…………………150G
???………………..1000G
Fire Scroll…………200G
Knife…………………70G
Armor……………….50G
Armor 2.0…………290G
Helmet………………50G
Helmet 2.0………..150G
Shield……………….50G
Watch the opening scenes until you gain control of a blue-haired character. We’ll call this fellow Tim. Run over to the other room and open the chest for a Fire Scroll.
Leave the house and enter the house north of the big platform, and talk to the man inside.
Now go back outside and talk to the left guy at the base of the platform.
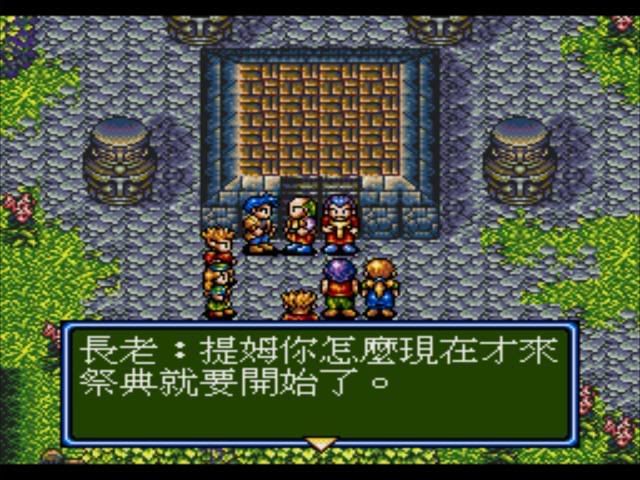
After everyone runs off, take the east exit out of town.
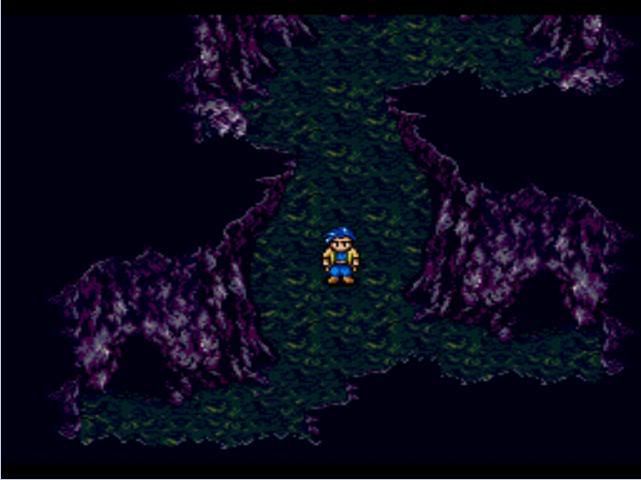
East Forest
Enemies: Slime (15 HP), Skull (20 HP)
Items: Potion, Shield, 100G, Antidote, Remedy?
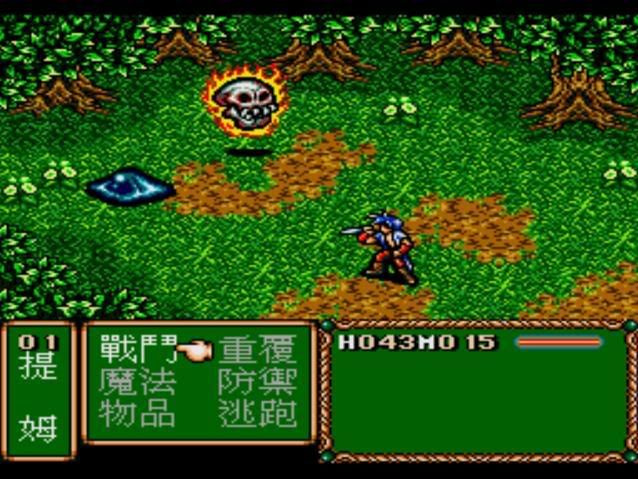
Walk east, and fight some of the enemies to get used to the battle system.
You will probably gain a level or two along the way. Get some money and go back to town to stock up on potions, then come back. Just follow the path.
When you reach a fork, the left path leads to a screen with a sign and a cave that you can’t enter yet.
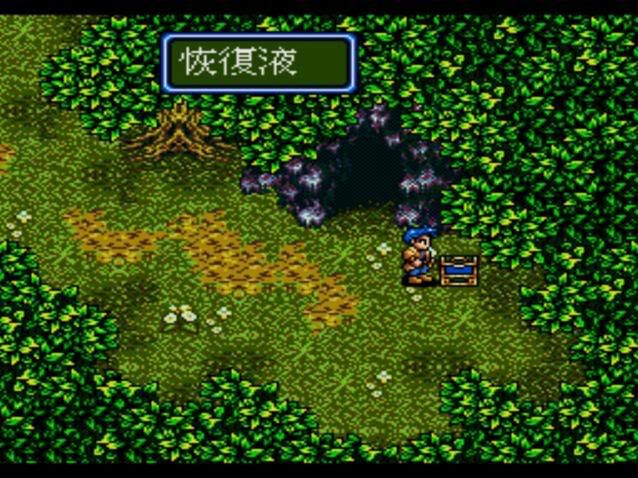
Go north, take a right for a chest with a Potion, and head up offscreen (not into the cave here).

Walk to the right side of this screen and enter the cave. Grab the shield from the box and continue to the next screen.
The left exit leads out to where the potion was, while the right exit leads further into the forest. Take the money from the chest among the trees and keep following this path to another cave entrance.
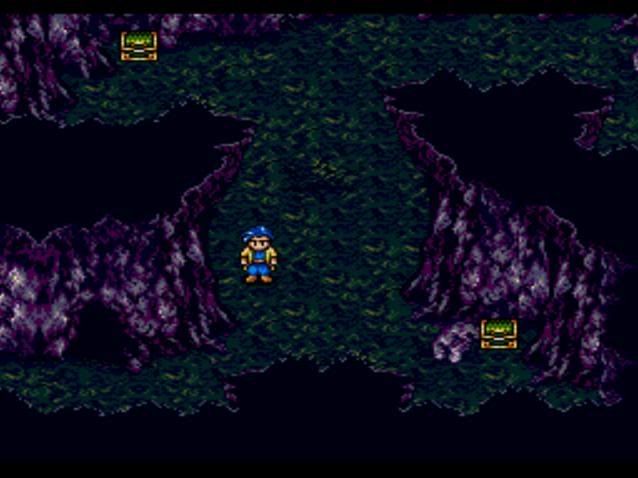
The upper chest contains an Antidote, while the lower chest holds a Remedy?. Heal up and leave through the other door, where you’ll meet the first boss.
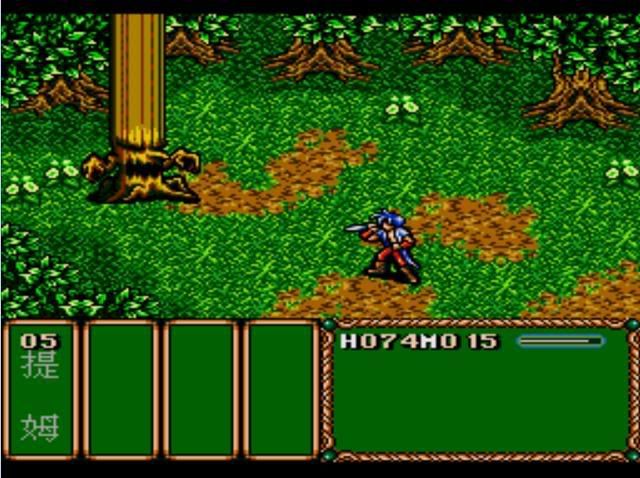
Boss: Evil Tree
HP: 100-120
My Level: 6
Not much strategy here, just attack him and use Potions to heal when your HP drops. He’ll either attack you or use a wind spell which does more damage. If you bought the better equipment back in town this battle will be easier, but either way you shouldn’t have much trouble.
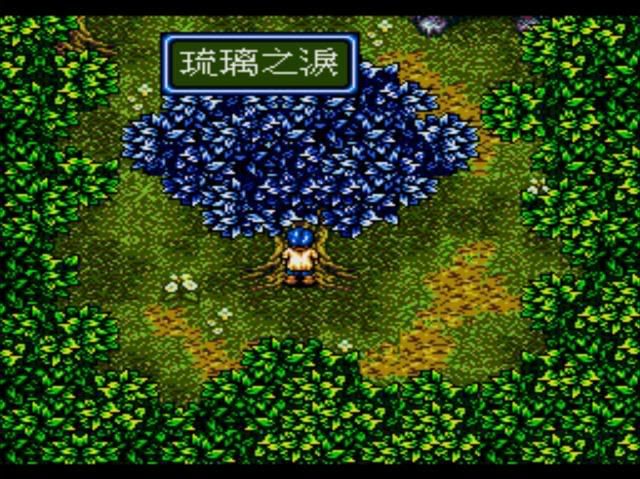
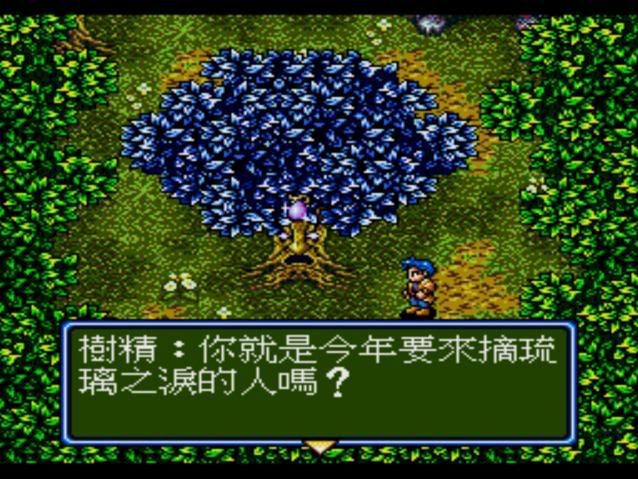
Tim grabs the fruit off the tree. Go back the way you came.
After exiting the cave, the villagers that ran off earlier show up. One of them beats Tim up before they leave.
You’ll see a scene with them in a cave, where one of them teleports away and the others flee.

Back in town, there will be a long scene, after which you’re booted from the town.
West Forest
Enemies: Slime, Skull
Items: Thunder Scroll, Armor
You can’t return to town, but you should be able to get by on your Potions. Go down the first set of stairs and walk left under the leaves to reach a chest with a Thunder Scroll. Continue on to the next screen, cross the bridge, and keep going to the third screen. Walk to the left past the leaves and get the Armor from the chest, then enter the cave in the middle of the screen below the ledge. The chest just inside has 100G. Exit through the far opening, and go right across the bridge to reach a new town.
Hamlet
Shopping List
Potion……………..15G
Ether……………..500G
Antidote…………….5G
???…………………70G
???………………..100G
???………………..300G
Fire Scroll……….200G
Knife……………….70G
Knife.. 2.0……….250G
Bow……………….200G
Staff…………….1100G
Armor…………….290G
Armor 2.0……….550G
Helmet…………..150G
Hat……………….300G
Helmet 2.0………500G
Shield……………..70G
Shield 2.0……….260G
Shield 3.0……….580G
???………………1000G
Magic List
Cure……………700G
Antidote……….300G
Thunder……..2000G
Ice……………..580G
Wind………….1300G
Poison………..1700G
Walk straight north from the entrance under the trees to find a chest with 200G. Enter the house near the sign and grab the Potion from the chest and the Bow from the shelf. Go to the Pub and check the shelf there for an item. Next, go around the backside of the shop for another item. Go restock if you need to, and buy new equipment. Then head over to the magic shop. Unlike DOAE3, you don’t just find magic in pots, you also buy the spells in the shops. Make sure to buy Cure, and maybe one of the attack spells if you have the spare cash.
Walk over to the big house below the Inn and enter the right door. Speak to "Tar" and grab the item from the chest. Now go to the Inn and take a nap. Tim will talk to himself at night. In the morning, go back to speak to Tar again. Now go outside and check the window between the doors to talk to someone inside. Enter the left door and Tim will chat up the people inside, after which you’ll rest. The guys blocking the east exit are gone, so leave through that gate.
Hamlet Woods
Enemies: Flaming Skull (33 HP), Licker (35 HP), Green Slime
Items: Remedy?, Potion, Hi-Potion, Ether, 250G, Shield, 500G, Antidote
Spells: Antidote
The enemies here are stronger, so you may want to take the time to gain a couple levels (Level 10 should be high enough for now). You can’t take the north exit yet, so grab the Remedy? from the northeast chest and leave through the southwest exit across the bridge. Open the chest on the left for a Potion and continue north. Cross the first bridge here, go up and check the chest for a Hi-Potion, and keep going to the next screen. Go left under the trees to reach the partially obscured chest, which holds an Ether. Then walk up all the stairs for another chest with 250G, cross the bridge to the right, and open the last chest here for the Antidote spell. Exit right to the next screen and open the chest on the ledge for a shield. Then just go down, right, and up to the last screen. Some enemies are here messing with a girl, but you step in to save her.
Boss: Dual Ogres
HP: 150 each
My Level: 12
These guys aren’t too hard if you bought a good attack spell from Hamlet. Their physical attacks are pretty weak. Watch out for their fire spell though, it does good damage. Use the Cure spell and potions if your HP gets low.
Tim wakes up the girl, Wen, and they hide from some more monsters who arrive. After a short chat, she joins your party. Put her in the back spot since she uses bows. Begin the trek back to Hamlet. You may notice the enemy groups get bigger now.
______________________________________
Chapter 2: Forest Castle and the Moon Statue
Once you’re back in town, go talk to the man in the left half of Tar’s house and he’ll give you 1000G. Then rest at the Inn, restock, and buy some magic (I suggest Cure and Wind) and gear for Wen. Go back to the woods, and this time take the north exit. More ogres are here, beating up on a girl.
Boss: Dual Ogres
HP: 150 each
My Level: 13
Same battle you just fought, now even easier with Wen’s help. Beat them again, should be easy.
A man enters from the left, and everyone moves to a building in the woods where the girl lies in bed. You’ll learn that you need herbs from the northern woods, and the fairies have them. Leave the house and enter the woods to the north.
Fairy Woods
Enemies: Evil Stump, Scorpion, Skull
Items: Helmet, Bomb, Potion, Lightning Scroll, 200G, Tonic, 320G
Spells: Great Fairy
Time for some Fairy hunting. From this first screen, go straight left to the next screen, and take the north exit you see here. Walk behind the tree and get the Helmet from the chest. Leave back south, then walk left and take the next north exit to find your first fairy. Kill her with your spells (~250 HP) and she’ll drop an herb. Exit to the south, and walk left through the west exit. Go north from here and grab the Bomb and Potion from the chests here. Return to the last screen and go all the way left out the upper west exit. Here is the second fairy; dispatch her like you did the first one and she’ll drop another herb. Go back to the previous screen and take the left path just below you, then take the right path below the opening you entered from. A Lightning Scroll and 200G await you in the chests here. Go back to the last screen, walk left a few steps, and take the first path south you see to discover the final fairy. Take her out to get the last herb. Leave this screen, move left, and take the next south exit. Two final chests are here, holding a Tonic (HP & MP + 100) and 320G. Exit this screen, take the left exit, and then go south from here to exit the woods.
Enter the house and you’ll see a scene where the girl is healed and thanks everyone before leaving. Re-enter the Fairy Woods, and take the north exit on the left. You’ll meet another fairy here.
Boss: Great Fairy
HP: 800
My Level: 14
This Fairy’s a little stronger than the ones you fought before, with a good physical attack and a very powerful spell. You’ll want to heal after she uses the spell since it hits both people. Keep casting spells at her until she drops.
She drops a crystal, which will teach the Great Fairy summon to one of your party members. Now leave the forest and go back to town for a stop at the Inn. Then return to the house in the woods and walk west past the tree to the next section of woods. From the sign, go up the stairs and check the chest to the right for 500G and enter the cave. Walk right and up, get the Antidote from the chest, and exit out the other side. Go left and up from the sign. Here you’ll see the girl you saved being "escorted" by some guards. Continue on to Forest Castle.
Forest Castle
Shopping List
Potion………………15G
Hi-Potion…………250G
Ether……………..500G
Tonic…………….1500G
Phoenix Down…..600G
Eye Drops?………..20G
Remedy?…………150G
Lightning Scroll..2900G
Power Ring…….4000G
Knife………………700G
Bow……………….630G
Staff………………530G
Staff 2.0……….1100G
Armor…………….290G
Armor 2.0……….790G
Armor 3.0………1200G
Hat………………..300G
Hat 2.0…………..800G
Shield 2.0……….370G
Shield 3.0……….600G
Shield…………….260G
Shield 4.0……….700G
Spells List
Cure……………..700G
Remedy?………..400G
Remedy?………..300G
Blind……………1500G
Fire……………….900G
Lighting………..2000G
Ice-All………….2900G
Wind……………1300G
Bio………………1700G
Walk in the gate, and walk down the stairs to your left. Check the dresser in here for a Phoenix Down. Now go back upstairs and keep walking forward through several screens until you reach the throne room. After a long scene where the King explains how a Great Evil will Destroy the World unless you protect the Statues, the girl from before, Kate, will join your party to escort you to the Moon Palace. Exit the throne room and go through the door on the left, which leads up to the roof. There’s a Shield here in a chest. Go back downstairs and outside. The door to the right leads to the shops. Down the stairs to the right of the shops is another door. Inside is the library; check the rear-left bookcase to find a Bomb. Take the stairs in the upper-right up to find a room where you can rest for free; check the clock for a Potion. Go outside from here and walk left to find a chest with 150G. Head back inside and down the stairs, and take the stairs in the lower-left down to find a final chest with a Thunder Scroll. Take the other set of stairs up to wind up back in the entrance hall.
Go shopping now if you like. You should get all the new gear, of course, and you may want to grab a Power Ring for Tim. As for spells, get a Cure spell for Kate, and I suggest also buying Bio (for Kate) and Blind (for whoever). Once you’re done here, leave the castle. Now, the next dungeon is a little tough, so you will want to build your levels up a little (level 17 should be fine, Wen will probably be a couple levels behind Tim and Kate though). The Fairy Woods is a good place to train. When you’re ready to go, go south from Forest Castle, east through the cave, and south from the sign here. Open the chest along the way for a Remedy?. Keep going through this area to reach the Moon Palace dungeon.
Moon Palace
Enemies: Dwarf, Spectre, Gold Scorpion
Items: Remedy?, Phoenix Down, Hi-Potion, 350G, Potion, Attack-Up Scroll, Potion
Spells: Sleep
The north door here is blocked off, so head left to the next screen. Walk north from where you enter, move left and get the Sleep spell from the chest, and move south and turn on the moon switch in the alcove. Return to where you came in and follow the other path to a set of stairs leading up. Walk down to the second path on the right, and go right there to find a chest with a Remedy? and another moon switch. Then leave through the south exit, and get the Phoenix Down at the end of the ledge. Return to the previous room and take the northeast exit. Turn on the moon switch in the middle of the north wall, and open the chest in the upper-left for a Hi-Potion, then take the east exit. Go south from here and flip the moon switch on the ledge before going back. Walk north, get the 350G from the chest, flip the moon switch on the right, and go up the stairs in the northwest. Move to the southeast corner, turn on the moon switch, and get the Potion from the chest, and pick up the Fire Scroll from the northwest chest before leaving through the southwest exit. You’re back at the entrence, and the north door is open now. Heal up and head through. You’ll see a short scene where the boss blows up the Moon statue before the fight begins.
Boss: Wraith
HP: 1000
My Level: 18
Well, if you want to be cheap, just cast Sleep on him to put him out of commission while you pummel him with spells. You should be able to kill him before he wakes up. If you want to fight this battle the real way, watch out for his lightning spell; it’ll cause quite a lot of damage. His physical attack is also a threat, though not as much. Keep your health up and use spells like Bio to whittle him down until he falls.
The boss dies, and Wen picks up a book from the ruins. Open the two chests on the way out for an Attack-Up Scroll and a Potion. Return to Forest Castle and enter the throne room for another scene with Kate and the king. The King tells you to travel to Arabia to defend the Fire Statue from the same fate. Rest and restock before leaving, and enter the cave north of the sign near the castle.
Cave & Arabian Plains
Enemies: Cave: Lizard Man, Vampire, Skeleton; Plains: Golden Skeleton, Bandit,
Items: Helmet, X-Potion, Antidote
Be careful here, the monsters are a lot stronger. Open the chest just to the left for a Helmet, and check the one in the northeast for an X-Potion before going outside through the northwest exit. On the plains, follow the path to the next screen. Here, get the Antidote to the left, then follow the path north to the next town, Arabia.
________________________________
Chapter 3: Arabia and the Fire Statue
Arabia
Shop List
Potion…………………..15G
Hi-Potion……………..250G
Ether………………….500G
Tonic………………..1500G
Antidote…………………5G
Eye Drops?……………20G
Remedy?……………1000G
Sleep Scroll………….300G
Lightning Scroll…….2900G
Defense-Up Scroll…1000G
Ring………………….4000G
Knife…………………1200G
Knife 2.0……………1650G
Sword……………….1300G
Sword 2.0………….2900G
Sword 3.0………….3800G
Bow………………….1000G
Staff…………………1200G
Staff 2.0…………….2280G
Armor……………….1700G
Dress………………..2300G
Helmet………………1000G
Headgear…………..1500G
Shield……………….1960G
Magic List
Cure2……………..1900G
Antidote…………….850G
Life…………………4500G
Scan……………….3000G
Earth……………….2100G
Wind-All…………..1900G
Bio-All……………..4300G
Remedy?…………..400G
Lightning………….2000G
Ice-All…………….2900G
Welcome to Arabia. Rest at the Inn here and buy the new gear and spells (Cure2, Scan, and Life are helpful). The equipment here is a lot better, and you’ll need it against the new enemies roaming the plains. Enter the house to the northwest and check the clock in the back for 1000G. Then go into the house on the right and check the clock here for another X-Potion and the bookshelf for an Antidote. After getting these items, move north to Arabia Castle.
Walk straight forward into the throne room, where you’ll meet the Bishop; he’ll ask for you to help protect the Fire Statue. The man from the Forest Castle also shows up here; you know he’s evil since he’s got his own monologue. Anyway, leave the room and take the southeast exit outside, then grab the Knife from the chest. Go back inside, and north up the stairs. Enter the center door here to find the library. You can check some of the shelves here for reactions from the party. Inspect the pot in the center to discover the Wind-All spell. Leave the library, enter the room to your right, and check the pots for a Hi-Potion. Walk upstairs and enter the door on the left, and check the buckets for 900G. Exit this room the way you came in and enter the middle room, checking the right clock for a Shield. Now go back downstairs and follow the big carpet outside. Walk right from the door to find 2000G in one chest, then head left to locate an Ether in another chest. Go back inside and down another set of stairs, then exit through the southwest and enter the room there to take an Elixer from the chest. You’re done here, so leave back to town. Sleep at the Inn and a guard will come to tell you something’s wrong with the castle. Try to enter and you’ll be thrown back by a spell! The party decides to move on.
When you’re ready, exit Arabia to the west and walk north at the sign. Follow this path to the next screen, getting the Potion from the chest along the way. On the next screen, go north at the fork to get 700G, then go east to reach the village of Aden.
Aden
Shop List
Potion………………..15G
X-Potion……………700G
Phoenix Down…….600G
Remedy?………….1000G
Bomb………………2000G
Ring………………15000G
Knife……………….2080G
Sword……………….980G
Sword 2.0…………2130G
Bow………………..1400G
Bow 2.0……………2300G
Heavy Armor…….2500G
Armor……………..2700G
Helmet…………….1300G
Headgear…………1500G
Shield……………..1020G
Light Shield………1450G
Magic List
Cure……………….700G
Remedy?………….300G
Remedy?………..1200G
Remedy?………..3500G
Blind………………1500G
Sleep……………..1900G
Scan………………3000G
Fire-All……………2300G
Earth……………..2100G
Bio-All……………1900G
Wen falls down upon entering and you’ll have a scene. Rest up here and enter the building near the west exit. Check the pots for 3000G and the left shelf for a bow. Leave this house and enter the small house near the east exit, and get the Lightning Scroll from the chest inside. Once you’re done shopping, leave through the south exit. Follow this path to a cave and walk to the upper-right corner, then walk left through the wall and up to a chest holding the Water Spirit summon. Then go left from the exit, get the Phoenix Pinion from the chest, and walk north to find the guy from before facing a boss.
Boss: Valkyre
HP: 2000
My Level: 19
Again, you can just cast Sleep on her to make the battle easier. You should be able to take off about half her health before she wakes up. Even then, you should be careful. Her physical attacks aren’t very strong, but both her wind spells do high damage, with the more powerful one probably killing one of your party members in one cast. She can also heal herself for 200 HP. Keep at her and you should be able to vanquish her.
She beats a hasty retreat as your party has a quick talk. Go back to town, rest up, and leave through the east exit. Walk right, under the ledge, and enter the cave here.
Lava Cave
Enemies: Fire Thief, Fire Lizard, Licker
Items: ???, Antidote, 10000G, ???, Shield, MP Plus
Spells: Stop
Walk north and get the ??? from the chest. An Antidote is in a chest further north. Head east and north to find 10000G in another chest. Straight south of here is another ??? in a chest. Go east again and north to find two chests holding a Shield and an MP Plus. Then go south again to locate the Stop spell in the last chest. Now leave out the way you came in.
Go back to Aden and enter the middle house, then speak to the man inside. The men blocking the north exit are now gone, so you can now enter the Dragon Graveyard.
Dragon Graveyard
Enemies: Fire Thief, Fire Lizard, Licker
Items: Hi-Potion, Helmet, 1200G, Full-Potion
Spells: Fire2, Hydra
This is a great place to train, so you might want to gain a few levels before going further in. Level 22 or so should suffice. Those glyphs on the ground will teleport you to other platforms, and the skeletons are used as bridges. Ignore the pads and follow the path all the way to the end to find a Hi-Potion. Then walk back to the first pad and step on it to teleport to the next room. Walk south across the bridge and get the Helmet from the chest, then walk right and use the teleport pad just south of the bridge. From here, walk south and take the Remedy? and the Fire2 Spell from the chests. Now go back across the north bridge and take the upper pad near the right bridge. Walk all the way right, get 1200G and a Full-Potion from the chests there, and then follow the path north to the next screen where the boss awaits.
Boss: Hydra
HP: 3000
My Level: 22
The Hydra is a water monster, so your new Fire2 spell will do great damage against it. Use that spell along with your summons to eat away at its HP. You can put it to Sleep, but it may take a few tries before the spell works. As for attacks, its physical attacks are very weak, but its ice spells are very powerful, with an all-target spell that does moderate damage and a single-target one that does heavy damage. Stay healed and use your spells until it dies off.
The Hydra will let you pass, and tells you that a dragon egg is being threatened by some monsters further in. Continue on through the next room, just follow the path, and heal up before you enter the last screen. The monsters are here with the egg, and another boss battle commmences.
Boss: Green Ogre
HP: ~3000
My Level: 22
This boss is not very hard, he mostly just uses weak physical attacks. Try putting him to sleep, although he’s about as resistant to it as the Hydra was. Use up what’s left of your MP and then just pummel him with physicals to finish him off.
Tim picks up the Dragon Egg. Walk back through the previous room to where the Hydra was. There’s a scene where the egg hatches into another Hydra, and the first one transforms into a crystal which contains the Hydra summon. Now to leave the graveyard; walk back to the teleport pad and step on it, then use the pad just to your left. Walk left and then north across the bridge and use the left teleport pad here, then just walk left to reach the exit.
In Aden, talk to the man in the center house and he’ll fork over 10000G. Rest up and restock, and head out the east gate. Follow the path here to the cave, picking up the Staff along the way. The lava inside the cave has now cooled, so you can walk over it. Follow the path onto the lava, move over to the next platform, and head south to find an X-Potion in a chest. Then continue on through the next screen until you exit the cave, and walk through one final plains area to reach the city of Basra.
Basra
Shop List
Potion……………………15G
Hi-Potion………………250G
Hi-Ether……………..1300G
Tonic…………………1500G
Phoenix Down……….600G
Remedy?……………..150G
Remedy?……………1000G
Mute Scroll…………..380G
Leaf-All Scroll………5800G
Sleep Cure?………….750G
Defense Ring………7500G
Knife…………………2500G
Knife 2.0……………3100G
Bow………………….2720G
Staff…………………1700G
Staff 2.0…………….2280G
Staff 3.0…………….2950G
Armor……………….3400G
Armor 2.0………….4300G
Helmet……………..1800G
Helmet 2.0…………2500G
Heavy Shield………2480G
Shield……………….1900G
Shield 2.0………….2100G
Magic List
Cure…………………..700G
Cure2………………..1900G
Antidote………………850G
Remedy?……………3500G
Remedy?……………1200G
Life…………………..4500G
Sleep………………..1900G
Earth-All……………3500G
Bio-All……………….1900G
Wind-All……………..4300G
Move north to find the Valkyre from earlier tied up by the guy from Hamlet. Talk to her to have a quick scene involving Wen. Afterwards enter the shop building in the northeast and walk up one set of stairs and down the other to steal 500G from a chest behind the counter. Then enter the northwest house; talk to the woman here and choose yes, and she’ll give you a key item. Take this to the house in the lower-right corner (with the overhanging midsection) and give it to the man inside. Now go back and talk to the woman for 5000G. Next, enter the house just to the right of the north exit and walk to the right half of the room to take a Remedy? from the bookcase, then enter the left half to meet Dr. Who. He mentions wanting to study the northern ruins and runs off. Leave his house and follow him north to the ruins.
Basra Ruins
Enemies: Outside (Gold Worm, Caveman, Fire Thief), Inside (Flying Robo, Humanoid Robo)
Items: 700G, Remedy?, Phoenix Pinion, 1500G, Hi-Potion, Death Scroll, Attack-Up-All Scroll, Antidote, 3000G, Armor, Ring
Walk north past the pillars, go right and down the stairs to get the 700G, then go back, turn left and take the stairs down to find a Remedy? in a chest. Go back up the stairs and continue left and north, then step on the plate in the corner to lower the spikes. Head north past the spikes, go right and take the lower path to reach a Phoenix Pinion, then go back and take the other path to find a plate you should step on. Walk back to the main fork and take the left path, stopping to take the 1500G from the chest, and continue north. Go down the stairs when you reach them and step on the plate at the end of the path, then go back upstairs and keep going east to find a Hi-Potion. Head south to the spikes, walk up the steps and hit the plate, then continue west past the door inside and hit the plate in the corner to drop the last set of spikes, letting you leave easier. Proceed through the door (which will only be open if you spoke to Dr. Who in town first).
Inside, head down the stairs on the right. The inside of the ruins is mostly a bunch of platforms with metal plates moving between them. Take the south plate to a platform containing a Death Scroll in a chest. Ride the plate here right to another platform and ride the next plate to a platform with an Attack-Up-All Scroll. From here, ride the plates back to the first platform. This time, take the west plate to the long floor section on the left. Ignore the plate to your right and walk south to a chest holding an Antidote and a door. Dr. Who is inside this room in front of a terminal, but he can’t use it until the power is turned on. Leave the room and walk right to the narrow strip jutting north, and ride the plate on the end. Follow this path until you reach the northeast corner, where a chest holding 3000G awaits. Now walk all the way south to the plate at the end and ride it over the gap to the stairs leading down. Hop on the plate here, then walk to the upper-right corner of the large platform and ride that plate. Get on the plate just above you to reach a chest holding some Armor. Head left and ride the plate there back to the stairs, then take the first two plates again. This time, take the far south plate and walk all the way left to get a Ring. Move north a bit and then right onto the ledge and hop on the plate there. From here, get on the left plate. Walk left and take the Remedy? from the chest, then walk right and flip the giant red switch on the wall to turn the power on. Take the plate back to the stairs and go back up. Use the plate here, walk north to the highest plate and ride that left, then use the plates here to return to the stairs. Jump on the left plate again and then walk south to the room where Dr. Who is waiting. The screen is on, showing a Einsten-like man, and there’ll be a scene. You’ll learn that to power the robots, you’ll need two orbs from the town in the Arabian desert. Once the screen shuts off, make your way back out of the ruins.
Back in town, a monster shows up and frees the Valkyre. Rest up and take the west exit. Follow this path to the next screen where the boss awaits.
Boss: Valkyre & Master Thieves
Valkyre: 3500 HP
Master Thief: 600 HP each
My Level: 22
The thieves are mostly used as healers, being able to heal for 150 HP, but are otherwise weak. Having all three of these enemies awake is not a good idea, so use Sleep often. The thieves will easily fall asleep, but the Valkyre will take a while, so if you do manage to get her asleep use the opportunity to kill the thieves and heal yourself. You should be able to hurt her a bit before she wakes up. Her wind spells are much stronger now, and she can also heal herself, so this will likely be a hard fight.
Wen tries to talk with the Valkyre, but she runs off. Go back and rest up, then continue west to the Arabian Desert.
Arabian Desert
Enemies: Caveman, Gold Worm, Skeleton
Items: Attack-Up Scroll, Earthquake Scroll
Here’s the quick path through here: Walk through the ribcage at the beginning, then go north to the first sand hole you see and drop down. From here, walk north to the northwest corner and enter the sand hole there. Now walk north to the northeast corner and enter the sand hole you find. You should see two chest here containing an Attack-Up Scroll and an Earthquake Scroll. Enter the northern sand hole to wind up in a desert town. Inspect the two orbs on the platform, then enter the southwest house and talk to the man there to learn that the Sandworm is causing trouble. Drop through the hole in the northeast corner to face the Sandworm boss.
Boss: Sandworm
HP: 4000
My Level: 23
I think he’s immune to Sleep, so don’t use it. His physical attack, which he uses most of the time, is rather weak. The real threat is if he decides to use status spells, like Confuse or Poison, on your party, which can ruin the battle for you. Use items to cure yourself if you get hit with one of those statuses, and just hope you don’t have everyone confused at the same time.
Go back into town and talk to the man in the southwest house. He’ll thank you for the good work and will allow you to take the orbs from the platform. Head outside, grab the orbs, and go back through the desert to Basra. Enter the ruins and walk to the room where Dr. Who is waiting. Your party will insert the orbs into the robots, turning them on. Meanwhile in Arabia Castle, the Bishop is talking to the evil guy. Once the scene ends, make the long trek back to Arabia. Once there, rest up and walk north to the castle. Robot #2 is here, and tells you the door is unlocked. The party enters the castle and moves to the throne room, where the Bishop is under attack.
Boss: Wraith
HP: 5000
My Level: 23
Another Wraith. Remember how you beat the first one? Just put this sucker to sleep and lay waste to him. Beware when he wakes up, though, as his Drain and Bio spells will really damage you.
The party moves to defend the Bishop when some guy runs in and slays the remaining enemies. The man, Phil, talks to the Bishop. The Bishop asks the four of you to go to the Fire Palace now and defend the Statue there from harm, and Phil joins your party. You can get any treasures from the castle now if you missed them. Get some spells and new gear for Phil, and then leave west from Arabia. This time, take the left at the fork and follow that path. Pick up the Lightning Scroll along the way until you reach the Fire Palace.
Fire Palace
Enemies: Gold Skeleton, Fire Lizardman, Fire Robo
Items: Sleep Scroll, X-Potion, 1500G, 1000G, Ether, Armor, Shield, Antidote, 900G, Potion, Ring, Elixer, Leaf Scroll
From the main hall, check the two ledges on the left for a Sleep Scroll and an X-Potion, then walk onto the northeast ledge, move down to the bottom to find 1500G, and take the stairs to the next floor. Walk left and then north to get a Remedy?. Head back south, ignoring the hole on the left, and up the flight of stairs. Now go north to the hole and fall through to land two floors down. Go up the stairs, then take the stairs on the left. Open the chest at the bottom for 1000G, then drop through the lower hole. Get the Ether from the chest and fall through the hole to land back in the main hall. Follow the previous directions to return to the platform with the 1000G chest, then drop through the upper hole this time. You’ll land near two chest which hold an Armor and a Shield. From here, walk south to the end of the platform and take that hole down. Take the stairs up, then go southeast to find an Antidote. Head back north, get the 900G from the chest near the stairs, then take the upper stairs up and walk to the end of the platform to take the Potion. Go back downstairs and move left to the next hole down. Take the stairs up, then walk up the staircase on the right to reach a Ring. Return to the last floor and take the middle stairs this time, then fall through the hole on the right. Open the chests on either side of the door for an Elixer and a Leaf Scroll, then enter the room. Move north to trigger a scene and the boss fight.
Boss: Wraith
HP: 5000
My Level: 25
This is exactly the same boss you just fought at Arabia Castle, so fight him the same way. Again, Sleep works wonders. You even have Phil to help you out this time.
The evil guy comes in, and Wen removes the seals on the statue so your party can come close. Kate picks up a book from the foot of the statue. Now take the stairs up and fall through the right hole to wind up back in the main hall. Leave the Fire Palace and return to the throne room of Arabia Castle. After a quick scene, the Bishop will thank you, and asks you to travel to Arctica to help them as well. When you’re ready to go, leave Arabia through the east exit and hop on the boat to depart. You’ll see a scene involving Myona, the Valkyre from earlier, and the guy who’s trying to destroy the statues. He’ll send out another of his men to meet you in Arctica.
_________________________________
CHAPTER 4: Arctica and the Ice Statue
Enter the town and you’ll be greeted by Beth. After the scene with the quake, leave the inn and enter the middle house. You’ll meet Dr. Why, who is taking care of some injured patients. He wants you to check out the northeast building, but the door is locked. Head over to the west gate and talk to Beth, and she’ll tell Tim the password. Go to the northwest building and examine the door to open it.
Arctica Ruins
Enemies: Black Robo, Eye Walker
Items: Remedy?, Light Armor, Hi-Potion, 3000G
Spell: Demon Bird
You’ll meet a dying man here who gives you a key item before passing on. Flip the switch on the wall to open the door. In the next room, enter the doors on either side of the center door and follow them to the switches at the end. The left path has a Remedy? and the right path holds some Light Armor. After hitting both switches, return to the center door and enter the door to the north, which has been opened, then slip the switch here to unlock the center door. Jump on the plate and ride south, then ride the next plate north. Walk left and north, and enter the door for a boss fight.
Boss: Demon Bird
HP: 6000
His main threat is his Mute spell, which will shut you down, so quickly put him to Sleep before he can use it. You will also want to beware of his Ice spell, since it hits everyone. His physicals are rather weak, though. Just use your powerful spells and summons (Hydra works well) and hit him until he drops.
He drops a summon gem upon defeat. Once the man leaves, check the gem to learn the summon and then flip the wall switch. Leave the room and walk south to a chest holding a Hi-Potion. Move onto the long platform and ride the plate right. From here, jump on the lower plate, then walk south to the lower plate and ride left. You’ll find 3000G in the chest here. Now hop on the plate to return to the center door. If you need to heal up (probably a good idea), take this chance to return to town and rest. When you come back, take the plates again until you reach the platform with two plates on the right. This time take the upper plate, ride the next plate over, then enter the room to grab 1000G and a Hi-Tonic (HP, MP + 300). Leave the room and ride the upper plate on the left to the last door, where the boss awaits.
Boss: Rifle Zombie
HP: 7000
His rifle burst does decent damage, but what you want to beware of is his Explosion attack. Most likely it will kill off one of your party members, so be ready to revive them. Sleep is effective as always, so put him to rest for the first half of the battle so you can soften him up. Once he wakes up it’s hard to use Sleep on him again, so just pummel away and heal up when you get hit with Explosion or a critical. With some luck, you should be able to prevail.
The party inspects the machine, after which they return to Dr. Why’s house. You’ll get a key item from him. As you leave, Beth enters and asks for your help. The gates in town have been lowered, so you can now access the port and the path west of town. Stock up on anything you need and exit town to the west.
Arctica Woods
Enemies: Brawler, Gold Scorpion
Items: Shield, 700G, Bomb, Armor
Just follow the path west, getting the Shield from the chest as you go. On the next screen, get the 700G and keep going. The third screen has a Bomb in the upper-left corner and some Armor in the upper-right; after getting these treasures, enter the cave in the lower-right. Head out the other side to wind up on in the mountains. Continue on to the next screen to find the Demon Emperor. He doesn’t take kindly to having the party show up, and blasts Tim. The rest of the party will enter a battle, but he’ll demolish you so don’t bother attacking. Desperate to escape, Phil grabs Tim and the party leap off the cliff-side.
Pleasant Woods
Enemies:
Items: X-Potion
After landing, you’ll be at a house in the woods; Tim stays here to heal while the rest of the party looks for a cure. Check the chest for an X-Potion. You can use the other bedroom for a free rest if you need to.
More to come!
September 29, 2006 at 4:40 pm #22266huaxiong
Participanteven though this is random and not related to the topic, who is the guy with the duck on his head in ur signature?
September 29, 2006 at 6:39 pm #22267CommieCatGirl
ParticipantIt’s Cao Cao.

You have to remember, though; the very thing that makes you a nerd is that your enthusiasms are totally unrelatable and non-marketable to most of the world. For example, anime and celibacy. - Seanbaby
September 29, 2006 at 7:09 pm #22268Lord Yuan Shu
Keymastergood game choice taishi
Welcome to Lord Yuan Shu Walkthrough Guides ·
Huo Hu's Adventure started Destiny of an Emperor hackingSeptember 29, 2006 at 8:37 pm #22269ParticipantNormally I’d get angry if you spammed my thread, but since that’s one of the best San comics I’ll let it slide.
You ought to try it, Lord. Although I don’t know which person out there in the internets had enough free time to translate this game into Russian.
September 30, 2006 at 12:03 am #22270ParticipantProbably some Russian guy.
You have to remember, though; the very thing that makes you a nerd is that your enthusiasms are totally unrelatable and non-marketable to most of the world. For example, anime and celibacy. - Seanbaby
September 30, 2006 at 12:07 am #22271thechieftain
ParticipantNo way it was an arab spy from the cold war.
September 30, 2006 at 9:23 am #22272Participantu know that im of arab origin, right chieftain? :mad:
:lol:
September 30, 2006 at 2:27 pm #22273ParticipantAbu Hmaiz!?
You have to remember, though; the very thing that makes you a nerd is that your enthusiasms are totally unrelatable and non-marketable to most of the world. For example, anime and celibacy. - Seanbaby
September 30, 2006 at 3:12 pm #22274ParticipantYeah Hua I remember, an arab with a love for rice. :lol:
September 30, 2006 at 4:25 pm #22275Participanti figured u were gonna say that chieftain.
yep, thats my msn address, commie, but not my real name.
October 1, 2006 at 1:36 am #22276ParticipantThe how could let you down?
October 1, 2006 at 1:35 pm #22277Participanthuh? :?
October 1, 2006 at 9:03 pm #22278ParticipantCan’t you guys stay on topic for even five minutes? Honestly…
October 2, 2006 at 12:40 am #22279ParticipantYeah Hua, jeez,
-
AuthorPosts
- You must be logged in to reply to this topic.