Dragon Warrior 4 Chapter II
Chapter 2


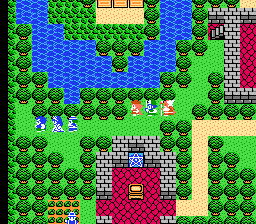
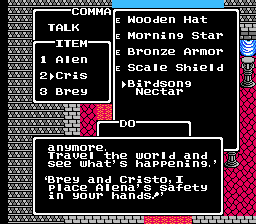
Alena has a deep chapter. By the end of it you have a relatively complete party and in turn you have some difficult battles. Starting off go around and speak with everyone. Cristo and Brey will join you later so be sure to say hi. You have to talk to all the important characters to advance the storyline – the king, chancellor, Brey, Cristo, and the front gate guards.
You can find a Feather Helmet for Alena in her room on the top floor, as well as a Fairy Water in the back of the House of Healing. If you have talked to everyone, go back to your room and check the wall. It turns out you can kick it, so do so and you will be able to jump on the roof and ultimately off to leave Santeem.
When you get outside and walk a few steps, Brey and Cristo will join you. First of all, Alena is a fighter and will have really high agility and good attack with a high propensity to get critical hits. Cristo is a “Chancellor”, and he specializes in healing/white/infernus magic and also is a force with his ability to equip a lot of weapons and armor. Brey is a dangerous Wizard who is a liability when fighting in battle as his low defense means he will die on you. He has some really nice spells. Build up a few levels and get a Thorn Whip for Alena and some defensive gear for Brey (Leather Shield/Hat). Then a Thorn Whip for Cristo. Alena should be okay on defensive gear thanks to the Feather Hat.
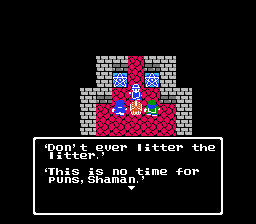
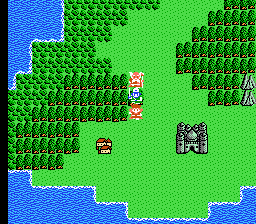
At about level 3 or 4 start venturing towards the northeast where you will encounter more dangerous monsters and a outlet to a new town, Tempe. Basically Tempe is being oppressed by some monsters that demand girls. You probably aren’t strong enough to be able to stop these monsters quite yet so don’t accept the liability to do so when you talk to the town shaman. Instead get to level 5 or maybe higher and try to get the best equipment possible at this stage, as this is pretty early in the chapter to have a boss battle.
When you are ready, head to the House of Healing in the north part of Tempe. The shaman and his workers get you into a litter box, pretending that you are the female offering, and sending it to the north of town. A Chameleon Humanoid comes with two Rabidhounds as guards. Cast Upper on Brey immediately as he could be killed in the first round otherwise. At the same time have Brey cast Sap on everyone and then start throwing Icebolts around, with Alena attacking the corresponding Rabidhound that Brey hits with Sap/Icebolt.
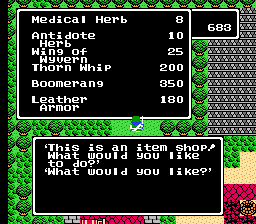
The Chameleon Humanoid is a pretty versatile guy so beware, he too can cast spells and even use an attack that hits everyone (for under 10 damage fortunately). I’d save him for last, as he is easy to gang up on at that point and the Rabidhounds go down much easier. Again, if you are of sufficient level, your three should end up trouncing their three. You’ll get a Lifeforce Nut afterwards and the town will be transformed into a jubilant one. Also of note their item shop will re-open, so check that out and grab a Boomerang if you see fit.
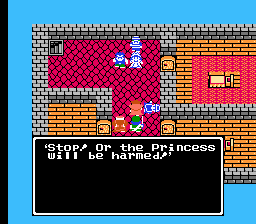
When you are ready, head north and east to Frenor. It is not a long trip, and when you get there you’ll see a few people rushing to a scene at the Inn. The “princess” has been captured by some thieves and everyone implores you to help if you can. Asking around, you’ll learn of the Golden Bracelet that they want, and that the southern cave houses this item (talk to the little boy during the day and the pirate at night for this information). You may want to get a Chain Mail or something else at the item shop before you go, and I’d also probably build up to level 7 or 8 maybe as these monsters get harder both on the way to the cave and in it.
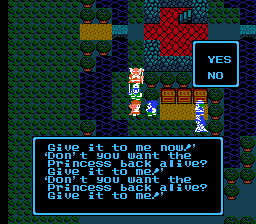

As you enter the cave, make your way south through the passage to get a Wing of Wyvern. Further west you will have a three-way fork, with north being 360 coins, south being an Agility Seed, and west continuing your path. In fact, this goes all the way to the staircase leading down. From here, ignore the path going left and instead continue east and then south, leading to a choice of west/south. Go west for a Magic Potion and then south. Follow the path east over the skull bone heads and then south and west for the Golden Bracelet! Use Outside and Return to Frenor (if Brey has them). Maybe it’d be a better idea to walk there, as you MUST be there at night. At the graveyard you will meet the thieves who will trade you the princess for the Golden Bracelet, which you will learn to be much more important later on in the game. However the princess does apologize and proceeds to give you the Thief’s Key. The weapon shop opens up here, but I’d wait and just go south. Great, so go south of the Frenor cave and a little west to see a desert with a lake. Walk around this area to find the Bazaar.

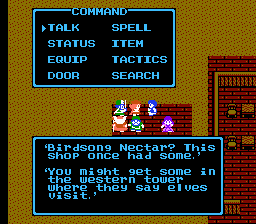
Great weapons and armor are stored here. A Morning Star and Venomous Dagger are vital for Cristo and Brey, respectively. The Scale Shield can aid those two as well, and the Bronze Armor is good for Cristo. West of the Inn is a purple woman and a bunch of barrels; search the two for a Strength Seed and a Gum Pod. I think the Gum Pod is worthless save for a few gold coins after being sold. A Santeem guard will find you and tell you to go see the king immediately! Hmm, well go Return there. You will hear that the king cannot speak, and that the chancellor tells you to talk to Goz out back. Well you have a Thief’s Key, so you can enter his house (just jump out your window as if you were escaping). Goz tells the tale of Marone, whose voice was once out too. He is in Surene and he probably knows what to do. Talk to him (second floor balcony of the House of Healing). He refers you to a Bazaar, one that you have already been to. So go back here and it’s the item shop owner (talk to him from the side, not from the desk) that tells you to go west to the Birdsong Tower.
Interestingly enough, you can reach an Inn if you go immediately north and down the staircase. This is good for leveling up, as the enemies (especially on the later floors, like the Butterfly Dragons) are significantly more difficult than those you’ve fought so far. Try to be in the early teens as you make your way through the tower. The thief running around complains about not having a key to go up, but you do so use it and head to floor two. Directly south is nothing, but southwest of the initial staircase is another. It looks like a dead end here, but head left and north to go through the wall! Two chests are here, a Strength Seed and 1200 gold coins.
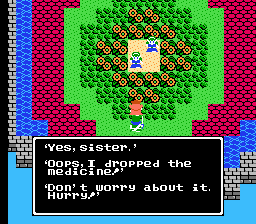
Fabulous, now head back to the staircase, and go north and then east from here, taking your second south. This will take you to the next staircase (ignore the two right options, they both lead to dead ends). Directly north of here is a Wing of Wyvern, while west is the way to the next staircase. Careful with the pitfalls, but you should be ok. Head south and then west on the next floor, and you will end up on the top with two elven females. They scatter when you move towards them, and one says that she forgot the medicine! Search anywhere in that desert-like circle, and then you can leave and Return to Santeem! Administer the medicine to him and he will be fine, and will explain that he was strucken with this illness after a few horrible and seemingly real dreams. He then allows you to go on with your journey, and the guard at the shrine east of the Bazaar will now let you go to Endor, so go see him!

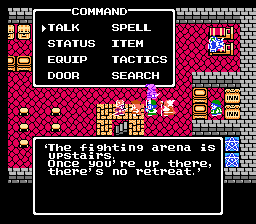
Endor is the only thing on this side of the shrine, as the gates are closed going north and east. Endor itself has lots to do, fortunately, including armor and weapon upgrades. First, grab a Half Plate Armor and Iron Shield for Cristo, and then talk to the king. He will eventually ask you to win the tournament that you’ve been hearing about going on in Endor, so head either east or west of the main door to one of those side doors, which takes you north. The music will change here and talk to the western guard to let you in. Do not go up the stairs right away, the end-of-the-chapter battle will ensue and you don’t want that yet. Instead talk to the item shop guy to fill up on Medical Herbs and to buy an Iron Claw for Alena, which is her second best weapon in the entire game. Fight up (outside, of course) to level 14 or 15, and at that rate Alena should be ready for the contest. Hopefully she has a Chain Mail and Feather Hat along with the Iron Claw, this is probably the best equipment she can get right now. Before you leave though, understand this is the end of the chapter so you may want to check some things out. The casino is open and you have a chance to win some great items here. Personally, my luck lies at the slime poker table, or whatever. Just do the double or nothing thing (and if you have a save state emulator, you can’t go wrong) until you get enough coins to get all the Metal Babble Shields and Meteorite Armbands that you’d like. Do understand that these Metal Babble Shields will upgrade your defense by 48 over an Iron Shield and 53 over a Scale Shield. Yikes, needless to say Cristo and Brey will be very ready for Chapter 5 if you happen to get a pair of these in the Casino. You can try your luck at the battle arena, although that tends to be more entertainment for me, rather than income. The slots are there as well, although I haven’t played them enough to tell you whether they are valuable or not. When you’re ready (get a Meteorite Armband for Alena if you can) and full of medical herbs, go up those stairs at the arena.


That Linguar guy is weirding you out again isn’t he? Well maybe you’re not at him yet. But anyway as you go up the stairs, Brey and Cristo announce that they’re going to cheer for you from the staircase area. The king then addresses you, saying that you must defeat 5 enemies, and only Necrosaro has done this. Hun comes out first, and he doesn’t do a whole lot other than take off about a third of what you take off on him. Afterwards use a medical herb if you wish (definitely if you’re full, you’ll get another after Roric).
Roric is next and he has a boomerang. Scary, and sometimes he throws it, which doesn’t really take off any more than his physical attack does. Use the medical herb he drops, and Vivian will be next. Vivian uses Icebolt and Firebal and Healmore, but will run out of magic eventually. After this she’ll pretty much just parry the rest of the time. Just attack her until she needs to cast Healmore on herself and by this time she’ll have fried her MP count, not like it matters. Sampson is next, so rest up. He is a knight and one that will hit you nearly as tough as you hit him. You’ll be faster and you have something called medical herbs at your disposal. Outlast him and heal up for the final battle against Linguar. Okay, so he splits once the battle starts. You have to guess which one is him, and it’s random. Fortunately, you only have to hit him two or three times to ounce him. This may be frustrating for you as ya, you have a 1/4 chance of doing it. If it gets to that point just attack a constantly until you luck out. It’s really not that difficult though. Necrosaro is called out next, yet fails to come out. The tournament is rewarded to Alena!
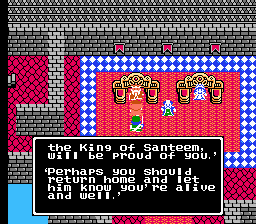


The king thanks you, as his daughter (the princess) no longer has to marry the winner (you’re a girl!). He suggests you tell your dad, so cast Return to Santeem. You won’t be able to go, as “the strange force works and contains Return!” so you must walk out. As you do, a soldier will approach you. He tells you to return and then disappears. Leave Endor and then cast Return, and you’ll finally be at Santeem. No one is here, except the cat on the roof. What is going on? These Santeem people have some obvious secrets involving their dreams and the sudden disappearing of everyone. The chapter closes mysteriously, with the three journeying for answers.
ENEMIES OF CHAPTER TWO
As you begin Alena’s quest, you would think that the enemies would be repeated to some extent, but they face completely different enemies. You’ll find blokes like a Kaskos Hopper, Elerat, Giant Worm or Red Slime outside of Surene. Prank Gophers and Troglodytes are around as well, although the latter is more often found near Tempe. As you move towards Tempe in the mountainous area, you’ll come across Rabidhounds and Minons, dangerous monsters.
Inside Tempe, you fight a Chameleon Humanoid and two Rabidhounds, which is a sort of boss battle. Near Frenor you will run into Blazeghosts, Brahmirds, Demon Toadstools, Carnivore Plants, and the Healers that the Carnivore Plants summon. The cave of the Golden Bracelet holds harder enemies, including the Thevro, Vampire Bat, Crested Viper, Ozwarg, Somnabeetle, Orc, and Demon Toadstools. All of these monsters appear elsewhere, except for the Vampire Bat and Ozwarg I believe. Continuing on, the Bazaar and the surrounding area has even harder monsters. Crested Vipers, Thevros, Sand Masters, Kordras, and Armored Scorpions are in the area. The Birdsong Nectar tower boasts the Pteranodon, Flythrope, Poison Lizard, Razor Wind, Grislysaber, Spectet, and the Butterfly Dragon at the upper levels of the tower. Lastly, near Endor you’ll find Skeletons, Metal Slimes, more Armored Scorpions, Rogue Knights, and the Healers they summon. The coliseum provides five opponents, including Hun, Roric, Vivian, Sampson, and Linguar.
Kaskos Hoppers and Red Slimes are the worst of the enemies you fight. Elerats and Giant Worms aren’t much better however, neither are Prank Gophers. Troglodytes are the first enemies that have some ability, although not much. The Minon is strange and rare, with a defense that is tough to crack, not to mention Icebolt is useless. Try using Sap on him, and also on the powerful Rabidhounds, who have upwards of 20 hit points. The boss you fight is the Chameleon Humanoid (with two Rabidhounds).
The Chameleon Humanoid can use attacks to hit your entire party and can heal himself and his friends. Try using Upper on everyone and Sap on the Chameleon, and then gang up on each Rabidhound to consolidate your problems. By himself the Chameleon Humanoid will go down. The Demon Toadstools near Frenor are annoying as they can poison you, and the Carnivore Plants can summon Healers. Worse yet, the Brahmirds are sometimes asleep and when they wake up they take off a massive amount with a “roll” of theirs. The Blazeghost can evade your attacks and even duplicate sometimes, so try to use Icebolt as much as possible. Thevros can also attack your entire party and have a good defense. Vampire Bats can put you to sleep but really aren’t too difficult. Crested Vipers use Defence on you, so kill them off quickly. Ozwargs will use Icebolt and Somnabeetles will try to put you to sleep. Orc’s cast Surround on you and can attack decently, but these cave monsters aren’t too tough overall. Near Bazaar though, you get some tricky ones. Kordra is an eccentric creature. He will run occasionally and sometimes he’ll get you with a critical hit. Be careful. Sand Masters are fast and have good attacks, not to mention they come in large groups sometimes. Armored Scorpions have a legit defense, so use what you can to whittle them down. The Birdsong Tower has more enemies with magical ability.
The Pteranodon casts Firebal, the Flythrope will use Stopspell, the Razor Wind likes Infernos, and the Spectet will create a barrier around themselves with Ironize. The Grislysaber can attack and duplicate, while the Poison Lizard can poison your entire party. The hardest monster in this tower is the deceptive Butterfly Dragon, who can use deadly attacks on your entire party, along with having a good strength and hit point total. Endor brings the last batch of random enemies, with the solid warrior that is the Skeleton and the elusive one that is the Metal Slime. The Skeleton casts Defence also which can be tricky when paired with the Rogue Knight, who is powerful in his own right. The Metal Slime will try to run away often, so attack him with everyone when you get a chance. You’ll get 1000 experience points and that’ll help. Alena likes to get critical hits on them though so that is nice, and if you have an emulator feel free to cheat and re-load if the bugger runs from ya. Cheap but hey, you’ll be leveling up like a lord. The coliseum people aren’t that difficult really and you can skim up for the walkthrough if you need some help.
 From left to right (also in relative order of appearance): Kaskos Hopper, Red Slime, Prank Gopher, Elerat, Giant Worm, Troglodyte, Minon, Rabidhound, Chameleon Humanoid, Demon Toadstool, Carnivore Plant, Healer, Brahmird, Blazeghost, Thevro, Vampire Bat, Crested Viper, Ozwarg, Orc, Somnabeetle, Kordra, Sand Master, Armored Scorpion, Pteranodon, Flythrope, Razor Wind, Spectet, Grislysaber, Poison Lizard, Butterfly Dragon, Skeleton, Rogue Knight, Metal Slime, Hun, Roric, Vivian, Sampson, Linguar