Dragon Warrior 4 Chapter IV
Chapter 4

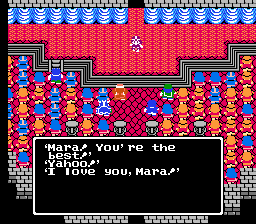

Chapter 4 is similar to 2 in many ways. The fighting is more difficult than 1 and 3, and you get 3 members along the way. Mara is a dancer that specializes in Blaze-type attack spells (in contrast to Brey’s Ice-type attack spells) while Nara is a Fortune Teller. Similar to Cristo, Nara has healing and status spells, and is a decent fighter who can equip mid-range weapons/armor. The story begins with the two discussing Balzack and his role in your father’s murder. You are currently in Monbaraba, a town at the southern coast of the continent (Mara and Nara are from Kievs, a short walk north). Mara comes with a Dancer’s Costume, which you should sell as it nets 300 gold, much more than it is worth defensively. With the 100 gold coins you start out with, this should give you a decent amount to spend (try to buy a Boomerang for one of the two girls and then start building up). When you return here at night, you’ll notice it is much more lively than it is during the day. Anyway, fight up until 3 or 4 and then you can consider stopping by Kievs to the north.


Kievs is your hometown and the people are nice here. Feather Hats and Chain Sickles are nice too, so definitely buy two of the former and a Chain Sickle if you can afford it. In your old house are some Lifeforce Nuts, in a barrel. Other than that you can rest for free and you’ll get information on your father and his pupils, including one who may be in the western cave. This cave is pretty tricky so try to be around level 5-7, with adequate equipment. As you enter follow the path and continue up and talk to the shop owner from Monbaraba, who claims it’s hopeless to get downstairs. Continue along and take the next detour for a Wing of Wyvern. Further along the path and you’ll get to a dead end with an elevator-type yellow button on the ground. Step on this and you’ll figure out what the shop owner never did. In this new area, you’ll come to a main area with a bridge and water surrounding you. Directly west is to continue on. As you take the west passage elevator, you’ll come to a new place where you will acquire the Lamp of Darkness and Orin will join you as well.
Orin is basically a Ragnar clone at this point and will take off 30 consistently, a huge addition to your party. Furthermore, head back to the area you were just at (with the bridge and water, before the Orin area). So head down from here and you are stuck with a west or east fork, and the west one gives you 240 gold coins. Heading east you’ll come to a Lifehouse Nuts treasure chest at the first passage, and then the Sphere of Silence at the end of the south passage (after a few elevator trips). This is what you came here for so leave.


With the Sphere of Silence in hand and Orin beside you, heading northeast of Kievs is now feasible. Skip past the castle Keeleon and go to the port town Haville north of here. Rest and do what you need to and hit the shops, with the money you inevitably got at the Kievs cave. Nara is going to need a Morning Star, Half Plate Armor, Scale Shield, and a Feather Hat if you didn’t get one at Kievs. Mara meanwhile will need a Venomous Dagger, Fur Coat and a Feather Hat if you didn’t get her one at Kievs either. I know this is a lot of money, but you’re going to need to build up some to beat Balzack anyway, so fight around Haville/Keeleon/Aktemto to get the cash to buy all this, because you’ll thank yourself later. Having a strong Mara and Nara is vital for a smooth transition into the fifth chapter while the Hero is still weak. Around town you’ll hear more about the oppression at Keeleon by Balzack, and also of Gunpowder in Aktemto. You can check out Keeleon first but you can’t advance the story so you might as well check out Aktemto. Along the way on the eastern peninsula is a Sage who proclaims that the Hero and his friends are close to joining eachother. At the very northwest is Aktemto, a mining town that is in very dire straits. The citizens are obsessed with the potential of gold, yet are dying of the venom being spewed out of the very caves that they are digging in. Even the House of Healing guy is sick at night and can’t help you. Fortunately for you the monsters in here shouldn’t pose a problem, assuming your equipment is as stated earlier. You’re looking for Gunpowder remember. As you enter you’ll see a miner and a treasure, so take the Mystic Acorns (MAX MP).
Head north, ignoring the first two west forks but taking the third for Silver Tarrot Cards. These are for Nara and are worse in terms of attack power compared to the Morning Star, but cause all sorts of ailments when “used” in battle. For me it’s a little too high-risk to be using all the time and most of the time I end up having Thor used a magic spell on my party or having my party be killed by the Defeat spell. Just stick with the Morning Star but if you want to have fun, then use them. Continue east and hit the stairs. From here head north, and ignore the two west exits, as they lead to a miner and a dead end respectively. To the northeast is the stairs where there are two more miners and the Gunpowder. Cast Outside and get out of this depressing place. Rest and save at Haville and head to Keeleon when you are ready.


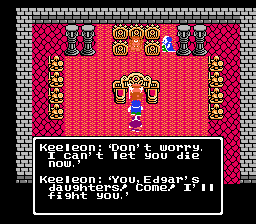

Normally you would need a Magic Key to open the doors around here. Orin just breaks through them. Everyone in the castle say the same thing you’ve been hearing; scare the counselor with the Gunpowder and follow him to the King of Keeleon. When you do this, stay a decent distance away from the counselor, or he’ll never actually open the door. As he enters the king’s area, go after him and search where he searched. Press the button and you will be in front of Balzack! Use the Sphere of Silence in the first round and cast Sap on him with Mara. After that, his spells will be neutralized so hack away and use Healmore and Firebane with Nara and Mara. Balzack shouldn’t be too difficult for you. Afterwards the real King of Keeleon shows up, and he absolutely demolishes you. You end up in prison, and you wake up next to an old man who gives you a Boarding Pass! Go south and grab it, and then east to get out. This secret path takes you to the outskirts of the castle, where a group of guards go after you. Orin sacrifices himself to allow you to get away. Leave Keeleon and then go right back in. Orin is dying and wishes you luck. Sadly, he passes away. Alas you must continue on towards Haville. Any extra money you have I would convert into weapons/armor so you can sell them first thing in Chapter 5 to get perfect equipment for the Hero.
The ship to the northwest of Haville will allow you to leave towards Endor. Talk to everyone on the ship and only then will the captain ask you if you really want to leave. Say yes and you’ll be on your way, ending the last solo chapter. Now, onto the meat of Dragon Warrior IV.
ENEMIES OF CHAPTER FOUR
Mara and Nara fight some difficult monsters, many of them being new to you. The majority of the repeat monsters you see are from Alena’s chapter. Starting off, you’ll come across Red Slimes, Kaskos Hoppers, and a new monster called the Monjar. Further north towards Kievs, another new monster will come along called the Angel Head. The Minon, Sizarmage, Demon Toadstool and Rabidhound lurk these parts as well. The cave presents even tougher opponents, including a few new ones such as the Xemime and Lava Doll. Blazeghosts are present, and in the later floors you may run into a dangerous Magemonja. Moreover, once you get in the Keeleon area the monsters are ridiculous. Liclicks, Infernus Beetles, Brahmirds, Zappersabers are all in the Haville area. You’ll also run into groups of Slimes. Some of them are regular slimes, but others are an odd breed that multiply and then turn into a King Slime after 8 of them are out! Careful with him, he’s a hefty one. Use Sap or Sleep to get the battle in your favor. Towards the Aktemto area, you fight Viceters, Weretigers, Dark Doriards and Mad Clowns.
All of these are new to you so be careful. The Aktemto mine has the hardest monsters of the chapter. On the first floor you’ll run into Vampdogs, Viceters, Weretigers, Rogue Whispers, Mad Clowns, and Liclicks. Baby Salamands, Garcoil Roosters, Metal Scorpions and Vileplants can be found in the bottom floor. At the end of the chapter, Balzack and Keeleon show up in boss battles.
Many of the new monsters will give you fits. The Monjar and Angel Head are pretty generic, but the Lava Doll can cast Upper. Not really a pain when done on themselves but it can aid their friends (Demon Toadstool, Sizarmage, etc) immensely. Infernus Beetles can cast Infernus, and Magemonjas can cast Icebolt. The Xemime is tricky and can steal MP from you. The Slimes will multiply into a King Slime, who can be done in with Sleep, Sap, Firebane/Firebal, etc. Liclicks cast Surround while Mad Clowns will hit you with Firebal. Viceters multiply at an alarming rate and thus are good for gaining levels. Weretigers can make you shriek (ie you lose a turn). Rogue Whispers are strange creatures and start off flustered but can do some damage if left alone. The lower part of Aktemto has really tough monsters. Metal Scorpions have tremendously high physical defenses and can knock out your party members quickly. Garcoil Roosters just seem to attack and do little else and Vileplants aren’t too difficult either.
The Baby Salamand can use a fire breathing technique that attacks your entire party. Lastly, Balzack can use some difficult spells and also use a non-magic technique to attack the entire party, When the Sphere of Silence is used though, he can’t use magic. Keeleon is the last enemy you face and he’ll attack 2 or 3 times per round and destroy you in 2 rounds; and that’s a best-case scenario.
 From left to right (also in relative order of appearance): Kaskos Hopper, Red Slime, Monjar, Angel Head, Rabidhound, Minon, Troglodyte, Sizarmage, Blazeghost, Demon Toadstool, Lava Doll, Xemime, Magemonja, Brahmird, Infernus Beetle, Slime, King Slime, Zappersaber, Liclick, Mad Clown, Viceter, Dark Doriard, Weretiger, Rogue Whisper, Vampdog, Metal Slime, Garcoil Rooster, Vileplant, Baby Salamand, Balzack pre-Sphere of Silence, Balzack post-Sphere of Silence, Keeleon