Suikoden 5 Raftfleet Dawn Rune Suikoden V Index : Walkthrough/FAQ
Post-Dawn Rune in Raftfleet
 It’s definitely nice being situated with the Raftfleet people as opposed to the Rainwall folk. They’re just more genuine, if not a little stupid. Talking to Raja is your goal, so do that. Raftfleet will move so that you can walk to Lordlake. During the move you’ll discuss some important issues about your recently removed army, like what the name is going to be of it. When you’re done with all of this explore Raftfleet as it has changed. Gavaya from Stormfist is here, but you can’t recruit him. The detective agency is here also, and when you go near here (south of the trading shop) you’ll get a scene with two of the Dragon Horses and Dragon Knights that you saw during the Stormfist festivities. Ask them to join, but they won’t yet.
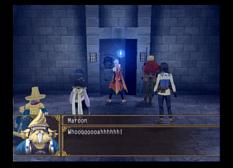
Inside the Oboro detective agency you’ll find that creepy jerk Dolph, who will try to get Lyon to join him. Dolph will then talk to Oboro and leave. Head back in and ask Oboro to join, and the agency will join you except for Sagiri. Norma and her tiger are in the Inn room, but you can’t get either as they are still looking for the wizard. Norden is in the room next to it and he’s ready to avenge himself for his drunkard-like behavior. He’ll join, if you ask him.
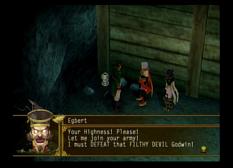 Put Cius and Lelei in your party (the Agate Prison guards) and talk to Logg. Logg can bring you places with his boat, so choose the Baska Mine in order to get to the prison again. So, head back in the area that Gunny brought you to, but go left instead of continuing to the prison. You’ll run into your old friend Egbert, who seems to have been right about those Godwins. Now, when he starts talking slowly with his crazy face, DO NOT press anything until he is finished talking. Once he is done, then press a button to trigger another dialog from him, and so on and so forth. Just make sure not to press anything while he’s slowly talking. Afterwards, he’ll join you. Now, continue on to the prison. You’ll see a guy in one of the first western cells; if you brought the guards, they’ll let him out. He’ll ask for his map, so backtrack and it should be in that previous save room. Search the northeast corner of the room and it is indeed his luggage. You get the Map of Falena and he joins you. Now go back to Raftfleet.
But we’re not done getting characters yet. Now go to Haud Village and leave, heading northwest to the Lunas North Woods. Takamu will take you through the area that only Isato previously could take you through. Go to the top of this hill now, where you found Logg stealing gold initially. Halfway up you’ll meet Urda the elf. Head back from whence you came, and exit to the world map. Pick the second option so she leaves (don’t worry, you’ll get her later). Head back in now and go to where you just found Urda. Zegai will be up here with a lizard he slaughtered. He offers you some of the meat, but choose the second option twice to ask him to join. Zegai will do just that, since you’re not associated with the Barows anymore. Now talk to Urda and go to Lunas via the path left of her. Once there, it seems she asked you to bring her there so you could tell Isato he can return home. Isato says no and that he is sworn to serve the Oracle. He then gets into deeper reasons as to why he supports the Oracles cause, as these elves would suffer if not for the protection of the Oracle. He’ll go upstairs, so follow him and ask him to join. He still won’t. Stubborn elves…we’ll return later. It’s nice to go on those classic Suikoden 108 Stars of Destiny hunts, and this was definitely one of them, but now it’s time to advance the plot.
Return to Raftfleet, and leave via foot and walk to Lordlake.
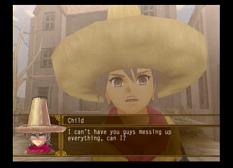 Talk to Talgehl. You’ll then go to the clinic to see the horrific condition of the patients, and then will leave. Outside you’ll see the kid you saved back from your first visit, Toma. He’ll join if you choose the second choice. Nothing else to do, so head back to Raja. It’ll be decided that you’re to ask for the help of the beavers, so go to Logg (bring Cornelio if you want to recruit another Do Re Mi elf).
He’ll take you to the Yashuna Village, where you should go south upon arrival. The Arrow Stance tactic is here, not a very conventional one but good if you’re a long-range specialist. Far to the east are the Prosperity Sandals, and there are a Mother Earth Piece and a Cyclone Piece in the southern part. Before you leave though, check out the Inn with the hot springs, as they have a beaver you can meet.
In the overworld, head to the southeast to get to the Mountain Path. It is extremely linear and long, but do bring Cornelio along in case you run into another Do Re Mi elf (SoLaTi). Use his DoReMi rune to do so. Exit this very long path and head west on the overworld. If you want to build up the recently recruited SoLaTi, put him in the back. Currently I have Zegai in front with a Drain Rune, and he’s basically an unstoppable tank, and having Sialeeds with to do the Unite with the prince is a good idea as well. And for some reason, I continue to bring Cornelio along. Maybe it’s because I find him funny but he seems to be an effective magic user with a decent physical attack. Regardless, there is a tough boss fight in a bit so it’s best to have a solid party instead of an experimental one. Far to the west is Beaver Lodge, so go explore in there.
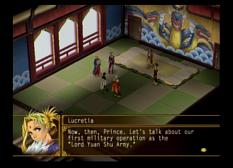
 Everything is locked, except the elder’s hut up the ladder. You’ll meet Fuwalafuwalu, who will apologize to Toma for the Lordlake incident. Maroon and Muroon will too come out and speak with you. Ultimately, the beavers want to help you in your efforts to take down the structure, although they advise you it will be hard. Maroon will go with you though if you pick the second choice. When you’re done talking, get the Flowing Piece to the east of you, and then leave to meet Lucretia. She’ll discuss matters and Fuwalafuwalu will come back out. You are to go to Ceras Lake now and meet someone “mysterious” who can help us with the fortress. Take the long walk back to the Yashuna Village, where you will not go southwest instead of southeast. Zweig will join you outside here, and he’s a solid (although under-equipped) fighter. Save and head in.
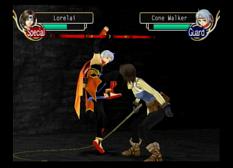
 These ruins are a little tricky. First of all though you will find Lorelai, who you may remember from past Suikoden’s. Accept her request for a duel. I did not have much of a problem, she either attacked or did a special every time and it was pretty obvious which one was which. Let her join afterwards and you’ll head in now.
There are three main parts here, with the north being blocked off. Head west first. You’ll notice the enemies are pretty difficult around here. Take the north path at the fork, and then take the west at the next fork. You’ll go in a door and find a Guardian Scarf. Now head back out and go north at that fork, stepping on the switch to open a door. This door is south of this switch, so keep heading south and then west into the room that just opened. Take your first north for another switch and continue west, taking a short detour south for a Robe of Destiny. Now continue to head west, it’ll be a bit of a long path, but you’ll get to a room with the Old Book 2 and a large switch.
 Back in the central room (with the water still preventing the northern path) take the eastern path this time. Go south at the first fork you come across, which will lead you to a switch and a Window Set 2. Return back to the previous intersection and go east instead of south now. The switch you just hit will have opened the door in this area so you can continue north into the next room, and to another intersection. Going north here is a switch that triggers the door in the area you were just at, while east has the second big switch and a hard to see Tiger Tactic in the northeast corner. Now, starting heading back. Before you leave to the center room though, head south and then east through the recently-used switch. Continuing east will only lead to a dead end, but north will lead to the final big switch and the Basic Magic item, allowing your tutor to be upgraded. Leave the place and save, and then go north where the water was.
You’ll find out that Ceras is artificial, and a little further north and you’ll be fighting two recognizable Suikoden enemies. These Sun God’s use plenty of spells, but you too should have saved your powerful runes. The Lightning rune was particularly effective, but as long as you have a person or two with the Water rune to heal, you should be in good shape. Further north is an advanced Sindar-created room, and Zweig is pleased. It’s time to go to Raftfleet now he says, and he’ll explain further then.
 When you are outside the ruins, Viki will teleport in. Viki along with Jeane (parden me if I am incorrect) are the only characters in each Suikoden. Anyway, she doesn’t know where she is, but she asks to join. Do so, and she will teleport your party to Raftfleet. Head to Raja and you’ll talk about creating a tsunami effect with the lake ruins. Before that though you must handle the ships in front of the gate. They’re pretty stationary, just make sure you match them up right. Timing is the key; you don’t want to allow the enemy to initiate contact with something it is strong against, so protect your weaknesses. You have a decent amount of ships but so do they. After a while they’ll give in and it’s time to release the gates. You get a Thunder Helm for your trouble.
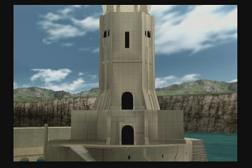
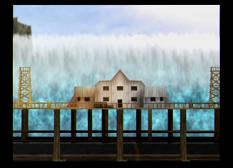
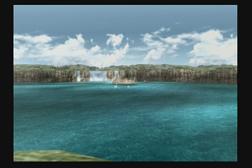 Go to Chuck’s warehouse and you will see Viki took up shop right next to him. Have her teleport you to Yashuna Village, and then walk to the Lake Ceras Ruins to open the gate. Great visuals all around here, and everything works out as planned. Lordlake has water amazingly. And after all the water is drained, a beautiful castle is shown. This castle will be your HQ, as you may have guessed. You’ll go through a few more scenes, and Zweig will ask you to inspect another Dawn Rune room. After this Zerase, the mysterious black-dressed woman, will show up and join if you let her. Also, the Dawn Rune gets a level 2 spell, and a pretty good one at that. Head to the downstairs to talk to Viki, who will give you the Blinking Mirror to return back there anytime you wish. Outside, Toma and Maroon will join you and ask to go to Lordlake.