
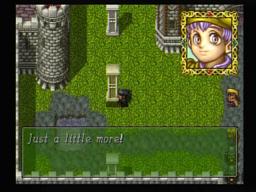
Isla
Name your character (default name is Finn). He is the typical silent hero who is a good attacker and has some magic skills to boot. He also has a pet dragon Steiner at his side to aid him.
You start off in Isla Village, watching Galahad and Annie argue over Sir Kevins treatment of Finn. In the morning Steiner will wake you and you can move about. Search the southwest barrel for an Herb and go down the stairs.
Galahad gives you a Flask, and you are to go to the Cave of Spirits to get Spirit Water. Annie runs off ahead, but go in the basement before you leave after her. There is an Antidote, Herb, and a storage chest. Inside are 2 Herbs, 4 Antidotes and a Light Shield. Definitely take out the latter. Also, search the wall to get the Short Sword (the beginning of all the x punching starts now).
Save your game in the northwest. Leave and go southeast to a cave.
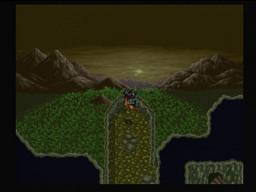
Cave of Spirits
Fight a battle and you’ll see Annie is here. She taunts you and runs off, so follow the path to fight a battle and you’ll see her again.
As you’re fighting these bats and slimes, you’re eventually going to need to use an Herb on Finn. Not much Finn can do besides attack, but remember to press X as rapidly as possible when the blue crystal hovers over your character’s head (or an enemy when they are attack, to counterattack / dodge).
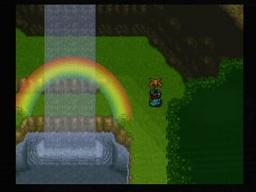
Annie takes the left path, so take the right one. Take the south path (the east leads to some cool scenery), then go east for the stairs going down. Go up to the water and use the Flask to get the Spirit Water. Return to the intersection to find Annie at the west fork.
Go west for a Source of Wisdom then north down the stairs. West for more stairs, and south for another set. This last set though you’ll hear a scream that is likely Annie’s.
A monster is messing with Annie in the swamp. Use the Flash to put the Spirit Water in to get Annie back. Annie then joins the party. She doesn’t have any spells yet, but she’ll be your Cleric and will do the healing (but she is decent at attacking too). Finn probably has Fire already.
Isla
Return back to Isla. Just as you return, Percy comes back injured. Annie does some weird levitation thing and Percy recovers, but falls asleep. Hm. The next day, Finn, Percy and Annie will leave Isla to go to Marion.
Marion
Might want to fight around a bit to get some money and level Percy up. There are a few things to buy here, then rest and save. Talk to everyone (notably a soldier in the southeast and then a villager in the west) and eventually you’ll see Samson is found. He’ll be surrounded in the graveyard area.
Go to the place where he came out of. Search the grey switch to open a staircase down, and then search the next grey switch you see. Return to the graveyard and a staircase is open. First get the Ring of Defense in the northwest and then enter.
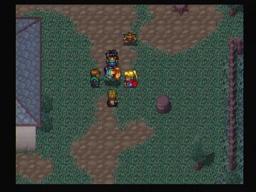
Some Bats down here and a rock blocking your way. Your entire party can push past it. Soon you’ll meet Samson who joins you after a bit of talking. He’s a beast as you can see.
Talk to Edward in his cell then go in the west room to defeat some Bandore Soldiers. They drop a Prison Key and you can free Edward now.
As you leave, Ramue stops you. Samson is here to protect you, and it looks good at first. But soon Ramue throws a cursed shawl at him and it gets him. Samson is now cursed (you can’t fix it) for the time being. Go back underground and you’ll be shown the way you (Finn, Annie and Percy that is). You are to go to Border Church with the Royal Pendant.
Border Church
East of Isla Village is the Border Church. Go east before the house to get a Resist Jewel and in the house for an Antidote. Save your game and then use the Royal Pendant to continue on here.
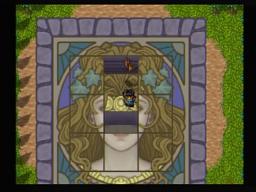
A puzzle is ahead. This task isn’t too difficult – you have to re-arrange the blocks so that they are back to their original form, and then the ninth and final block will appear. If you attempt to leave before solving it, Ramue will slaughter you. Save your game with the priest and go north.
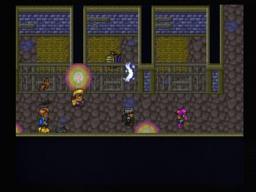
Search the barrels on the first basement floor to find a Blizzard Card. Search the blue lever ahead to push it and go forward. Unfortunately a member of your team decides to destroy the lever and stay on the other side to allow Finn and the rest of your party to escape. One of the barrels in the northeast has an Herb, and then go up the stairs.
East here for another set of stairs and a Source of Agility. Back to the previous fork and go north, taking the west path to pick up Brother Thomas, and then northeast to exit.
You can save at the Mountain Cottage ahead. The north cave has tough monsters and nothing for us really, so we’ll skip that and go east.
Giant Tree
Passing through the forest you’ll reach a huge tree. Go up the first stairs and then push the beehive into the hole in the second floor to continue.
Take the southwest path to push the beehive in the hole and get Steel Mail. This is good armor for Samson. Return, jump down the hole, and take the right path this time on that floor. Another beehive ‘puzzle’ for you to do to get up to the next floor. The following two floors though are tricky as you’ll have to take roundabout routes to get the beehive in the hole. Go to the vine when you see it.
Take the next vine down for a Counter Jewel and then east to a new tree. Take the southwest hole to fall down, then the east-most hole, west-most hole, south-most hole, and the the last hole is in the north part in the middle (but the southmost one of the group).
Once you exit the tree, a cave should be east of you. Take the northeast path for some stairs and then southeast for a Counter Orb. Northwest for the stairs and south to exit. A short distance northeast and you’re finally at Zalagoon.
Zalagoon
Surely you need to rest after all of that. Definitely save but you’ll notice you can’t buy weapons and armor here yet.
Immediately go to the northwest and Glade will stop you. He’s a shady fellow, the new advisor. Sir Piat recognizes Samson but Glade still doesn’t believe them. They shut the gates and you are back in town. Talk to the nearby kid to learn about the sewers around town.You can now buy weapons and armor so purge all your money into upgrading. Save, and then jump into the sewers (just search them) and you can fight tough enemies. Do this until you get all your new armor and weapons.
If you take the northwest sewer pit you’ll enter right by a Source of Magic barrel. The current blocks you from doing anything else here.
Take the one by the church now. There is a Smoke Bomb to the west. Back up now and take the southeast sewer passage. Travel to the east, south, and west and you can see you can travel further northeast through this route. There is a locked door up here though. You can however go west of here and into the water and walk through the water path (in the north, middle part) to get access to the northwest part. From here go south to the southwest part, where there is an Herb and then jump down (only when you’re very far to the south) and then take the south stairs up. They lead to the bar, where the Bronze Key is. Now you can take that northeast path. Take the stairs you see up there. Bison and that kid is here to see you. Talk to them, return to town to save, and then go to the king. You’ll have your audience but Samson will fail his task because of the curse. Return to the sewers to meet Bison again. You’ll get the Magic Bean here and will be on your way to get Samson uncursed so you can pass the trial. Rest, save and prepare to leave Zalagoon.
Ophera
Travel south and east along the coast. Soon you can go south again through some sand and you’ll eventually reach Ophera along the coast.
Only one new thing (a Garment for Edward) to buy here. A Guiding Branch and Mage Potion might be worth your money, at least one of each. In the north is a Flame Card, Smoke Bomb, and a place to save.
Luna
Luna is to the far west and south a little along the west coast this time. But it’s only active at night really.
Lots of treasures around here you can’t reach. In the northeast is a vase you can buy and stuff you can sell, also a guy is here who got cheated out of the valuable Vase of Life by Domino.
Plenty of great weapons and armor to buy. The Iron Rods will run your funds into the ground so you may wish to fight up around here.
Basically you’ll hear about the Moon Crescent and Domino. First though we’ll need to go north (after you get new equipment for all).
Mist Cave
Go north from Luna and stick to the west and take the coastline north.
Enter the caves and go north up the stairs. Take the southeast path for a Broad Sword for Finn, and then north and west. You’ll have to walk through the wall to the south to continue, and then go up the stairs.
Go up the vine and up the stairs. Go east then south, taking the western door to drop down near a vine. Climb up both of them and get the Magic Emerald. Back down the last vine and into the cave, going north to the stairs. Go southeast now and take the east drop off this time. Just continue along north until you see stairs and a treasure. It is a Flame Card, and then you can take the stairs.
Take the nearby vine and go west for a Power Gauntlet. Take that south path at the fork to get outside. Taking the vine again you’ll see lots of flowers around here. Just enter the place and go northeast for the stairs and then north for the stairs.
Take the north path again and then keep going through stairs until you’re out.
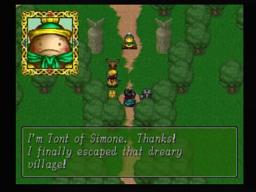
Simone
Rest at the Inn and go upstairs. There are a few defensive items to buy here. Search the fire in the southwest house for a Source of Agility.
North of here for a huge tree. You’ll hear about Tont along the way. Grab the Antidote and then the Tempest Jewel. Go to the very bottom to meet some Simone magicians who can’t break Samson’s curse unfortunately. They recommend Zeon the master magician around here who is currently gone.
Leave and go south, and take a west to a house with a huge pot. Get the Source of Agility west of the house and give the old man the Magic Emerald. He’ll put it in the pot and a yellow blob will come out. Talk to it and it follows you. Leave town and it transforms into Tont. He is a summoner who is no longer human, and he joins the party as the fifth member.
Desert Pyramid
Head through the Mist Caves and then to Ophera.
Fight as many battles as possible to get Tont leveled up (buy equipment for him in Luna and Simone too). Northwest of Ophera are the Desert Ruins.
Enter and take the staircase to the east. Now go northwest to a vine and then take the staircase to enter the pyramid puzzle. This first area is simple (trust me, it gets much harder) but it gives you the general layout of what you have to do. Travel northeast on the ground until you can go up the stairs and stand on the spot to switch it over and continue.
Go south on the second floor to flip that switch. Then go west to flip another switch and go down the stairs that open up. Travel to the southeast through all the open paths, and then west to hit another switch and continue on to take the stairs down. Along the way you’ll see a treasure on the floor in the northeast corner, it is a Smoke Bomb.
Step on the southern switch and the northwest switch, but don’t go down the eastern stairs yet. Go past them along the east wall to hit another switch, then go down the stairs. Follow this all the way on the ground to the southwest, where you can take the stairs going down to floor four.
Go north and hit the switch. Take the available east path and hit the switch ahead to go northwest. Take the west set of stairs and go southwest for a Dragon Card. Return up the stairs and to the most recent switch to hit it, and then hit the next blue switch to the southwest. This is how the room started. Now go northeast and down the east stairs, and then you can go south and east to get to the stairs going down.
Fifth floor now. Go west to a switch to hit, and then north for another switch. South to the first switch to hit it once again. Now you can go to the southeast corner (where you came in) and go down the stairs and start going west. It’ll start to open up north and east eventually, so travel east all the way until you get to the northeast corner. Go west and down the stairs to the sixth floor.
Walk south past the first switch you see and then there will be another you should hit just a little further south. Go northeast now to another switch that you should hit. Go west and you’ll be at the beginning. Hit this first switch you passed the first time through, and then go west and south all the way to steps going down. When the path opens up, go north and follow this path a long ways to the Moon Crescent. Just below this is a Firedrake Vase, but you need to exit and re-enter this floor and then do more switch stuff to get it.
Want specific directions? hehe no thank you. It’s not worth it, just cast Escape or use a Guiding Branch to leave. Rest and save at Ophera.
Luna
With this Moon Crescent, you can enjoy the nightlife of Luna. Use it on the World Map before entering and it’ll be night time when you do.
You can now go on the lower grounds through the northwest part of town. Once you get down there, work your way to the southwest to find the weapons / armor shops. Unload all your money here. Get the Critical Jewel in the northeast, and then go in the bar to the west of this. Get the Healing Herb in the northeast and the Source of Growth just west of this.
Talk to everyone in the bar so that you can hear of the person with the statue looking for the moon crescent. Rest or leave town and go to the southwest to trade the Moon Crescent for Statue of Gaia. You need this soon. Note that you won’t be able to visit the new weapon/armor shop, so if you still had stuff to buy you might want to wait to trade until you get everything there.
Valley east of Luna
Go east of Luna for a Valley. Keep going northeast and north until you reach a wall. Go west for an Angel Ribbon and then return to the previous intersection and go east to a stone dragon.
This thing will pull you across. Keep along the east wall and go north. More series of Dragon Heads as you’ll have to continue through the southeast and then north. But when you first see the dragon head facing north, head one spot north + east to get pulled to an island with three dragon heads. Search the northern head for a Tempest Ring which increase Speed by 5. This is one of the most valuable rings in the game because it basically allows whoever you give it to to be able to attack first. Use it wisely. Anyway, continuing on. When you get to some dark trees to the north, get pulled to the south and work your way west, north, east and north. Make sure you don’t get pulled back to the east part though.
You’re in a new, less foggy area of the valley now. Work your way northwest and up a vine. Then go southeast to get pulled over to the east, and then go north to exit.
Jonowan Village
After exiting the valley, go southeast to Jonowan. A Source of Wisdom in the southeast house. An item shop guy is walking around in the north. Check the guardian statue in the southeast for a hint, and then in the far east, search the bush in the middle of the four rocks for a Cure Herb. From the middle, go one spot east and three north and then search. Use the Statue of Gaia to open up Gaia Island. A couple things before going though; the monsters there are extremely tough, the dungeon is long, and there is a tough battle at the end of it so take a few Mage Potions.
As you cross it, the part will disappear and you will have no way back. But you can make it happen again in the Gaia Island Shrine and back in Jonowan too still.
Gaea Island Shrine
As you enter, you’ll see the same set up as in Jonowan so you can figure out how to get back. Go up the stairs.
Go east past the pink spot (reduces MP) and wrap around the north part of it, going west. The stairs to floor three are up ahead.
This floor is a little creepy because the guardian statues will just begin to follow you as you pass them. Anyway, just go east and stop at the first statue you see. It’s eyes are lit up and it’ll begin to follow you, so take the south path twice and then southwest to a statue floor glyph. Step on it and have the guardian go on it to lock it back up. If you travel too fast it sometimes doesn’t get locked up. Return east now, avoiding the pit and going up the stairs along the east wall.
Go southwest and the second statue you see will begin to follow you. Go north from here and you’ll see a floor glyph to lock up the guardian and continue to floor five. Head east to pick up the guardian, and then go south. You’ll come to the glyph but it’s a fourway – just make sure you can go west or north because the other two aren’t where you want to go. Then go southwest for the stairs. Return back to floor five quick though. At the floor glyph, go east (yea, absorb the – 5 MP for everyone) and get the Battleaxe for Samson. Jump in the pit north of here, then return to floor five and then floor six.
Get the Steel Plate for Finn directly to the north. Return south to the stairs, then go east a little to the lake and eventually northeast of it. At the last fork, go north for the stairs.
The guardian is on top of you as you enter Floor Seven. Okay this gets tricky because you have to maneuver to the south part of the stage to get rid of the statue. Take five steps west, then south for four. East twice, south six steps, four to the west, 4 to the south, and then go east to find the glyph. Make sure to to east, west or south when walking off. Go west three times from this glyph and then north all the way for a Battle Dress.
Now go to the east end of this puzzle and begin working your way north and west to the corner. Unfortunately, the last statue turns on just as you get there. Work your way east and south to the south-center to find another glyph to put the statue on. Finally you can take the northwest stairs. Hopefully the High Elves and Nagas didn’t destroy you with Wind 2 and Ice 2 while you were doing all this like they did to me. It might make sense to return back to Jonowan at this point to rest since you got the optional items (of course then you have to go through everything).
At the top, floor 8, you can finally see. Rest up and use a Mage Potion if you’re low with Annie, Tont or Edward.
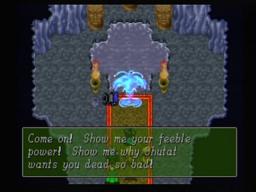
North of here is Domino and the first boss, the Water Demon. He mentions a guy named Shutat that wants you dead. This is a long and grueling battle, with the Water Demon having around 800-900 hit points. Use fire on him with most if not all of your characters. Have Samson use Flame Cards or attack, but because of the curse he can’t be relied upon. Edward should use Fire2 for about 20 damage and Tont’s Fire Drake does about 30 damage. You can use the Dragon Card and anything else like that. Stay healed because Ice2 can strike you at any point. Ice 1 and his physical attacks aren’t much to worry about fortunately. Towards the end though he’ll use Healing Herbs and cast Confusion on you which is extremely dangerous. If you have enough Mage Potions and LP left, you can outlast him for 500 EXP.
I lost Samson pretty early in this one and Edward shortly after but managed to beat it still.
After the battle, you talk with Domino. He knows about the legend with the Magic Beans and the Vase of Life. Since you saved his life, he allows you to have the Vase of Life (search it to get it though) and then he leaves. Use a Guiding Branch or Escape to leave as well.
Magic Beans and the Tower of Arawn
Rest up and save in Jonowan. Maybe restock your mage potions. Start the trip back through the valley and back to Ophera to rest and save again.
The desert ruins is where you need to be headed. Go north as you walk in, put the Vase of Life down and then the Magic Bean in it. Take the southeast stairs and then go straight north to begin climbing the vine. Prepare for more beyond the beyond puzzles.
Go north to the first water bubble you see and search it. Then go to the pink thing west of this and search it to pour the water on, and climb the vine to floor two. Go south on the left side so that you see a raindrop to the right of you. Search it, then go north and west a little to the pink thing to make another vine grow.
On the third floor, grab the Great Mail for Samson and then return to floor 2. This time take the northeast bubble and use it on the east vine to go up to floor three. In the northeast is a water bubble and a pink bud – do the usual and go up the vine in the northeast.
Go north to the water. Get some and pour it on the small green leaf southwest of you. Then get some more and use it on the pink bud to continue up the vine.
Get the water bubble west of you, and pour it on the leaf to the east. Go to the northeast now and use the water on the green leaf again. Now get some more water and use it on the bud to climb to floor 6.
Take the southeast bubble and use it to get further east past the green leaf. Go past the first east bubble and take the northeast bubble to get up the nearby vine. Travel south, west, then north on the seventh floor, going east for a water droplet to put on the northern green leaf. Go northwest past the first drop you see and then get the next drop to put it on the green leaf east of this. Just go southwest all the way until you can go down a vine back to floor six.
Continue northeast past the bubble and pink bud, but use the second bubble on the previous bud to get back to floor seven.
Go northeast and use some water on the leaf to go further north. Get more water and walk due north (you’ll just make it) and go up the final vine.
Tower of Arawn
You’re finally here. Go to the south part of the room for the stairs. You’re probably drained from getting whacked with Ice 2 by a Yeti or Naga. Hopefully you brought a few Mage Potions so that you can keep utilizing Annie to heal and Edward/Tont to use their high level magic to beat enemies quicker. Also if you use Escape/Guiding Branch to leave at this point, all the progress you made with the vines will be remembered which will allow you to go through that area quicker.
Anyway, in the second area go west and north, looking for a south exit to the middle of the room. Go up the stairs south of here.
The day blocks are down, the night blocks are up. Go west and up, and follow this path until you make a full circle to the south. You can go outside now. Keep going west until you reach the first door with the moon symbol above it. Go south and take the stairs going down. Go north and east for a Tempest Sword, and then return south to the stairs going up. Go north again to more stairs going up.
Go north to reach the outside. East and then search for a Hammer. Return back inside and take the northwest path and stick against the wall and follow to the southwest for the stairs to continue.
Head north until you go outside on this floor. Head west and you’ll see a weird spot at the end. Have Finn look at it (not step on it) and then use the Hammer to reveal a pit. Fall through, then go west and into the tower through the sun door. Go north, east, and southeast to the stairs.
Go north to another set of stairs. Walk south and go outside now. Go east and enter the moon door once more. Head southwest and eventually east and north to the middle where the stairs up are.
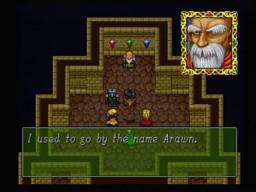
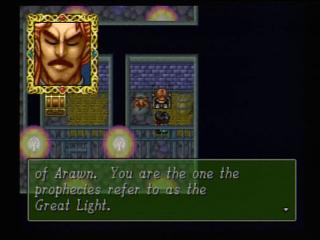
Look at the outside crystals and then the middle one. Arawn finally appears. He’ll talk to you some, about most of the popular topics like Bandore but also new ones like the Abyss and the Vicious Ones. You get an Ancient Tablet from him and a Light Orb. At the end he sends you to one who can break Samson’s curse.
Simone
You’ll be at the altar where you couldn’t go to earlier. Zeon is here to assist you with Samson’s curse. After a short sequence, Zeon succeeds and Samson no longer has that annoying curse to bother him in battle. Clearly, we can return to Zalagoon and prove Samson’s strength.
Save at this point ASAP. When you can leave, go southeast for a Wind Cloak. Before you leave to Zalagoon, make sure to take the path north of where you met Zeon (so that you end up near that broken down ruin on the raised ground when you are on the overworld).
North Simone Cave
The enemies here are quite easy. Get the Healing Herb in the first area and take the north stairs down. Then take the northwest stairs down. At the end of this pass you’ll find two Bandore Soldiers. Don’t let the appearance of these two fool you, this is close to a boss fight. They have a few hundred HP each! So they’ll take a while to kill, but they don’t really do much besides attack you with arrows. Good damage though (20+) and they’ll focus on the magicians in the back. Use Attack on Finn and Samson and hopefully you can get a few criticals for 50-60 damage. 700 EXP for this victory too.
As you exit, walk northwest and then when you go between the sets of mountains, head east a bit and then north for a while. Soon you will be back at Zalagoon.
Zalagoon
As you go north towards the kid, he’ll tell of Glade putting pressure on the king. You must rest and hurry to the sewer. Everything else is locked besides the church and Inn more or less.
In the sewers, you’ll notice the improved monsters from last time here. You may wish to build up a bit before continuing on. Take the southeast sewer and work your way north and to the northwest corner eventually. A maid will meet you as you get out.
Talk to Bison in the castle. Go left though and take that route for a Guiding Branch, Iron Plate, Healing Herb and Heavy Mail. Keep heading east and then towards the courtyard to confront Glade.
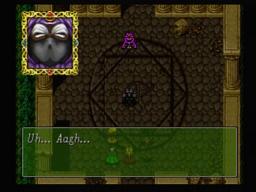
Glade isn’t happy about any of this and blurts out something about the curse. When Samson proves his strength, it’s clear Glade is the suspicious one. He starts talking about his love for the tiny pill (so tiny) and he takes it. He transforms into a huge monster that is sent by Lord Shutat to kill you. This boss battle is more about resilience than anything else. Glade has a good defense and near 1000 HP (similar to the Water Dragon). Glade just attacks and uses Fire 2 (rarely fire 1). He goes twice per turn; usually first and then last. When Glade nears death, he may pull out a Healing Potion. Finn and Samson will be doing the bulk of the damage so you may wish to delegate Edward and Tont to casting Attack on them.
Finally you are allies with Zalagoon and can retake Marion and then take over Bandore. After you rest, go northwest and talk to everyone by the throne. The soldiers are gathered at the southwest bridge but cannot defeat Bandore. You must help. Before though, take the northwest stairs up and search the cabinets for a Ring of Power (attack +5).
Last, before leaving town visit the weapon / armor shop. The door is not locked and you can now buy newer weapons and armor here.
Northwest of Zalagoon is the Dragon Cave. A Healing Herb is in Area 1 to your left and the stairs are southwest of it. In the next room, the treasure across the lake is a smoke bomb, but you need to work your way to it through the south bridge. go southwest and then east for the stairs going down. The next area has a Thunder Card straight to the south, with the exit just north then west of it. A big dragon is here so you’ll have to backtrack to the previous area. Go north until you reach a house, then go west and south to a chasm. Left for a Healing Herb and the exit.
Save and rest at the nearby Inn. The enemies lately have been easy so you may not need to rest but at least save. You will need to travel through that other cave next to the Inn, the one that leads to the Border Church. The priest was arrested for helping you previously. As you exit, go south and look for a bridge.
As you get in, two bandore soldiers attack you. Then it’s time to fight three regular bandores and a commander. The commander has 500 HP like the two you fought a bit earlier, so he’ll take a while to kill. You may wish to start on him and just have Tont use summons to kill the regular Bandore soldiers, although they have strong attacks so may be worth getting rid of them early. You get roughly 880 EXP for this. The Zalagoon Soldiers will rush through to Marion now, so you should go too.
Marion
Rest and save. Go north to the castle to see a scene.
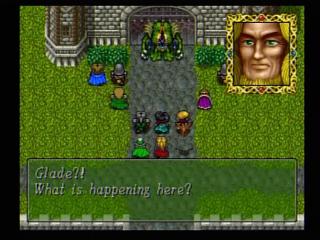
A soldier gets killed and the Bandore’s rush off through the stairs going northwest. Follow them, and then go north and west down the stairs. Go to the switch but the Bandore’s and the king will flee in a carriage. At this point you may be tired from the tough random battles, so rest up. If not, go to floor two and head south through the middle to get on the roof. Turn west to the western tower.
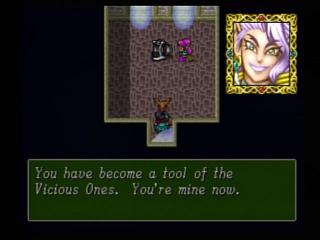
Inside, Ramue will put a cursed mask on this Black Knight, who is now to help the Vicious Ones. Ramue and the knight teleport away but she leaves you with an Evil Summoner and some Ogres. They have boss music but it’s not warranted, should be able to kill them in a turn or two. They drop a Steel Key.
Go to the east tower and use the Steel Key. Inside is none other than the king of Marion and his advisor. After speaking with them, go back to that gate where you saw the Bandore King escape. Use that Steel Key and you’ll come up to Lord Shutat! He wants to kill Finn now that he has him in front of him. Lots of reinforcements eventually come though, like Sir Piat from Zalagoon and then Galahad so Shutat and Ramue flee.
There will be some throne room conversation, good dialogue here. Marion is not ready to invade Bandore but Finn and Annie party wants to go anyway to save Kevins. Go south and tell Galahad this, and then take the east stairs going up. Search the west drawer for a Tornado Card.
Go back to the previous area and take the southwest stairs to floor 1. Check the treasure room in the center of the room for Thunder Card, Mage’s Potion and Source of Defense. Also there is a Source of Power in the room west of here where there is a soldier (search the wood table).
Back in Marion Town, you should rest and check the weapon shop once more. There is a Rune Sword.
Southwest Bridge of Marion
Southwest of Marion is a bridge to Bandore. Go across and you’ll see Edward and Samson rejoin. Up the stairs and search the urn for Healing Potion and a Mage’s Potion next to it. At the top is a Source of Growth.
Bandore
As you exit to the overworld, you will need to travel a great distance to get to Bandore. Fortunately the enemies aren’t that difficult so the 15-20 battles won’t be too much of an issue. It is about this time of the game that I put Edward in the front row as his attack is starting to surpass Annie’s. That said for dungeons and other areas where there are a ton of battles and you have to stay alive, I’ll switch Annie back in the front once Edward’s LP gets low. As for the directions to get to Bandore, it is a narrow route that winds around but easy enough to follow. The battle music has changed to the awesome one to signify you are about to go kick Bandore’s ass.
As you enter, go to the Inn and rest. A locked chest is on floor 2. Lots of interesting info from the folks in town. Get the new weapons and armor north of here. In the northeast part of town are three barrels – one has a Unicorn Horn. The Unicorn Horn removes poison, paralyze and petrify status. It can only be used a few times before cracking, at which point if you use it again it will break or go to a shop and repair it to keep using it. The northwest house has a Ring of Revenge. What does the Ring of Revenge do in Beyond the Beyond? Not sure but would guess it increases the counter rate. I usually give it to Finn for now. Outside of this house is a lady who tells of a secret path that is used. Go towards the house and you’ll see the little blonde kid go through the path that is lit up (because there’s a hole obviously), so that’s where you are to go.
Bandore Secret Path – Bandore Castle
As you are following these paths north, take the east one at the first fork and then take the west path at the next fork for a Flame Scroll. Then go north via the east route. Keep going this way until you reach the basement of Bandore Castle.
Go east and north between the barrels and through the door. Look to the east as you’re walking north to see a Bandore Soldier. Defeat him and get the Chain Key. Go northwest for the stairs and then southeast in the next room to see the Bandore King fleeing. Go east then south to see another Bandore Soldier for you to take out. Keep going south out of the castle.
Travel east as you get out and north when you can for Angel’s Ocarina. If you go south you’ll come across the main guards, and of course those idiots say you can’t pass even though you’re on the castle-side of them. Back into the castle, go north and then east for the stairs down. Go south to see Lord Kevins! Use the Chain Key on his cell to open it up and talk to him. Finn gets told some crazy stuff from Sir Kevins. Leave and go up those stairs you went down previously, and some soldiers will go to execute Sir Kevins.
Take the west exit going up to get to the throne room. Now go south and then east when you leave the castle. You’ll see stairs going down and keep going east to the Volcano area.
Shortly after entering and going east, you’ll be trapped by Shutat and Ramue, the Vicious Ones. They have to leave but they sic some tough monsters on you – two Phantom Armors and two Wyverns. Not quite bosses but difficult monsters none the less. After the battle you’ll see that Black Knight throw the key to you. Hmm. Use it to exit out to the east and continue on.
The enemies around here are tough and you are likely weary from all the traveling in Bandore. As you travel northeast you’ll reach a southwest / east intersection. Take the east path which leads to a cavern.
There is lava around here as you see. Keep going north and then east for the exit in floor 1. Once you reach floor 2, grab the chest in the northwest, a Death Hood (across the lava). To continue on, take the northeast path and it’ll wrap south to some stairs going up.
Take the first path going north you see and take it until you get a Robe of Darkness. Neither this or the Death Hood you can equip right now, and they are both cursed equipment. Return south and take the next path going north, through a bunch of lava. You’ll reach floor 4.
East then north for a Critical Orb. Now go back south, west, north, and keep going this route until you exit to the south. In the next area, go down the steps and you’ll hear “help”.
Keep following east towards the pit to see Sir Kevins. You must save him but once you do he turns into the Magician Yeon. Some scenes and you’ll be saved – but you’ll lose someone close.
Arawn speaks with you for a while then. Afterwards, go east and into the cave. Grab the Gold Key at the end, and cast Escape. You’ll be at the beginning of the Volcano area. If you really want to return back to town and rest/save you can, but there is not much further to go. Anyway, go east a bit back into the volcano area and then back to that southwest / east intersection, which you went east previously. This time go southwest until you reach a Gold Key door and a cave entrance.
Go through it to the other side and you’ll be at the docks. Go down the stairs for some scenes. The Bandore King is no more. Shutat and Ramue are again sidetracked when they have a chance to destroy Finn, and head off for Barbaros Castle.
When you regain control, go north and search a barrel for a Healing Potion. Also there is a Wind Vase in a northwest barrel. Go back across the plank and talk to Domino. He joins. Then he brings his ship near.
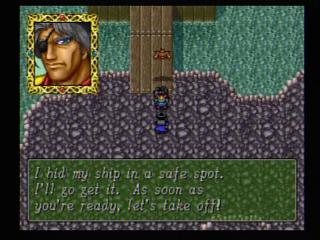
Domino’s Ship
Go down the west stairs and then the stairs north of you. Grab the Dragon Card, Healing Herb, and another Healing Herb. North back up the stairs, and then east and go down into Domino’s personal area. Search the table for a World Map. This is a very useful item that I missed the first time I played because I made the mistake of talking to Domino right anyway.
Go back and talk to Domino and he’ll join. Now you have the option of putting a teammate at a place you’ve visited. If you use the Light Orb, you can teleport to where that character is. For now I just put Domino in Bandore. Domino has some magic like the Wind spells and is actually a strong melee fighter. He throws his weapons which means he can attack from long distance, so it doesn’t make much sense to put him in front. Consequently when I do use him I usually take out Samson, but then that means you have Edward and Annie on the front lines which utilizes their melee attacks better but puts them at risk of dying since neither are a tank.
Up until this point, the story focused heavily on the battle between Marion and Bandore with hints of a larger enemy throughout. Now that Bandore is conquered, we move onto what I consider the 2nd half of the game. Check out the Beyond the Beyond Walkthrough Part 2 now.
Very helpful, even gives pictures…
Thanks Powell, glad you like it. Beyond the Beyond is one of my favorite obscure RPG’s. I love the boss battles, they can be long epic battles. It was a basic game but it had a charm to it that pulled me in. Plus in the early Playstation (pre-FF7) there wasn’t much else out there besides Suikoden I and Wild ARMs.
Yeah, I even went as far as emailing Camelot Software Planning now owned by Nintendo and asking if they will ever make a sequel to Beyond the Beyond. I wanted to play this game so bad before I even owned a playstation, I went out and rented the game and a playstation. First game I did not ever save I in my very early 20’s before the game actually froze b/c the playstation over heated… lol
haha nice! I could see a sequel on the DS, that would work well and wouldn’t cost too much. If only Beyond the Beyond garnered more mainstream praise, maybe that would be a possibility.
I got this February 2nd 1997 when I got my PSX….though it took me years to figure out how to beat Akkadias (not sure why it took me so long to use Resist Jewels, and find the Revive spell).
I belive I got this game when I finally bought a playstation… Leveling Percy up before he leaves my party… currently at level 27 (but I did manage to get him to level 18 with out cheating) I had to use a walk through walls code to leave the Isla/Marion. Saving is a bit tricky…
Got Percy up to level 30 yesterday, His promoted stats are going to be awesome.
hehe i finally found a way for finding the moon cresent its so hard
Agreed Michael. That Desert Pyramid is brutal! I remember playing this when I was young and having a hell of a time finding the Moon Crescent. First few floors aren’t bad, gets a little confusing towards the end.
But, that’s a good example of why I love this unheralded game. It has that NES-type difficulty. The kids growing up these days play games 10x easier than this where they never die, never have to think, etc.
Well I finally finished the game after 20+ years, it’s entirely possible to keep Percy in your party for the entire playthrough, just make sure he’s level 20 promoted before you encounter the Black Knight in the Sand Cave.