
Bandore
Continuing on from Part 1 of the Beyond the Beyond walkthrough with Bandore conquered. Once you gain control of the Domino Ship, park it near Bandore and head into town.
Head to the Bandore Castle. When you enter, take the far northwest stairs. Go south all the way until you reach some stairs, and then use the Gold Key on the door. Search to acquire the Ancient Tablet of Bandore.
Talk to Galahad in the throne room to hear about the new Bandore Government.
Leave Village
Get out of Bandore and onto the ship. Sail north a bit around the mountain range and then south along the east coast of it. Leave Village isn’t for a while, not until you start to see the dark green terrain. Shortly after you will be able to see a village from the coast.
Enter the Inn to rest and search the northwest bed for a Resist Orb. The house north of this has a Demon’s Leather inside. Southwest of here is the weapon shop, which you should check out. The bush in the back has a Reviving Herb. Northwest to the church to save, and search the back bush for a Guiding Branch.
Lots of weapons / armor here can not be equipped due to you not being promoted yet. More on this later. Buy what you can though. The Tempest Axe for Samson is really nice because it increases his speed to the point that now he will be going first instead of last. Meanwhile there is defensive equipment for Annie, Edward and Tont that you can buy.
Barbaros Castle
If you remember, Shutat was talking about destroying Barbaros Castle. To check it out, sail south of Leave and follow the coast as it wraps west. It is a long trip so hopefully you rested in Leave and you might even need a Mage Potion to survive it.
Once you get to some shoals you’ll see two rivers. Ignore them and continue west. You might fight some really tough enemies around here like Demons and Demon Pets so hopefully you can run if you do. Shoals will prevent you from landing as you continue on, but as you are going along the coast to the northwest you’ll see an opening with a river. Take this and keep going east until it splits northeast / southeast. Take the northeast path and get off on the forest north, and travel north and east to Barbaros.
Inside you’ll meet the princess here, Lorele. After some scenes of her kicking butt you’ll regain control. Go north to the king of Barbaros, Lorele’s dad, and he’ll tell you to go to Discipline Island to prove your worth to him. People here are cocky and talk about how they are bored and ready for battle.
The east end has a church and the west end has a weapon and armor shop with some good stuff that you can still equip, like Mystic Mail for Samson and Stun Rods for the magicians. They are super expensive so may want to just get them for Edward and Annie for now. You can search Barbaros more, but you’ll be back here later so you can do it then too.
Discipline Town
To get here, use the Light Orb to where your spare character is. Then send that spare character to Port Town Luna, the closest spot to Discipline Town. Now all you’ll have to do is sail your ship west to the new island and get off. Keep going west and you’ll see the Discipline Temple.
A few treasures to get in Discipline Town. Check the southwest house for Healing Potion, and north of here is a girl who likes Finn. She runs off, but go in her house for a Source of Courage. The weapon shop on the east part of town has a Chaos Shield in the nearby barrel.
Okay, give Finn a few Mage Potion’s and Healing Potions. He’s going to need them up ahead. Straight north and you’ll be at a temple with temple tunes playing. Search the southeast room for a Blizzard Scroll and then go north to the purple robed man.
Select yes and just Finn will go forth into the Discipline Island Training Labyrinth. Head north into it.
As you enter, climb up the stairs northwest of you. In this new area, walk northeast to a red tile. Walk west 4 spots and north 4 spots, then west to get on that island. Get the Heavy Shield. Jump down now.
Go southwest and back up those stairs. Step on the northern purple tile, and then go to the red tile just northwest of it (check the flash to see which spots you can walk on). Go west three spots and then north until the green tile is just two spots west of you. Get on that green tile, and then get on the red tile three spots north of that.
Once you step on the red tile, go west four spots, north all the until you are parallel with the purple tile, and then step on that. Work your way north to that platform with a Source of Power. Fall off from here.
Take the southeast stairs in this new area. Walk on the red tile, and then go north and west to the green tile. Walk up once and east to the purple tile, and then north to the green tile. This is the last part and it’s a little tricky, but you need to go north once, east four times, north a step, east twice and south twice to be next to the Mystic Blade. You are now a Hero and will teleport out.
Promote everyone over level 20. Annie will become High Cleric, Samson becomes General, Edward becomes Mage, and Tont becomes Summoner. Everyone is back at level 1, but this is good as their new class is much better than their previous.
All of the weapons and armor you couldn’t previously equip, you can now. Buy all of this at the weapon / armor shop here. As you exit town, you’ll see Steiner was promoted to a huge dragon. With Steiner, you can now fly anywhere.

Barbaros Castle
Anyway, the reason you went to get promoted in the first place was to show the Barbaros King your worth. Either fly over there or use a Light Orb to send a character to Barbaros.
When you get there, soldiers everywhere are dead. Go north and talk to the king and then the counselor. Search the Ancient Tablet against the wall to get it.
Take the east route into the castle and save. Work your way upstairs and then out on the balcony. If you can manage to get on the west end and go south and east, it’ll look like you’re at a dead end. However, face east and press the talk button to find a Traveling Merchant. This guy sells all sorts of items which will prove vital for boss battles later in the game. In the northwest corner check the pots for Thunder Scroll. Move to the northeast corner on the second floor outside and you’ll find a Demon Gauntlet in a barrel. Go back downstairs where the priest is, and northeast of there you’ll see a staircase going down. But go 4 or 5 steps south and try to walk east through the wall – you’ll find a soldier with a Bronze Key for you.
Go northeast into the cellar, and then use the Bronze Key. Lorele will run off. Get the Healing Jewel, Wind Bandanna, and War Rod. War Rod is a good weapon for Annie or Edward. Return to the throne room and Lorele will join you. You can follow her up to her room, check out her closet to look through her silk panties (the guy who made this line must have been the same pervert who designed the sleazy Succubus enemy you saw on the way here). Anyway, when you leave she’ll join. Lorele is a monk in case you didn’t guess, so she has physical ability (pretty much everyone is though), can Heal, and also has the Wind / Holy Light attack spells too. I still usually roll with the original 5 for now.
Sage Merlin
Go to Leave Village via the Light Orb, and then get on your ship. Sail south a ways, which will lead to the northern continent. Travel east along the coast once you hit land, and then south between the mountain ranges when you can. You can get off at the very south to find a cave.
When inside, go south. Search the urn and Sage Merlin will come out. Talk to him for a bit and he can teach you Resurrect. The catch is, any character can learn it. Might as well have your High Cleric Annie do it. This is something I’ve passed up in earlier quests but it is a huge boon for the end of the game.

Mistrall Town
Mistrall is a town that is northwest of Isla. You’ll want to travel west until you hit a new piece of land. Travel north along the mountain range (that you can’t fly above) and eventually you’ll be able to go west and see Mistrall Village.
Save to the north, and then search the northeast bush for an Ice Ring. The weapon shop west of here has a few things of interest, like the Dragon Scale for Finn and the Rune Axe for Samson (although that will lower his agility from the Tempest Axe). The Blacksmith in the northwest is looking for Mithril Silver, and if you can find this he’ll be able to forge some daunting new weapons.
Go south of here to the next house to find a Monster Bait under the table. Search the bush southwest of this house for a Dragon Scroll. Last and least, you can find a Cursed Bandanna in a fire stack to the very southeast.
Pity Island
You’ll notice you’ve been collecting Ancient Tablets. You need another one, at Pity Island. Fly east of Bandore to find this island and the shrine towards the east end of it.
The mushrooms here do different things. The red mushrooms make you grow, the green ones make you get smaller. In the first room you’ll see nothing but red ones as you travel northeast. Take the first south path you can for a Mage’s Jewel. Continue to the southeast for the stairs to floor 2.
Hit the green mushroom in floor 2. Travel through the hole to the northwest and hit the red mushroom and then the ladder.
Floor 3 has a ton of red mushrooms by you. You will need to hit the green mushroom to the west, and then begin to travel southeast avoiding the red mushrooms along the way. Once you pass the hole in the northeast, hit the red mushroom and climb up.
In floor 4, just go west for the green mushroom and a pitfall west of that. Grab the Power Knuckles, get on the leaf, and then travel south, east and north again to go up to floor 4. Ignore the green mushroom this time and go to the southwest to go up.
You’ll want to hit the nearby green mushroom, and then go south through the wall and then east for a Throwing Knife. Return the other way, hit the red mushroom and go north to floor 6.
Make your way north, west, and south, avoiding the pitfalls and such until you see a green mushroom. Avoid the pitfalls again and get on the green leaf, hit a red mushroom on the other side, and drop in that hole.
Head north a few floors up, until you reach floor 7. Go east to the green mushroom, then back to the center and then north. Go west for the leaf, then west some more while avoiding the red mushroom so you can go through the wall, then hit that red mushroom. Go up the stairs to floor 8.
Okay, this is hard if you don’t know what you’re doing. Hit the green mushroom, and then go straight south of the red mushroom – you’ll go through a hole. Grab the Battle Gi then go back down the ladder.
Back to floor 7 though. Hit the green mushroom, and then get on the nearest leaf. Go north when you get off, hit the red mushroom and go up to floor 8. To the southwest is a green mushroom which you must hit, and then the leaf nearby. Then go north, avoiding everything until you reach another leaf. Finally, the last Ancient Tablet is in front of you! Cast escape.
Four Islands
Make sure you have all four Ancient Tablets in hand. One from Bandore, Pity Island, Barbaros and the Tower of Arawn. Check the World Map. See the four islands southeast of Pity Island? You need to land on each, enter a shrine on each, and place an Ancient Tablet as well. You can find some stuff near the altars if you search – Cursed equipment such as an Evil Scale and Cursed Scarf but also something useful like the Fire Ring.
After the fourth, you’ll see the Ocean Pyramid come out of the water.
Ocean Pyramid
In the center of those four temples is the Ocean Pyramid. As you enter, go in the very northeast spot to fall in a pit. Head straight south for a Cloak of Darkness. Take the stairs north of that now. You are back at the beginning, so go north and then west for the stairs.
Travel south and then east / northeast when you can. See the weird spot on the floor south of the image on the wall? Step on it to lower the spikes and go north through the stairs. In this area, go south and then take the eastmost path going south to reach a mummy. It’ll move if you go up to it. If you head all the way to the west and north, you’ll reach a Devil Ribbon. Take the east route now, but go south when you can. Be careful when you get to the mummy – it’ll move south when you run into it. This one you can push, so start pushing it west but make sure you can still push it north (meaning, don’t push it too far south). Anyway, at the very east end of the room you’ll go north and see another switch on the floor, so push the mummy onto it and then continue down the stairs.
Go south a bit until you see an unlit torch and two lit up ones. Once you reach this very south point, go west to the wall and then north.
Three passages are against the wall, so take the middle one north until you can take that little west path. Now go north all the way, and east to the Battle Shield treasure. Go south via the first path you see now, and search the mummy for a Torch. Go straight south and then east to that unlit torch – light it up by “using” the torch on it, and then a huge block north of you will move. Go towards the new opening and down those stairs.
You are in basement 4. Go south all the way until you are stopped, and then go west. You’ll see a chest north of you, so get the Silk Scarf. Back south to where you were and then east all the way to that side of the room. Take the first of two paths going south though, and then take the far path south when you can go east. You’ll see a staircase going down in that southeast corner.
Basement 5 now. Go north right away and push the mummy on the ground switch. Back down now and then push the other mummy statue north all the way to the sphinx. In the next level, move all the way down and start pushing the mummie’s onto the ground switches. There is a third mummy in the northwest corner you need to push onto a switch to open that center door. As you enter, you’ll be at the controls of the Ocean Pyramid.
However, an enemy is preventing you from leaving. You lose a friend in an automatic battle here against Dagoot.

Fifth Shrine
North of Mistrall is the fifth shrine. It’s the small island on the southwest corner of the world map. You may want to scroll down to the Zeal Village section to head to Zeal first and get weapons/armor.
As you enter the shrine and go to basement 1, you’ll see a bunch of torches north of you. Search the west one up the stairs to get a Magic Staff. If you look closely, you’ll see a staircase going down in the northeast corner behind a torch. Face east and push this torch so you can go down.
Lots of staircases to go down. Just as you get to the end, that jerk Dagoot is back. He has a Lich and Necromancer with him too. This battle will not be easy as Dagoot is a wind specialist. Wind 3 in particular is damaging (25+ damage to all), not to mention he attacks twice per round. Obviously, defeating the two sub bosses is paramount in your success especially the Lich because if it gets Void off and auto-kills characters, you are in trouble. Once they are out, it is about sustaining your health in the early stages as Dagoot will eventually run out of MP. You’ll know it once he starts using bow attacks constantly. Just use Attack on your two brutes (Samson / Finn) and Healing Rain with Annie. If you have Edward at Level 7 he has Attack 2 which can really help. If you have trouble you can head to Zeal Village to upgrade weapons/armor and this battle is then a cinch.
After the battle, well, Dagoot dies and you continue on. North of here and finally you have reached the Final Tablet. A chest is east of you, but you need to walk through the west wall and counter clockwise to get there. It is a Seraphic Ring for Annie which gives her +2 defense and can be used in battle for Heal Rain Level 2.
Escape out.
Check the shrine northeast of Marion Castle. It is the Dragon Shrine, where some priests lie and Steiner resides. He is resting but if you talk to him he’ll rejoin, but there really is no point with the Ocean Pyramid at the party’s disposal. You can grab a Source of Life if you search the torch east of Steiner.
Zeal Village
This is your next destination. From here you can reach the Sand Caves. Anyway, to get here you need to fly south and a little east of Bandore. It’s in the sandy area.
Tough, desolate area here. They are right by a cave where lots of monsters are coming from, and they are boxed in. Rest at the Inn, and then search the upstairs table for a Silence Orb. Outside in a barrel is a Source of Magic. In the south part of town is a Drain Rod in a barrel, a nice weapon upgrade, Monster Bait in the bar, and an Evil Armor in a barrel west of the weapon shop. There are some new weapons / armor here that could serve you well.
Sand Cave
South of Zeal are the Sand Caves. Fly there to eliminate random-battle damage. In the first area, travel northwest and take the northwest fork when presented with the option, and you’ll work your way west and south until you see the stairs going up.
Floor 2 is tricky because you are to go south and there are some pitfalls along the way. South to the wall and follow it east, making sure to hug it until you can go straight south. Only take 3 steps south from this point though, because you’ll have to go east a spot to continue south and eventually southwest for the floor 3 stairs. Go south for a Mystic Dagger.
Back to floor 2 and fall in a hole so that you can take the stairs back up to floor 2’s starting point. Travel east along the south part of the lake and then hug that wall as it turns north and eventually west. Stay on it until you start going south to a Healing Jewel. Stick to that west wall to go north to floor 3.
Go straight south, but hug the west wall as it splits after the narrow path. Keep going south and eventually east until you reach a Source of Vitality. From here you’ll be blocked off east / south, so hug the north wall as it goes north and east and north some more. Keep following it until you get on the other side of that treasure chest.
Cut east at this point along that wall and go north along that thin path when you can, until you reach the stone barriers. Go east at this point and then turn south when you can. East again until you get to the east wall, but stick south and look west for an opening because that path will lead to the floor 4 stairs.
So go south and then east past the lake. Travel southeast at the fork and you’ll reach some stones, but they don’t block your way completely. Take the south route under them and then go north, veering to the northwest path. Keep going northwest until you see the stairs, and avoid the blocks again. Hug the west wall too!
Okay, go to the rock and then east to the north wall and then south to that wall. Hug this rock as you travel south. You’ll see three rocks to the west as you travel south – once you are one step south of the two rocks, start going west past them. Keep taking this route to the Shadow Gi. Go back to that spot just south of the rocks and stone barriers. Go straight east from here until you reach that wall, and go north to get along the south portion of that wall. Keep hugging that as it goes north and then west, and then go north to reach the stairs when you see them.
Next floor you’ll want to go to the south until you see the water. Get along the west side of that eastern wall and go south, all the way to the wall blocking you to the south. Then go west and hug the south part of the lake as it wraps north. West for a long ways for the Demon’s Axe. Return back to that lake so you can take the little south route for a Thunder Vase.
Go back up to the lake area and east to that southeast path. Take it this time and keep to the south wall and as it eventually turns west. You will soon meet the Black Knight. You noticed him help you a few times (at Bandore specifically) so you should not attack him. After about 10 tens he runs away and joins your party. Hopefully you know who it is…and if you choose to fight the battle it’s not too tough. As you’ll see just from defending the whole time, he really only uses mid level fire spells but his attacks are decent. Just follow the path to exit.
Quamdar
Quamdar is just west and south of the Sand Cave exit. Go between the rivers through the narrow passage.
In Quamdar, rest up and save. Then grab the Gundalf Hood in the northeast house of the church, and check the weapons / armor shop if you need to.
From Quamdar you can reach the Abyss, but there is more to do as far as sidequests. I definitely advise you do the Mithril one so that you have the best weapons for the Abyss, because you’ll need it.
Dragon Cave
Use a Light Orb to go to Marion, Border Church, or Mountain Cottage. Well, the idea is to get to the mountain cottage but the other two are close enough that you could fly over. As you enter you’ll notice the music is different. Take the east route when you can for a Skeleton Key. This opens any previously locked chest.
First off, we need to get that chest in the Dragon Cave. Go east from the key’s location and follow it northeast. Keep going north through the hole and then into the house for the Dragon Blade, Finn’s best weapon. What else can you get with the Skeleton Key? You can go to Bandore and go to the 2nd floor of the Inn. There is a locked treasure here that you can use the Skeleton Key on to get the Mystic Gi. Then go north into Bandore Castle, and go down the first set of stairs to the north in the castle. Now that you are in the Bandore dungeon, go south and you’ll see a treasure in a locked cell. Use the Skeleton Key to open the cell and then search the treasure (the treasure itself isn’t locked) and you will get a Reviving Herb. Finally, head to Simone and go north into the Mystic Tree. Follow the trail down here a few levels down until you see the locked room with the treasure. Use the Skeleton Key to open that door and get the treasure, which is a Tornado Vase. This is the end of the secret treasures that you can get with the Skeleton Key.

Mistrall Mithril Cave
Southeast of Mistrall is the Mithril Cave. To get in here, you will need the Ocean Pyramid to fly over the craters.
You’ll see this is an icy cave. Take the path southwest for the stairs going down to basement 1.
In basement one, grab Gimry’s Axe just east and north of your starting spot. Now return to the stairs and take the west fork as it wraps around to the northeast. This is where you are introduced to skating on the ice. When you step on a spot, you’ll skid two spaces. So, you’ll need to plan this out to get to the Basement floor 2 stairs. Get on the very south part of the lake and go north twice. Then west once (for two spaces), and north until you can go east to the exit.
Go to the lake to the east. Drop in one of the holes north of you. Go south for a Dagger in b3, and then north for some stairs. You are back to the B2 lake but from a different perspective.
Take the Helium Ring to the west. Get back to the southmost spot here. Your goal is the northeast area. Anyway, start by going east three times, south, east, north, east again, north and east all the way. About halfthrough through you’ll easily see the route. Take the southeast stairs to B3.
A staircase is just to the south for B4. Go up the east steps, and then to the south of this platform so that you can ride the slide west. Keep going west on land up another platform but take the northmost slide going east. Okay, you will get shot a far ways now, all the way in the northwest corner in fact. Take the south ramp going east and then the northmost ramp the next time going west. Grab the Flint Stone and go back down the ramp.
Backtrack to the southmost ramp here and go west. Back in the northwest corner you should take the middle ramp going east this time to get yourself on land in the northeast. Before you head on, head west all the way until you see the ramps and the treasure. You are going to need to go south once and continue west to grab the Storm Bandanna for Domino. Take that southern hole.
Take the west path to get to two ramps, and take the northern one of the two to get on the east side. A Battle Scarf is north of you. Return back, take the other ramp (south one), and go north up the stairs.
Go straight south to land, and then take the northwest platform so you can go down the north slide. Take the middle one in the next area, and then you can take the stairs going down to your east.
On the next floor, head northeast towards the stairs by the platform. You can then slide across and take the stairs down. Next floor down, take the west path up the stairs and follow the path west, south, east and north to an oil pot. Use that Flint Stone you found a few floors earlier in the middle to light up the north path, and you will find the Mithril Silver. Cast Escape and head back to Mistrall Town.
Give the Mithril to the Blacksmith in the northwest part of town. Go outside, fight a few battles, rest at the Inn, and then talk to him again. Now weapons are at the new weapon / armor store, pretty much the best weapons / armor in the game except for a few cases. The blacksmith also offers you a deal on a Mithril Dagger (not better than a Mystic Dagger though).
Quamdar
You are now more or less ready to go into the Abyss. You will be returning to Quamdar to rest on a few occasions likely. Make sure you are stocked up on Revival Herbs, Mage Potions, Resist Jewels (defense + 50%), etc. As far as which combination to bring, that depends on your preference up to this point. The first few times I went through I stuck with the original cast, though I do like Percy’s versatility and Domino’s strong long range melee attacks + Wind 3 (Annie is always my healer so Lorele gets the shaft).

Abyss
To get here, head south along the path east of Quamdar. After a bit you’ll reach the Abyss Shrine, and make sure you have the Final Tablet with or else these events won’t materialize.
Up ahead is Yeon. He talks some junk, you learn your friend is still alive, and a battle ensues with Yeon, a Royal Guard and a Hydra Warrior.
For starters, you’ll want some attack spells / summons that target everyone so you can kill off the side enemies. Yeon will take a while with his 1500 or so HP. He is a Thunder fiend, using Thunder 2 a lot but even trying Thunder 3 once in a while for 30 damage to everyone. You may want a Resist Jewel, or just let your LP soak up the damage. His physical attacks are meager. Maybe the most dangerous aspect is Confusion level 2, if it works on a lot of your allies. It can ruin a few turns. But his guards are easily dispatched and then you can just assault him with Attack 2 and Level 2 Undhine, and level 4 spells if you have them.
After the battle, set that Final Tablet onto the space by where Yeon was and the Abyss is now open! Might as well get out, Light Orb back to Quamdar, and replenish your LP / MP for a long journey into the Abyss.
Back into the Abyss, go straight north down the stairs. Take the east route and go north through the door. Walk east through this trippy area until you reach another door to enter. Go to the west statue and search her to grab the Orb of Light. The Orb of Darkness now radiates. Return south and go back to the three dimensional area, where you should backtrack west to the door.
Back in the main area now, go south and take the staircase going down. Go east until you reach a fork, so quick check the female statue south of you for a Seraphic Cane. Further south for stairs going down. East and down the stairs again.
West once you get down the stairs, and then north when you can. If you go east you’ll get a Malicious Rod. Back up the stairs to floor 3. Go west and north this time, all the way through the door to the weird 3d stuff. Go west to the door and take it. Take a left and go north through that thin passage, and then go northeast near the stairs.
Don’t take them quite yet though – search the angel statue that is south of you (not the first one that is more southeast – the one that is in the second row with all the female statues). You’ll find a Mystic Shield. Backtrack to the beginning of the floor, and go to the east (along the south wall) to that eastmost thin passage going north. Now you can take the northeast stairs going down. In the next area, walk to the south and take the set of stairs going down.
The music changes (pace is faster). You’ll notice the monsters are harder, there are more Shadow Dragons, Nightmare Queens, Hydra Warriors and other nasty Abyss-only enemies. Anyway, head straight south through the passage to the 3d area again. Go east once you are here to enter a new passage. You’ll want to go all the way to the west, all the way to the south, and then go east past the first spot to go north but take the second path going north for stairs going down.
Just go north to the female statue, and place the Orb of Light in her hands (you have to use the Orb of Light in your inventory). Just cast Escape at this point and return to Quamdar to rest / save. The next time though, you’re going in for good. So be loaded with Mage Potions, Resist Jewels, etc.
So we still need to bring back the Orb of Darkness at the Abyss. Go north through that door and then the stairs going down. North again to the 3d area, where you should go east and north to get the Orb of Darkness. Backtrack through the 3d room to the main area where you started, and take the staircase down.
Go down those stairs, and east then north through the statues. Up the stairs and north through the door. West in the three dimensional room, and then north all the way in the next room for Hero Scale. Go down the nearby stairs.
Head southwest past the glowing white statues, so that you can head east to that side of the room and then north down the stairs. Next area go west and north down the stairs again.
Travel south past the glowing statues again, and east once you are able to. All the way east and north for a Demon’s Fist, and then south all the way through that door. Take the east route in the 3d room.
Walk south, west, and south again when you can for an evil statue (search it for Ring of Death). Go back north a bit, and then east all the way, south all the way, and then west. Take the second north path for the stairs going down.
Put the Orb of Darkness in the statue to the north. Now that both statues have their respective Orbs, the north door opens. This is it. You are welcome to return back to rest/save, knowing all is accomplished with the orbs and that you just need to make it back to this point with as many LPs/MPs/items as you can.
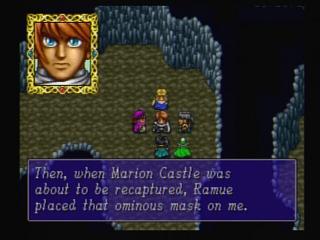
 Shutat and Ramue will threaten you. Just say no or else you’re screwed. Regardless, a battle breaks out with you and those two! They attack fast, and twice per round. Their physical attacks are trashy, but they have Undhine, Titan, and Firedrake level 1 as abilities. This is why you bought all of those Resist Jewels. Use them here as soon in the battle as you can to lessen magic damage by half (you may get the first turn to yourself like I did). Other than that, try to save your MP in this battle, if that’s at all possible. Use attack on Finn / Samson / Domino (or Attack 2 on all) and if you manage to get some crit hits you should be looking at 100+ damage. Ramue is the weaker of the two and has less HP – you may wish to just gang up on her first as it becomes much easier with 1 enemy. Or go after the strongest and get Shutat killed right away.
 Afterwards, an evil soul is purged from Shutat. A new creature is surfacing…named Akkadias? Okay…you will curse this guy if you didn’t bring Resist Jewel’s. I had saved the Resist Orb for him (you only get 1 in the game and it does resist on all members) and just like the previous battle was able to get the first turn free to start whooping on him. He absolutely abuses his Soul Blast ability which takes off mid-20’s unless you have the magic defense up, keeping in mind your magic defense maintains this throughout the battle. Thankfully, with the Resist Jewel, he should only be doing 10-11 damage on each member (though he goes twice per round of course). Maybe most troublesome is when he silences you. This wears off after a few turns. You’ll know you’ve depleted most of his 4000 HP once he starts using Heal Rain level 3. Just keep up the Attack augmentation strategy and use your Revive Herbs if/when necessary. With attack up, if you get a crit hit or attacking twice, you can be taking off nearly 200+ with Finn, Domino or Samson.
You have beat Beyond the Beyond. Go celebrate.

I like how the Beyond the Beyond Finn FAQ was done. But when you select the next Entry it does not link to Beyond the Beyond Shutat Ramue FAQ.
Yea I know. The problem is most of the time when I do guides I complete them right away so the different walkthrough pages are easy to find by hitting next or previous entry. However I took a break with Beyond the Beyond so like you say, we cannot find the other Beyond the Beyond page by using next or previous.
But you can bookmark the category page for the Beyond the Beyond walkthrough, or just look on the right sidebar to click it.
Love Beyond the Beyond. I always gets Percy at the end and build him up to use him at the end. Fun game and as you say, the difficulty is a huge factor in how fun it can be – boss battles are HARD.
I am just replaying this game as i never finished it . I hope you still answer peoples questions. All I want to know is what the helium ring does. I can find no where that tells me. You mention it here but not what it does. I hope your still around and I get answer, Thanks, mary
Hi Mary. I am around here once and a while still.
Helium Ring I actually had to look up last time I played. Only thing I can find about it is that it makes the voice of whoever has it equipped be at a much higher pitch. So no in-battle effect.