Aliahan
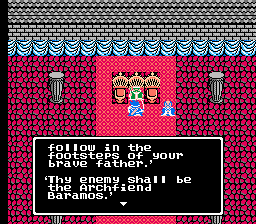
You are the son of Ortega and you are about to go on a journey for your 16th birthday. Your mom brings you to the castle, and then you go talk to the Aliahan King. He tells you of the Archfiend Baramos that you must go defeat. You’ll get 50 gold and then are told to go to the eatery to acquire characters.
Class Tutorial
- Yes, you create your own characters and choose their class. This is a pivotal part of your quest (deciding your party) so best to understand each of the options.
- Three default characters are created for you with random names; a Soldier, a Wizard and a Pilgrim. This is a good way to go especially starting off. The Soldier is slow and has no ability with magic, yet he is unmatched with Attack, Defense and HP. He is costly to keep up with all the weapons and armor but he can also equip some of the best weapons and armor that you find towards the end of the game. Pilgrims are the healing types and every party should have one unless you are a veteran, as otherwise the Hero will be the only healer (more on the Hero later). Pilgrims also are able to equip a wide variety of weapons and army to keep them viable physically. Wizards are weak and susceptible to melee attacks but of course they have all the offensive magic and are fast.
- Often times I would use a Fighter instead of a Soldier or Pilgrim, as Fighter’s have very fast agility, high critical hit rate, and few equipment to get so they are a cheap character to manage. In recent years I have come to find Merchants to be quite a solid character as well especially early on. This is because they can equip very good weapons and armor, similar to a Soldier, but they act much faster in battle whereas the Soldier tends to go last. That said Soldiers can equip elite weapons and armor late game that Merchants can’t use. Merchants can however find gold after battles on occasion (a small fraction of the total gold from the battle).
- Goof-Offs are only for the advanced. They will spend many of their turns doing absolutely nothing. They can equip some decent weapons and armor, so can be nice to load them up with defensive equipment and parry. No magic but the Goof-Off gets crazy luck improvements each level and you may wonder what that does. That just influences the likelihood of dodging a status ailment or more importantly instant death moves like Beat/Death. It does not influence critical hit rate or the likelihood getting an item drop (Merchants don’t influence item drop rate either). Ultimately with a Goof-Off the biggest benefit is the ability to switch to an elite class later in the game in a way that no other class can, so if you can survive until that point with them it will boost your party the rest of the way.
- Oh and the Hero? Great attack nearly on par with the Soldier most of the way. Gets some healing spells as well as offensive magic including some rare spells that even the Wizards don’t get. Worst thing about the Hero is that they will be unbearable slow to act in battle but we can overlook that and overcome it later.
After visiting the eatery (northwest part of Aliahan) you can leave with your four characters. Any Dragon Warrior veteran will tell you that levelling up is the most important process in the game and this is no different. While not quite as extremist as Dragon Warrior I and Dragon Warrior II you will still need to spend a great deal of building up levels before you go into new areas. Certainly in the sense that you need to gain levels but also to get enough Gold to stay up to date with weapons / armor, which can be expensive for the Hero and Soldier.
One little secret to note in battle. Let’s say you use parry with the first, second, and third characters and then press B to go back to the first character to re-select what you want them to do. The parry that you backed out of will count to reduce the damage you take while you can then also attack/use magic. Use this cheap loophole at your own discretion. Of course you can’t use it with all four characters because there would be no way to back out (you would just have your whole group parrying).
Outside of Aliahan fight up to level 3 or 4. You can heal for free at the hero’s mom’s place in Aliahan. You can buy some weapons and armor at Aliahan but let’s not as there is a village nearby with much better stuff. As you go outside you’ll notice this game has a day and night function, the first of the series to have it. Villages and castle are much different at night and generally inaccessible but some areas must be visited in certain parts of the day.
Reeve
When you have gained a few levels and are ready for a bit tougher monsters, go north of Aliahan to the village of Reeve. Inside are some quality weapons and armor most notably the Chain Sickle. You’ll hear more about the cave to the southwest of here and the Tower of Najima west of Aliahan.
Try to level up around Reeve until you get to level 5 or 6 with everyone. The hero is really slow at gaining levels whereas the Soldier and Wizard are a bit fast. By this time you should have around 500-600 gold so get a Chain Sickle for your Soldier. or whatever melee character you are bringing along. Now it is time to venture into this Tower of Najima.
Tower of Najima
I like to enter this place just southeast of Reeve. You’ll see a grass patch that looks a little different, this is what you need to take. Go down the stairs and then continue west for some gold coins. Head south and you’ll be at a huge four way intersection. East leads to a door in Aliahan (that needs the Thief’s Key to open) and the left leads to the cave west of Aliahan and south of Reeve. If you took the cave read the next paragraph if not just skip the paragraph and go to the next one for the Tower of Najima.
If you entered the cave west of Aliahan this is what you’ll find. East of the entrance is a Medical Herb and north leads to another treasure, the Wayfarer’s Clothes. The south and north path’s in this room are a loop that lead to a 16 gold treasure on the north part. The east path leads to the Tower of Najima.
The center of the four way intersection has a stairway leading to the Tower of Najima. When you get there you’ll notice the scene changes to a tower-like one. Go north to the middle area, leaning toward the left. You’ll see a chair and a table, go down the stairs and there is a Wayfarer’s Inn here. Rest if you want and with an Inn here it’s a great place to build up levels. Head directly east of here when you want to continue the tower.
Up the stairs and then west and north when you get the chance. Go west first for 40 Gold Coins and then east for a staircase and a Leather Helmet. Lot of people can equip this but I tend to give to the weaker ones first if they have nothing. Return back to the staircase that got you to this floor and go south and west all the way, north at the end for the staircase up.
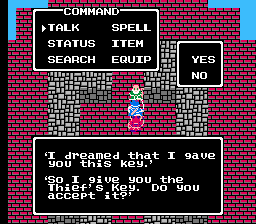
Go north from here and start working your way east and you’ll have lots of options. Take the second south passage for a Wing of Wyvern and then the south path before that for a staircase. Talk to the old guy and he dreamt that he gave you a key. Take his Thief’s Key and then use it to open the south door. Now you can open all those types of basic doors (but there are still two different types that you cannot open).
Jump off the roof and you will be outside. If you are low on health and want to head out you can use a Wing of Wyvern. Otherwise head back in the tower and go back into the basement. Go north and east to open that locked door. Treasures are in here, the Medical Herb and Agility Seed. One note about the various seeds in this game. DW3 has a mechanism that will average out characters level-up stat increases based on their class, so look at seeds as a temporary increase because the game will level itself out over time. So just for example if you used a bunch of Agility Seeds on a given character, they would increase their agility yet the next several level ups would probably get nothing for it (the game’s way of averaging out the stats to match the class).
Back south and east and you will hear town music. You’ll be in Aliahan now! Use the Thief’s Key to go through the door and you can now rest and save.
Cave of Enticement
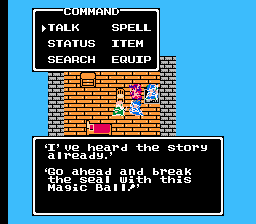
Return to Reeves. You may have enough money to get another Chain Sickle for either your Soldier or Hero. This along with the Wizard’s Icebolt and Firebal will make you a formidable offensive team. Go to the northeast part of Reeve and open the door with the Thief’s Key. You will see an old guy who has heard the story already. He gives you the Magic Ball. You’ll need this very soon. Go outside and fight up for a while more, until you’re around the 7-10 range for your characters. When the Hero gets to level 7 he gets Return so you can go to any town at any time. Very useful. Buy the best equipment and Antidotes you can afford and head east of Reeve.
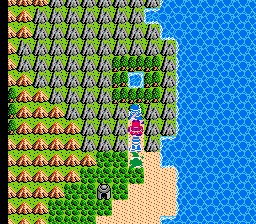
 Go in the shrine and talk to the old guy who tells you to go east more for the Cave of Enticement. Do so and go by the lake. North of here is a hole that you need to enter. Now you are in a cave like structure with an old guy. Go to the wall and use the Magic Ball and watch the wall be destroyed. Enter the stairs.
There are some tough monsters here, to let you know. I find the groups of Spiked Hares to be the most annoying as they have a good attack and cast Sleep often so they have a chance to rail on you good for a few turns. Use Firebal on the first turn when you fight these groups to get rid of them quick.
On the first screen take the northeast most path to get past the pit. Now take the northwest most path to get an Antidote Herb. East all the way to the wall now, and south all the way to the wall. You’ll make your way west into a new area with lots of paths. Take the path that is north one and west for the Magic Knife (good for wizard). Go northwest for the exit.
You are in a room with three paths going south. Take the west one and use the Thief’s Key. You may encounter Demon Anteater’s around here, they are a bit more difficult than the monsters you’ve fought. They also focus on attacking the same character over and over so stay healed up. Take the warp to a new area and use the Thief’s key again to get out. Go to the nearby castle to the northeast.
Romaly
Hopefully you didn’t get killed by the tougher monsters in this region. It’s not a long walk anyway. Caterpillers, Poison Toads, and more of the tougher monsters earlier. Anyway, in Romaly is a King proclaiming that you help him. A crook named Kandar stole the Golden Crown from the King of Romaly. You are to get it back since he knows you’re Ortega’s Son and all.
In town notice the Broad Sword and other goodies at the weapons + armor shops. You probably don’t have the money for all that but you can get it quicker around here with the newer monsters or you could gamble south of here. Yes, Dragon Warrior III added a sweet minigame, and it’s much better in here than DWIV in my opinion. You gamble on which monster will come out victorious in it’s grouping. It could be four Spiked Hares fighting or a Slime, Horned Rabit and Anteater fighting. The favorite is harder to determine in the former group but you will be rewarded less for picking the favorite (Anteater) in the latter group. That said if you pick the Slime and it happens to win you get a great percentage back. Another one I like is the Magician, Humanabat and Killer Bee matchup. Magician is 20+ odds so if you win you get bank! They have a decent shot too but if the Humanabat uses Stopspell on the Magician, the Magician is screwed. Anyway, you can get rich or go broke here, but it’s pretty entertaining for a while. Save before you go off gambling too much though, incase you lose.
Later on you’ll see new areas with new arenas and new monsters to bet on. (note, for people on emulators, you can save state before the match and see who wins and then load state and bet on that monster. Money will start rolling in and your characters will be well equipped for it).
Again you’re going to want to go outside and fight around for a decent bit (especially if you didn’t do the money trick above). This is where if you have a Merchant like I do during this play through, at this point they can equip almost all of the same weapons and armor that a Soldier can. Including a Broad Sword and Half Plate Armor! Some of the lesser equipment like Bronze Shields and Shell Armors are mostly worthless, better to save for the more expensive options. Iron Spear is a nice upgrade for a Goof-Off as it is their best weapon for a while.
Don’t venture too far east while battling, that’s a new area you aren’t quite ready for. North is the next part to go but that may be too hard for you to be around at first as well. After a bit of leveling go to Kanave in the mountains up north.


Kanave
Kanave is a really small village around some mountains. It might be small but it has some delicacies at the weapon shop especially if you have Fighters. Now Fighters are really quick and naturally have a high attack, but if you get them an Iron Claw they will be devastating. Combined with the Fighting Suit here and then they can defend themselves as well. If you don’t have a fighter there are still things to get. Iron Shields are here and are the best shield for Merchants and a good upgrade for Soldiers and the Hero. Half Plate Armor is valuable for right now too for the three aforementioned classes, although the Fighting Suit is just 2 less defense and costs 300 gold less so it is a decent cheaper option for a Soldier or Merchant. If you visit Kanave at night you can get the Poison Needle at the Item Shop place. Perfect for the Wizard as the Poison Needle will take off 1 every time but it has a slight chance of a one-hit kill (~10% chance).
Fight around some more and then go northwest of Kanave to Noaniels the sleeping village. You will see some new enemiese here like Gas Clouds and Avenger Ravens. The Avenger Ravens are nasty with the best attack you have seen yet plus they attack twice per round. This will test how well equipped you are in terms of armor up to this point. Use Firebal to get rid of them quick as they tend to come in groups.
Everyone is sleeping at this Noaniels place and if you talked to people at Kanave you’ll hear the elves did it. Now you can either go do this to the northwest or go southwest towards the Tower of Shanpane for Kandar. I tend to go west of Noaniels to the patch of forest that sticks out, this is the Elves Village. There isn’t much to do here other than get the story on why Noaniels is sleeping. Go south to the cave.

Noaniels / Elves Cave
South and take the first left for a Wing of Wyvern. The path wraps around east and go north when you can for 288 Gold Pieces. Go all the way south and take the staircase. This leads to the Acorns of Life. Exit via the opposite staircase and then enter the nearby staircase.
This is my favorite room in the entire game. See the stuff in the middle? Walk in the center and you get fully healed. You can build levels to your heart’s content! In this cave it’s necessary to spend some time here as there are some difficult enemies around and your armor will be tested as well. Yet the Man-Eater Moths are strong and use Surround and the Vampires will be spamming Ice-bolt. The groups of Demon Toadstools may be the most annoying as they use their sweet breath to put you to sleep.
West from the recovery room when you want to continue, and then all the way north in the next room. The east has a Strength Seed and the west a Magic Knife. Southwest from here for the stairs to continue.
In this big new area go west and ignore the staircase and go south and east for 80 gold. Back at the staircase, go west all the way and south for 224 gold pieces, and then southeast for 75 gold pieces. Take the path just north of this for Fairy Water and a staircase that leads to a message from Anne and the Dream Ruby. Cast Outside and walk to the elf village.
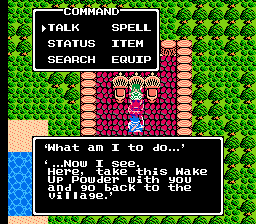
The elf leader will give you Wake Up Powder to use at Noaniels. Use it at Noaniels and go to the tool shop in the northwest. Buy a Cloak of Evasion for your Wizard if you can afford it. There’s really nothing else important here so rest up and leave to the southwest.
Tower of Shanpane
It’s time to get that Golden Crown back from Kandar. To get to the Tower of Shanpane, either go southeast of Noaniels or go west from Kanave to get there. It would be wise to be around level 14 – of course getting your hero to level 14 means everyone else will be level 16. If you can get people in the 13-15 range you should be okay.
Anyway, enter the tower. See that treasure as you walk in? It’s a Wing of Wyvern. Take the staircase west of that now. Go west and north for the next staircase. Another split on the new floor, so go east and get the 384 gold coins in the northeast room. Then venture clockwise. If you take the first path on the west side you will reach a guy to chat with, otherwise continue to the northwest for a new room and stairs up.
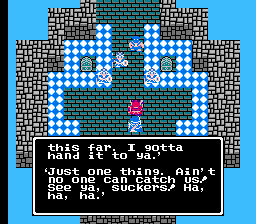
Go south on the new floor then use the Thief’s Key to enter the door and see the guards. They’ll flee to the top floor and then you’ll fall into a pit. Go back upstairs and the treasures will be gone and Kandar has fled! Jump off to the north after them and you’ll see them. Rest up as a boss battle will ensue.
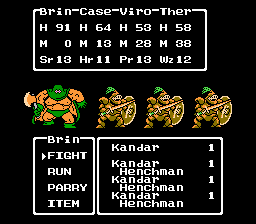
Kandar is your main adversary but kill his Kandar Henchmen first. Cast Increase and Speedup to help the cause and Sap on Kandar. Just attack and stay healed, using your best offensive magic with the Wizard (like Bang on multiple members or Icebolt on one). In my recent play through with the Merchant/Goof-Off/Wizard party, Kandar killed my Wizard in round 1 before the Wizard could even act! Of course, I hadn’t gotten the Cloak of Evasion like I should have. If you can survive the first round or two and get the henchmen defeated, it gets easier. Once you defeat their group, let Kandar off and grab the Golden Crown.
 Return to Romaly and become King! You can go around and chat with folks. But you can’t stay king forever so go to the coliseum and talk to the guy that looks like the chancellor as he’s the old king! Now you can choose to continue on your journey. Head east and south of Romaly to Assaram.
Assaram
Tough monsters around here, like the Wild Apes. Inside of Assaram though are some good deals. There is a really expensive Revealing Swimsuit here. You can barter with the guys in the west part of town or come back at night for the north shop to be open (or the dance stuff in the southwest). The nicest thing to get here is the Iron Helmet as these are the best helmets you can get for your Hero, Soldier and Pilgrim until quite a bit later. You can talk the guy down to 2000 gold for the Iron Helmet.
Rest and leave this place as there is nothing left to do. Go southwest but stay to the very south and you’ll see a shrine and hear the Magic Key is in the pyramid to the northwest. First go west and stay south and you’ll see an oasis. Get closer and you’ll see it’s a castle.
Isis
This place is loaded, with new weapons and armor and a new monster arena. Thank goodness because you’ll need the cash for Battle Axes, Full Plate Armors and maybe some Giant Shears (if you have a Soldier). Go to the castle area and go left right away between those bushes and head north. Hit the stairs you see and go east and north for more stairs. Take the Meteorite Armband and talk to the skeleton. Equip the thing by “Using” it. This will double your speed. For the record I like to give it to the Pilgrim or Wizard so that they can cast spells faster but giving it to the Hero is useful to get his slow ass up to speed.
Leave from whence you came and go north and talk to the Queen of Isis who runs the place. Now leave and go north of here to a pyramid.

Desert Pyramid
Things are very difficult here. There are monsters in treasure chests and the monsters in general are tough. But this makes it a great place to train. The Trick Bags are annoying because they will steal your MP and use Stopspell. But they give you 450 gold so hard to argue with that. The King Froggore will use Sleep once in a while which can be a problem but otherwise they are weak if you have been keeping up with armor. Still the enemies here will wear you down so stay healed up throughout.
Go north as you enter and don’t walk in the center when the path has an intersection (stay near the wall). Take the northeast path that leads to a staircase.
Go south all the way and west all the way here. In this new room, go to the very southeast corner and push a button. Now go to the southwest corner and do the same. Go north now and get the Vitality Seed and Magic Key that just opened up! Go to the northwest or northeast corner of this room for a staircase.
Use the Magic Key to open the door and you’ll have about 1000 different treasures in front of you. In the northwest is 176 Gold Coins. Now clockwise of that is 40 gold, Strength Seed, 80 gold coins, Agility Seed, 112 coins, 24 coins, 304 coins, Wing of Wyvern, 56 coins, medical herb and 24 coins. As you can see only the Seeds are really important. Oh, and you have to fight four Mummy Men each time you get a treasure. Once complete with this area, continue south in the room to the stairs. This will take you to a new area with a treasure chest which is the Flashy Clothes, a really nice option for Goof-Off’s only (for once in this quest I am able to utilize it as I have a Goof-Off). You can continue to the other staircase in the room to get to the top of the pyramid! Looks cool but not much to do up here. You’re probably tired anyway so cast Outside or jump off the top and then Return to Isis to rest. Come back to the pyramid later though.
Go west as you enter before you go north at all. Go down the staircase and then northeast to the spot on the picture above. Search to find a staircase and use that Magic Key. Go along and get the Golden Claw which is for fighters but makes random encounters happen nearly every step. Might as well sell the damn thing for 11,200 gold! Yes you read that right.
Portoga
Now that you have the Magic Key we can continue west of Romaly. Use the Key to get over there and southwest for Portoga. There is really nothing here to do but talk to the king. He wants Black Pepper. He is friends with the dwarf Norud east of Assaram. He gives you the Royal Scroll to read to him.
Cave east of Assaram
Head in and grab the Training Suit and Club, useless items at this juncture. Talk to Norud the dwarf and then read the scroll to him. He opens the way east and you can leave the cave.
Baharata
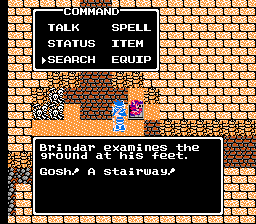
South and a little east of the cave’s exit is Baharata. These people have the black pepper but if you go south when you enter and talk to the old guy, Galen will go after Tania. They are the ones selling the pepper so we have to go north on the east side of the mountains to find the cave. We will see it but continue north through the mountains to reach a castle.
Dharma / Muor
A unique looking castle indeed! Maybe the best place in the Dragon Warrior III world. Inside you can change your class if you are level 20. So if you are a Wizard you can turn into a Soldier and cast all of your wizard spells that you have learned but can also equip the best weapons and armor. Once promoted you go back to level 1 and your stats will halve, so it will be one step back to start but you will quickly gain levels. There may be another class that becomes available to you later on. At this point my characters are around 16-18 so not quite promotion level and your’s likely won’t be yet either unless you have been leveling like nuts.
Either way the cave that you need to go to is southwest of here. Chances are you’ll want to build up to the high teens before entering though so check out this side quest option. If you want to gain a ton of levels, I would suggest traveling southeast of Dharma and follow the land as it goes east and then north. As you go east you will see a shrine that you can rest at which would be wise because the enemies here are tough. Sky Dragons that breath fire and Garuda birds that can use Firebane make for tough sledding. Not to mention that you will see a Shell Slime, a cute looking little green guy with a shell covering him. You will likely only be able to take off one on him and he will hit you with sleep and Icebolt meanwhile. May be wise to run from him or hope you can get a crit (or that the Poison Needle can one-shot kill him) because magic won’t work either. Other tough monsters abound so stay rested while journeying. Anyway as you go north of that shrine you will see a little village and some ice at the far north. This village is Muor, a generic city that you will not be able to use Return to get to. Mostly of note, you can get a Water Blaster and Iron Mask here. Water Blaster allows you to “spray” people to get a reaction. Iron Mask meanwhile is the best mask in the game (for the Hero and Soldiers only) so if you can afford one I would highly suggest grabbing one since it’s the cream of the crop when it comes to head protection. Other than that, there are Metal Slimes outside of this town. They give you about 1300 EXP per kill so if you can kill a few of them your levels will go up fast. They are mostly either going to use Blaze or run away, though they will use a pointless regular attack occasionally. If you are on emulator it can help to save/load state to kill them if you want to be cheap (re-loading if they run away). Otherwise it helps to have a Fighter because of their high-crit rate and high agility, allowing you to kill them in one shot sometimes. Wizards with the Poison Needle will also always do at least 1 damage or will one-shot them. Other characters will miss on occasion but if you can down a few, you can gain levels quick.
Cave north of Baharata
Okay back to the story. From Muor you can either make the trek back to Dharma or just cast Return to go to Dharma to rest up and save. Head south and west across the bridge when you can for the cave.
From the start you can go north and open some doors for gold, Medical Herb, Fairy Water and a Man Eater Chest. We know of the volatility of Man Eater Chests so hopefully you have rested/saved prior to coming here so that if they do kill you, you won’t lose all of your party’s gold! Continuing on. Now go all the way south and use a Magic Key facing south when you can go no more. The door will open and you’ll be in the southmost corridor. Go west all the way for another Man Eater Chest and east for the staircase.
West and use the Magic Key and you have four treasures. They are the Acorn’s of Life, Strength Seed, Intelligence Seed, and Agility Seed. Rest up and go south.
You come to four Kandar Henchmen. Tell them to screw off and then a battle will ensue. Use magic to kill all of them in one turn and go south. Press the button in the southeast corner, rest up and go back north.
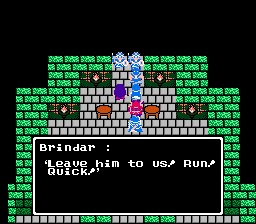
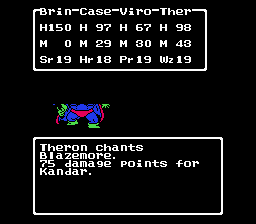
Kandar is back. He stops Galen and Tania so you gotta kill him. Kill off the henchmen quick and then use Defence or Sap on Kandar. Now start going to town on him and use Blazemore if you have it. Increase helps if he’s doing a lot of damage on you. He has a strong attack, good crit-rate and can hit anyone (ignores formation and attacks back-line if he wants). One tricky thing is that he auto-recovers 45-55 HP each turn. So if you are hammering away with a few characters seemingly forever, you are probably slowly whittling down his total HP. This happened to me recently going in there with a Wizard that ran out of magic (and could only take off 1 with a Poison Needle) and a Goof-Off who would take off 10-15 on the turns he chose to attack. So try to do as much damage per turn as possible and hope you don’t run out of magic!
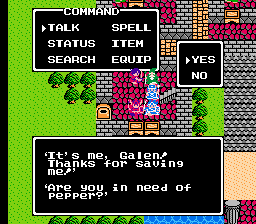
With any luck you should be able to take him down. After the battle you’ll have to set him free, but you can go to Baharata and get the pepper from Galen. Just go south and you’ll see him in his shop.
Portoga
Bring the Pepper from Galen in Baharata to the king of Portoga. He gives thee a ship! Take it south and enter the shrine you see south of Portoga. You will hear of Tedanki and of the 6 orbs. Your journey now will be to get all of them with the ship in your possession.
Help! Nothing I do moves the rock in the prymid, am I missing something?
What can I do to move the rock in the prymid? Tried the buttons in the correct order and it still did not move
I think there are 4 buttons total, two on each side right? Do the one in the southeast (facing southeast) and then southwest (facing southwest) and that should do it. If not I guess leave the room and try different combinations, but I’m pretty sure the above is right. Either way that room will yield the Magic Key, there is no other way to get it.
All the walkthroughs I find say something different. I have tried them all and they don’t work. Can I continue with the game without the magic key? If so, HOW?
Nah, all the Key’s are vital. There has to be a way to get it.
What are you playing on? NES? GBC? Emulator? It’s possible if on Emulator you are having a bug. If you are playing the NES version there absolutely should be no problem.
I am plaing on gameboy advanceSp. I tried doing southeast right then southwest left then southwest right and then southeast left but rock still there. I am already on level 33 so I don’t want to start over.
Hmm…try southeast right and southwest right, see if that works. It’s gotta be one of those ones.
For the record I’ve never played this game on Gameboy Advance SP so I can’t say for sure how it works but I’m assuming it’s the same. I know being on level 33 is WAY higher than you would be playing on NES (it’d be more like level 16-17 at this point). But try the combination I mentioned above though, southeast east and southwest east, hope it works.
Good luck, let me know. I agree, I wouldn’t want to start over but I don’t think that would do any good anyway. You’ll find a way past this, there are only so many permutations after all.
I am going to start another game but how do I get a wizard at the start of the game.
The game only lets you choose a warrior, fighter, mage, cleric, dealer, jester or thief. Which one turns into a wizard and when?
Wizard = Mage I believe.
That must be another difference with the Gameboy version. Never heard of the Dealer or Thief class either
I got the magic key and now I wonder if someone has a better overview of the world as the one on the web site I looked up is really hard to read.
See, I knew that was the right combination for the Magic Key lol.
Here is a map I found of Dragon Warrior III World Map
Thanks for the map. It is much easier to see and read.
How do I defeat the Orochi? Is there any tricks I need to know to defeat him?
Orochi is definitely a tough boss. Did you get blown away easily? What level are you? If you are in the low 20’s he will probably slaughter your group, which is why I like to do a lot of other things on the map before taking him down. Do you have a Sage? They get black + white magic so that would help. Use Increase a few times to drastically reduce his physical attacks on you. Other than that take a look at the second Dragon Warrior III Walkthrough page and it has a lot of other things you can do to find better equipment and so on (which will help you defeat Orochi).
I AM ON LEVEL 39, SO I SHOULD BE STRONG ENOUGH. WHAT EQUIPMENT DO I NEED? THANKS FOR ALL THE HELP YOU ARE GIVING TO ME. DID THEY MAKE THIS GAME FOR PC? IF SO, WHERE MIGHT I GET IT?
Hmm, level 39. That’s right, the levels for the Gameboy version is way different. So not sure what level to be in the Gameboy version.
Good equipment depends on what classes you have. If you have a Soldier, a Zombie Slasher would be good for Hero + the Soldier. Or a Dragon Killer Sword if you have been to Samanao.
They have not released the game for PC, but it is on the Nintendo too (with better graphics of course).
I finally destroyed the Orochi. Thanks for your help. The Walkthrough talks about leaving some stuff in a vault in Aliahan, all I know about is the bank and you can only put money in it. What are they talking about. I am at the point where I am waiting to return to New Town after an upraising.
WHAT ARE THE MEDALS FOR? CAN I GET RID OF THEM WHEN I GET THEM OR SHOULD I HOLD ON TO THEM?