Continued from Part 1 of the Dragon Warrior 3 Walkthrough
Tedanki
You have your ship, you must be pleased! The game is so much more open right now, you’re getting closer to fighting Baramos but not quite. You need to acquire the six orbs so that you can fly to his place and you also need to become much stronger in the process. There is also the matter of your characters starting to reach level 20 so you have the option of promotion to a different class. More on that later.
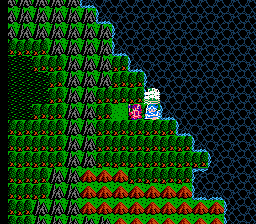
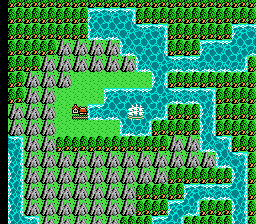
Head south of Portoga via ship, sticking to the west side of the island below. Take the third river going east (the first two are stopped by bridges) and then you’ll come to the village of Tedanki. If it’s daytime you won’t see much but if you come at night (likely if you came from Portoga) then you’ll see a flourishing town.
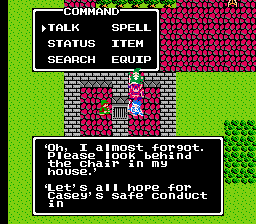
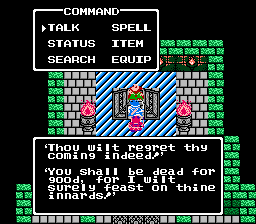
Okay, buy a Zombie Slasher and Magic Armor for the hero if you can. If you can afford it for Brindar then do the same. You can’t do much else besides talk to the townfolk. If you had the Final Key you could open that jail cell and talk to the crook but alas you don’t so remember this though. Rest at the Inn and you’ll find no one is here in the morning. Tedanki really was destroyed by the Archfiend Baramos! Go up the weapon shop stairs for Lamp of Darkness (turns day into night). Time to head out now. Note that Tedanki is one of those villages that you can’t use Return to get to, so remember this Portoga route.

Merchant Town
Return to Aliahan and create a merchant, and put them in your party. It doesn’t matter that they are on level 1. Now Return to Noaniels and go west of there to Eginbear, and then south a little and further west. You’ll come to a bigger island but sail south down it until you see a forest and a patch of plains. Go to the plains and talk to the old guy.
He needs merchants and that’s why you brought yours along. Lend him your merchant and leave. Note if you have a Merchant from the beginning that you have been using, who would likely be in the high teens or low 20’s in level, then you shouldn’t send that merchant with! After all it would be best to not waste all the effort you did building that Merchant up. Just head to Louisa’s and create a fresh Merchant level 1 to use and leave the merchant with the old man to build the town, and plan to head back and check in on them later. In fact, if you leave and re-enter, you will see your former Merchant now in the standard green merchant clothes. Nothing else to do here, so moving on.
Lancel Town
Return to Baharata and head due south in the boat. You’ll reach a new continent with a town called Lancel. There is a challenge in the north part of town but you cannot go through since you don’t have the Final Key. We’re going to take care of this soon, but buy an Invisible Herb from the tool shop for now. Back in the boat, go southwest of Noaniels to Eginbear. Or if you already stopped by Eginbear quick on the way to the merchant town, you can cast Return to get to Eginbear.
Eginbear Castle
You won’t be let in but use the Invisible Herb that you just purchased and walk past the soldier! Go to the northwest part and talk to the king, then go back downstairs and down the stairs south of the kings staircase.
You’ll be in a puzzle room with three blocks. You need to get the three blocks on the three squares in the fair north. To do so you’ll want to move the middle one next to the right one to start off, and then move the left on up one square, and then push it from the left until you can get it where you can push it north. Repeat this step for the other two and a path will open. Grab the Vase of Drought and teleport to Aliahan.
Go due south of here and you’ll come to four shoals. It’s like Dragon Warrior II – you use the Vase of Drought, a shrine emerges, and inside is the Final Key. The game just opened up tenfold.
Return to Tedanki at night and talk to the cellmate for the Green Orb! One down five to go.
Pirate’s Hideout
This place is in the southeast corner of the world. Either go south of the Merchant Island or east of Jipang / Baharata and south. You’ll find a little village where Pirate’s hide out. A woman is the head of this operation and one of the guys talks about an Orb.
Go to the east part of this place outside of the building. Push the boulder you see and search for a staircase. Get the Wing of Wyvern, Strength Seed and Red Orb! That was easy!
Soo Village
Go north along the east coast of this island where the Pirate’s Hideout is. You’ll see a river inlet, take it and you’ll see about four more intersections. Take the second one from the left that goes deepest into the land. You’ll come to the Village of Soo.
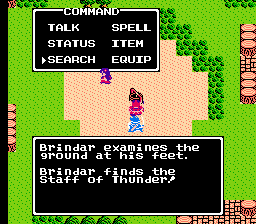
Not much to do here but the locals have some good advice. Search the well for a Staff of Thunder, a valuable weapon for Wizards. Usually I’m a little past level 20 now so we’re going to go back to Dhama and do something important.
Garuna Tower
Rest at Dhama and go north to the Garuna Tower. Go south when you get in to hear about Sages and the Book of Satori. West a little bit and south for an Intelligence Seed. Go west and more more and ignore the staircases you see until you get to the northwest corner (you can walk in the green area where it’s open to get there).
Continue along this way walking across the tightrope and then take the warp and you’ll be at a four way intersection. Take the north path for 248 gold coins and the south path for a Man Eater Chest. East leads to another intersection. Take the southern staircase and then walk across the tightrope. Take the southern staircase again here for an Iron Helmet, could be useful for your Pilgrim still (or a class soon to be available to you). There are tougher enemies up here like Sky Dragons, so rest up as needed.
Return to the tightrope and fall south about halfway across. Fall down again anywhere in the black pit area, and then go down the stairs. There is a treasure, and it’s the Book of Satori! Cast Outside and Return to Dhama.
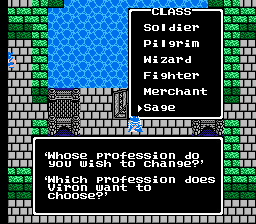
Dhama
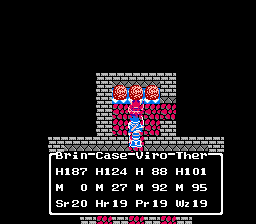
This is where you have a huge choice as far as the direction of your party. You can now turn a character into a Sage, a class that learns all the White Magic and Black Magic. Generally I like to have my Pilgrim become the Sage so that I have two Juggernaut spellcasters. It may be different for you as I tend to have the standard Pilgrim Wizard Soldier grouping. Currently I am going through with a Merchant, Goof-Off and Wizard, so naturally I made the Goof-Off the Sage because it did not require the Book of Satori. Then I changed the Wizard to a Sage with the Book of Satori and have two Sages! Combined with changing the Merchant to a Soldier, we will have four expensive classes to outfit. All four classes can now equip Zombie Slashers which would get very expensive quick, let alone keeping up with armor. You may wonder what is the advantage of turning a Merchant into a Soldier? The Soldier has a bit of an agility boost thanks to the Merchant switch, and has access to better weapons and armor. Early on the Merchant can equip a lot of weapons and armor, but end-game they are limited with options so we opt for the Soldier class.
You will see even at early levels the vast potential of Sages. Now remember when you turn a Pilgrim or whomever into a Sage, they start off at Level 1. Your former Pilgrim already knows the white magic spells between level 1-20, so they will only get black magic (Wizard) spells for a while. But then at level 21 he’ll start learning both Wizard & Pilgrim spells, so basically it does set you back in his current class a little bit but ultimately he’ll catch up and be able to be a dominant character.
Liamland
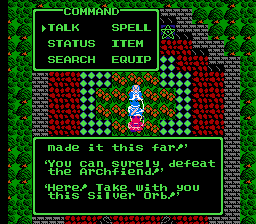
You have a few orbs and need to build your Sage up so lets travel to get rid of those orbs. Go southwest of Lancel to an ice covered island. You can place the orbs at the shrine here and you’ll hear about the Phoenix Ramia.
Samanao
Enemies in this area are difficult on top of it being hard to get here. First, Return to Eginbear and travel west. You’ll be a little north of the merchant village, keep going west along the north coast and you’ll see a shrine on an island to the north. Go here and take the left or right warp. You will need the Final Key to advance further at this point.
Once through, you’re in the Samanao area now. Tough monsters are around like the Tortdragon who will really test your mettle (spells mostly won’t work and they have super high defense). You can hope for Sap or Defence to connect – low percentage though, so helps to have the Orochi Sword to use that (which casts Defence automatically when used).
Anyway, back on the map go northwest and south to get to the castle. Talk to the shopkeepers at the funeral to the east and then rest. The next day, go to the southeast corner and up the stairs. You are at the weapon shop where they have the formidable Dragon Killer and Silver Shield. These are huge upgrades for your Hero and Soldier, not to mention if you have Sages they can equip the Silver Shield. You are seeing how costly outfitting some of these classes can be, but also if you can swing here early right when you get the Final Key, grabbing the Dragon Killer is a boon. They also have another battle arena that you can fleece if you’d like.
Talk to everyone in town. To solve the problems in Samanao you have to go to the southeast cave of course, so rest up and head over.
Samanao Cave
Go west until you can go north. Then go west when you can, and south as soon as you can for the staircase. The treasures you see are 128 Gold, Strength Seed, 56 Gold Pieces, Wing of Wyvern, 568 Gold Pieces, 24 gold pieces, Acorns of Life, Medical Herb, 30 Gold Coins and then Four Mimics in the northeast room. Obviously don’t get those four.
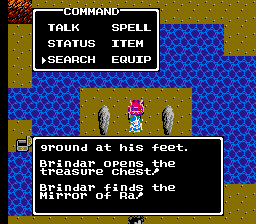
Go back west and southeast to a pit. Fall through and grab the Mirror of Ra! That’s why you went here so you can cast outside if you like. Otherwise, fall down the pit again and go up the stairs. Go south and take the west path staircase to an Animal Suit and return south to the nearest staircase. Go west and north when you can, grabbing only the northeastern most treasure for a Stone of Life (avoids beat / defeat once). Further west and north again when you can for Vitality Seed, 24 gold pieces and a Medical Herb.
That’s all so cast outside and return to Samanao. Rest up, go outside and use the Lamp of Darkness. Back in Samanao, go to the castle and go east and north along the side of the building. Use the Magic Key when you see the door and you’re in the castle!
Go west, north, and east for a staircase up. Keep taking them up and fall off the left side of the top floor. You’ll be near the king, rest up and use the Mirror of Ra on him.
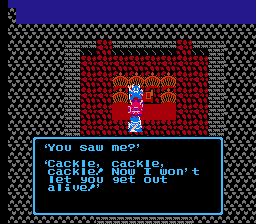
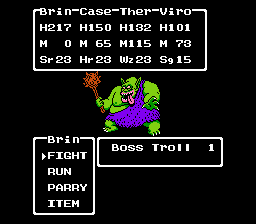
Behold, it’s no king but a monster! The Boss Troll is going to try to kill you. Cast Increase and Sap and you should be okay. Blazemore away and stay healed, he has some powerful attacks. After the battle grab the Staff of Change and then you can leave this area. With the Staff of Change you can do a few random things – notably changing into monsters and scaring villagers. You can also head to the Elve’s Village and use it to turn into an elf and they will allow you to buy things there. But for the real use of it, following the guide below.
Greenland
Go north a little and west of Eginbear. You’ll see another snow covered land with one set of plains in the middle, go here. Talk to the old man and give him the Staff of Change for the Sailor’s Thigh Bone. This will prove useful in a bit.
Lancel
Get your hero the best equipment you can afford, like Zombie Slasher or Dragon Killer and Magic Armor and Silver Shield and Iron Mask. Give him the Final Key and then go east a little in Lancel and north. You can now go north through the Final Key doors and talk to the priest guy to go ahead. The hero will be by himself here, so enter the cave to the west.
Navel of the Earth in Lancel
Just keep heading south, past the door and into the next area. The left path has 248 Gold Pieces and the southeast path has an Intelligence Seed and then go south and east to exit.
Go north a little and east to find the Armor of Terrafirma (after some stairs). Back in the wide open room go east a little and north for the staircase. You can go south to a dead end or north to a Medical Herb and the Blue Orb. You know which way to go. Cast Outside and get out of here.

Jipang
We probably have the firepower to deal with the Jipang sidequest now. Go to the cave of Jipang right next to the town. Go west, ignoring the paths leading in either direction but stay on the main course. Continue south along the west all and then you’ll be going east. Go north when you can here and then northeast for the Noh Mask. This is cursed but powerful, still you won’t want to equip it. West for the stairs.
Go east when you can and you’ll see the Orochi. Rest up and go up to it. Cast Increase right away of course and Sap. Use your best attacks. Blazemore might be hard to connect with so try Snowblast. He’s one tough customer with that damn breath he does that takes off 30 on each. He drops the valuable Orochi Sword which I tend to give to my Sage. It’s attack power is basically equal to the Zombie Slasher and when using the Orochi Sword in battle, it will cast Defence on a group of enemies.
Go through the teleport that the Orochi did and you’ll see the dragon was actually Himiko! The ruler of Jipang! Well don’t rush into this, he actually killed a few of my guys so I returned somewhere to revive them and come back rested. You won’t have to re-do the first battle or anything for doing this.
Anyway back at Jipang, this time you have another battle with Orochi and it’s basically the same. His AI seemed a little more tame this time for me. Use the same strategy and then afterwards he drops the Purple Orb.
Merchant Town
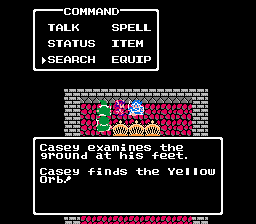
Now you’ve progressed a lot of the story so go to the Merchant Town. Enter and leave, enter and leave, enter and leave. Throughout this time you’ll see the time become bigger and then the people get mad at your merchant. Eventually they throw him in jail, talk to him there and he says he left something behind his throne. Search behind his throne for a Yellow Orb! That’s 5 of the 6.
The Phantom Ship
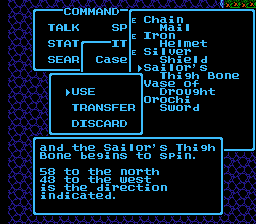
Use the Sailor’s Thigh Bone to find the location of this ship. Enter it via your ship. When you get in, go in one of the staircases leading down. The south part of this lower floor has the Locket of Love, the item you came here for. The room above this has a Mimic in the lower left treasures, a Full Moon Herb to the right of it, and three Gold chests above it.
Shrine Jail
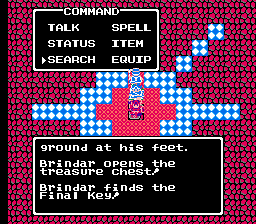
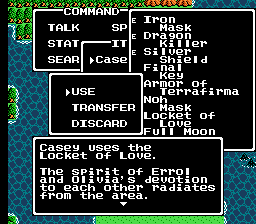
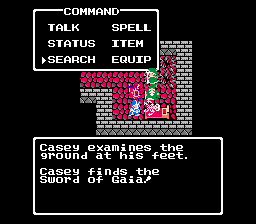
Okay Return to Noaniels. Travel east and take the river inlet going southwest after a bit. You’ll be stopped, but after you’re stopped use the Locket of Love. Now you can pass and enter the shrine. Inside, go to the southeast jail cell and open it. Search the feet of the bed to get the Sword of Gaia.

Cave of the Necrogond
You probably aren’t around level 30 but you’ll need to be to get through here. First Return to Assaram and go southwest of here via boat until you see a black pit to the southwest.
Go on land and Use the Sword of Gaia when facing the pit. Flames go everywhere and the river to the southwest of the pit dries up and you can pass. This leads to the Cave of the Necrogond.
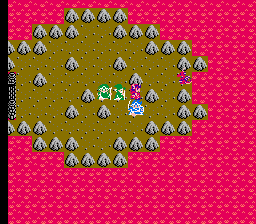
Tough battles inside. Go west for the first staircase. You’re in a much bigger area now, first go west all the way for 784 Gold, and then back east through the southeast path you just skipped. Go south and ignore the path going right and you’ll come to a Thunder Sword. This is a very valuable sword, even stronger than the Dragon Killer. Oh, and if you use it in battle it’ll cast Boom. South from this treasure into a new area, and west all the way for the Swordedge Armor. Back east and south for the stairs.
Large new area now. Go south all the way until you get to six little pits. Go east past them and down the stairs in the following room. East all the way again but fall into this pit for a new area. Take the northeast path and then go east and south in the following room for a staircase.
You are in the northwest corner of a very large room and you need to work your way east. There are tons of paths though. Go south at first and east when you can, then take the path going east that is a little north of where you are.
Now go east a little and take the south path and go east. Continue along and take the south detour and then south more through the wall there and you can go east just a little more. Now go all the way north and you’re gone.
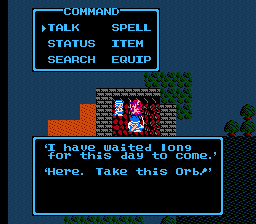
You’re outside! See the castle north of you? That’s the Archfiend Baramos’ place and northeast of you is the Necrogong Shrine. Talk to the guy inside and you get the Silver Orb, the sixth and final one.
Liamland
Back at Liamland (southwest of Lancel if you forgot) you can place the final orb/s in their spots. For the short list of orbs –
Silver Orb – Cave of Necrogong
Yellow Orb – Merchant City west of Eginbear
Blue Orb – Lancel (south of Baharata)
Red Orb – Pirate’s Hideout south of Merchant City (under boulder)
Green Orb – Tedanki (at night with Final Key)
Purple Orb – Jipang (from Himiko / Orochi)
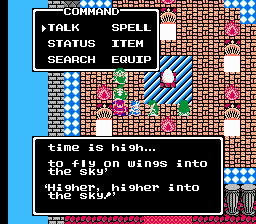
After these six orbs are procurred and placed at Liamland, Ramia the Phoenix will fly again. Go outside and yes, you can ride it all around the world. You won’t get in a battle and can land basically anywhere.
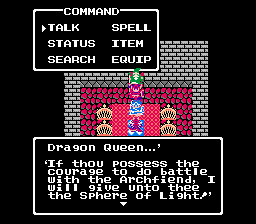
Dragon Queen’s Castle
Fly south of Lancel with Ramia and you’ll come to a castle surrounded by mountains. Inside use the Magic Key to get to the center area and use the Final Key facing south in the very middle and you’ll find the Dragon Queen. She gladly gives you the Sphere of Light so that you can fight the Archfiend Baramos.
Archfiend Baramos’ Castle
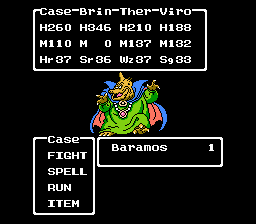
This is directly south of Romaly. Fly here and enter, but try to be around level 34-36 if you want to ensure that you get through here alive. You will have to fight Baramos, remember. The enemies within aren’t a treat either. Stone Hulks are plentiful, but you really need to be careful of the group of 4 Evil Mages. This group of enemies might literally be the toughest for when you fight them in the game than anyone else. They have a myriad of nasty attacks including Blazemore, Snowstorm, Chaos, Sleep, StopSpell and if that wasn’t enough they can emit a flame breath. Running may be the wisest option or try to hit them with StopSpell yourself and hopefully it hits. But their AI is smart and they’ll still be tough with the fire breath.
When you are ready, enter the Archfiend’s castle and go east and north along the east wall. Go west when you can see the water and if you go on the south part of the water you’ll come to a staircase. Follow this path until you get to some damage steps. Cast Stepguard and then go south, taking the south staircase going up. This takes you to the Unlucky Helmet, Wizard’s Ring and the Demon Axe. The Demon Axe believe it or not isn’t cursed and is the best weapon for your Soldier that you can have right now. It does have a downside though in that it will miss from time to time.
Return back to that intersection previously and take the staircase going down. Go east to the next staircase. Go east via the north route now and enter. Take this path all the way until you’re on a damage step in a room with a skeleton and throne. Exit via the south and go east, cast Stepguard, and you’ll be in the basement!
Rest up, it’s Baramos time. Now this bastard will hit you with spells you’ve probably never seen unless you have them yourself. He’ll unleash Blazemost when he wants one of your characters dead. He also casts Explodet and attacks physically. However his most devastating attack is his breath attack that takes off about 80-90 on everyone! Yikes, you’ll be scrambling to heal with the Hero and Pilgrim / Sage.
Cast Bikill on your Soldier / Hero and Defence or Sap on Baramos. Increase will help you against his physical attacks. He has a decent amount of HP so this might take a while as you won’t get to attack with many members of your party (you’ll be healing!). Good luck, if you’ve built up enough you should be okay despite his offensive firepower.
Aliahan
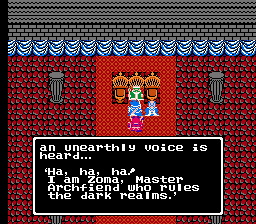
A warm light engulfs the party. You are revived and fully rested. Return to Aliahan. Go to the king. You are victorious and just as you are celebrating you are interrupted. It is Zoma, the Archfiend of the Dark Realms.
Well the game isn’t over obviously. What are you to do though? You have Ramia at your disposal so you can go anywhere. Go to Baramos’ castle and fly east of it to the black crater. Walk inside and fall. You’ll be in the dark world now, the dark world of Alefgard. Hop on the ship and head east.
thank you!!!1
oh, thanks.
but, what about the way of finding the stones of sunlight?
post it SOON!
i am waiting…
hello I can not get past the guards in the cave where kandar is I did beat this game for the 8bit nes but this is the super Nintendo this is the cave east of baratta please help