Tantegel
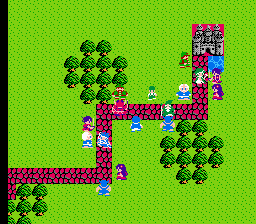
After you fall in the pit and get in the boat and leave, you’ll be in Alefgard. This isn’t like the scaled down version of Dragon Warrior II. This is the full Dragon Warrior 1 map. So go east into Tantegel and Brecconary Town.
Not much is worth your time at the weapon shop. That Falcon Sword is weak (but does allow 2 hits per turn). Talk to Kandar your old friend in the northeast and he’ll tell you of the Stone of Sunlight. Go east to Tantegel Castle and save, and then go back outside the throne area and then east to the kitchen in the castle. Walk to the southwest and you’ll find a passage for the Stones of Sunlight.
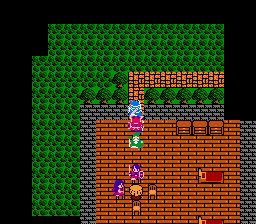
Garin’s House
Go northwest to where Garinham is in Dragon Warrior I. This is Garin’s House now and to the north (walk through the wall) you’ll find a Silver Harp.
Cave Northwest of Tantegel
Enter this cave and go to the southeast for the exit in the first room. Go to the northwest for the exit in the next room. This cave is very small and simple, but you’ll notice unfortunately that you cannot cast magic, so you won’t be able to heal unless you brought items. You can however use items like Thunder Sword (Boom on all) or Staff of Thunder (Firebane on a group) or Orochi Sword (defence on a group) to help you get through. In fighting the Troll King, I was able to get Thor’s Sword as a rare item drop, pretty nice for a 1/128 chance. It will be one of the best weapons in the game for either your Soldier or Hero.
Continuing on, on the final floor you will come across several treasures. The one in the far back is a Shield of Heroes, the best shield around. The four in the center are – 960 gold pieces is closest treasure, the left treasure is a Mimic, the far right treasures is a Stone of Life and the other treasure is 1016 gold coins. Stone of Life protects a character if they get hit by Beat or Defeat. Jump in the pit if you want for a cool effect, and then just leave. Despite it’s short length it’s tougher than you think considering you can’t heal, and in fact I ended up dying and losing half my gold. But wasn’t worth resetting considering I had the rare Thor’s Sword drop.
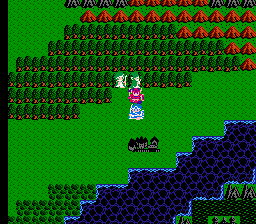
Kol
Get in your ship and sail north of all of this land and head east along the north shore. You’ll come to a tower but skip that. Keep going east to a bigger land structure and you’ll see a small village, this is Kol.
Get the Water Flying Cloth for your Wizard or Pilgrim. It is the best armor for them plus it takes 1/3rd off all magic damage or any breath attack. The Water Flying Clothing doesn’t equip with the Sage however, though they can continue to use the Magic Armor to reduce magic damage by 1/3rd.
Go to the water fountain in the north part of town. Go south of it until you reach a bush and search – you’ll find the Fairy Flute. You’ll hear about Rubiss and the Oricon. We’ll worry about it later, take the ship to the northeast corner of the land and go south all the way. Get on land now and go northwest and you’ll see Rimuldar.
Rimuldar
Enter here from the left side of the land as the right is blocked by crags. Not much at the weapon shop but the Ring of Life is at the inn (HP + 1 each step). Talk to everyone here and then head out of town.
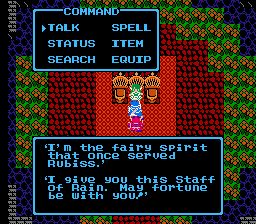
Back to your boat to the east of Rimuldar, and then sail southbound. You’ll see a shrine on a new island, but when you encounter the guy he will send you off since you don’t have the Sacred Amulet. West a little bit for another shrine with an elf. She gives you the Staff of Rain!
Cantlin
Sail a little west of this Staff of Rain temple and land. Go north and east a bit to come to Cantlin. On the way my luck continued as a group of Marauders dropped a Snowblast Sword. This isn’t quite the boon of the Thor’s Sword, but the Snowblast Sword is a unique weapon that is 5 attack power less than the Thunder Sword. And of course the Snowblast Sword will cast (you guessed it) the spell Snowblast when used in battle, so that can be worthwhile to have on hand for someone that you know is weak against it.
Not much here in the Town of Cantlin but you can find a monster arena in the east part of town. The best monsters are here. Garin is in this town, and he tells you that his harp is at home (but you knew that already). That’s about enough here.
Hauksness
West of Cantlin and north into the desert is Hauksness. It isn’t destroyed like in Dragon Warrior I. Buy a Strength Shield for your Soldier as it is the best shield for a Soldier. You can also use the Strength Shield in battle and it acts as a free Healmore, which is so nice that you might want to get one for each character (doesn’t have to be equipped to use in battle). That said, save some money (at least ~$15000 gold).
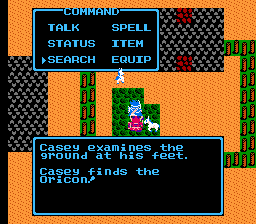
Then go to the southeast portion of the town for a horse stable. Go in there and search the middle of the grassy area and you’ll find the Oricon.
Return to Kol with this Oricon. Sell the Oricon to the Jipang guy in the southwest corner of town up in his shop for 22500 gold. Leave Kol and re-enter. He’ll now be selling the Sword of Kings for 35000. You have no choice but to buy the thing.
Kol Tower
Northwest of Kol is that tower. The toughest monsters you’ve seen are here to haunt you, also making it the best place around to level up. Go north upon entry and cast Stepguard. Go north and grab the right chest for 1016 gold (the left is a Mimic). Take the left path for the staircase going up.
Go north and east in this room. First, you might want to try out these panels (either save state or practice away from damage spots / pits / cliffs. It’s not that complicated but you may be confused, it’s all based on how the floor tiles look. They can be facing only two ways though. The chests in the north are a Full Moon Herb, 960 gold and two mimics. Not worth it. The southern chests though are three Acorns of Life and a Vitality Seed. Go to the northeast to continue on.
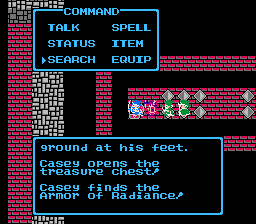
Go south and through the stairs you see. Go north at this initial fork and then west, and you’ll see a daunting task, with little room and highly likely you’ll fall off the pit unless you know what you’re doing right away. The treasures is the Armor of Radiance.
Back to the staircase that is southeast. Now walk west and north this time, and then east and fall through the north (off the floor tiles). Go south a little, through the door and west up the stairs. Go east and up the stairs in the following room.
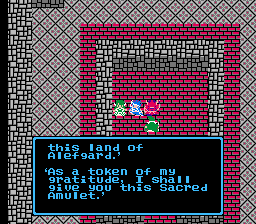
Follow along a bit on a few linear areas and you’ll make it to the top floor. The hardest monsters are here of course. Go south all the way, east and north through the door. Use the Fairy Flute you found in Kol next to the statue. Rubiss will appear as the seal is broken. She gives you the Sacred Amulet. Funny enough, if you have a full inventory, she will turn back into stone and say to come back later when you have room in your inventory for the amulet :).
Cast outside and go south of Rimuldar to that shrine you were previously at. You have the Stones of Sunlight, Staff of Rain and Sacred Amulet. The guy inside gives thee a Rainbow Drop. Go northwest of Rimuldar now. You can use the Rainbow Drop where you see two land structures separated by one space of sea. If you played Dragon Warrior I, you know where I’m talking about. Go west from there to Charlock Castle where Zoma resides.
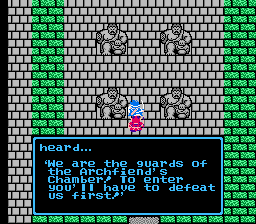
Castle of Zoma – Charlock Castle
Are you around level 40? Try to be before you enter. Also, if you want to stand any chance against this Archfiend, you will need the Sphere of Light! This was acquired in the previous Baramos walkthrough, but if you missed it, you will want to cast Return to Lancel and travel south until you find the Dragon Queen’s Castle. Explore within to find the Dragon Queen, who will give you the Sphere of Light.
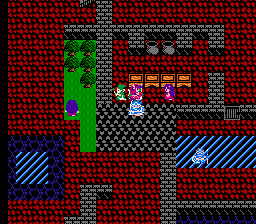
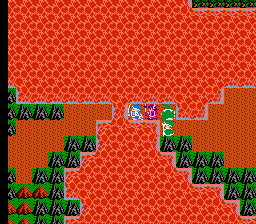
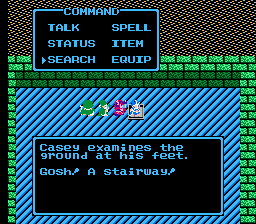
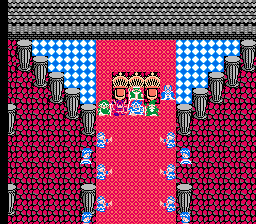
Anyway, as you enter Zoma’s castle, go west and follow the path as it wraps around towards the middle. Use a key to get in the north – center part of the first floor. Fight some Granite Titans (three battles of 2 Granite Titans) and then you’ll gain access to the north area. Cast stepguard and go behind the throne, searching in the 2nd of 3 rows to find the staircase (see picture).
Go up the staircase. Go north when you can and you’ll come to a gigantic confusing tile area. Your goal is to go north, straight north to the staircase. You should be used to these by now, just maneuver around the cliffs.
In this room, there is the Multi-Edged Sword in the southwest corner of the room. Go east of here and north for the staircase.
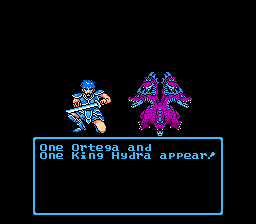
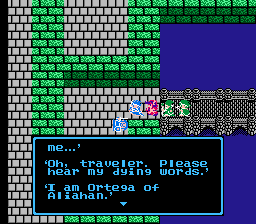
Follow the path and go west across the big bridge. At the other end you see a king hydra and your dad Ortega in battle. Ortega loses to the King Hydra and dies. This happens even though Ortega can cast Heal-All on himself several times and take off way more than the 550 hit points that the King Hydra is supposed to have. After the defeat, Ortega tells you to tell the hero (you) of what happened, so he obviously doesnt recognize you at this point.
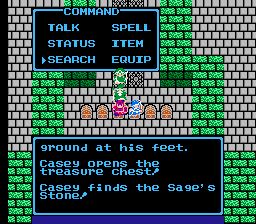
Continue along now and skip the first door but open the second (head south). You’ll see six treasures. The left is a mimic, then a Stone of Life, then Leaf of World Tree, then Sage’s Stone, Wizard’s Ring, and a Mimic. The Sage’s Stone has ridiculous potential casting Healus in battle when used at no MP cost, alas you only get it for a short bit but nonetheless use it often.
Go east and south to continue. You are in a large room, the last room. As you go to the pedestal, Zoma greets you. He’s a giant. A battle against that King Hydra commences. Use the Sage’s Stone to stay healed and just attack, conserve that MP for Zoma.
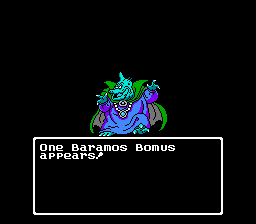
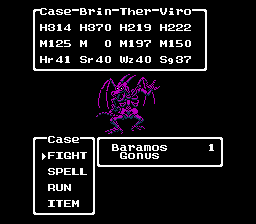
Baramos Bomus is the next miniboss you fight as you go north. He is like Baramos basically, with a lot less HP. Baramos Gonus follows him and he is a skeleton type Baramos. His attack is ridiculous, doing around 150 to each. He has a bit more HP but does go down eventually. The only offensive spell I ever use in these battles is Bikill on the Soldier just to take off a little extra – none of the battles will last more than a few turns.
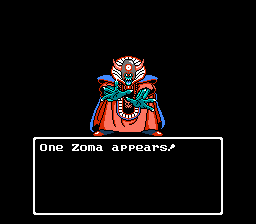
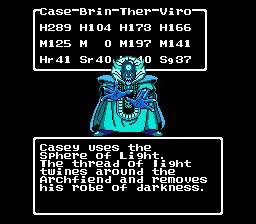
Zoma is last. Are you level 40 and rested with decent MP? You’ll need to be. First of all, use that Sphere of Light. This will reduce his HP and powers in general immensely. Then, play a defensive fight, remembering that the Sage’s Stone is a free Healus for the group.
Increase helps and so does Sap, but he goes twice per turn and one thing he likes to do is release things from his fingertrips that get rid of those attribute increases / decreases. If you can get Bikill on your Hero and Soldier and then Zap on Zoma, you can take off a ton (like 250 each hit). He’ll be dead in no time if you use this strategy. His physical attacks take off the most, around 100, but it’s his freezing air that takes off around 70-80 on each that is a problem. Snowstorm is decent at 50 each but you should be able to survive all of this.
Enjoy the ending. I won’t spoil all of it, but the darkness is gone and a familiar tune plays around Alefgard.


thanks it helps too much !