Final Fantasy XII – 2. Fleeing the Nalbina Dungeon
Nalbina Dungeon
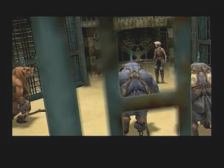
Walk about, and Save if you want. You’ll find four Knots of Rust down here. Talk to everyone and Save, and continue along. You’ll see two Bangaa prisoners get killed by two vicious Seeq’s. These seeq’s aren’t the friendly ones you saw laughing outside. A third one will jump Vaan and he’ll wake up being drug around a sand area.
Turns out he’s in the middle of a caged fighting ring it seems, and the Seeq’s have him surrounded. Balthier comes to aid you so it’s two on three, but you don’t have weapons. Still though, your characters take off more. Just make sure you coordinate your attacks, attacking the same one until it goes down. Take advantage of your speed also to buy time to charge up your attack. As you clear out one or two you’ll get more room to manuever and you should win easily at this point. Daguza and his two seeq buddies are dead, but you’ve upset the higher ups. Balthier and Vaan hide until Fran gets them out. You get your first look at the head of the imperials though.
Save when you regain control and go north. You’ll be right by where the imperials keep all of the prisoners equipment. That means yours. You can also search around for a Tourmaline Ring and Gambit Foe: Targeting Leader. Save again and continue on, and you’ll get to a part where the door closes behind you. Your party makes it through, but there are plenty of imperials on your side of the wall unfortunately.
You can fight them all if you wish. I run up the stairs that you are near and clear that area out, getting the Chromed Leathers. Imperial Hoplite, Imperial Magus, Imperial Swordsmen and Imperial Marksmen are scattered about. Kill them all, get the treasures (Knot of Rust mostly) and follow the Judge through the door that he and his friends went through.
You’ll see some scenes with the Judge and Bash. The Judge and friends will leave and you’ll have a chance to talk to Basch. Your party will cut his cell down and you’ll all fall down. After the event, Basch joins as a guest.

Barheim Passage
Again, you have Basch as a guest. Go straight (down the stairs) and then east for a bunch of Gil, and then west to Save. Talk to Burrogh, he has a really nice shop. I bought some Leather Shields and Bronze Armor here for as many as I could, not to mention BlindA, PoisonA and any other spells I could afford. Last but certainly not least is the Ally:HP < 50% and 30% one, both of which you should buy and equip to at least one character. I tend to use the %30 in regular battles and then sometimes both for boss battles.
Hit the switch next to him and then go upstairs and try to use the Power Relay. It won’t work, so return to the Bangaa to get a Tube Fuse. Go back up and use this and everything will light up. Now go downstairs and press the switch to open the door. The charge lowers. The bangaa will tell you to make sure you have a charge otherwise tough monsters will come about.
As you continue along, you’ll see Battery Mimics. They suck your charge down, and you’ll want to kill them right away. There is also a Little Mimic and Zombie in this room. Clear it out and get the Quiver of Onion Arrows. The next room is a little easier, and then you’ll be in a room with a Battery Mimic and a Steeling.
This new area has much more narrow pathways, just watch for the Battery Mimics. You might get pulled into combat with other monsters, like Little Mimics and Steelings. Again, just worry about the Battery Mimics should this happen. Stay healed as you continue onward.
You’ll find the map (you can actually see it through the wall of where a Battery Mimic is, but can’t get it until you circle around) shortly after entering the narrower area. This should open things up a bit and allow you to see the dead ends so you can search them first, although most of the treasures are Gil, Potions, Remedy or an Ether.
When you get the chance, take the dead end path that heads to the west (instead of south, the fork after getting the map). Clear this out (2 Battery Mimics in here) but you’ll see you cannot continue. Return and take the path south, and you’ll see a Battery Mimic in the next room. It’ll scamper south, so follow it as no other enemies are down there. Back west and you’ll fight a pair of Flan, and then you’ll see the charge going down. Continue westward as a Battery Mimic will be over here as well, and a Flan will drop down and ambush you on top of that. Ignore the Flan and kill the Battery Mimic. Grab the Potion and Onion Arrow Quiver and go further west.
This is the last room, and there is a switch at the end. You’re going to want to take the west (upper) path first, as this leads to a few Flan and a Buckler (great shield, although L2 Shields take a while to get to). Return downstairs and you’ll see a Battery Mimic through the narrow path. Kill him immediately, and then the switch and a few more Flan are in the last room. Hit that switch to hear a door open to the south. Take that path south to a small area where there will be a flashback regarding Reks, Vaan’s brother who you controlled with Basch early in the game. Finally though there is a Save Crystal here, so use it.
 Not much left from this point on. You’ll see on your map that there is a Battery Mimic just south of you, so rush it with your party. A few of the treasures around here are Mimic enemies. One of them is the Gambit Foe: HP greater than / equal to 50% though, so make sure you get that.
In the next room, there will be two Battery Mimics right by you. One of them will fight you while the other runs further south. Kill them both, there are only two other Little Mimics around. Return to the beginning of the area and get the Gil treasures along with the Light Woven Shirt. You’ll notice the charge is still going down, that’s because this is a large area and there is a Battery Mimic at the other end of the area that you want to sprint after. Careful, a new monster, the Suriander, is around. Kill the first one and go up the hill area to find two Tiny Mimics and a Battery Mimic. Kill that Battery Mimic first of course. There is a Gil treasure and the exit here, but first go the other way you skipped before, by the Suriander. There are two more Surianders and a dead end. Okay, so that wasn’t really worth it.
Back to where you fought the last Battery Mimic, and exit out. Save your game and continue on. You’ll be fighting four Tiny Battery’s and a Mimic Queen. Just attack the Mimic Queen (Steal of Knot of Rust if you’d like) and use Blizzard (and not Thunder). This battle will be very tough, and there’s also the factor of the Tiny Battery’s sucking the energy out on the sides. The energy got pretty low so I assume it’s likely to go to 0 if you completely ignore them. That said the Mother will use Earthshaker and a powerful thunder storm attack that will likely kill a few characters. I won by sneaking in a Blizzard at the last minute with both Fran and Balthier having less than 50 HP (the other two being dead). Some scenes happen and eventually you’re out!
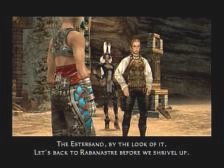
Dalmasca Estersand
Save, and then you can explore a bit. Go north first, and then east for a door which is locked. Then go north for a camp area, where you can buy things (like items, accessories and a map of Estersand). A ferry normally runs here but not right now. There is also a Gate Crystal here.
Go south now into the center area, where you will see an unknown exit to the northeast. Go here and you’ll see an FMV, this is Nalbina Fortress. There are plenty of shops here, the Gambit one has some especially nice choices. You can get better weapons and armor than you’ve been accustomed to, so use all those License Points you earned fighting recently. I don’t know where I came across it, must have been from an enemy, but I had a Mage’s Habit, great armor for this early in the game. Return back to Rabanastre now.

Rabanastre
The party splits up when you enter. Save and notice the moogle attendant. He can transport you around Rabanastre. Use this to go into Migelo’s Sundries. Kytes will talk to you, and then you are to go to the slums, wait I mean Old Dalan’s house. He has you deliver a sword, the Sword of the Old Order. Deliver this to the red area on the map and you’ll see a scene with Basch. He’ll join as he needs Balthier’s wings. Go to the second floor of the Sand Sea and Fran and Balthier join Vaan and Basch. Before going on this escapade with the airship, first check out the board. Be SURE to put two of the three that joined you in battle with you.
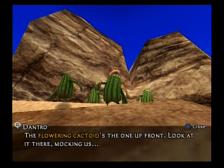
That Flowering Cactoid (Rare Cactoid) is still there. You are to meet Dantro in Estersand for this one. Talk to Dantro in the middle section and he’ll explain the Flowering Cactoid, and it resides in Yardang Labyrinth. Go to the upper-center area and you’ll find it (that’s where mine was at least). He was incredibly easy for me, as were the weak monsters around him. He has a 1000 Needles move that he uses when he’s low and you get a Cactus Flower for defeating him. Return to Dantro to receive 500 Gil and 10 Potions.
 Talk to Dantro again and he’ll ask you take the flower to his wife in a camp north of here. So, go north and talk to her (in the middle area of her camp by a house). She gives you a bundle of needles and asks for some Semclam Shells. Go in the nearby water and search the shiny objects to get them. Then she asks for Nebralim.
Back in Dantro’s camp, search behind the Chocobo to find a Phial of Nebralim. Take this back to his wife and then she’ll ask for the Valeblossom Dew. You can’t get this now, so just return to the board at the Sand Sea.
The Wraith (Ghost) is also available. Accept it and talk to Milha in the north part of Lowtown to get the details. Enter Storehouse 5 and take a right into Garamsythe. Stand around in the center and a Wraith will appear. He is not easy, much more difficult than the Cactoid you just fought. He’ll cast Blizzard on you and Doom, not to mention some other more annoying, status-based attacks (like Dark). He is weak against Thunder so utilize that. I had all three characters casting that (or Cure). He has a ton of HP but as long as you have a Phoenix Down or two (to survive Doom) you should be okay.
Back at Lowtown, talk to Milha to see the “person” scared was actually a baby Seeq. You get 500 Gil, Ether and a pair of Gauntlets. Go inside the house to get a very important Dusty Note. You’ll need this later.
Time to visit Montblanc at the Clan Hall. He gave me 2 Warp Motes and 2 Teleport Stones for going up one class and then 3 Remedies and 2 Teleport Stones. Finally, for defeating Flan, the Rabanastre Common Council will give you 150 gil. The Rabanastre Healers Covent will give you 200 Gil for defeating the Firemane and a lady will give you 300 for killing the Mimic Queen.
Now Montblanc has some choices for hunts. Choose Cluckatrice in the Giza Plains. Go to the Nomad Settlement which is just a screen south, and go to the Cockatrice area and talk to Dania there. Accept the hunt and go to the Giza North Bank. It’s probably too hard for you so I’ll touch on this later. To continue the story, speak with Fran at the Aerodrome and then go inside and talk to Balthier. He’ll have things set up to go to Bhujerba. Watch the flying scenes and the Penelo scenes and you’ll be there.
