Final Fantasy XII – 3. Bhujerba Sky City
The Skycity of Bhujerba
Talk to everyone and exit outside. Lamont will join you as a guest (he wants to go in the same mine you want to go in). You’ll want to buy some equipment around here and then go to the mine. Nearly everything else is blocked off.
Lhusu Mines
You’re going to want to take the first path going south all the way down for a Quiver of Onion Arrows. Then, go north a little, west a little, and then southwest for the exit. Now you’ll be on the exterior area, and this is a bit more difficult. The center is filled with enemies but it is pretty empty on the outsides. Still though, you’ll want to build up so head through the center. Keep in mind though that there are traps in the middle of areas that you are walking in, so be cautious about where you are walking (hug the walls).
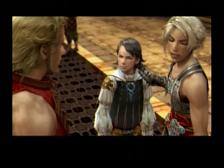
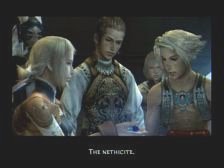
 In this next room you can take the right path and go through to continue north. Just a little longer and Lamont will find the Nethicite that he needed to see. The bangaa hunters were following you (remember them from Rabanastre, the green one especially). Not sure if you can kill them but they certainly were on pace to kill me fast, so just run back to Bhujerba.

The Skycity of Bhujerba
Back in town, go through the scenes and you’ll have to raise the rate to 100% to get Basch’s identity through to the citizens. Finding larger groups helps as does the guides, they’re the biggest boosts. Once it gets to 100%, you’ll be brought in front of a group that wants you to see Omdore. Before you do this though, you’ll gain control and can do some things.
Go to the board and sign up for Nidhogg. Talk to Aekom in the northeast part to initiate the hunt. Now Nidhogg is very tough, was for me at level 13 at least. He is in the third room at the Lhusu Mines, so you’ll probably want to clear that room out before going after Nidhogg. Get everyone to have Gambits that use Fire magic on him, that’s what he’s weak against. I ran into the problem of running out of MP too early, as in right before Nidhogg was about to die. He moves much faster and attacks consecutivelty often not to mention uses Tail Slash which will kill a character fast. Because of this it might be wise to save some MP for later (or save one of the four characters for later) for one last push. When he is done, you get 600 Gil, The Rose Corsage, and the Balaclava. Last, he gives you the Great Serpentskin.
Time to go to the Marquis house in the north. Look at the map for the big red X. Once you go here, you’ll go inside and see a bunch of scenes. The judge wants the stone Vaan stole and he gets it. Your party is locked up but catches a break as an imperial soldier is caught off guard. Vossler joins and then you should save.
Dreadnought Leviathan
Vossler is of high level, he’ll be a big help. After the save room, you’ll be in a much larger room. You’ll get taught about the lasers protecting certain passages. It’s not the end if you hit one of them but you will have enemies directed towards you for a while. Regardless, make your way south for some Gil and then far east for The Gambit Ally : Status = HP Critical. Now go south and you’ll be in the south-most room with an opportunity to go into the room northeast of this one, or the one to the far east. Take the one that has two exits (the one directly east that leads north).
You’ll find Gil and Blue Fangs around here. Just continue through to the top, where you should activate the switch and then continue on. In this room, go to the west and you can go further west than the map suggests. You’ll find an Ancient Sword and the Assassin’s Dagger over here, brilliant weapons for your immediate use likely. Hit the switch and continue on to get to the far east room.
Rest up and head through the door straight in the center. This will prompt a battle against two Judges and some henchmen. Three Swordsman and an Imperial Magus to be exact. Take out the Magus right away and then the Swordsmen. The Judges have the most HP so naturally they are to be dealt with last. By the time those are the only two left, you should have no problem surrounding the Judges. They stick to physical attacks so just heal and you’ll be a fine. They’ve got a Tri-Attack they use at the end, and like any boss they’re toughest right before they die. A No. 1 Brig Key is your reward, and then you can use that to continue onward.
You’ll see four cells. The one immediately to your right has a Systems Access Key, and a Save Crystal. Across from this is a moogle shop, worth your time to visit incase you can fill in some holes. The cell next to this is empty and the one across from this is Ashe. You now have 5 party members and a guest.
The alarms will set as you leave the area. Just continue to run through and don’t fight anyone, it’s not worth your time. At the end, Lamont and Vossler will go off on their own but Lamont will give you a piece of Manufactured Nethicite. A few more areas to the left and you’ll encounter Judge Ghis at the port, along with three Imperial Swordsmen. Ghis is slow to get to you so clear out the Swordsmen before he can get to you. Ghis has some powerful physical attacks and seems to go after Ashe if she’s in the party. He’s really not that difficult, he has Aero that he’ll use on you but that’s just 150 or so. You can heal after it and be fine.
Afterwards you’ll have found a way out and you’ll be at Bhujerba before you know it.
The Skycity of Bhujerba
Back in town, go to the Marquis. He’ll have a plan ready. Afterwards your party escapes and decides to follow Lady Ashe. This gets you to Dalmasca Westersand, where you should make your way back to Rabanastre
Rabanastre
First of all, there are new things at the shops. Check them out and upgrade what you can. Berserk is a must, as are Round Shields and Ancient Swords.
I went for the Cluckatrice another time now. It was too difficult prior to going to the Skycity of Bhujerba, but I was finally able to defeat him at level 13, with physical attacks. I’d concentrate on the main one, as the chicks just attacked Vaan for 0 damage. Watch out for the status ailments, they can cripple your chances if you don’t have the necessary items. Afterwards, the Little Love on the Big Plains rewards you with 1000 Gil, Rainbow Egg and Jackboots.
Now if you waited to fight the Rocktoise (talk to Montblanc to apply), then this might be a good time to try. Do remember it’ll cost you 200 to fly to Bhujerba again. And do remember Rocktoise will probably destroy you if you don’t know what you’re doing. I couldn’t beat him, I’m sure some Mist Links could do him in though. For now I’ll skip him and sign up for the Wyvern, and then continue on to Westersand.
Dalmasca Westersand
If you didn’t explore this area when you returned from Bhujera, then look at it now. You can uncover a path to Giza Plains, as well as one to the Zertinan Caverns. Directly to the north is an area you can’t get to now, so continue on westward. Past the camp and you’ll be at Ogir-Yensa Sandsea.
Ogir – Yensa Sandsea
Vaan will have a scene with the sand as you walk in. Walk up the ramp and follow your way to the southwest. Pretty easy screen. Continue further and Vossler will join you. I like to use Berserk on Vossler and watch him tank through hundreds of Urutan-Yensa’s.
Take the west path for a map of the Ogir-Yensa Sandsea. You’ll see that this place is downright huge. Take the south passages first for some treasures (mostly just Gil and Potions but there is the Gambit Ally: Status = Confuse. Further along to the southwest is an exit that leads to a Gate Crystal and a merchant. He has some really nice spells you should buy, Raise and Cura (expensive of course). Further west is an entrance to the Nam-Yensa Sandsea.
 Return back and head north, and then check the center if you want. One of the southern “circles” has a Gambit Ally: MP < 40%. There is another southern passage but it just had a Gil treasure. Further east to return to the Refinery, and then north. Take the east exit here for an entrance to the Zertinan Caverns. Leave and check out the dead end area just north of this for a Handaxe and a Capella.
You’ll notice that nearly all of your enemies are Urutan-Yensa. Use this to your advantage, as if you get a 50 chain (otherwise known as killing 50 Urutan-Yensa’s without killing a different monster or going to a save point) you’ll get a Montblanc picture at the Sky Pirate’s Den.
So as you work your way north and then south again, in the middle you’ll see another exit. This, like the northeast one, leads to a different area of the Zertinan Caverns. Not where you want to go through, so you might as well head west. You’ll make your way to the Nam-Yensa Sandsea. Before this though, you’ll speak with a moogle, and listen carefully to what he says.
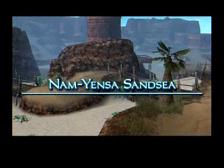
Nam-Yensa Sandsea
Save as you get here and then continue west. Note that I took the upper Nam-Yensa path as opposed to the one that comes out from the merchant’s area farther south. Regardless, Save and continue west and then south, but stick to the east wall as you go south to see a forested path. I found a Lambent Hat, good for this point.
Soon you will come to the Urutan Eater. This is a gigantic creature that loves Urutan-Yensa’s. You can try to kill it, it has pretty good defense and a ton of HP though. Fortunately you can get huge combos and Vossler will downright slaughter this creature as a Guest. You’ll get a message saying you killed it, should you do so. Return to the moogle and talk to him. Then go back to Ogir-Yensa and up the ramp to see a scene. Return back to where the moogle is to see another scene. Now you can take the Eksir Berries. Afterwards, I went back east through the southern route to the gate crystal to go back to Rabanastre (and spend money on Armor).
Back at the Ogir-Yensa Gate Crystal, go west and take the skinny bridge going southwest. There is a treasure and a Nam-Yensa map. Another big (yet smaller than the last) desert. Take the south route now and you’ll fight a bunch of Bagoly’s. If you take the southern path you’ll come across the Gambit Fore: HP > 1000. New enemies (Axebeaks) are here as well. The exit in this area leads to another Zertinan Caverns entrance. Not worth going to of course, so return back and make your way west.
You’ll get to a large desert area that combines the upper and lower paths. In the northwest part of this area is The Gambit Foe > 500. The north part is really nothing of note, so continue westward. The bridge going north has explosives at the start of it, and it leads to nothing. So, it’s probably not worth your time to go down there to fight Yensa’s.
Do go further west, and then take the northeast path first as that is a dead end (the west continues). There will be a few explosives you’ll trigger, hopefully you bought Raise. If you go directly east in this area (up the ramp) you’ll come to two treasures (and no enemies along the way). The treasures were just an Antidote and some Gil though.
If you take the western path that leads north, you’ll come to some minor treasures along with the Wyvern Lord. Needless to say, he is not an easy Hunt. He flies so that makes things even that much more difficult. I wasn’t able to defeat him so I continued westward. You’ll come to the merchant again, who has some words of advice.
 The Tomb of Raithwall
The Tomb of Raithwall is just before you as you work west. A Garuda will meet you, and if you paid attention to the moogle and the merchant you’ll know that those Eksir Berries could help you a lot. If you use them on him, he’ll become much more tame and the battle will be extremely easier. Magic or Bows are your best bet to bring this creature down.
Inside you’ll see a Gate Crystal, where you should obviously save. Take the teleport and continue on until a Demon Wall bars your path. Run from this one and then in the next room another appears! Run towards this one and start attacking it. I was best off Berserking 3 of my characters and using one to Heal or cure status (like Blind, Sleep, or characters in the Void). He’ll go down rather fast and you have a lot more time than the first fight. Now you can retreat afterwards and Save and come back, in which case that first Demon Wall will fight you again. You still probably can’t kill it but it’d be wise to do so later.
Continue along, and I chose the left path. This will take you to the lower section, where you should work towards the middle to a glowing switch. Hit it, and then hit the teleport switch in the middle to go back to the center room (where you chose to go left). This time, go right. You’ll be on the upper part where you can make your way to another glowing switch that will open up a new area completely that isn’t on the map.
Continue to the lower part, grabbing the treasures on the side. In the center leads even lower, to a boss named Belias. This guy killed me the first time I fought him. He has an Oil-based attack that takes off around 400 and leaves characters in the Oil status. The second time I went to fight him, I had Shell and Protect on before I started the fight and then Berserked a few characters and kept a conservative plan (not using Water the entire time). With Shell and Protect (along with Hankerchief’s to cure the Oil status) you should be able to take down Belias regardless of his barrier he puts up towards the end of the battle.
Continue past the door and you’ll get the Dawn Shard after a scene or two. Take the teleport behind you when you regain control for a quick leave. Now, you’re about to go through a bunch of scenes.
Eventually, Vossler and three Imperial Soldiers attempt to stop you. Fran will be in Berserk mode so that helps things greatly. Try killing the soldiers as fast as you can, allowing you to focus completely on Vossler afterwards. Berserking your other characters might be a good idea, as is using Protect on them. Vossler will get violent and will attack several times consecutively as he is nearing death.
More scenes and eventually you’ll be back in Rabanastre.

Rabanastre
You have some more freedom. After buying equipment / spells, I suggest catching yourself up on the hunts. Return to Montblanc and go after the Rocktoise if you haven’t defeated him already (which is the case for me). He’ll likely give you some additional small rewards for certain feats (getting an esper, defeating certain enemies, etc). Rocktoise at level 19 or 20 should be easy, although it’d be even easier if you fought it with Vossler. Have someone with a powerful bow, like the Longbow, and then two others that you can Berserk and have melee attack. Be sure to cast Protect right before you walk into his area. Afterwards return to Pilika in Bhujerba to get 1200 Gil, a Hi-Potion and a Heavy Coat. Talk to him again and he’ll give you the Merchant’s Armband and ask for you to get his diary.
Go get it for him at the technicks shop and you can read it if you like. Return it to Pilika and say yes or no, although you get better armor if you choose no (Shepherd’s Bolero as opposed to Kilimweave Shirt).
Another hunt I was unable to complete earlier was that against the Wyvern Lord. The signup for that is at the Sandsea, and then the Rabanastre Weapon Shop for details. The Wyvern Lord isn’t that difficult but you need a powerful long range weapon (the recently available Elfin Bow is ideal) to consistently hit him. Take three Elfin Bows to the Gate Crystal and warp to Raithwall Tomb. Backtrack a screen and then you’ll be right by the Wyvern Lord’s screen. Take the northeast instead of south path and you’ll reach the Wyvern Lord’s area. When you see it’s large red dot, don’t approach it right away, but rather rid the area of Bagoly’s and other enemies. When it is clear, use Protect on everyone and Berserk at least one of your Elfin Bow users. The Wyvern Lord likes to use Aero, and also will use a powerful tactic towards the end of it’s line that puts a character in sap mode (the opposite of Regen). With strong bows and Protect to minimize the physical attacks, you should be able to put the Wyvern Lord away without worry. Your rewards are 1000 Gil, Longbow and the Shell Shield.

Hi all, here every one is sharing such experience, so
it’s fastidious to read this website