Final Fantasy XII – 4. Ozmone and Jahara
Rabanastre
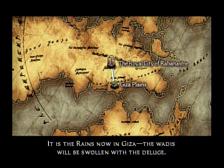
Still in Rabanastre, the party is to go to Giza Plains (and then south) to the Ozmone Plains. Before heading through there, I set up a hunt with the Croakadile as he is in Giza Plains anyway. You’ll notice plenty of others including some level 5 hunts. I was unable to beat any of the other ones however.
Giza Plains
The season has changed and there is water everywhere. This affects where you can go, and also there seems to be more water-based creatures (like frogs). The Hyena’s and other enemies you fought earlier have been beefed up.
To the middle area with the Save Crystal, and talk to the guy who is by himself. He is very short and gives you the details. You are to go to the southwest part of Giza Plains and walk by a bridge – the Croakadile will then jump out and you’ll get to fight it.
Before walking completely past the bridge in the middle of the southwest area, apply Protect and Shell to your entire party, and then Berserk two characters. Keep walking and eventually the Croakadile will pop out. Have your third character (who isn’t berserked) heal and attack accordingly (with a Bow, or something from long distance). The Croakadile will attack, and will use Growing Threat (increases his level) and Aqua Bubbles (aqua attack). He’s really not too hard to bring down, and a Ring of the Toad is your reward.
Back to the guy in the middle of Giza Plains, who gives you 1200 Gil, the Serpent Rod and a Teleport Stone for your efforts. It might be a good idea to sign up for the hunt in Jahara against the Slaven before you continue onward.
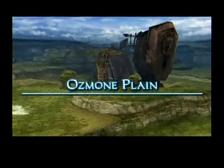
Ozmone Plains
This area has a lot of larger monsters and it may seem difficult especially at first. There is a bit to explore so take your time. The large amount of Zu will probably mean you’ll want the Elfin Bow on for easy kills. You’ll see Vipers, Black and Red Chocobo’s (which are sometimes sleeping), Mesmenir, Wu, Hybrid Gators, and the extremely tough Zaghols.
One screen south and in the middle of this area will be an entrance to the Zertinan Caverns. Two screens south and then west is Jahara, Land of the Garif. In the northeast part is an entrance to the Golmore Jungle, a Save Crystal, and a Game Hunter.
The eastern screens have more monsters and harder monsters. The left screens are filled with Vipers and Mesmenir, easier creatures. When you are ready, take that southwest exit towards Jahara.
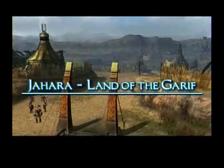
Jahara, Land of the Garif
As you enter Jahara Land of the Garif, you’ll be in the Banks of the Sogoht section with a Gate Crystal near you. Talk to the Cartography’s Guild moogle if you wish, but talk to the guards and go west to move on. The Garif that you saw walking around Ozmone Plain will come to vouch for you as he saw you slaughter all of those monsters. Anyway, you’ll be at the far west screen talking to the elder and then you’ll get to have some freedom. You are to go to the Golmore Jungle to continue as Larsa decides that is what the party will do. Before that though, talk to the Low Chief Sugumu in the north part of the far west screen to initiate the Enkelados Hunt (hopefully that you signed up for at Rabanastre, it’s only a level 2 hunt).
You are to go back to the Ozmone Plains and to the shred area. Clear out the Bull Croc and the Aeros, both considered Rare Game. Finally, kill all of the Wu and then you should leave and re-enter. Enkelados will now be here, but before you rush him, cast Protect on everyone and Berserk your tanks. Larsa will be a big help with healing so keep him un-berserked. Control your tank while your others attack with bows preferably, and run around as Enkelados is slow. This will allow your berserked bow using characters to annihilate Enkelados as he’s running around. I had no problem with this fight, although he used Restore a few times to get about 25% of his HP back each time. After the fight, he dropped an Errmonea Leaf and the Low Chief Sugumu will give you 1100 Gil, an Ether and a Golden Amulet.
Golmore Jungle
Go to the Golmore Jungle and you’ll see a scene with the party and one with the Imperials. There are plenty of Panthers in this area, along with a section of Malboro. If you take the west path you’ll come across a dangerous Hellhound, careful of them (they regenerate). To the northeast is an area with Gargoyles, and if you go east you’ll come to one of several barriers. In the center of the northwest area is the map of Golmore Jungle by the way. Fortunately, if you go in the east / southeast area, Fran will show the party a secret way so that you can meet the Veira. It’s by the passive monster (the huge Treant). You just have to speak to the wood to go to the Eruyt Village.
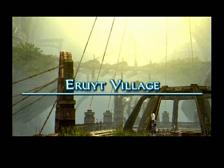
Eruyt Village
Fran will tell you to look for Myrn and to bring her to Fran. Moogles will run up, one of them has some wares. Good Accessories, and the ever-important Curaga spell. He has some other unique ones too, like Float.
Go inside and talk to everyone, even though they aren’t very welcoming. Eventually you’ll run into Jote and the story will progress. Myrn actually isn’t here, and Fran can sense that. You are to leave and head for the Henne Mines south of the Ozmone Plains.
Actually just as you enter, talk to the Imperials. Give them a Potion, and talk to them again to use their Chocobo. Go to the next screen west in the Ozmone Plain and then go south where the yellow chocobo is. Actually, you can walk through this area, and you’ll see another Chocobo. Keep going southeast and you’ll be in the next area, previously inaccessible. Get off the Chocobo at the end and go in the Henne Mines.
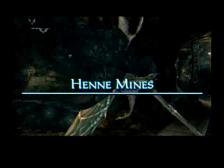
Henne Mines
There are plenty of bat creatures in the mines, Redmaw and Seekers.
As you enter, take a right and go down the stairs and continue that way, hitting the blue switch along the way to open the gate. Continue along the same way until you get to a new area. Here you will have two gates open and two closed. Talk to the Imperial and hit the switch, but a bunch of Jelly drops down. These things are difficult and they continue to split, I wasn’t able to kill them all. Instead, go the new way that you just opened to find the Map (along with several bats).
Get the map and return to the room with the second switch and the four way fork. Hit the switch again and take the way going west on the map (the way you haven’t taken yet). Continue to the next room where you will be going down plenty of stairs and fighting many Redmaw’s. You’ll be at a more cavern looking place next, and go east on the map to the dead end to get a treasure and fight a Nightmare.
Now go back and go straight, taking the long path around. You’ll find some more treasures in the southern dead end, but then go south and east to continue along (look at the map for further detail).
If you take the dead end going north right before the next screen, you’ll come across a Thunderbug (they look like treasures, but are enemies). In the next screen, go north and take the east fork to fight the Tyranorox. He’s pretty difficult, but not impossible, just attacks strong. The passage will be blocked, so go north through another Tyranorox and several other Redmaw’s and you’ll be in the next area.
 Two more Thunderbugs south of you here. It’s closed to your left, so go north and east and south until you can hit the switch (note that if you try to enter this area from the other door, it’ll be blocked. Now in this room, you have to hit the switch to open up the path to the north (allowing you to continue on). As you hit the switch, the door that was previously blocked (by the Tyranorox) will open, so go out that way. You’ll have to head back west and then north to exit. Now go north, the door will finally be open.
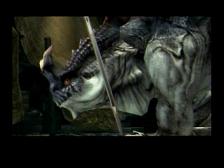
A scene will happen with Myrn possibly, but she detests humes and responds as such. When you regain control, Save and continue onward. The Tiamat will bar your progress. Expect a tough fight, and with Disablega, there is a chance you won’t be able to use a character (for a short period of time). Protect is your best bet, Shell might be worth the time to put up also. Berserking your tanks and keeping Larsa alive to heal is of prime importance. He’ll use Aero and attack physically, but as long as he doesn’t disable your non-berserked character, you should have total control of the fight. Stay clear of him when he uses powerful attacks like Breath. Towards the end, he’ll melee attack like nuts, so prepare to Raise if necessary.
 After the battle the halo around the Tiamat falls off and the beast is destroyed. Myrn will be unconscious and she’ll drop a shiny, nethicite looking possession that destroys. She then passes out, and afterwards talks to your party. Turns out the mist the Veira feel is a closeness to Nethicite. Larsa takes Penelo’s nethicite and after a bit more you’ll be back with some scenes at Eruyt Village. You’ll receive Lente’s Tear and Myrn will wish to go back out with the Hume’s.
Save and prepare to head back into Golmore Jungle to go through previously inaccessible paths.
this isent the same thing im looking for but its good to seet it again…
(and i do not know why i just said that) ps. im evil
Haha, okay…
Nice of you to stop in Midnight Devont. Even if you are ‘evil’.
don’t suppose anyone looks at this anymore but here goes. i’m wanting to get the golden amulet in ff12 but can’t get across the river. i have tried some walkthroughs for it but none seem to work. ?? can someone please give me some advice on how to accomplish the river crossing?
you have to sell alot of things then its for sell <.<