Final Fantasy XII – 6. Nalbina Mosphoran Wasteland
Rabanastre
First sign up for Atomos at the Sandsea, and then go to the Aerodrome and make your way to Nalbina. Probably will want to buy new weapons and armor here. I’ve settled into a two sword users and one bow user party. The bow user is of course the recently won Yoichi Bow, very useful of course, while the sword users have Icebrands from Nalbina. Talk to Burrogh for more information on the Atomos hunt.
You can now enter the Mosphoran Highwaste, so do so.
Mosphoran Wasteland
First of all, there are plenty of traps around here. Have a Libra on and be careful, it’ll still take some work to get your other two characters to avoid them. In the middle area are some supplies and a save crystal at camp. There are some new weapons and armor here so check them out if you wish. Otherwise, rest up and save and head north. You’ll get to an area where you walk down a hill and there are several Vultures. The northeast part of this area has Atomos (Mosphoran Highwaste / Northern Skirts), and I’d clear it out of the Vultures first and then walk around to replenish MP. Anyway, get Berserk up for your Tanks and Haste and Protect for everyone. Atomos isn’t too tricky, he just uses physical attacks and does Spin Kicks as he nears death. He does have Regen Protect and Shell on though, not to mention lots of HP. Take advantage of your speed advantage and use your bow wielder to get Atomos’ attention and run away, while your Berserk characters destroy Atomos. Continue this strategy until Atomos starts flashing and eventually keels over. Burrogh at Nalbina Fortress will hook you up with 1800 Gil, the Gaia Rod and the Diamond Shield for your efforts.
Back at Rabanastre, talk to Montblanc for any rewards and then go sign up for Braegh now that you have access to the Mosphoran Wasteland. Talk to Va’Kansa in the center area with the caravaners and Vakansa will tell you that Braegh is in the northwest part of the Salikawood, near the Necrohol of Nabudis.
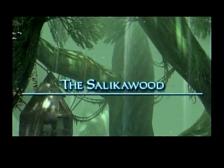
Salikawood
Rest up and head on in, going to the east side. If you were to try to go northwest, a Bomb King would bar your way. It’s possible to defeat him with efficient use of your Mist attacks, but this is not the way you are to go and it’s a very tough fight for that reason. Instead go east and talk to the Moogle Boss at the gate and then look on your map. You’ll see a bunch of markings and you’ll need to bring back all 9 moogles to the moogle boss to continue. When you do, they open the gate for you and if you talk to the moogle boss afterwards you get a pair of Quasimodo Boots.

Phon Coast
This is a scenic area to say the least. Work your way southeast, hopefully you have a good bow like the Yoichi Bow to deal with the Pyrolisk flyers. At camp you can get some better weapons and armor, and talk to everyone to learn the way to Tchita Uplands. You’re getting closer to Archadia, but more dangerous monsters are along the way.
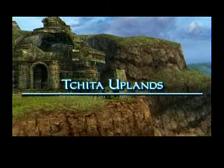
Tchita Upplands
Head south to the next area and then east to the next. You’ll be by an Archadian Wayfarer and a Save Crystal. The wayfarer will put up an impromptu bill against ???, so accept it and you’ll get the Soul Ward Key. This is by Sochen so we’ll deal with it in a bit. Go north of here to meet a kid wayfarer and a Gate Crystal. Save and then go to the northeast like they’ve said and you’ll get to the Sochen Cave Palace.
Sochen Cave Palace
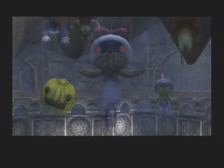
Go north and shortly thereafter you’ll get to a door. Before you use the Soul Ward Key from the Archadian Wayfarer, put Protect / Haste up for everyone and Berserk your physical attackers and enter. 5 little fellas will fight you, they are Topstalk, Onion Queen, Mandragora Prince, Alraune King and the Pumpkin Star. Whew. However don’t underestimate them as their status attacks can put you in a bind, with Sleep, Blind and Poison. Their attacks aren’t that good but their sheer volume of them warrants use of Protect probably. Try to surround one at a time with the non-berserked character doing traffic control ensuring that the Berserked characters gang up on one at a time to make things easier. Remember this was a hunt from that Wayfarer in Tchita Upplands (by the Save Crystal) so return for 1000 Gil and 3 Remedies.
Anyway, back at Sochen Cave Palace, take either side door in the boss room to continue north. There will be a Crystalbug ahead, but kill the Crystal Bug and a real Crystal will form of course. Save and continue eastward past the dead Bangaa.
 In this area will be several paths leading north, some blocked by waterfalls. Work your way north and you’ll find a map in the center of the area with all the doors. The Wendigo’s and Striker’s can wear you down physically so Protect would be useful. You’ll get a lot of Element Enemy Gambit treasures around here, from Ice to Bolt to Fire.
Eventually you make it to a square room towards the end of your journey north, and an Ahriman appears. This character will split up at various points in the fight, with more Ahriman’s as his HP gets lower. There are 4 or 5 towards the end of Ahriman’s hit points. Careful of his Doom and other status ailments, his physical attacks shouldn’t do you too much trouble but when there are 5 of them it is worth keeping an eye on (Protect and Cura are most useful). After the fight you can continue on to a lift and then to the Gate Crystal.

Old Archades
You will be here now. Check out the shop and make your way to the Save Crystal and the imperial guards. They won’t let you through, but give the guy the money the Jule guy the money he asks for to help you out. Go talk to everyone now, specifically the northeast area with the bag of loot guy. Return to Jules and talk to him, and then return to the bag of loot guy. Now return to Jules and he’ll have moved to the middle area. A scene occurs, the imperials run away and you can get up to Archadia.
Head to the northwest to the Magic and Technicks area. The Technicks shop has a map shop which you should buy the Archadia Map to make travel more simple. Get some new armor and weapons if you’d like and talk to the Cab Driver in the southwest. He won’t take you yet, since you need Chops. Jules shows up to tell you about Chops if you give him money.
This is kind of annoying (really annoying actually) but you have to go to each area of Archadia (there is four in your immediate area) and talk to certain people to memorize a comment. Now you must tell this comment to someone else in the same area to get a chop. It matches only one person, the others will be disinterested in the comment. Get 9 of them to use the Cab Driver, but at some point get all 28 for a prize.
With 9 chops, he’ll take you to Tsenoble. Continue north for a short scene and then back to the Cab Driver. Balthier will talk with Jules, and tell the Cab Driver what Jules tells you to tell him.
Draklor Laboratory
Within this, you are to head north and choose to go to 67 instead of 68. Go to the northeast of this to enter a room (an imperial is just outside) and you’ll get a scene in Cid’s room and you’ll get the Lab Access Card and a map of Draklor Laboratories.
In control again, take the two doors next to you for a Save Point and a Panel that you should switch (turning the room red). Make your way to the elevator (you’ll have to fight some Imperial Hoplites and stuff) and go to 68F.
Upon entering 68F go west (east on the map) until you get to 6803. Enter and flip the panel so the room is blue. Leave and go north and then west and south to 6804 to flip the switch yet again. Now you are to work your way south a little, west a little, south some more, west and south (basically the southwest corner) until you get to room 6811. Flip the switch for a third time and then work your way to the middle south area for an elevator that can take you to 70F.
 A scene happens when you get here, but Save first before rushing up the stairs. Might want to set up Shell / Protect / Haste on everyone and Berserk on your tanks, a tough battle awaits you. It is Cid, and like Bergan mist can be smelled. This means Cid with Nethicite aid. He has four Rooks around him that must be killed first, there is no way around it. Having Berserked characters means the sword users will be hacking at anyone even Cid which would be useless but more often than not they’ll work on the Rooks. Each have about 10,000 each but can go down rather easily. When they are all gone Cid busts out a new attack that does around 600-700 on each character, still easy to keep up on though. Cid will eventually go down and will flee saying he’s going to Giruvegan. Bunch of scenes and you’ll end up at Balfonheim Port. Probably a good time to go for some hunts.
More Hunts
I still hadn’t gone through the Bomb King to get to Braegh, so I figured it was time to do so. Bomb King is in the center (toward the northwest area) of the Salikawood, right after the Save Crystal. Get your status effects like Haste and Protect up and then use the crystal to restore your MP, and go towards the Bomb King. He’ll constantly get little bomb reinforcements to trouble you, will do oil based attacks and then follow up with Fire. That’s his MO more or less, but the hardest part about the Bomg King is that he does a Renew ability that fills his HP. This is very very annoying and happens any time after about 30% of his HP is left. Mist Combos are obviously a way to get him done quick once he’s close or you can just pummel him and hope he doesn’t get it in. This was the case for me as I went through about 6 or 7 lines of HP for him. Afterwards a new path opens that allows you to get to the northwest.
As you continue northwest in the Salikawood, go for the western exit as opposed to the northwestern. Near the western exit you can see a unicorn-type creature along the way, this is Braegh. Have your protective stuff up and go in, he’s not too hard at this juncture (about level 36 for me). I did have to switch out the Yoichi Bow as it healed him unfortunately. Back at the Mosphoran Wasteland, your rewards are 1700 Gil, 1 Hi Ether and 1 Obelisk for the Rodeo to the Death hunt against Braegh.
Mind Flayer was another hunt (started at Jahara) that I couldn’t finish previously but could now. He does Soul Etude which restores his HP and that was fatal in the prior meeting but with stronger weapons he was easier. Also Mindflayer does Hero’s March which gives him lots of positive status affects like Faith and Haste and such, so you should use Dispel as soon as he does that. His attacks aren’t that great but Invert will turn your HP into your MP amount, meaning you’ll be near death. He can do Blizzara and Thundara but that shouldn’t be an issue and his physical attacks are meager. Anyway, return to Warrior Gurumu in Jahara to get your gifts for The Mine Flayer, which include 220 Gil and the Carmagnole. After this talk to Geomancer Yugelu to hear about a section even farther in Henne Mines, but he won’t tell you about it quite yet.
Bloodwing was next for me, but to do this the sidequest with Dantro’s Wife has to be advanced past where you left it Dantro Barheim Passage Sidequest . Agree to sail over and see what’s wrong on the other end. The cactoids have taken over evidently, so return back, talk around and search behind Dantro’s Wife’s house to find a cactoid bud which turns into a baby cactoid. This will follow you so take it back to the other side and the cactoids will leave the village. The little one even gives you 1000 gil and a Wyrmfire Shot. Return back to Dantro’s Wife and she asks for some Valeblossom Dew, which is where we were stuck at last time. Vale Blossom Dew is in the Broken Sands. Go back across the river and north a few screens until you get to the Broken Sands, where you should go north (sticking to the right side). You’ll see a beautiful pink tree, search near this (an action icon will pop up) and you’ll get a phial of ValeBlossom Dew. Return to Dantro’s Wife and give it to her, and then she’ll ask for the Great Serpentskin, which you should also give to her. Now you’ll have to waste a little bit of time until the journeyman recovers. Leave somewhere and walk around for 10 minutes and return to talk to Dantro’s Wife, and then the Bangaa in the back. He will give you the Barheim Key and a Balance Mote. You can also get Sassan the Cockatrice across the river, by first bringing the dog and boy over first. For this you acquire a Koga Blade. Before leaving this area, talking to No. 381 and Number 381 will tell you about his friend who got attacked in Barheim Passage, West Annex area specifically. Remember this and head on out.
Barheim Passage
Now of course you can enter Barheim Passage in the Estersand, just southeast of camp in the Murmuring Defile section. This is not where you came out of Barheim Passage before (that’s south a bit more). Use the key to enter and go north a few screens to save at the Gate Crystal.
Now go a bit south and west. Take the northmost exit and continue west and take the northwestern exit again. You will now be in The Zeviah Span where you will work your way south by taking the left path and then when you get to a dead end near the south, search the prevarious boat to push it over and open up a path further south. Soon you’ll be at the West Annex. The long bridge on the south is dangerous as the Bloodwing (the hunt you hopefully signed up for) will appear. Run past it for now to the next area, it’s fairly linear at this point and you’ll get to a Save Crystal, and you should use all your support spells and then Save / Rest and go back for Bloodwing. The large amount of enemies nearby means you’ll have to clear the area out first. Bloodwing isn’t too difficult, just uses Eerie Soundwave and leechs your HP from you occassionally. He is very hard to hit, but he doesn’t have a lot of HP and damage is easy to do to him. Take him out with the Yoichi Bow and any other weapon that connects at a decent clip. No. 381 back at the Estersand Camp will give you 2400 Gil, Stun Bombs and a Vampyr Fang for The Deserter’s Revenge.
Back to the Save Point, where you should Save and cast a bunch of support magic. Zalera the Death Seraph is here to disturb you. He’ll have henchmen spawn that you will have to kill before you can harm him, which can be a detriment when you have Berserked characters attacking anyone. Zalera himself really won’t threaten you so much with his attacks and he’s easy to hurt when you are able to. However while he is vulnerable he also casts instant kill attacks constantly so you’ll have to raise immediately. He can also put you to sleep and disable you, which are even worse hassles for you. The time limit is there and it’s 5 minutes, but really that shouldn’t be too much of an issue. Might want to try a mist attack at the end to ensure that you aren’t wiped out by his more powerful abilities. I was at roughly level 39 for reference and it was pretty simple.
Continue westward and you’ll be at the Garamsythe Waterway. Make your way towards the crystal and get the Garamsythe Candle, showing you the hidden parts of the Garamsythe Waterway.
At this point I decided to go after Orthros, a hunt through Montblanc. Talk to the contrite thief in the lowtown of Rabanastre and then go to where you fought the White Mousse in the Garamsythe Sewers. This is the southwestern corner, but before you go to the south central area, put in the 3 females and cast the supportive magic on them. Orthros will appear and it’ll be time for battle. He doesn’t have too hard of attacks, you’ll want Protect and Shell up incase. Watch the status ailments like Sap, but he really doesn’t have anything that makes him too deadly. You get a pack of Stolen Articles and return back to the Contrite Thief in Lowtown for 3800 Gil, a Horakhty’s Flame, and an Unpurified Ether for Crime and Punishment. You will also get a Blackened Fragment.
 Nalbina Fortress is near so I went and talked to Morgen about the Roblon hunt. Roblon is within a hidden area in the Overlooking Eternity part of Nabreus Deadlands (northwest part). To get there, head to the middle where the Gate Crystal is, and go to the screen south of that. Go to the northwest part of this screen and you’ll be able to head north and west, and then through some more areas. The hardest part of this hunt is that there are so many Dead Bones that you’ll have to go slowly so that they don’t kill you. It may seem like there is an endless amount but there is not. The key is to run up the hill and then retreat when you encounter new Dead Bones. If you don’t there is a chance your berserked character will go and attack Roblon, a bad idea. If you can bait all the Dead Bones down until they’re all gone this battle is far easier. Roblon itself doesn’t have too many powerful attacks other than -ara level black magic. He does have a ton of HP and good defense when he’s near death. Keep your support magic like Haste Shell and Berserk up and you should be able to defeat him assuming the Dead Bone issue has been dealt with. Back at Nalbina Fortress, Morgen will give you 3100 Gil, Giant’s Helmet and Mythril for Adding Insult to Injury.
Finally I stumbled across a raining Giza so I went after the Gil Snapper. Talk to Nanau near the south-most crystal to start it and you’ll receive the Silence Urn. Before you can access Tracks of the Beast you’ll have to go around and cut all the dead wood trees. There are six of them, including one in the area where you start off in, Crystal Glade.
The other areas are Starfall Field, Toam Hills, Nomad Village, Throne Room, and Gizas North Bank (in that order preferably). After you cut them all down, a new path in the southeast part of Gizas South bank will open up. Bansat will tell you whether the Gil Snapper is in the screen or not at that particular time. If not, clear the area out of the Silicon Tortoise’s and get the Feather of the Flock in the southeast corner. Return back until the Gil Snapper is there. Get Bravery / Protect / Haste / Berserk up. You should be far ahead of where you’d normally fight Gil Snapper, but he can prove difficult nonetheless especially towards the end. Be sure to Dispel him and treat him like the other Tortoise’s, using a Bow character to distract him while the tanks destroy him as Gil Snapper attempts to go after bow wielder. When Gil Snapper dies it’ll be drawn into the Urn and if you return to where Nanau was you’ll see a note. It says to come back during dry season, so do so and you’ll see a scene and get 3000 Gil and the Phobos Glaze for Paradise Risen.
It was Adrammelech the Wroth time for me. He had been a little too difficult for me with his status ailments until I was around level 40. Remember, he is in the middle of the Zertinan Caverns, the Athroza Quicksands to be exact. Adrammelech is a flying monster and will absorb lightning so make sure you don’t use the Lightning Arrows. His HP isn’t that high and his cronies aren’t that tough, although the Sleep / Stop ailments can be fatal. The Adrammelech Esper is yours to use from now on.
Antlion in Bhujerba was the next destination. Talk to the petitioner in the middle of Bhujerba and then head towards the save crystal by the Lhusu Mines. You will see some scenes with a boy as you walk through, but get to the point where you fought Rocktoise and use the Site 3 key you acquired at the beginning of the hunt. This will open a new area with Dullahan’s and Headless and other tougher monsters. Continue along and you’ll get to the Gate Crystal for Lhusu where you should obviously save. Just a bit further and you’ll see Antlion’s bright red dot along with about 5 other red dots. These are Mantis’ that are with him, making this fight very difficult. You can’t draw them out like the Roblon fight because the Antlion will charge right after you! Scary, well you can Warp the Mantis’ evidently but I have just put up Protect and took them out with one tank and two others casting Cura. The Antlion will probably feed on a few of the Mantis’, very bad news for you as this helps his abilities. Still, once the Mantis’ are gone Antlion is pretty simple to defeat despite his Flattening maneuver. A scene afterwards and back to get 4300 Gil, Bubble Belt and the Sickle-Blade for the Antlion Infestation.
Go to the top of Mt. Bur Omisace to get the Stone of Condemner and then talk to Gurdy at the bottom of Mt Bur Omisace (Chocobo moogle) to start the Trickster hunt in the Frozen Brook part of Paramina Rift. You’ll know you’re in the right area when Monid (clan member) the bangaa comes out and tells you about the trick. Trickster will just show up, a giant white chocobo. This battle is tough, even at this point. At first it’ll be easy to whittle down Tricker’s HP, but soon he’ll use a technique to make him invulnerable to physical attacks. If you had berserked characters up you’ll have to wait until they get unberserked to use them efficiently again. He also changes his status so you’re better off with Bio or Drain or some other non elemental spell, Bio is probably the best though. He uses Chocobo Comet and can do several physical attacks in a row when near death, so putting him away fast at that point would be pretty smart. Back to Gurdy in Mt Bur Omisace to get 4800 Gil and Deimos Clay for the Paramina Run against the Trickster.
Since Archadia has been unlocked there are a bunch of new hunts at the Sand Sea. Sign up for the Lindwyrm and the Darksteel and the Vyraal.
Talk to the Homesick Man in the weapon shop of Archades for the Darksteel and then in Old Archades the sitting guy (Fermon) for Lindwyrm. You’re near the Sochen Cave entrance so head in and Save at the Gate Crystal. Go south a few screens to Temptation Eluded and you’ll see the Darksteel. Get Bravery / Haste / Protect / Berserk for your tanks and first cast Dispel to get rid of Shell / Protect / Bravery and then attack him next with your bow and arrow user (non-tank). He’ll chase your bow character while your two tanks destroy him. Darksteel did not even get a chance to attack once, it was quite sad. The homesick man at the Arcahdes Weapon Shop will give you 3000 Gil, Lead Bolts and Adamantite for Shelled Obstruction.
Vyraal is next on the hunt list. He is in the Cerobi Steppe and you’ll have to talk to the Viera Wayfarer to start the hunt. Vyraal is in the center area, The Northsward. You have the help of the Viera Wayfarer but she doesn’t do much except low level healing and status help. The Vyraal has some powerful attacks and is immune to magic towards the end (along with Haste / Protect). Dispel it and continue tanking it with your Bravery / Haste / Berserk / Protect / Diamond Sword tankers. A Viera Rucksack drops after the battle and the viera will leave you. Go back to Balfonheim Port to get 3500 Gil, Halberd and Crystal Shield for Get My Stuff Back! hunt. At the end you will also get a Dragon Scale.