

Baron
After taking the Serpent Road you should Cure yourself and go to the Inn. Up to the bar area and you’ll see Yang consorting with some Baron Guards.
Unfortunately Yang sends the guards after you. They aren’t that hard other than when they cast Size. Just have Tellah cast Size on whoever is small. Then you have to fight Yang. He’s pretty tough but a twin combo and Virus and regular attacks should do him in.
Yang regains his senses and joins you. They go to the Inn to talk and Yang seems to have the Baron Key. You can open a lot of the locked doors around town now. First, go to the weapons and armor store and get the Thunder Claw behind the table for Yang (look to the southeast for a passage). Then, buy another Thunder Claw and two Thunder Rods (lots of Lit-weak enemies ahead). Hopefully you bought Cecil a bunch of Paladin stuff in Mysidia (you can still go back if you didn’t) but you should also buy Karate Gear if you can afford it especially for Yang.
Baron Castle Sewer
In the west part of Baron (north of the serpent road) you can use the Baron Key to enter the castle Sewers. Go east to get 2000 GP and then down the stairs.
Go south as you enter for Cure2, Ether1 and Life. Go ahead to the northeast to the next room.
The next area consists of walking through the walls. Go to the south for 500 GP and Life. Back north so that you can go east and get the Life, and then through the east wall and north to exit.
You’re out of the water area. Go northeast and west through the wall at the end for Ether1. Exit to the north and west for a save room. Tent and Save but get the Ancient Sword through the northeast wall before leaving.

Baron Castle
You are at Baron once you go east past the save room and north to exit. You’ll be in the moat area, and travel west and south to go through the opening. Cecil’s room is useful for resting if you don’t have a tent for the previous camp.
As you go east and head for the King’s throne, Baigan comes by. He joins you, but you already have 5 members…Palom and Porom know something is up. Baigan turns into a monster and battle begins. Baigan has two hands that do damage and paralyze you temporarily. Start off right away casting Virus on Baigan’s body and then he’ll put up a wall. Now you can’t cast magic on him for a few turns until his wall disappears (he usually puts it right back up though). If you still want to cast magic like Virus on him, you can Wall one of your members and cast the attack magic on your member and it’ll bounce off and hit Baigan (although not always his body of course). His hands regenerate if you kill them. This really is a tough early fight especially if you aren’t leveled or have good equipment.


After this, return to Cecil’s room to rest up. Now go to the king’s throne room. Kainazzo is here impersonating the king. The real baron king is gone it seems. Kainazzo is the fiend of water but doesn’t provide much resistance. You have two Black Mages so Lit 3 and Lit 2 should be used constantly. The Thunder Claws should do good damage from Yang, and this battle should really go very easily. Kainazzo will summon a wave but the Lit will dissolve it. The waves hurt if he gets them off. But Lit 3 can take off nearly 4000 damage!
Cid barges in after the battle. The whole party leaves but in the previous room the walls begin to come at you and the doors lock. There is no way out, but the twins cast Stone on both sides to stop the wall. What a rash thing to do.
Cid shows the party the Enterprise and they escape. Kain and Golbez meanwhile plot to make Cecil get the Earth crystal of Toroia for them and exchange it for Rosa. Kain meets you after this to tell Cecil formally.
 Toroia
You finally have an airship to travel the world freely. Toroia and the Earth Crystal are to the northwest in the really foresty region. You’re going to need to land in one precise spot near the town of Toroia.
Not much to do in the actual town of Toroia although it may be wise to buy non-metallic armor / weapons (like a bow and leather defense) so that your characters aren’t screwed in the following cave. Go to the castle now and you’ll know more.
If you talk to the clerics you’ll hear the Dark Elf took the Earth Crystal from Toroia and it’s in the Magnes Cave east of here. Dark Elf is weak vs. metal so it sealed metallic weapons (like swords) and characters that use them are paralyzed hence the bow / leather gear comment in the last paragraph. For now though, go west in the castle to a room where you’ll find Edward! He survived but is injured. Since he can’t join, he gives you the TwinHarp.
When you are ready, leave Toroia and go north to a chocobo forest (very north). There are Black Chocobo’s here that can fly and land in the forest. Take one if you want to go to the Magnes Cave east of here. However note that it’s very difficult here and this is a great spot to level up with the tough monsters and Tellah’s high level black magic to wipe enemies out quickly.

Cave Magnes
Well you need at least one character to not have a metallic item equipped otherwise you’ll be wiped out before the battle even starts. I highly advise you just run from the monsters in this cave and build up in another area.
Go east for a Cure2 as you enter. Then, southeast and eventually southwest for Heal. Enter the building near. West for a Life and then northeast for two treasures (500 GP and Ether1). Exit and northwest to leave.
The nearby building has a place to Tent / Save. South of here for Cure3 / Cure2 / Life. Further west and north to exit.
Go northeast a bit for Charm Claw then west to exit. North but don’t enter, getting the Ether2 on the west side first.
Next you’ll be in the crystal room. Go up to the Dark Elf but he’s going to destroy you. Just take it. Edward senses you’re in trouble and plays his harp – your TwinHarp plays the tune and the Dark Elf can’t handle the music. You can now use your weapons (oh, your party is restored to full hp / mp too). Physical attacks work best as he takes 1 damage from spells like Virus. When he transforms just keep the attacks up and he’ll be gone, and the Earth Crystal is yours.
Leave the throne room and cast Exit to leave.
Toroia
As you get back to Toroia and give the Earth Crystal to the maidens, Kain contacts you. Rest and go to your ship – you’ll be transported to the tower where Rosa is immediately.

Tower of Zot
Pretty intimidating place. Hopefully you’ve built up well enough to survive here. As you enter, go northwest for a Fire Armor, and northeast to continue.
Go south, west, and take the first path north for a Flamedog Monster and the Fire Sword for your victory. Northwest to exit. The next room, just go east all the way, north, and west to exit.
As you go east in this next floor, take the first path north and straight north for the Earth Hammer. The left path has a Poison Claw and Fire Shield and the east has a Wizard Outfit. To the far east (or southeast) and you can continue on.
Definitely go in the first building so you can Tent and Save. You may want to build up levels here, either way head left for a boss fight.
You’ll meet the Minions of Valvalis the Air Fiend. They are Mindy Cindy and Sandy of the Tower of Zot. Don’t be fooled, this is probably your toughest battle yet. Out of all of the Magus Sisters, you’ll want to kill Cindy first. She can revive the other two so it definitely has to be her. Unfortunately she’s big and can take a lot of damage (decent defense too). Casting Fast on your attacks is a good idea and keeping them Cured since Tellah can’t really cast offensive magic when they have a wall up. Once Cindy is done you’ll want to focus your attention onto Sandy in the back because she’ll cast Charm, which is very bad. If it’s done on Yang (since he probably has Charm Claws) it could be death. Make sure to attack the confused character (s) right away and Cure up.
It might be a good idea to go use a Tent and Save again. If you really want, unequip Tellah. Back north now and you’ll see Golbez and Kain!
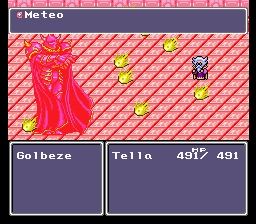

Tellah rushes up after Golbez takes the crystal. Tellah uses Meteo causing Golbez to retreat and lose control over Kain. However Golbez is still alive and Tellah is dying after using the spell. Go up to Kain when you regain control and he says to rush north. Save Rosa with Cecil and then after that the two will join you to form a 5 character party. Equip Rosa with Tellah’s defensive gear and then go south.
Valvalis The Fiend of Air stops you. She is a tough fiend unlike Kainazzo. She can cast Weak when she’s spinning and also Ray to slowly petrify you. Make sure to heal that, and Cure 2 to get the Weak-ed character back up. Kain can stop her spinning with his jump so utilize that, and Berserk your other attackers. Just beware of Weak.
Baron
Rosa casts Exit to leave after the battle. The party discusses the Dark Crystals and Kain gives over the Magma Staff.

Agart
Go south of Baron to Agart. Head north into the door as you get in. See that well? Use the Magma Staff when it prompts you. The crater north of the village is destroyed and you can take your ship through!

Dark World
As you fly into the Dark World, it seems you’ve come right when the Dwarves and Red Wings are fighting. Cid’s Enterprise goes down and when you wake up, you can walk into the build castle nearby.
Dwarve’s Castle
Go straight north and talk to the king Giott. A nice guy, your party senses something is wrong with their trap door to the crystal. Giott opens it and sure enough Calbrena are there. Cal Brena are separate dolls and once you defeat all six, a big Calbrena doll comes by. She can confuse you and do some more potent attacks but your physical attacks and Jump should be way too strong for it – especially if you Berserk your fighters.


After the battle, Golbez shows up. He talks about his intentions with the Tower of Bab-il. A battle then ensues with Golbez. Jump right away with Kain so he doesn’t get screwed with Golbez’s summon Shadow. This summon uses Demolish to just kill your characters easily. Fortunately after two uses a Mist summon kills Shadow and a new battle begins! Rydia is back and you should use Titan or some other of her new powerful spells. Golbez has really low HP here so this should be easy.
Rydia is all grown up and will join the party once again.
Go to the Right Tower for some items, like Dwarf Axe, 500 GP, Cure1, Elixir, Ether2, Strength Ring. The left tower has some more GP, Cure2, Ether1, Elixir and Black Belt. Also you’ll want to buy Wizard Gear and maybe some other odds and ends if they are needed.
To continue on you’re going to have to find the dwarf by the hospital underground and after you talk to him he’ll open the entrance to the underground. There are some Cabin’s to the southeast here but just continue on. Near the exit is a pot for HP / MP restoration making outside of here a brilliant place to build levels. I advise you do this for a while before moving on.
Tower of Babil
Go north as you enter, then right for an Ether1. On the left side are two sets of Ice Arrows. North for the exit.
Head south for the Bandanna and then further south for a building to go in. It is an Alert monster and they will summon monsters like a Stoneman, Naga, Flamedog or Chimera. Make sure to kill the Alert in the back before killing the monster it summons, or else it’ll continually summon that monster. Your reward is a Blizzard Spear. To the east another treasure with an Alert, this time yielding an Icebrand. Northwest now to exit.
Go west for a CatClaw. Get the south treasure (Life) and then go up to enter a new area in the 4th floor. Grab the Archer Bow left of you and the Life east. Back to the third floor and get the Cure2 to the east and then wrap around west (along the north wall) until you reach a staircase in the south.
There is a save point in the west building. Then go east for three buildings. The closest one south of you has another Alert monster chest with the Ice Shield being the reward. The other south building is closed so go north for an Ice Armor room. North and west to continue on.
The next area has a 2000 GP chest just east of you. The center room (if you go north as you go east) is locked but we’ll come back here later. The southeast has a Cure2 and the northeast an exit.
Take the west exit, there is only one. Now go east for a save point, then south all the way for a Cure2. Southeast for the exit.
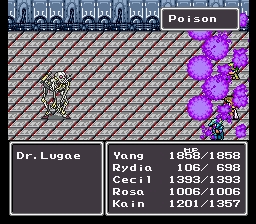
In this area you’ll see a path north. Doctor Lugae and Rubicant are here. Rubicante is the final elemental fiends. Dr. Lugae is put in charge to hold the crystals at the Tower of Babil. For some reason, they can’t see that you’re right next to them. Rubicant teleports away and a battle with Lugae ensues.

He has his pet project Balnab with him. Balnab begins attacking Lugae but eventually he does some decent damage on you. Just attack them both, Virus is good and quick to pull off. Stay Cured though because the real battle with just Lugae begins afterwards. He tranforms and poisons your party. After this though he is pretty weak, as Emission doesn’t take off much and he wastes lots of turns trying to use Gas. Continue to use Virus on him and Lugae will go down, dropping the Tower Key.
Bring the Tower Key to the center room on the floor below. As you enter you’ll fight some Dark Imps and then Yang will do something rash to save the dwarves. Go south and exit the Tower of Bab-il. As you do, Golbez destroys the bridge and Cecil is about to fall in the lava – but Cid and the Enterprise save him. Red Wings are after him so Cid plugs up the hole and you’re back in the overworld.

Baron
In Baron, go to the east in the castle. Cid’s airship workers will attach a hook and then hint you on bringing the Hovercraft (at Mt. Fabul) to Eblan Cave. So, take the airship to Mt. Fabul and pick up the Hovercraft. Travel southwest of Baron to come to Eblan and the Tower of Babil. Eblan is the destroyed castle to the southeast of this island but the cave to the west is where you need to go.

Eblan
At the deserted castle, you can go west inside and then east through the wall to get that eastern treasure. There are monsters inside (Staleman and 4 Skulls). To get the Ether1 on the other side, go up the stairs and then west and south. Check all the pots for 2 Cure2’s and the east treasures are Mute Arrows and 2000 GP.
Head to the east part of the castle. You can walk northwest through the wall for 600 GP and the east treasure, you have to go up and fall into the pit for 800 GP. You can then fall south into the basement for two Ether1’s and a monster chest with Three Mad Ogres. Use Mist on them and just attack for an Elixir. You’ll be out of the castle, but go back in for the east second floor treasures. Get the Life in one of the pots then east through the northeast wall for that treasure that is guarded by the pit. It is a Lamia and two Black Panthers that yield a Drain Spear. Get the other treasures, a Cabin, Cure2, and Ether1.
In the north part of the castle is a Cure2 and further north (through the northwest wall) is a Heal and Cure2 and there is a Cabin Life Cure2 through the northeast wall.

Eblan Cave
Once you leave Eblan, get on the hovercraft and go west.
Now go to the southeast for 1200 GP and then north (through the wall to the west) to get a Shuriken and Heal. To the southwest is the Kingdom of Eblan.
You should probably buy some Ice Armor for whoever doesn’t have it, and the Black Shirt for Rydia. There are some Cure1’s in the far west room but other than that just go northwest to exit. Just as you walk in you’ll see an Ether1 and a Tent. Traveling southeast through the wall for a Cure2. North to exit.
Go to the northeast here for a Cure3. You can walk a little south and east through a wall for Shuriken. South to exit.
Two Cure2’s and a Cabin here. East through the wall for two Elixir’s. South more for 800GP. Another 850 GP and two Life’s in the southeast. Northeast to exit. East for a Save Point and northeast through this wall for a Drain Sword.
Exit and go west for a life then north for an Edge / Rubicant scene. West through the wall for an Ether2 and then north to exit.
Tower of Bab-Il
Go north and Edge will jump through the wall. North for a Cure2 then continue west and south. All the way east for a Cure3 then the exit.
West and south when you can for Four Mad Ogres, if you beat them you get the Ogre Axe. Southwest for the exit in this area.
The exit is just east of you but go farther east for 2000 GP then take the exit. In the next area, take the east path as it goes north and south for a Middle Sword. North and east for a Save building and then the next area.
Go west all the way for 82000 GP. Wow. Now take that path just a little east and north of you. Equip your Ice-based weapons first if you took them off in favor of the Drain weapons.
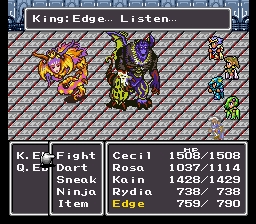
Because up ahead are the parents of Edge, the King and Queen of Eblan. They cast some level 2 spells but really aren’t a threat to you. Just use Virus, Titan or regular attacks and they’ll come to their senses before they perish.
Next is Rubicant. He will restore your HP / MP before battle, but he’s still the toughest elemental. Glare is his devastating attack. It will likely kill any character in one shot unfortunately. His Fire2 and regular attacks aren’t that bad though. Just watch out for casting spells because he quickly gets that coat up to absorb it. Flood and Ice2 are your best shots. If you have the Blizzard Spear Kain will do about 5000 on a Jump and Cecil does almost 2000 with his regular attacks with Icebrand. Hopefully you got those two because Rubicant has a lot of HP.
Chamberlain of Eblan runs up after this. Go north into the crystal room and of course it’s too good to be true, and your party finds a pitfall. Get the Cure2 and then go south for the exit.
Go a long way south then east for a Cure2, and then west to find a ship. Take this back to the Dwarve’s place and visit Giott to get the Luca Key for the last crystal. Now go see Cid in the underground (where the secret entrance is, and by the Chocobo). He’ll fix your ship so you can fly over the Magma.
Magma Airship
Now that you can fly over the Magma, lots of sidequests are available to you. Powerful spells and items can be found along the way so they’re definitely useful to go through.
Tomra
At Tomra which is southwest of the Dwarves, you’ll see they have some nice armor and another Middle Sword for Edge. Not much else to do here besides buy things.

Land of Monsters
Southwest of the dwarves is the land of monsters. Hopefully Rosa has learned Float otherwise it’s probably pointless to go here (you’ll have to cast it on each floor).
Go northeast for an Ether1 and Life. Southeast for a Cure2. Southwest for the exit (if you fight an Arachne they’ll cast quake so again make sure you have float on at all times).
Northwest in this new area for a Cabin. South for a Cure2 and east to continue.
You’re in the last area. Try to go through the west wall then south a little for a Cure2, Poison Axe and Ninja Sword. You can continue to travel around the outskirts of this room and in the southeast you’ll see a Cure3 and west a little for a Life. In the northeast is a tough battle against five Warriors. A Titan and Blitz should be enough to do them in, you’ll get a powerful Defense Sword for your efforts. It’s +30 ATP and +8 DEF for Cecil compared to the Icebrand. Take the center exit.

Land of Summoned Monsters
This is where Rydia was, and everyone knows her here. Go west for an Ether1 and 2000 GP. Take the nearby exit and then get right back in it to get the Rat Tail. Continue east on this floor for 2000 GP and south for 3000 GP.
Town of Monsters
Take the north exit for the Town of Monsters.
The Sorcerer Shirt and Aegis Shield are great buys. The Long Sword and Charm Arrow might be worth it at the Weapon Shop.
The northwest building has a Heal and Life and save point. Use it, then go to the library south of here. You can read a bunch of books around here, or go to the basement to meet Asura. She is a summoned monster that challenges you to a battle.
She’s very difficult even when you know the trick to beat her. The idea is to cast Wall on her otherwise she’ll continually Cure herself on her turn (unless she uses life). When you attack her she counterattacks with a powerful attack so you’ll need to stay healed (she’ll help by casting Cure on her Wall and then on one of your characters). For this reason try to use your best attacks like Jump and maybe you’ll want to Berserk Cecil and / or Edge. Have Rosa keep everyone alive and Rydia can attack or use Titan (since the wall is up black magic is worthless). Once you defeat her you’ll get Asura’s use for Rydia (casting Cure2, Cure3, Cure4 or Life I think).
Leviatan is next to Asura, even though he was denying it before. Talk to him (well, rest first) and then you can battle him. He’s actually easier, although he uses Big Wave a lot. This takes off about 300 on each character, so just Cure3 to get it back. His Ice2 can do decent damage too. He’s weak against lighting so Blitz is useful and Lit 3. It’s unlikely you have Lit 3 though and Virus is probably better and faster than Lit2. Keep jumping and Blitz Cecil, and have Rosa cast Cure. Not too hard, and Levia is a sweet Summon.
Not much else to do here so leave.
Sylvan Cave
If you go west of the Tower of Babil you’ll see a new cave. This is the Sylvan Cave. We can go through the cave but can’t do the sidequest yet, so we’ll return later.

Sealed Cave
In the south part of the Dark World, northwest of Tomra, is the Sealed Cave. You get in via the Luca Key that Giott gave you.
Take the southeast path and go to the white door. This is your first trap door. They are all over this cave and they’re tough enemies that do automatic kills and then sometimes summon monsters before they die, generally Mantcore’s but sometimes dragons. What a pain. The trick is to do damage quick so it only kills one character (it will always kill at least one character). Virus and Jump get the TrapDoor down quick. There is a LongSword and Ether in this area.
Exit out and go southwest for a Life and then northwest for a trap door and the exit.
Get the Cure2 by you and an Ether1 on the right side. The two northern TrapDoor’s lead to nothing. I always fight them for the high EXP. Southeast to exit now.
South and across the rope for a Life in the next room. North and east for another Life and north more for a ton of TrapDoor’s. Again I suggest you fight them all but you may be fatigued, if so just choose the one with the Save Point to rest afterwards. Starting from the right, here are what is in the TrapDoor’s: Nothing, Light Sword, 5000GP / Elixir / Ninja Shuriken, Nothing, Save Point, and finally Long Sword / Ninja Helmet. In the southwest is the trap door to continue onward.
Grab the Ether1 and leave this area. Get the Cure2 and Life in the next area, then fight the TrapDoor (although it leads to nothing).
Go all the way east here for a Life then the TrapDoor nearby (although again, it leads to nothing). Back in this area and take that rope that looks to lead to nowhere – instead you go under and to the south to a new area.
The east trap door leads to an Ether2 and Cure3, and the west exit leads to a save point. Continue south, and walk south in the new area until you can take the exit. You’ll eventually come to one last TrapDoor and then the crystal room. Grab the Dark Crystal and leave.
Unfortunately you’re greeted by an Evil Wall. This thing attacks fast, each time it moves, and can also petrify you (which is annoying to waste a turn to heal it). Berserking Edge and Cecil is a good idea so that they attack faster and harder. Kain should keep jumping and Virus works wonderfully. After it’s defeat you have to walk all the way out, you can’t cast Exit. As you leave, something surprising happens (okay not really) but you don’t get the Dark Crystal after all and the Tower of Babil is about to be revived.
