

Mysidia
Once Kain betrays you, then go back to Giott. He suggests the Big Whale of Mysidia. You can’t get back to the light world though, until Cid comes to add a drill to the ship to drill through the sealed up hole.
Once this happens, take your ship to the northeast to exit to the light world. Now travel east to Mysidia.
The elder rushes up to you when you enter. They pray for the Big Whale and it emerges. Take your party into the Big Whale and then touch the crystal in the center to travel to the moon.
You’ll want to find the crystally blue-ish thing, and then land northwest of it (see screenshot). Go down the white bridge and then into the cave.
Lunar Path
Take the east path for some easy monsters (use Titan) and an Elixir for a reward. Northeast for a Cure2, Heal, and the exit.
Travel east and eventually southeast all the way until you can see a cave. Just go southwest here to exit out and then northwest on the overworld to get to the Lunar Lair.

Lunar Lair
This is where the Lunarian’s are. Well, you can go west and east to get your HP / MP up and then go north to meet FuSoYa. Fu So Ya is a Lunarian and one of the coolest FF characters of all time IMO. He’ll join you and he puts Tellah to shame with his spells (although he suffers from the same problem, too low of a max MP). The first order of business should be to put FuSoYa in the back row.

Cave Bahamut
Just warning you, this place is extremely hard right now even with FuSoYa and there are minibosses (Behemoth’s) everywhere.
Go south for a Samurai Gauntlet and northeast for a Samurai Shield. Southeast to exit.
West when you get to a new area and northwest for a Samurai Armor. Go east now for a Samurai Helmet. Rest up and north for a Behemoth fight. The good news? You can leave after and this fight will be gone if you defeat it. However Behemoth’s are very tough especially now. They take 1 damage to most spells not named White or Nuke. They counterattack physical attacks with powerful attacks of their own, and have a Storm spell which is basically like Weak on everyone. Ugg. You’re going to expend lots of your magic healing, casting life and Nuke / White. You may wish to cast Exit after this battle (and the other behemoth battles) so that you can rest for free in the Big Whale before continuing on. Take the northeast to exit here.
Now in this new area, go south for another Behemoth. Use Meteo and all your other good spells, Exit out and rest, and go back in. Yet one more Behemoth before you reach Bahamut. You’ll definitely want to rest and be full strength before you get here.

Bahamut
is a lot easier than you’d think, especially with two characters that use Wall (hence the reason you’re doing this now, because you won’t get another shot with the same group). Start off by attacking it with Cecil and Edge, using Virus (because it’s fast) with Rydia, and then have the other two cast wall. They should be able to wall four characters and then when the timer runs out, Bahamut will MegaNuke one character and the other four wall’s will push it back to Bahamut, taking off 9999 on him. Now just unload on him, you should be able to kill him before he gets another off (if not just use Wall again) but with White and Nuke you should be able to do him in fast. You get the most powerful summon of all Bahamut.

Giant of Babil
When you hit the crystal and go back to the light world with FuSoYa, something bad happens. The Giant of Babil comes out of the Tower of Babil. It destroys everything. But all your old friends that you thought were dead come out to help fight it. Cid rushes your party into the giant so you can destroy the Core’s Control System.
This is one of my favorite places in any FF, especially to level up. The monsters around here are always a challenge and give tons of EXP, and it’s an ideal place to build up with some tough bosses ahead. Go north when you enter for the exit to the Neck and then Chest of the Giant of Babil. Get the Shuriken Cure2, Ether1, and Cabin along your way southeast and then back north. Before you head to the Stomach in the center, go to the northeast for some Samurai Arrows.
North right away for Life and then east for another life. Take the middle path north and then west into the Passage area. The treasure you’ll see going east is an Elixir but you have to fight a Last Arm for it. There is a save point ahead and here is where you build up levels, preferably to at least when Rydia learns all the level 3 elemental spells (Lit3 Ice3 Fire3). You’ll get plenty of Cabins dropped around here so use one and Save, and then go north to the Lungs.


You have to fight the Four Fiend’s of Elementals all at once. You get healed at the start but that’s it. They don’t go in the order you would think. First it is Milon Z, then Rubicant, then Kainazzo, then Valvalis. The reason you got those spells is to have two characters using Fire 3 on Milon, Ice 3 on Rubicant, and Lit 3 on Kainazzo and Valvalis. Expect to see lots of 9999 damage. Milon will curse you and generally isn’t much more than a nuisance, as you would expect from the weakest element. Rubicant is up next and although he now has Fire3 and uses Glare on everyone, it doesn’t do as well. Your HP is much higher and can Cure the mediocre damage he puts up. A couple of Ice 3’s should oust him. After this, just start throwing Lit 3’s out like crazy since the rest of the enemies are weak to it. Kainazzo is a pushover too despite his dangerous Big Wave and decent attacks. Valvalis though has a decent chance to kill you when she uses Storm on your entire party. Cure immediately of course, and Heal with Ray although you can probably ignore that.
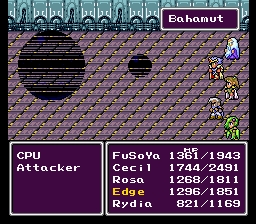
Go back and use a Cabin of course, then continue north. This battle is tricky too but in a more strategic way. There is the CPU, Attacker and Defender. As FuSoYa says you need to kill the Defender first. After this you’re just going to have to put up with the Attacker because if you kill both the Attack and Defender the CPU will just murder your party. The Attacker doesn’t do much but it allows the CPU to be in the back row the entire time making this battle last hours (okay not really but close). You’re going to need to just attack, and you can’t berserk your characters since they’ll hit the defender then. Fast can help though. If you really want, when you feel you’re getting close, use Bahamut or Levia, but it’s a risk incase the CPU doesn’t die.
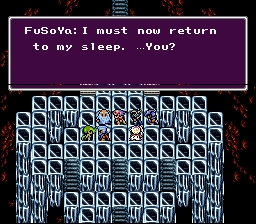
After the battle Golbez comes over because he’s upset the Giant stopped working. FuSoYa immediately recognizes him and eliminates Zemus’ control over Golbez. Golbez is the son of KluYa but Cecil is Klu Ya’s son also, so that means they are brothers. Golbez leaves to confront Zemus and FuSoYa just leaves without saying anything. However Kain comes by to get you out of the Giant of Babil.

Moon
After this, Cecil decides to go to the moon but without Rydia and Rosa. They aren’t pleased and eventually come on with anyway. Return back to earth though.
If you go to the Baron Castle and then the east-side basement, you’ll find the King of Baron. The King is Odin and challenges you to a battle. You only have a set time to defeat him (like 60 seconds or so) and you’ll know it’s getting close when he raises his sword. Lit3 is the best to use for 9999 and Virus is good since it’s fast, but other than that just attack him. You’ll likely be able to beat him and gain the Odin Summon to kill the enemies in one hit.


Lunar Subterranean
Back at the moon, land where you normally do and walk to the blue crystally Lunar area where you saw FuSoYa. In the back you can teleport to where Zemus is.
Take the left path when you get done teleporting. You will walk through the wall and into a new area. North for some monsters (Warlocks and Kary’s) and you’ll get a Life Rod for your victory. Take the southwest path to exit and then go north to see a sword. Rest up before going to it, it’s a special boss. There are several of these that are guarding the top weapons / armor in the game. This particular battle is against Pale Dim for the Murasame. The Pale Dim looks like the Dark Elf. It likes to counterattack with powerful physical attacks and use Slow on you as well. If you keep yourself cured, keep jumping and casting Virus, you should be able to put it down. Use Baham towards the end to finish it off and acquire the Murasame.
 Exit out and return to the Lunar Subterranean. Go to the northeast this time when you enter and you’ll come to a Monster Chest with two RedGiants that yield a Ninja Suit. It’s great for Edge, so use Baham to make quick work of the enemies, exit out, cure up, head back in.
Take the south path at the entrance and go through. Go southeast through the wall then north, going west when you can for a Flame Whip then north more until you can go west at the very north. West more for a Dragoon Shield and the exit.
Go to the very south where you can walk through the wall. Go east for a Dragoon Helmet, Dragoon Armor and Dragoon Gauntlet. Go back and take that exit before now.
In the new area, go east for some Artemis Arrows. Go south a little then west for an Elixir and east for some stairs going further south. Take the southeast exit.
Now go northeast for a Cure3. West for another Cure3 and the exit. The chest by you is a Stardust Rod guarded by an angry Behemoth. A tough fight and not really a worthy prize. Take the south exit.
As you go south in this area you’ll see a sword to your right. Can’t get it now so go south, get the west treasure. Unfortunately it’s a Red Dragon and a Blue Dragon. They are tough. Ice3 is useful on the Red Dragon and Bahamut works well on both. It’s going to be a hard battle so dedicate Rosa to healing. Your reward is a Crystal Shield. Take the exit now.
North and east for a Protect Ring. Southeast through the wall to continue and south. Another Behemoth here and a Crystal Armor for victory. Exit to the northeast now. East for two R. Dragon’s again and they yield a Crystal Gauntlet. West a bit for another exit now.
Get the White Shirt and go north. West for a battle with a D. Fossil and a Warlock that yields a Crystal Helmet – not a hard battle at all. East of this for a building with a Cabin then south to continue.
Right for a Ninja Shuriken and left for some Artemis Arrows. Take the left bridge for a Cabin and then west to the west on the thin cliff where it looks to be a dead end – you’ll walk through. Take this to the exit.
Grab the Life by you then go east for a grey teleport. You’ll be on that ominous thin west bridge going north, watch out because the battles are tough as hell around here. Go north for the exit and then north again this time getting the Protect Ring (Behemoth battle though) and then north more for the exit.
 Use a Cabin and save and then go south. Thankfully you saved because one of the hardest fights in the game is up ahead. The Wyvern is protecting the best weapon in the game, the Crystal Sword. It starts the battle with Mega Nuke but it’s not as powerful as Bahamut’s version. Hopefully you are leveled enough to survive it. If not, obviously you are to get your HP up for each character so that they survive this. Wyvern then works on using just Nuke (unless you use like Bahamut on it, then it’ll use Mega Nuke on you again). Pretty early in the battle the Wyvern will throw up a wall and cast Nuke on himself. He has a ton of HP and uses Remedy sometimes to recover. Because of this it may be worth risking using Baham on him when you think he’s about to die. Just stick with it and if you’re leveled enough you should be okay once he uses his Mega Nuke. About this Crystal Sword. It’s holy based and has +99 ATP than the next best sword (Defense Sword). Cecil will become a powerhouse.


Return to the save point and then the back to the invisible bridge. Go east and south to get the exit. You’ll be in a small room now, taking the left path for some monsters (Warlock and 3 Kary’s) for a Heroine Shirt. Go right now and take the first building entrance in the next area. You’ll see another Save Point.
East of this is a room with the White Lance. This is Kain’s best weapon but it’s guarded by Plague. This guy casts Count on you and then you have 10 seconds to kill him before you all pass away. He’ll also cast Fast on you to expediate the process. No wasted motion – just attack with Cecil and Edge (maybe use a dart), jump with Kain, Bahamut with Rydia and Arrows or White with Rosa (if you have it). If you can get some decent damage out of your weak spots (rosa / rydia) you should be able to get this done. It’s still difficult though.
Go back and rest and save. There is another boss two doors over. You have to fight two D. Lunars to get two Ribbons. A Ribbon is the best head armor for Rosa / Rydia. Anyway, Cecil should be taking off 9999 with the Crystal Sword and Kain should be doing good damage with his jumps too. These guys are really tough actually though because they cast Virus on you which takes off a ton. They also put walls on themselves so you can’t block it. Use Bahamut and attack one of the enemies with your melee fighters so you can single them out faster. Grab your Ribbons and save again.

Deep Lunar Subterranean
After you save again, go to the east, north, west, then south when you can and enter. You will be in the deepest part of the Lunarian Subterranean. You’ll fight some Masks and Behemoth’s around here. It’s best to just run (yes, you can run from these behemoth’s).
Start off going east, south a little, then west for a Ninja Shuriken. Go south now and east (rest up of course) and another boss battle. Ogopogo isn’t fun as he uses a double Big Wave. He then uses just one Wave or attacks you afterwards. The usual should work and Rydia really shouldn’t cast spells on Ogopogo unless you want a magical counterattack. Rydia may be better served to cast Asura and Rosa should heal too (or use White). A Masamune is the reward.
Take the stairs going down to continue. Go south and grab the nearby Elixir and then southwest for the Whistle. Southeast to continue.
Get the eastern Ninja Shuriken and then the other Ninja Shuriken to the west. Southeast to continue to the next area. Just follow the path around here and you’ll be at the last place eventually.


Zeromus / Zemus
As you enter you’ll see a thin bridge. Only go up here if you’re ready for the end of the game. It’s a good idea to be in the mid-50’s for levels and have Rydia with about 2000 HP so she can survive the powerful Big Bang attack coming up.
Golbez and FuSoYa will be fighting Zemus. They defeat him pretty easily but he turns into Zeromus and they cannot defeat him as Golbez is filled with too much evil to use the Crystal. He hands it over to Cecil as he and the party get cured by their friends that are no longer in battle (like Tellah, Edward, Golbez, etc).

When the battle starts, have Cecil use the Crystal to get Zeromus to change forms. Now the real battle begins. Kain should be Jumping the entire time, Cecil attacking, Edge darting the best swords / Ninja Shuriken, Rosa casting White / Cure4 / Life2, and Rydia using Baham. Zeromus will likely use Virus then Big Bang shortly after the battle starts, and Big Bang can take off 2000 or more on each member. It can be devastating so make sure to Cure4 or Asura to relieve yourself. White should be taking off the most so whenever Rosa gets a chance, use it. Rydia should be using Bahamut because it’s the most efficient in terms of speed / damage. Other attacks Zeromus uses includes Black Hole for negating positive status affects for your party, a weak version of Meteo, and a pretty weak attack in Nuke. Big Bang is really the only threat for taking off more than 1500 or even 1000. That said if you’re not leveled up enough, Rydia and Rosa may die from it which is basically death, and Zeromus uses the spell more than once in the battle.


great page, very nostalgic :)