Final Fantasy 5 World 1
First Meteor Strikes
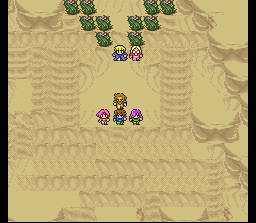
The opening lasts a few minutes and you’ll get to meet Butz and his chocobo Boco. Ride to the east when you can and you’ll get to a scene where you get off Boco and can continue along the path alone. Do so and you’ll come across some goblins carrying Lenna away. They are easy to kill, so do so and talk to Lenna and eventually Galuf in the northeast. They go off, so get the Phoenix Down in the southeast corner and then leave towards the west.
Pirates
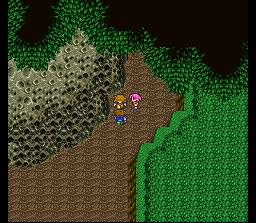
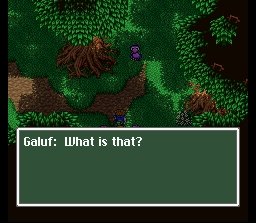
You’ll get to a narrow valley and as you head north a chasm will split behind you. Boco will hear your friends calling for help so rush northward and you’ll fight a few battles and then see Galuf and Lenna. After you save them and continue north, Butz will agree to join and come along with them to the Wind Shrine.
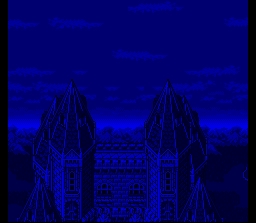
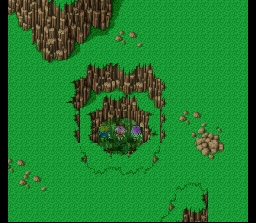
As you get to the cave you’ll have to abandon Boco. The enemies within the cave aren’t too tough but you don’t have jobs / classes yet (gasp!) so you do have to be a little careful. On the first floor is a recovery spring in the southwest that’ll recover your HP / MP and allow you to build up levels until your heart is content. You might want to wait on that until you can get give your characters Jobs. Head north into the second room to see a pirate hit a switch to get into the following room. First get the Leather Helmet that is just west of where you see the pirate, and then follow the pirate’s path. In this room, continue north and you’ll see a ship sailing without any wind (Wind Crystal was destroyed remember). Continue along and you’ll be at the Pirate’s Hideout.
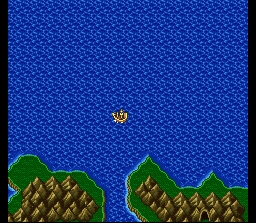
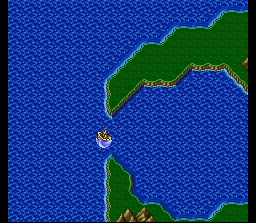
The pirate’s within the base will be sleeping. There isn’t much to do here, so continue to the east and you’ll be on the ship. Go to the very north and try to set sail – but you’ll be stopped by Faris. Your party will try to explain the situation but you’ll be tied up. Over night though, Faris has a change of heart and declares that it’s time to go to the Wind Crystal and you are set free. You can now navigate the ship (although the pirate will take you to the Wind Shrine if you want (but don’t do that)).
Tule
Go to the northwest and you’ll see a town (Tule). Search the entire town and you’ll come across plenty of items. A Tent and Potion are in the north, with a pair of Leather Shoes to the northeast corner and a Phoenix Down in the northwest. The southeast has 150 Gil and that’s it as far as exterior treasures. The southwest house is the Beginner’s House, one that you should visit if you’re a beginner. They also have 100 Gil, a Phoenix Down, Tent, Potion and an Ether (if you walk through the west wall) on the first floor. The second floor has some more people who will teach you some Final Fantasy things, and there is also a monster treasure chest (a weak Goblin).
You might want to rest before you leave. You can go to the pub and get danced on, and also you can use the piano. This is something you should do because if you use all the pianos you come across in all the towns throughout the game, you’ll get a special surprise for Bard’s. Anyway, the second floor of the pub has Faris who is sleeping. Butz and Galuf will go in and see her and be in love, revealing that Faris is a girl. Buy some weapons and armor if you want, the spells would be kind of pointless to buy right now.

Wind Shrine
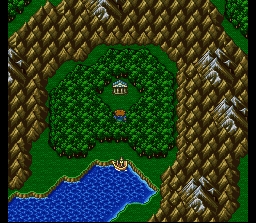
Anyway, leave with a few Broad Swords and sail northeast to find the Wind Shrine. Enter and talk to all your friend’s to the left. You’ll find your father went to the top of the shrine – before going after him, use the healing water and talk to the guy in the south for 5 Potions. Head up to the next floor now.
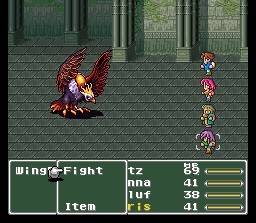
Go west for a Tent and then south through the middle part of the floor for a save point. Save and take the east path for a Leather Helmet and then take the west path. As you circle around the room you’ll see a griffin of some sorts. First enter the two rooms, although the nearest one has nothing the far room has a Broad Sword. Go up to this bird to fight it now. Turns out it’s a Wingraptor. It’s not too difficult of a fight if you’re semi-built up and bought some armor and weapons. Broad Swords help, as do Potions when necessary. When it cowers that means it’s going to use it’s wing attack but that only takes off 18 or so. You get a Phoenix Down for your troubles.
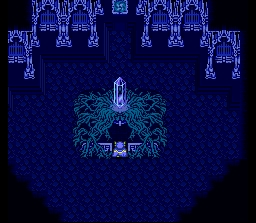
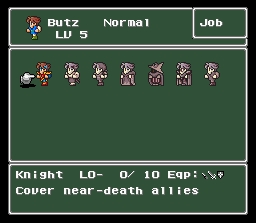
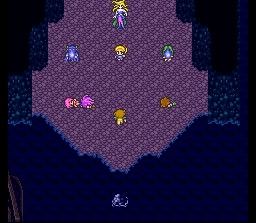
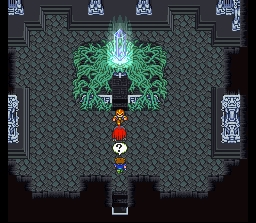
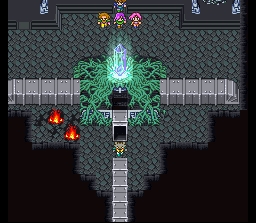
Grab the Staff in the southeast corner of the next floor and enter the stairs. You’ll be at the top with a bunch of crystal shards. Each character will be designated to one of the four crystals in this world, then Lenna’s dad appears telling you all of your fate. You’ll get the crystals and you’ll have six job classes to choose from.
It’s probably worth going over this whole class system thing since it’s pretty much the most important part of the game and if you don’t build your characters up properly you’ll have a hard time at the end of the game. That said as long as you build your characters up it shouldn’t matter which classes you should, so do choose whichever ones you wish. It does add to the replay value – there are endless combinations with all the classes you can switch around to.
Initially you get the Knight, Black Belt (Monk), Thief, White Mage, Black Mage, and the Blue Mage. The Blue Mage learns monster ability’s and can use heavier weapons than most mages and is usually a good choice to acquire all the enemy skills (some are very very useful). Galuf is usually my Blue Mage for a good part of the game. Also I use a Thief often, as they can move around faster, can run from battles easier, can see through holes in the wall making treasures easier to find, and so on. Monk’s and Knight’s are very powerful with Monk being one of the top jobs in the game with the counterattack, high critical attack rate and high HP. White Mage and Black Mage are pretty standard and speak for themselves.
Return to Tule, Pirate Hideout and the Wind Shrine
When starting off, it’s important to rotate once in a while. For example, if you have all the level 2 white magic spells and you have the white magic level 2 ability, you might as well switch classes and have the new class equip that ability and use white magic. I’ll try to mention beforehand when it might be a good idea to switch classes based on a particular enemy or situation. Starting off I generally make a Blue Mage (Galuf), Knight / Monk (Butz), Thief (Faris) and White Mage (Lenna). Again, do what you want though and head back to Tule to re-tool. Buy all the spells that you need and talk to the guy in the northern house that Lenna knows. He’ll give Butz the Canal Key to use, but don’t do that quite yet.
When you leave the town Faris will join you for good. Time to go to the Pirate’s Hideout. Now that you have a Blue Mage, fight the Steel Bat’s in the cave and have them use Vampire on you. You’ll then learn Vampire from them and now you know how to acquire Blue Magic spells. Continue on to the Pirate’s Hideout and hit the button on the left when you get in. This will open up a room in the northwest that has three treasures – 300 gil, tent and an ether. A pirate outside will give you 8 potions and you’ll also see Boco around here. Not much else to do so make one last stop at the Wind Shrine.
You can still rest up here for free so do so, then go up a few floors and fight around until you see a Goblin (Goblin Punch) and a Mold Wind (Aero). Both are Blue Magic spells with Aero being especially useful. You should be about ready to head to the ship graveyard now.
Ship Graveyard
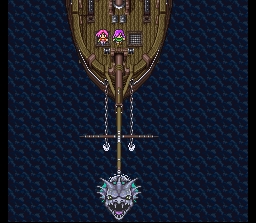
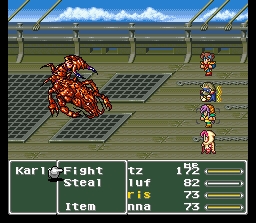
Go up to the door and Butz will use the key he secretly got in Tule. Sail along and you’ll fight some battles and eventually get sucked up into a whirlpool. A boss fight with Karlabos ensues and you can just attack and use some basic moves, it’s not very difficult. You will get a Tent and 5 ABP for your efforts though.
Syldra will go down as the ship drifts away towards the Ship Graveyard. When you recover consciousness, go downstairs where you can rest (Galuf gets the lone bed). Back up, go east a little then south where you see the rock – more rocks appear and you’ll see a Flail at the end. This is useful for a White Mage (to put him / her in the back row and do the same damage).
East a little from here is another ship part with a door that you should enter. Take the left path and enter for a Tent and then go further south. Faris will complain about the water but go through. Some emulators / roms get messed up around here – if this happens then you should mess with the layers (using 1-9 and such). Onto the game again – continue along and search the crates you come across – you’ll find 990 gil on the first water floor you see. Take the north exit for a Phoenix Down and then the south exit just beneath it. Down here is a potion and then an exit back up.
It’ll be time to rest and change your clothes. There will be an incident with Faris where she reveals that she is a girl. Now you can continue on and save in the next room. You’ll be on the outside again where you’ll want to work your way south and get inside to get the World Map. The lower floor has two Antidotes and a Phoenix Down. It’s time to leave and head east – get the treasure chest, which causes a ship to surface, and then pause for a moment.
A boss is coming up, so if you have a White Mage, change it to a Black Mage (assuming you don’t have a Black Mage). Your party will all be confused by Siren, all except for Galuf since his memory is currently gone. You’ll need the Fire spell in this battle as Siren is especially susceptible in her undead form. In her initial form, fire will do no good but she’ll just do weak attacks. Once she becomes undead, she has a deadly physical attack that will often one-hit your characters, as well as bearhug which causes poison and takes off a lot too. You’ll probably lose a character but keeping plugging away with fire. 5 ABP and a Bronze Shield are your rewards, and you can then leave.
Carwen
Not much to do currently other than head south towards Carwen. When you enter, go north and east a little for a bunch of things you should search – an Antidote is inside. Work your way to the southeast and you’ll find a hidden area where you can go further south to get an Ice Rod. The Ice Rod is a good attacking weapon for the Black Mage, but if you use it in battle it’ll cast Ice 2 and then proceed to break (so you might not want to ‘use’ it as it has long-term value for now). Inside the pub is 1000 Gil (you may need a Thief to see the hidden passage to the left). Play the piano of course. You’ll probably want to upgrade your weapons / armor / spells and should have the gil to do so.
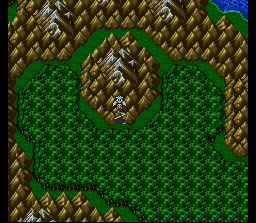
North Mountain
North Mountain is north of Carwen. Hopefully you have an Ether with you (you can acquire a blue magic spell). You’ll come across the enemy Blocks, and you’ll want to use an Ether on them and hope they use Flash on your Blue Mage. This is actually a very useful spell for blinding enemies that have strong physical attacks.
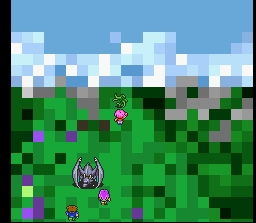
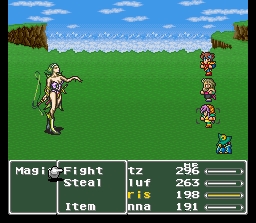
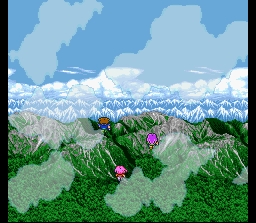
The first floor is simple, going south for a Phoenix Down and then west for a Soft before exiting north to the exterior. Continue along, avoiding the purple poisonous plants that you see. You’ll come to a point where Lenna gets separated from the group and is poisoned. Faris helps everyone across and a boss battle with Magisa and Forza. It starts off with Magisa who isn’t much, but she calls Forza to protect her. Immediately shift your attention to Forza and with a Monk / Knight laden party, you can dominate this battle. A Whip and a Power Drink are your rewards. It shouldn’t be too hard, so continue all the way up and you’ll now have a Hiryuu!!
Tycoon
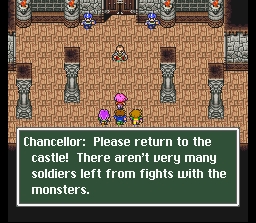
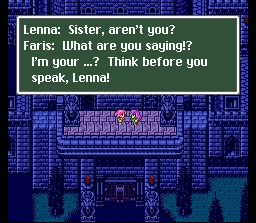
Now that you have the Hiryuu you have a little more freedom. You can go to Worus but first go to Tycoon to get some treasures. Head north when you get in and talk to the chancellor who will try to convince Lenna to stay. Instead you will sleep there, and search everything on the way out. You’ll see a Hi Potion on your exit from your room. Soon you’ll be at the main room, and you should head east and into another corridor. You’ll find some more treasures like a Cabin, Tent, Phoenix Down and an Ether. You’ll also learn of Sarisa, Lenna’s sister (who as you probably figured out, is actually Faris). North a bit and east is another tower, with an Ether, Maiden’s Kiss, Elixir, and a Phoenix Down on the first floor. Leave and go outside of this main castle and then west when you are outside.
You’ll reach a room with a switch you should hit, and then the Chancellor protecting a Cane. You’ll get a Katana, Shuriken, and a Giyaman’s Bell (the cane). Before you go, don’t miss the two cabins in a room far to the east (go east above a tree).
Worus / Walse
Go to the town first. Take a left and the stairs down into the water, and get left some more into a house with a green haired guy. The pot in the fair right of his room has a pair of Glasses for you. Now you can buy the spells at the nearby shop if you wish but you don’t have those classes yet (although you will so you may wish to do so if you can afford it). The Iron Armor and the rest of the stuff at the Armor Shop can be useful as well.
Time to head to the castle (rest up at the town first though). As soon as you enter the castle area, go to the basement area. You’ll see various passages but the one in the northeast (through several doors) leads to an area with some valuable items but a tough monster as a random battle. Definitely save before going here, and make sure you have a Thief with the Escape ability equipped so you can run easily, and a lot of Phoenix Downs because when you do encounter him he’ll probably kill a guy or two before you can get the Escape off. Take the right path first for two separate pots of 1000 Gil and a Drag. There is a treasure to the left path now, which is an Elf Cape. This is a valuable accessory which increases magic, magic defense and agility. Time to get out of here, hopefully you don’t get killed by Garkimasra. It’s probably worth it for the treasures though, and if you’ve got some balls you can try to Steal a Protect Drink from him. Just don’t try to kill him, it won’t happen.
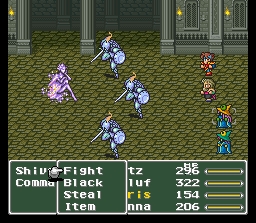
There’s another difficult sidequest if you go back to the main area and take one of the right passages – leading up towards a waterfall that you can walk into (see picture). Hopefully you’re rested up because there are some tough monsters around here (you can actually beat these ones though). You can steal Mythril Sword’s (good for a Knight (Butz)) from the Ice Soldiers and you can get the Frog Song from the Elf Toad (although it can be a pain to get). The glowing thing at the end of the waterfall is a boss battle against the Ice Queen, Shiva. She is very difficult at this stage (might be wise to try when you have Fire 2) but beatable. You get an Ice Rod and the Shiva summon for your efforts. As for beating her, I had two Black Mages (with one who could cast White Magic) along with a Monk and a Knight. Split your party up by having the Black Mages in the back and the fighters in front (Shiva can only use Ice 2 on one pair). She comes with three Commanders and it’s difficult enough just to get her by herself. Use Fire spells obviously (this is why Fire 2 is nice) and you’ll probably exhaust your Potion / Elixir supply in the process of the fight, if you choose to do it this early.
Back on the second floor of the castle now, go through the brown door to the northeast and follow the staircase to a small room with plenty of things to search – you can get a Tent, Phoenix Down and 490 gil. Head back up and talk to the king in the north room. A meteor will strike near the Water Tower just as you were speaking with him about discontinuing use of the crystal. The king heads there and you should too.
Water Crystal Tower
Take the Hiryuu there and hopefully you replenished your items. The Worus soldiers and king will be down and out. When you reach the fifth floor you’ll see a Maiden’s Kiss and an inaccessible treasure. Continue up and you’ll see three vines – climb the left for a Silver Ring and the right one for an Ether and the exit. A boss is ahead. You will want some Knights in to absorb damage. More importantly, if you got Flash from North Mountain (the Blue Magic spell), you will want a Blue Mage to cast that.
Galura will be up ahead and he’ll take out the Warrior blocking his path to the crystal. Now you jump in. If you have a black mage, use ice on him. You want at least one knight and maybe two to absorb damage. Most importantly, use the Blue Magic spell “Flash” to blind him and he’ll miss 80% of his attacks. Otherwise just attack and keep healing – he’s a brute physically so it can be tough. You can steal a potion from him (and you get a Hi Potion for winning).
After the battle the crystals shatter and you get five new jobs (you’ll get that last crystal much later). The tower begins to collapse after you get them all so leave and Syldra will end up saving you all (but “dying” in the process).
About these new jobs. You get a Time Mage, Red Mage, Summoner, Berserker and a Mystic Knight. I’m especially partial to the Time Mage as Haste and Haste 2 are essentials among other Time mage spells, although at first you should probably switch your Black Mage / White Mage to a Summoner if you got Shiva. You’ll be able to use Shiva and the Summoner gains a very good ability later on that’s worth building up towards right away.
The Mystic Knight is a decent option if you want one of your fighter’s to have some magical ability, although it doesn’t really pay off until way later in the game when you really need it. The Berserker is a worthless job so delve into it for experimentation only. The Red Mage can use white magic and black magic and gets X-Magic later on, a quality ability. Try out some of the new classes and buy the spells in Worus if you skipped them earlier. For the record, I’m keeping Butz as a Knight and Faris as a Thief, but changed Galuf from a Monk to a Summoner and Lenna from a Black Mage to a Time Mage.
Back in Worus you’ll hear that you should probably go towards the Fire Crystal in Karnak. How to get there though? Go back to the meteor near where Worus Tower used to be and you’ll find an opening within it now. That will teleport you just northeast of Karnak.

Karnak
On the way you can learn the Blue Mage spell ???? from the Wild Nack’s (it takes off 0 and makes a loud noise. The groups of Wild Nacks in the forest also yield a ton of gold so it’s a good spot to go to acquire all the upcoming weapons/armor. Go into Karnak town and rest at the Inn, then buy something at the store (for a discount). You’ll be arrested and thrown in jail, but Cid will blow up the wall and talk to you, and then the minister will let you all out once it is revealed that the Fire Crystal too is about to shatter.
Now you have time to explore except little areas of fire will block you from getting treasures throughout the castle. Go back into town instead and get all the new spells (there are lots of them) and any new armor and weapons you might need for your new classes. With the Charm spell, you can get a new Blue Magic spell back at the Ship Graveyard (yes, you can still go there). You need to Charm the Carcurser and it will use Fusion on you. Oh, play the piano here too.
Steamship
When you’re ready you can go to the Steamship where the Fire Crystal is. Go through the ship and you’ll eventually get to a grey, mechanical-looking area. North into a room right away is a Mithril Glove. The southwest staircase leads to an Elixir, to the northwest there is a Cabin and another Elixir to the east. To move on, go north through the elevator and then east for a Phoenix Down when you see one.
You may come across a Motor Trap. If you use Bolt on it, it’ll respond with Exploder, a Blue Mage spell that can be acquired if it hits your Blue Mage. Also if you missed Flash you can get it from Crew Dust (when they’re alone).
Back where the Phoenix Down was off the elevator, continue west and you’ll be at another elevator. You can’t get the treasure south of you, so continue along and you’ll come to a room with seven exits. Take the second to the right (southern ones) and you’ll get that Thief Glove you couldn’t get earlier. This is very very good for the Thief as it is an accessory they can equip to increase the likelihood that the Steal attempt is successful. Return and go to the far right path this time and you’ll make your way through to get the GrnBeret. Take the second from the left exit at the seven-path room and you’ll come to another east/west fork. Take the east path and search the panel and it opens, leading to the Full Moon (good back-row weapon for a Thief). Go back and take the left path here and then left again – you’ll be at a save point.
You’ll now be in a tricky room with a bunch of switches. You’re going to have to go through this a few times to get a hang of it, but just keep hitting the switches to work your way to the northeast corner, where you can get an Elixir and the exit. Keep in mind that you need to be standing on some of the blocks as you hit the switch (so you move with the blocks).
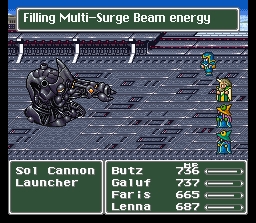
Just a little north of here is Queen Karnak and she summons the boss, LiquiFlame. He can cast Flame (about 90 damage to everyone) and Fire 2 (up to 400 damage) on one character. A difficult fight but you can get the advantage by using Ice 2 (or by using Ice Rods).
Fleeing Karnak Castle
Go up to the crystal, and you’ll see a wolf that recognizes Galuf. Regardless of whether you saved this wolf in the jail or not, he’ll aid you in saving the crystal but your party will fall through the floor. You’ll return automatically to see the wolf is down and you now have 10 minutes to leave! You can get all the treasures in the castle and still make it, but you have to be smart about it as time runs throughout battles. I would highly advise you to save as there are some things here you definitely do not want to miss.
When you get to the big room, go north and east a little into a cell for 2000 gil, and in the northeast of this room is a monster-in-a-box for an Elixir (Sorcerer and some dogs). Northeast some more and you’ll be in the next room. East leads to a battle with a Gigas for a Giant Potion and a Shuriken while the left treasure has a battle and the Ribbon. You will fight several Gigas enemies; have a Blue Mage around to learn Aero and preferably Aero 2 (though that’s a little harder because he only targets one of your allies). Continue along and you’ll be at the main floor with plenty of places to go.
Take the path just east of you through a door and you’ll be right by two chests, one with 2000 gold and one which is a monster in a box that gives you an Elixir. In the southwest part of the room is another monster, a Gigas, which results in another Giant Potion and Elixir. Take the south exit and enter the door next to you and you’ll be on the other side with 2 other Gigas’ that have another Giant Potion and Elixir each. North is a battle for an Elixir and 2000 gil again.
Take that north exit and you’ll get to a long path with a treasure that has a Gigas (Giant Potion and Guardian are your rewards). The other side has a Giant Potion and an Elf Cape. It’s about time to leave now. Back in that main room there are two treasures in the southwest and southeast part of the room – the southeast being a Thunder Scroll and the west being Heal, a white mage spell. Make sure you have a Blue Mage ready when you leave the castle, if not 2 or 3 of them, so that you can ensure that you get the Death Claw (great blue magic spell).
You’ll fight a soldier and some Karnak dogs. Then, he’ll turn into Iron Claw. He’s easy so make sure you don’t kill him and make sure he uses Death Claw on your Blue Mage. Kill him and move on, hopefully you had adequate time (you should have assuming you didn’t waste much in the menus and so on). If you are having trouble getting through this, skip a few of the Monster-in-the-boxes in the previous room that yield a ton of Elixirs (skip one or two of them and you have plenty of time to screw around with Iron Claw and make sure you get Death Claw).
After you leave the castle is destroyed and you get three new job classes! A Ninja, Geomancer and Mediator (monster trainer) are now available, with Ninja being especially useful.
Talk to Cid at the Steamship and then again at the Karnak Bar second floor. Now it’s time to venture to the Ancient Library.
Ancient Library
When Karnak Castle blew up, the gate west of the castle was destroyed as well. So now you can go to the Ancient Library to the southwest. The desert along the way has a D Chimaera which will cast AquaRake, a powerful water spell that hits the entire party. The Chimaera will also one-shot you with physical attacks (400+ damage). You may be too weak to handle him but if you can survive the attack with a Blue Mage along, you’ll get AquaRake. Casting slow on him would be a big help.
Further along is the Ancient Library so step inside.
You can heal on the second floor with the grey pot, and fight a book on the roof. Other than that, talk to the scholars to learn some key things. Go to the first floor and enter the door. You’ll be in a darker room now where you should navigate your way to the northeast part of the room. You have to step on certain portions of the room to activate a switch, so if you’re stuck just keep moving around.
You can acquire the Blue Magic spell Moon Flute from the Page 256. Page 64 can do L5 Death but you have to have your Blue Magician on a level that is a multiple of 5.
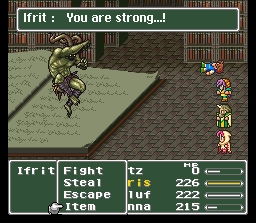
An even darker room is next as you can only see a close proximity near Butz. To the east is an Ether and then you can go south further for the exit. Take the west-most exit north (go up the ladder and search) and you’ll come to a book (Ifrit). It’s obvious, but Ifrit is weak against Ice. You’ll want to pull out Shiva, Ice 2, or AquaRake for heavy damage. If you’re prepared with these weapons you should be set. A Fire Scroll and the “Esper” Ifrit are your rewards.
Now go back and take the door exit. If you came here before, the bookcase won’t let you advance – defeating Ifrit will allow you though. You’ll come to another dark room. Ignore the right path and go to the southwest for a Phoenix Down. Further along is another path with a door leading to nothing and a set of stairs with a book – leading to a battle against a Page 64 and others.
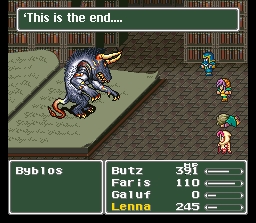
After the battle you can walk through to a Save Point and eventually to Byblos! He’s a bit tougher than Ifrit although there are some tricks to him. First of all, if you want no trouble at all, make a Blue Mage and use Dethclaw to cripple him and he’ll take one more hit and be dead. If you don’t have that, any fire spell or Ifrit will do. Careful though, he’s a tougher fight than Ifrit was. Note that he can also use Magic Hammer, another Blue Magic spell you can acquire.
Talk to Mid after the battle and he’ll take you back to the main part of the Ancient Library (with the other scholars). You’ll learn more about the situation and Mid will run off to see Cid so go to the second floor Karnak bar and you’ll be there right when Mid runs in to Cid. They’ll get the steamship working for you and will go off to the Ancient Library. Now you have some freedom to explore the rest of the world, so start off with the Ancient Library.
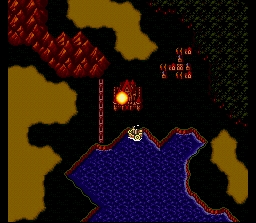
Mid will mention a weird crescent-shaped island and you should sail towards this in the very southeast portion of the map.
Crescent
There are BlackFlames in this area (in the forest at least) that use DrkShock (halves your level), which you can learn for your Blue Mage. Go to the town and there will be an earthquake (that happens to sink your ship). You have nowhere to go, so explore town and buy some new armor if you’d like (the weapons are for classes you don’t have quite yet). The southeast house has a Bard that teaches you the Life Song while there is a piano in his house that is worth playing also.
Leave and go to the forest in the southwest part of the island and Butz will have to catch the Black Chocobo. He’ll do so, and will attempt to fly with it, but it can’t fly because it has two crystals stuck in it’s wings! You acquire the Bard and Hunter classes, with both being relatively useful and one being very important for some of the special bosses later in the game. Now you have a Black Chocobo to fly around on, so go to the Ancient Library and tell Cid and Mid the story. They’ll also mention that King Tycoon was seen heading to the Quicksand Desert west of the Ancient Library. Well, we’ll worry about that in a bit, but for now let’s explore with the chocobo.

Lix
This is Butz’s hometown, northwest of the Wind Shrine. You can rest for free here and you’ll see a scene with Butz at his parent’s grave with Faris. The Heal spell is here if you missed it on the way out of Karnak Castle. Also note the rare scrolls you can purchase at the weapon shop, and this is useful since I tend to have Butz a Ninja right away (and usually someone else too later on). Scrolls can be a very efficient way to wipe out enemies fast.
You’ll get another scene in the northwest house. It used to be Butz’s house but now it belongs to a bard. Check the pink music box in the northeast and you’ll have a flashback – talk to the bard afterwards and you’ll get the Charm Song for your bard. Not much else to do, so head to the southwest-most town on the map, Jacole.
Jacole
You’ll have to land your Black Chocobo a good distance east of Jacole as it can only land in forested areas. Jacole has some nice weapons and decent armor, along with spells you’ve probably already bought.
Villagers will talk about the Jacole Cave to the northeast (you walked past it). When you’re ready go and enter. There are Nut Eaters and Skull Eaters here. Needless to say it’s the Skull Eaters that are very difficult and will most likely kill you (although they sometimes also run away, yielding 5 ABP). This cave can be tricky – hit the southmost switch first, and then work your way down. You’ll see plenty of switches and then it’ll only show one – choose this one fast and go back north to see things have changed. Go to the very north empty treasure chest and search it, pushing the button inside to open the door.
You’ll be in a new room, one that you should go north in and then west at the split. This will take you to a Shuriken and a Tent, and then work your way back east and north to get that other treasure you saw. If you let the Lone Wolf out of jail, you won’t get this item, but otherwise it’s a Thunder Whip. Leave via the north and you’ll be outside the cave on the other side (with no where to go). Circle back around (yeah that was kind of a pointless trip but that cave is kind of pointless).
Istory
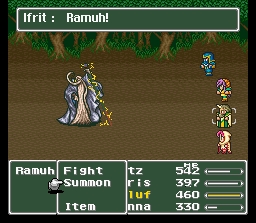
Istory can be found to the northwest part of the map. Walk around this area and you’ll find Ramuh, a Lightning-based summon. If you can defeat him you’ll acquire the Summon Ramuh. He can be difficult with Bolt 2 and to a lesser extent his Electric Shock spell, but with a White Mage present you should be able to heal yourself and continue the attack. He’s not really weak against anything but ice / fire should be effective, as well as Aero 2. Like most bosses, use Slow to keep yourself ahead of him. You can steal a Hi-Potion from him.
Inside the town, you can buy Coral / Flame / Angel Rings, although they are very expensive and are more useful later (when you have more money, anyway). Talk to everyone and you’ll get some important hints. To the northwest is a flower bed and if you walk all around the bed a frog will eventually appear and leave the Black Magic spell Toad behind. More north are a bunch of sheep and if you stand by the sheep that’s facing it’s back towards the fence (by the bard) it’ll kick you on the other side so that you can talk to the bard and learn the Love Song. Further east is a guy who tells you to walk through the waterfall but we’ll worry about this later.
Ruined City
Okay it’s about time to go to the quicksand west of the Ancient Library like Cid and Mid suggested. As you get there you’ll be stuck, but Cid and Mid will get an idea. You’ll end up fighting a Sandworm but it isn’t too difficult – just make sure you hit the hole that it’s sticking out of. After the battle, work your way to the bottom, sliding down in various areas to get there. Eventually you’ll get out and you can travel south to the Ruined City.
So here you just search around and you’ll see King Tycoon various times. Eventually you’ll have him caught at the top house but as you get up there you fall through. Now you are on some sort of mechanical device, and when you come to you have no option but to go north. After some light flashing, it seems you are teleported to the southeast part of the map. Meanwhile, Cid and Mid return the Black Chocobo to the forest near Crescent.
Go to the southmost part of this new place and you’ll be able to rest. Go left of these beds and you’ll come to some treasures and a switch. The switch doesn’t open but it tells you to search the flowers in the center room. Do so (by the beds) and then it’ll have you go to another place. Basically keep following the notes and a frog will tell you to go 6 steps down, 4 east and then you are to pull. When you do this the door finally opens and you get 2 Shurikens and Size (L2 White Magic).
Okay so go north all the way and try to leave – you’ll run into Cid and Mid who fell down a hole themselves! Cid will run downstairs so follow them and the airship will be in the air! A boss, ClayClaw, comes to stop you from taking the airship. He’s not too difficult and a Bolt Scroll / Bolt Magic will put him down fast. You may want to steal the Coral Sword, probably the best sword you’ll have for a while (you get an Ice Bow also).
Now you have an airship, so ride over to the Ruined City where the King of Tycoon was. You’ll see that little area rise up into the sky and you can’t find it, so head back to Cid and Mid in the underground Catapult. They’ll suggest you find some Adamantine so you can fly higher in the sky, and Galuf knows where to get some!
Head to the Tycoon Meteor, preferably with a Blue Mage (and L5 Death). If not, Ice spells should suffice, although this will be a tough battle if you try to battle it out without L5 Death. Adamantoise is slow in acting, but extremely strong and attacks twice (for about 300 damage each time so 600 total). That’s a lot of damage to have to continually heal, so Haste your healers. You can steal a Protect Drink from Adamantoise also. With the Adamantite, you can return and they’ll put that on immediately and you can go up.
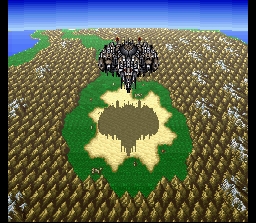
Ronka Ruins
Okay so when you’re ready use that function and you’ll be able to control your airship at the highest level. You’ll see a big machine in front of you – you’re going to want to go for the sides first. There will be four battles and the enemy will use Emission and Missile, two more Blue Magic spells. Bolt is your best friend, so Throw some Bolt Scrolls, use Bolt magic, etc. When he goes down you’ll get two Hi Potions and 1 DarkMatter. A hole will open up and you can enter and walk around (rest first).
There are a lot of secret passages so it’s wise to either have a Thief or have someone with the Passages ability. Starting off just continue along, and on the second floor you’ll get a Gold Armor. On the third floor you’ll go west a little and see an Elixir that you can reach via secret passages. Continue north and skip the first staircase but take the second for a Save Point. Return out and go further right, for a Phoenix Down and another exit. This goes for a while and takes you to a Gold Shield. Back near the save point, go west and little and take the staircase you skipped earlier.
This takes you to floor 5 and then you start working your way down. On floor 4 you’ll get a Hi Potion and stick to the top path and enter that staircase and you’ll see 5 treasures eventually. Don’t walk straight up but move one square left and then walk up to them, otherwise you’ll fall in a pit. From left to right, 5000 Gil, Shuriken, Ancient Sword, Full Moon and the Power Ring. Return back to the Hi Potion floor and go south instead. From here, you’ll be going through a lot of floors and when you get a choice, go south for a Save Point. Now continue along the west end to another floor. When you get another choice, take the east fork for a Cabin and an Ether. Finally, return and take the south path and hit the switch.
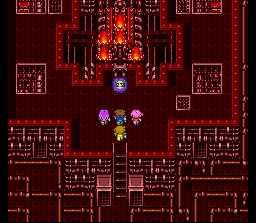
You’ll come to King Tycoon and the ArcheoAevis. Archeoaevis is a very tough opponent at this current stage and can absorb a lot of damage. His weaknesses change so try to mix up your elements (Water, Ice, Bolt, Fire) and physical attack specialists like the Ninja / Monk / Knight are useful also. The best strategy for me is to spam Fire Scrolls with a few Ninja’s since they don’t cause the Archeoaevis to change it’s elemental affinity. When it dies and revives, use L5 Doom for a quick kill. Even if you fight it, the new Archeoaevis has a weak defense and not much HP. A Hero Drink is your reward.
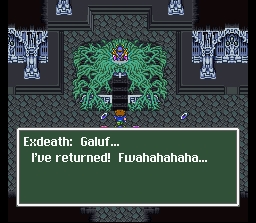
Watch the scenes ahead as Krile comes to save the party from a possessed King Tycoon. Galuf then gets his memory back but the crystal shatters and Exdeath comes back! He then leaves and you get the crystals (Samurai, Dragoon, Dancer, Chemist). Samurai is especially powerful and a personal favorite. After this, Galuf will leave to his world even though Butz insists on coming with.

Tycoon Meteorite
Okay so return to your headquarters near Crescent and you’ll find a note in the room east of the beds. Cid and Mid are at the meteor in Tycoon so go see them. The black chocobo is here to confirm they are inside.
Karnak Meteorite
You’ve got a feasible idea to get to Galuf’s world now so go to the Karnak Meteor, where you’ll fight Titan. Not too much HP actually, despite having a tough defense to most of your attacks. Maybe 2000-25000 HP. He is tough with his physical attacks 200-400, and his Earth Shaker does roughly 500 to each person, so stay rested (he does this before he dies). Not sure if he’s weak against anything. 5 ABP and more importantly, the valuable Titan Summon.
Walse Meteorite
The Walse Meteorite has six Purobolos, and they aren’t that tricky other than the fact that they use Life 2 when they die (so kill them simultaneously). Again, using scrolls with a Ninja might be your best bet (or summons). Even if the Purobolos are able to cast Arise, eventually they will run out of MP. 5 ABP.
Gohn Meteorite
Now the last meteor is where the Ruined City used to be. This Gohn Meteorite looks a little different from the others.Cid and Mid go in, but don’t come out. Go after them.
Inside you will find a Chim. Brain. Or a Manticore in FFV Advance. Frost will take off 250 on everyone and will sap your HP. The solution to this battle is simple – DeathClaw (Blue Magic). It is not 100% success rate, but keep trying and eventually it will work. Then just attack him and he’ll die. If he stays around long enough you can steal a Dragon Fang from him and 6 ABP. With all the meteoritess being visited, it is now time to go to the center of all four.
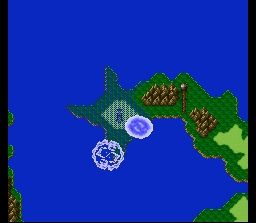
You’ll see it on the map and when you get there – a blue, whirlwind-like spot. After you go in there, you’ll be on a deserted island in Galuf’s World.
THANK YOU SO MUCH!!!
<3 your guide :) thanks a lot
best guide out there. written with important bits, and PICTURES!
saved my ass trying to figure out what to do next when i skipped over that ONE dialogue box.
Thank you for the guide. I changed the window color to pink for some reason.