Final Fantasy 5 V : Galuf’s World, Exdeath’s Castle Walkthrough
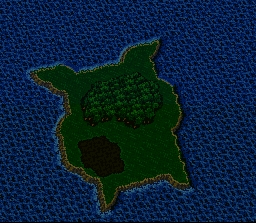
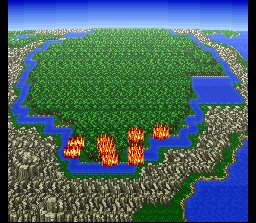
Deserted Island
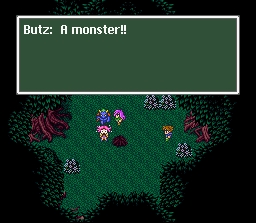
Your party of three will start alone on an island. You can fight a few battles and Lenna will eventually suggest to rest with a Tent. When you do, you get in a battle alone with Butz vs. an Abductor. Not a difficult fight although he can use Hurricane (taking your life to 10 hp or so). Sometimes the Abductor doesn’t connect with Hurricane anyway. He doesn’t have many hit points so he should be an easy kill. He leaves a treasure chest behind and when you search it, poisonous gas is released and you wake up in prison.


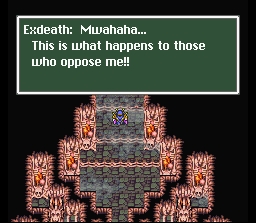
Escaping Exdeath’s Castle
The scene will switch to Galuf and Krile‘s (Cara in FF5 SNES) view as Galuf will back his army up but go into the castle alone. He lands the Hiryuu and gets the crystals / equipment from a treasure chest, and then you get control of him. Go to the downstairs and you’ll have to fight Gilgamesh alone. He basically uses some decent physical attacks, but you should be okay – Galuf as a Summoner using Titan or as a Monk attacking usually work well. Now you’ll have all four characters again.
Note that before you leave the castle you can go north to a recovery spring for free hp / mp recovery.
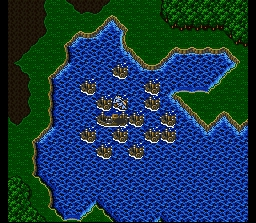
Big Bridge – Gilgamesh
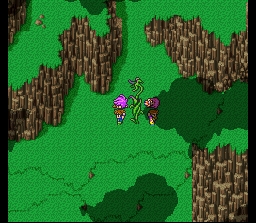
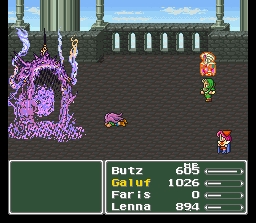
South leaves the castle and when you get to the bridge you’ll have to run all the way across and fight monsters along the way. If you walk on the right or left part of the path (instead of the center) you’ll be able to skip the battles. In the middle part you’ll fight Gilgamesh again, and you can steal a Hero Cocktail from him. Later on you’ll be able to steal really good armor from him. Further north and you’ll be at the end, although Exdeath’s Castle puts up a barrier and your party is thrown off into the distance. Galuf says this is Gloceana.
Regole
You’ll have to walk a great deal east and a little south before you see Regole. There is plenty to do when you get there though. Get all the new magic; Blink, Comet, Return, Slowga, Shell, Drain, Break, Bio, and Esuna if you missed it earlier. That will probably run your savings into the ground alone, but there are nice weapons and armor also.
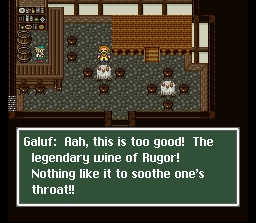
Visit the Inn and you can rest for free. Butz can’t sleep so he visits Galuf in the bar and Galuf thanks him for coming. In the Pub, you should have a Thief around so you can see through the wall to the left and walk through (and play the piano).
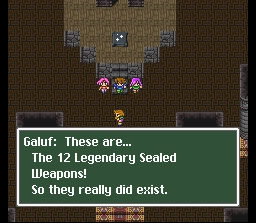
Sealed Castle of Kuzar
Just south of this village is the Sealed Castle of Kuzar. You can’t do anything here yet but you can go see the 12 legendary weapons! Starting from the top and going clockwise – Excalibur, Assassin’s Dagger, Sasuke’s Katana, Holy Lance, Rune Axe, Masamune, Yoichi’s Bow, Fire Lash, Sage’s Staff, Magus Rod, Apollo’s Harp, and the Gaia Bell. You’ll get them much later in the game, and note that you should have a Thief with the Escape ability as the two monsters you encounter in this castle are very very tough for this juncture in the game.More on Shield Dragon and Exdeath later.
Moogle Forest / Cave
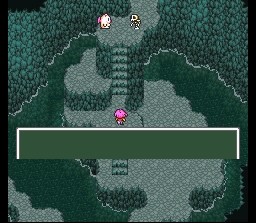
Further south and east is a valley and a forest. As you walk into the moogle forest you’ll see a moogle run into a hole, so follow it. Keep sliding down the water and you’ll eventually see a 4400 Gil treasure chest. Further down is a Phoenix Down, and at this point you should head east and you’ll come to a moogle and a Tyrannosaur. This Tyranasaurus is undead and can be killed with a Phoenix Down. If not, use Fire / Cure attacks to hurt him. Do realize though that he can use a Revenge attack that takes off over a thousand hit points and which will probably kill you, so use the Phoenix Down if you have it. 9 ABP.
As you leave the area you’ll see a moogle walk to it’s village. Notice it skips the desert. You should do this also, otherwise you’ll run into the Sand Crawl, a very very tough monster with a lot of HP and whom you can’t run from (even with Smoke / Escape).
Moogle Village
When you get to the Moogle Village they’ll all scatter about. The Moogle in the northeast will let you in his house to take his six treasures, because you saved him. They are; Ether, Phoenix Down, 10,000 gil, 1 gil, Dancing Dagger, and a Cabin. Now the rest of the moogles will warm up to you too.
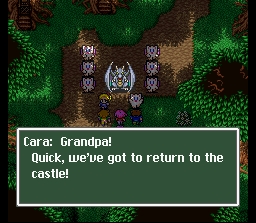
In the northwest is a moogle who won’t let you have the treasure. Put the Moogle Suit on (next door) and now this moogle will let you take his treasure (Elven Mantle). Talk to the northeast moogle again and he’ll use telepathy to talk to the moogle in Bal castle, where Cara is. Cara will come on her moogle to save you all, and you’ll be back at Bal Castle afterwards.
Bal Castle
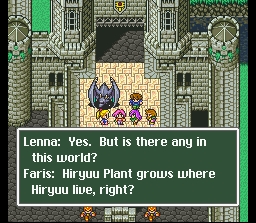
When you gain control it’ll be after Butz makes fun of Galuf about being king. Go west right away for a Hero Drink and Teleport (L3 Time Magic). Go all the way north and it’ll be decided that you are to get the Hiryuu plant to save the Hiryuu (Dragon Grass). Explore more of the castle first before going off to Drakenvale. If you go to the basement you’ll reach a dead end, but you can also fight Objet d’Art around here for huge amounts of ABP. This is by far the best place to build up ABP that you’ll find in a while. The 5 Objet d’Art’s net 8 ABP!! I suggest you build up several classes down here.
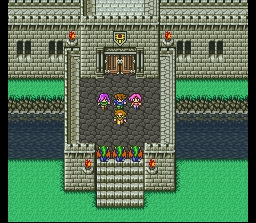
Outside of this main castle area is an Inn to the left and further left are spells / weapons / armor. You can get an Angel Suit if you go to the top floor and then go east to see a hidden staircase. Also, hit the switch (on the weapon / armor shop guy’s side) and you’ll open it up. Go in between them and they’ll get pissed and give you the Lamia Harp and send you on your way.
Quelb
Quelb is a village north of Bal Castle. Only leave Bal when you are really sure you want to leave – you can’t go back in for a while. You can go east to the cave of Gilgame, but that is risky and you’d probably die. Instead, go north into Kelb and go to the north part of town into the only open house.
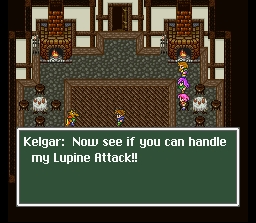
You’ll meet Kelger, one of the Four Warriors of Dawn. He’ll challenge Butz, and Butz will knock him out. You’ll talk some more and find out that Butz’s dad Dorgann was one of the four Dawn Warriors (along with Galuf, Kelger and Xezat Surgate). With that bombshell revealed it’s still time to find that Hiryuu medicine so you can leave via the north if you want.
At the Inn though, you can go up and talk to the Wolf for free treatment and 8 Potions. He’ll give you the 8 Potions three separate times. There may be some weapons and armor worth purchasing, although the spells are a repeat. If you search the well by the spell shop, an old guy will appear and ask for a frog. You need the Mediator’s Catch ability to catch a frog-like creature Kornago (right outside of town no less)). In return he’ll give you 10,000 and a Corna Jar.
Go to the northeast part of the town and talk to the wolves running in circles – one of them will give you the Requiem song, very useful as a Bard for the upcoming mountain.
Hiryuu Valley / Drakenvale
Again, you might want a Bard to use Requiem against all the undead monsters around here. Requiem can take off 2000+ damage to all undead you are fighting, so yea, it can be a help. You don’t really have a choice of where to go for a while, and you’ll eventually see a Cabin a few screens in. You might fight Golem by himself, but he’ll run away (his name will be ???). Eventually you’ll get to an area with a lot of different bones. Search one of them for the Bone Mail – which you should in turn sell, otherwise it will continue to be equipped when you do ‘optimum’ since it has a high overall defense. But it is cursed.
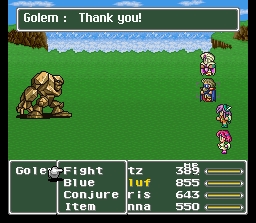
Fight around until you see Golem and two monsters (Bone Dragon and Zombie Dragon – both undead, and both have high hit points). If you happen to have Bards on your side this will be easy, but you have to make sure those enemies don’t kill Golem otherwise you won’t get him after the battle. That may mean you have to use Curative spells on Golem to make sure he stays alive. But if you have two Bards you can finish the battle quickly with two Requiems and an attack to the Zombie Dragon. After the battle you get the Golem item, which you should then use and then you’ll have the Summon. Golem protects you from physical attacks, very useful in some of the tougher bosses later in the game. Golem Summon will run out after a few turns, but you can always re-cast it.
Continue along the path and you’ll eventually get to a room with a blocked entrance and no way forward. Walk around southeast of the shut door and eventually you’ll fall through, and get the 7000 Gil when you do. Take the left exit and hit the switch, opening up a new way through if you backtrack, so go back to the room you fell through in, and take the north exit this time. You’ll be right by the path that just opened up because of that switch you hit a second ago. Take this path and then use the west fork for an AirBlade (Wind Slash) and a Coronet (Hypno Crown). Hypno Crown allows you to manipulate enemies easier. Return back and take the east fork for a Phoenix Down and another fork.
The first path is a Save Point, so you may want to fight around for a while then rest and continue on. Upcoming is a boss, the Dragon Pod (Hiryuu Plant), and it has several of it’s minions fighting you. They die off easily but regenerate fast also. Focus your attacks on the main plant and you should be okay. The Dancing Dagger can do Sword Dance and that can take off a large amount of damage. Otherwise, use Golem to stop the physical attacks and use your best summons and attacks and you shouldn’t have a problem. Not sure if Death Claw works in FFV SNES, but Death Claw worked on the first try in the GBA version. Nothing to steal from this beast, but you gain 10 ABP and an Elixir. The Dragon Grass is yours. Save yourself the walk, and just use the Time Mage’s Teleport spell.
Acquire Hiryuu at Castle Bal : Ghido’s Dwelling
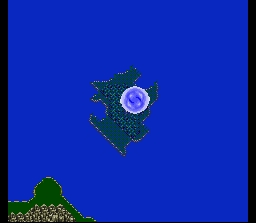
Search the door at Bal, but it is still locked. You will have to travel to the northwest part of the moat and hit the switch to return via water. Rest up in Bal and go up to Cara in bed, who talks about Ghido, a sage who has lived for 700 years. Time to go to the top floor and get the Hiryuu back. The Hiryuu will eat the dragon grass and feel better.
Just as you make your way to Sage Ghido’s Place, Exdeath makes an appearance. We will have to change our course.
Surgate Castle
Just west of Ghido’s hideout is Surgate Castle. As you enter, they recognize Galuf, and let you in.
Head inside and take the northwest passage and work your way to the library. On the bottom floor you’ll see a lady who wants you to organize the three books that aren’t on the shelves. It’s simple – put the books with whichever letter corresponds to the first letter of the first word of the book. Afterwards, she’ll open up a passage and you should follow, eventually coming to 5000 Gil. In this room, go south and you’ll be in the courtyard, where you should go west and in the door. Continue along and you’ll find Float, a great spell for avoiding earthquake attacks.
Back in the main room, take the southwest stairs to Xezat‘s Room. Read his book for the Song of Speed / Swift Song. The right path has an Inn and a decent weapon / armor store for you to explore. Leave Surgate Castle now and look for Xezat’s Fleet southeast of Exdeath’s Castle.
Xezat’s Fleet
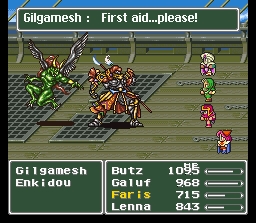
Just land on the big ship and you’ll be on his fleet. After the introductions, Swordsman Xezat will insist you rest. Go downstairs and do so but you’ll wake up in the middle of the night from being attacked! Make sure to appoint a Thief or two here.
Go up and talk to Xezat and enemies will rush your ship. They’re easy to dispatch, then you’ll see Gilgamesh (and hear his music). Work your way to the southern part of the ship and make sure you have someone with the Steal ability. Gilgamesh is here and he uses Death Claw (or did on me in the SNES version). Anyway, he has the Genji Glove and that’s one of the best gauntlet-types in the game so you’re going to want to get that. After a decent amount of damage, Gilgamesh summons Enkidu who has a Green Beret to steal. Enkidu starts off with White Wind to restore 4000 HP. Enkidu’s attacks are not that powerful other than Missile which will do 500+ damage depending on your current health. Both of them are decent but if you concentrate on one of them, that one will go down soon enough and it will be easy to roll the fight after that. A Golden Shield is your reward but the Genji Gloves and Green Beret are far more valuable.
The Wind Drake saves you from falling into the water. Then go down the stairs, and take the right room to rest. Then the left room. Help Xezat move that box.
Submarine to Exdeath Castle Underground Barrier Tower
This Xezat has his shit together. The ships are just a decoy to go into the Barrier Tower from the submarine here. Xezat is going to the basement while we go to the top to take care of the Antenna. He gives you an “Echo” so you can communicate with him – this will be called a Whisperweed in the GBA Final Fantasy 5.
So take the lower path (going up) and you’ll see a save point, and then two treasures on the next floor. The western most one is a Drain Sword / Blood Sword but you have to fight two Yellow Thunder Dragon’s for it and that’s a tall order right now. They have devastating physical attacks and if they use Thunder magic, watch out (250 damage to all). I advise using Slowga and then Haste your party, and then spam Death Claw to kill them quickly. The Yellow Dragon’s have an absurd amount of hit points for regular foes (seemingly close to 10000 each). 9 ABP and the Blood Sword are your rewards.
The other chest is 9000 Gil. Continue south to the exterior, then west and up to the fourth floor door. Go north to the 5th floor exterior, and north more to the 6th floor. Here is a chest with 18,000 gil. After the 7th floor exterior, Xezat calls to you to say he’s at the Generator. Go through the 8th floor, and take a left at the 9th floor exterior. Rest up before touching this treasure – you have a Red Dragon awaiting you. Probably easier than the Thunder Dragon’s since it is by itself, and very weak to Water Scroll. Use Slow asap. Stay healed and you should be fine. 6 ABP and an extremely useful Gold Hairpin for your magicians. Put this on a Summoner and those expensive MP costs for summons are halved!
Take the right path now to floo 10 and the Save Point. Definitely use a tent and save, one of the toughest bosses in the game is here (Atomos). You will want a Time Mage or two to make sure everyone has Haste up, and your main source of damage can be Titan Summons, Bio magic, Ninja’s, Dual-Wield Samurai / Knight, etc.I wouldn’t make a Thief or have someone waste an ability on Steal, because you only get a Flail.
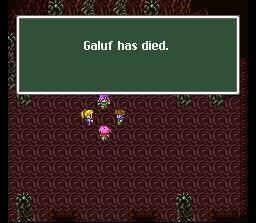
Atomos will start off with a Comet to off a character (or get very close to). Then once he kills a certain character, he will try to suck them in. This is where the gameplay differs from FFV SNES to FFV GBA. In the SNES version Atmos will continue to kill that character if revived. In the GBA version he will just start using Comet until someone else is dead, and start sucking that character in. So in this way it’s easier for the GBA version because he can’t continually suck one character in. Thus it’s a much deadlier fight on the SNES version. Make sure to Haste your party. You can’t use Slow on Atomos, it won’t work. But Atomos will use Slowga on you, so you will have to go running to Haste. This is why I suggest two Time Mages, so that you are not stuck with a dead Time Mage and a slowed party. Lightning Scrolls do about 1050 damage and Titan can do 1500. The Dual-Wield Samurai did close to 2000 per turn with how often the critical attacks came. Atomos has near 20,000 HP but more like 19,000. A whopping 12 ABP comes your way along with Dark Matter. The antenna is destroyed, the barrier gone. But Butz has to carry Galuf out.
Xezat’s Submarine – Get Catoblepas Summon aka Shoat
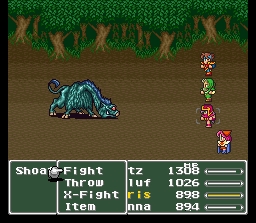
You will be back in your sub (well, you’ll have to wait for Galuf). When you regain control, don’t go see Ghido just yet but, go to the northwest white dot under water. Go through the cave and you’ll be outside in a forest and you’ll eventually run into Shoat – or Catoblepas if you are playing GBA. This boss is just annoying. He uses his Evil Eye anytime you do anything to him, and sometimes will do it twice to stone two characters. He has drain which sometimes doesn’t work but does take off about 500. Regular attacks for 200. But it’s more a test to how fast you can use Gold Needles and Esuna. You should have a ton of Gold Needles from leveling up at Bal Castle Basement. Maybe the most annoying thing is when your characters are petrified, you have to re-haste them afterwards. 3 ABP and Catoblepas Summon are your rewards.
There is a part of the forest in the southeast where a Yellow Chocobo is, but it’s a female so we can’t ride it. Boko’s future wife?
Ghido’s Cave
Go underwater to the flashing white dot in the center. Go southeast to B2, and then straight south to a strange room. Check the treasure chest that is not opened, for dead weight. Put that in the northwest empty chest, and go through that eastern door. Hit the switch to open up a new area. In B3, go to the far southwest to see a hidden path through the southern wall. Hit the switch at the other end, then take that staircase. Just follow the path now, through hidden passages. If you have a Blue Mage you can acquire Aero 3 / Aeroga from the Whirl Demon (who starts off as Metamorpha but he can summon into Ifrit, Wyvern or the Whirl Demon).
Hop on the turtle, and then talk to the turtle – Sage Ghido. Ghido says the warlock Exdeath seeks the Great Forest of Moore. Something is inside of there. It is also where Exdeath was born. Ghido hands you the Guardian Branch (Elder Branch) to enter the Great Forest of Moore.
Moore Village
Go under the water and travel to the northwest where the white dot is, and you’ll resurface right next to Mua / Moore.
Travel start north upon entering to the magic shop. Buy Curaga, Reflect, Berserk, Graviga, Hastega, Old, Firaga, Blizzaga and Thundaga. This might be the best magic haul of the entire game – Curaga is the pen-ultimate healing spell for White Magicians, and Hastega might be one of the best spells in the game period. All of this will cost 54,000 Gil, but make it happen :) Tiger Masks are nice at the Armor Shop, along with Luminous Robes and the Diamond gear. Hefty price tag for all of this stuff though.
Also, be sure to play the piano at the pub, you’ve almost played them all. Go to the west part of the Pub and search for a Main Gauche / Guardian. You won’t be able to get in that far southwest house yet by the way. Remember it for later though.
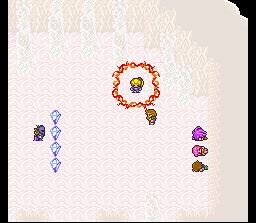
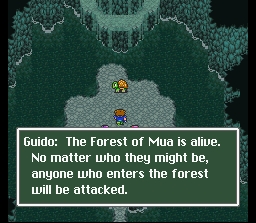
Great Forest of Mua
This is a big forest. As you enter, you’ll use the Guardian Branch / Elder Branch to get in. Head due north and you’ll see a treasure with 2500 gil. Before you get too far, I want to let you know that if you are using an emulator (likely considering this guide is for the SNES version) then you should hit “2” and “3” (on ZNES) to remove the layers and see better. Of course part of the fun is navigating and not being able to see that well – it’s up to you, just know the option is there. If you are playing GBA Final Fantasy V, obviously you cannot do anything like this to help your view. From that 2500 gil, go a good deal east for an Ether and an opening in a tree. Search the opening and you’ll see the exit to the next part of the stage.
Keep to the north part of the map and you’ll acquire 4900 gil and a Phoenix Down. Work your way south a bit, and then a long way east. You will see a north path with an opening in a tree, but go further east and north for 9500 Gil. Then return to the tree opening.
Third part of the level, go west right away for the Cabin and go right afterwards for a Goliath Tonic (Giant Drink). Up and right a bit for a Save Point, and then left for an Elixir. Continue up for a Morning Star. Go west, and a scene. The Grest Forest of Moore is on fire.
When you regain control, wait or walk around until a Moogle shows up and reveals a hole to jump in. Before that though, notice the chest in the northeast part of the screen. It is an Aegis Shield now but if you go in the hole and come back out it’ll be a Flame Shield. I prefer Aegis as that’s better overall in terms of magic defense and isn’t such a specialty shield.
Further west is a treasure that has Soot (Ash), and further west is a Flametongue. You can exit south and rest or do whatever you’d like and came back. Go north to use the Branch one more time to continue onward into the Guardian Tree. Load up on Summoners, along with a White Mage or two and a Time Mage or two (I mean secondary ability Time Mage). I like to have one brute at the end to clean up (Samurai with Dual-Wield). Beserk that Samurai and watch the 2000+ crit hits fly.
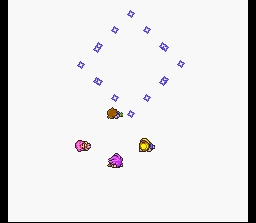
This battle is against four elementals, and you can expect a tough bout. Start off with Haste 2 / Hastega, and then Float on everyone. Then you can concentrate on Slowga, although it only works maybe 33% of the time on these four crystal bosses. Besides that, just use Titan summon to do heavy damage to three of the four. You can then use Comet and regular attacks to finish off the bottom one, since you are floating and can dodge it’s best attack anyway. A whopping 15 ABP is your reward.
You can’t lose the battle against Exdeath. But, the results are not good. Krile joins you, and then the Hiryuu comes by.
Gil Turtle Cave
Okay, so there is one other thing you can do (assuming you got Shoat already). Go northeast of Bal Castle to the Gil Turtle Cave, and instead of going east to the other side, go south and you’ll make your way to a narrow passage and you’ll gain gil with each step. However you are likely to fight the Gil Turtle, a nasty battle. Ice is it’s only true weakness and it’s really a test of attrition – and you might fight him a few times. Is it worth it? Depends how poor you are in FF5, basically. But he’ll probably kick your ass, so I’d advise against this.
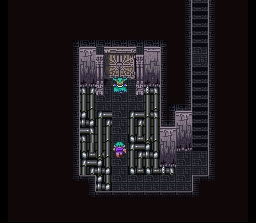
Castle Exdeath
Finally it is time to rush Exdeath’s Castle. It will be open and the fallen soldiers instruct you to go upstairs – grabbing the Ether and Diamond Shield in the south part of the 2nd floor. Continue up and go west for a dead end – hmm.Krile senses something though.
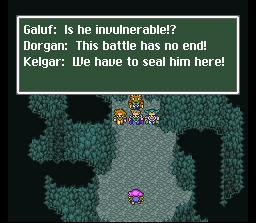
Walk out and Kelger is in his bed, sensing it is his time. Before he goes, Galuf pays a visit. With the last of Kelger’s power, he shows you the true form of Exdeath’s Castle. Exdeath’s illusion is no more. But the Four Dawn Warriors are no more.
You can get some Blue Magic spells, like L2 Old and L3 Flare in this place. Also note that you’ll either need a Geomancer or the Float spell on so that you don’t get damaged by the floor. A Thief or the Find Passages ability are useful to make sure you see all the hidden items.
Go north when you regain control to the 4th Floor. In this room you should hit the grey switch to your right, and that’ll open a passage so that you can get the Ice Shield just east of you. Find your way southwest to the 5th Floor.
All the way north and then east (through the wall) for an Ether, and the exit to the 6th Floor. Take the lava path (with Float or a Geomancer) and go all the way south and east through the wall for a Gale Bow (Hayate Bow in FFV GBA). Hayate Bow sometimes acts like the Ranger’s !Rapid Fire command, attacking four times. Anyway, take the path avoiding the lava this time and you’ll come about an Elixir and the exit.
On the seventh floor you’ll see a skull and then you can determine the bridge’s location whenever you hit A. The treasure on the left is an Icebrand and the right is the Kotetsu for a Samurai. Both are pretty useful for their respective classes. North leads to the exit and a Save Point. If you miss at any point, an Oiseaurare or Jackanapes comes out to fight you. The Jackanapes is really dangerous, it likes to use Moon Flute to Berserk you but it dodges well and has a staunch defense.
Floor 8 has an Elixir hidden to the right and 9900 Gil in a treasure to the far west. Just east of this treasure is the exit. Continue along and when you get the chance, go all the way east across the lava for a stair to 8000 gil. Return back and go up the middle staircase, and you’ll be by some more skulls. Again, you may want a Geomancer so you don’t fall through these holes. Walk to the far east, dodging the holes, for a Double Lance (Twin Lance GBA). Work your way to the north skull and it’ll transport you in front of a glowing Esper. This is the summoned monster Carbuncle.
The trick with Carbuncle is that you basically can’t cast spells on him (but you can cast Wall on yourself and cast a spell on that member, reflecting back onto Carbunkle). That is one of the options. Shoat / Catoblepas doesn’t work often, but is an instant kill when it does. Very low percentage and you may run out of MP trying it, unless you have a Gold Hairpin on or have multiple Summoners casting. Use Time Magic to speed up the process for your Summoners. Or you can do it the long way with good physical attacks. Air Knifes somehow do 1300+ damage each shot with my ninja, and Carbuncle only has 15000 HP. Still a lot, but at 2500 a turn with just the Ninja you could be fine doing this route as well. You get 11 ABP and the esper “Crbnkl“, and it’s very useful in certain battles for putting up a Magic Wall for every ally in your party.
Return to the skull pitfall room and step on the southern most skull to reveal the opening to the south. You’ll want to take this and rest up and save. Continue onto floor 11 and take the right stairs first and you’ll get a Partisan and a Pinwheel / Fuma Shuriken. Return and search the treasure in the middle of floor 11. It’ll be nothing, and as you try to go north you’ll see Gilgamesh yet again.
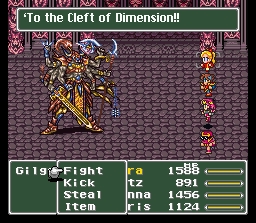
This Gilgamesh fight is very easy. As usual, make sure you have a Thief on hand. You can’t steal the valuable Genji Helm (Genji Helmet) until he morphs into a different form (second form). Initially you can only steal a Hi Potion. Gilgamesh starts off with the Lilliputian Lyric, Pond’s Chorus or Dancehall Daze. When he morphs he’ll use the “Excailbur” and it’ll take off nothing basically. Take him out, and when he’s done Exdeath will get pissed and will banish him to the Cleft of Dimensions (The Rift in FFV GBA – more on all this later).Afterwards, you get the useless Excalipoor.
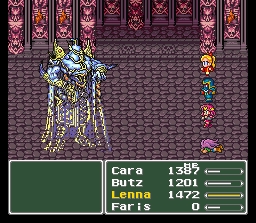
When you’re truly prepared, head up the next few sets up stairs and you’ll run into Exdeath. What works against this guy? Well he has some powerful attacks and spells, so first off you’re absolutely positively going to want Golem equipped otherwise he’ll put you in a bad way fast.. Crbnkl is useful but can also be a detriment to your cause in that you cannot use Cure 3 (for example) on your party with the walls up.A nasty trick is to use Float on our entire party, and Exdeath will waste turns on 100 G’s to bring you back down for an Earth Shaker attack. One nice thing about Hasting your party – Exdeath will waste time trying to Dispel your buffs, but your party can act too fast for him. This allows you to recover from Hurricane (lowers your HP to 1-10) quickly. Towards the end, Exdeath gets more dangerous and attacks twice per turn. Usually with an -aga spell for good damage and Vacuum Wave, which is extremely destructive. Conversely the -aga spells are some of the toughest attacks you can use on Exdeath himself. Exdeath has over 32000 HP, so it will be a long fight.
For the first time doing the guide and going through, I had Faris be a Ninja (with X-fight (so 8 attacks)), Butz was a Ninja also, Lenna was a Samurai with White Magic and Cara was a Monk with Summon capabilities. This allowed for good physical attacks but also the ability to use Golem, Carbunkle, Cure 3, Bersk (on Butz) and so on. I will point out that every time after this I have used at least one Time Mage.
When Exdeath goes down, the crystals shatter and the world is back to it’s original form – that’s right, World 1 and World 2 are combined. Final Fantasy V World 3 starts up..
Excalipoor isn’t useless. When Goblin Punch is used while weildign it, you can do a lot of damage.
Exdeath’s castle is pretty bomb
World II is awesome, reminds me of The Dark World in Final Fantasy IV (2 for SNES)
Now, since I’m currently playing the SNES, I’m looking for players to post a forum or two about tactics and secret items to obtain. And thank you very much that I’ve got to find the items that I couldn’t get in the previous games. Thanks! Oh, I’m looking for Corna Jar.