Final Fantasy 5 World 3
Tycoon Castle and Boco
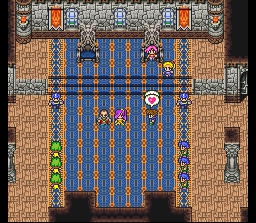
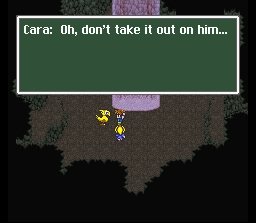
So the story begins southwest of Tycoon Castle, just like it did in World 1. What happened, and how did they get there? No one seems to know but a celebration hits as you enter Tycoon Castle. Faris (Sarisa) will be dressed up and Butz will like that. Eventually you get control of Butz, so follow Cara and you’ll talk to her outside, then leave Tycoon.
Far to the west is the cave you dropped Boco off in, and he’ll be there! Despite him having a wife you can still use him. Ride him towards Tycoon and then north of Tycoon and you’ll be going for a long while.
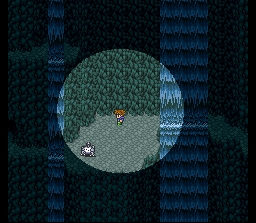
You can stop at Tule Village but there isn’t much to do, and eventually you come to a valley where you take control. You fall down and have to fight the Antlion here. He’s not too difficult, just cast Slow and you should be able to keep him in check after you do that and Haste your party. Faris messes around with you a bit but finally lets you climb up with the rope.

Ghido’s Dwelling
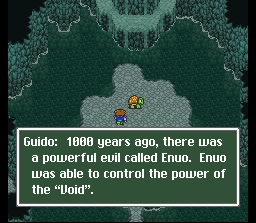
Continue along now until you come about a cave and go through and flip Ghido over. Ghido talks about Enuo and the Void. You’ll learn much more about what’s going on, but Exdeath was the splinter Krile picked up a while back. Exdeath will banish you over by the Ancient Library. Exdeath also sucks Tycoon Castle into the Void. Then he sends Krile, Butz, Faris and Ghido to who knows where.
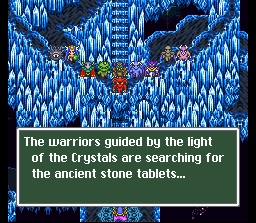
Ancient Library
Go inside and you’ll have some more learning sessions with Guido and the Surgate scholars. The Void is trying to break free from where it has been sealed within the Rift. You must obtain the same twelve legendary weapons needed to defeat the Warlock Enuo a thousand years ago. The weapons are sealed within the Castle Kuza. You need four tablets to unlock these weapons at Castle Kuza. Other great abilities and spells are around the world for you as well. You then acquire the Sealed Tome, a book that will prove valuable. Time to head to the pyramid in the Desert of Shifting Sands, says Ghido.
Before you leave go to the top floor and talk to the rightmost scholar for the Magic Song (Mana’s Paean in FFV Advance). Time to go to the Quicksand Desert to get that tablet!
Moore Village
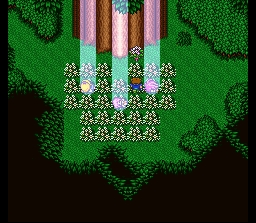
Well, skip past the desert for now and continue west to Mua / Moore. You will pass through the Guardian Tree. Go to the house in the southwest and this time you can go through and work your way south through the forest.
Eventually a “sage” will pop up asking you if you’re brave or not. More or less this is alluding to whether or not you run away from fights often. Chances are you run away a fair amount, which case you’re better off choosing that you’re a coward as the Chicken Knife becomes more powerful as you run away, although sometimes it causes your party to run away (because, well, you’re a chicken). Meanwhile the Brave Blade is pretty good if you never run but it decreases when you do run. Chicken Knife is the way to go and you can get around the issue of running away occasionally by using abilities like ‘Mug’ which will be an attack/steal attempt with 0% chance of running away.
Quicksand Pyramid of Moore
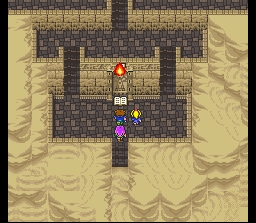
Okay, this is the first tablet destination and you have to fight Gargoyles outside. They are rather difficult, but not quite on the level of boss fights. Problem is, you want to expire both of their 5000 HP totals at the same time, else they’ll revive the other one. Chances are you’ll need to defeat them a few times before you clear the battle. The Sealed Tome comes out and opens the path into the Quicksand Pyramid.
Inside take the left-most path, then hit the left and right switch at the top by the spikes to create a path. Follow along and you’ll hit the quicksand and fall to B1.
Before you get the treasure (it’s a monster), make sure you have a Mediator with the Control ability if you need either GuardOff or Condemn (Blue Magic spells). Also note you’ll need to use an Ether on The Damned before they can use these spells. An Ice Shield is the treasure chest reward. Continue north back to the first floor, and you’ll come to the quicksand again, but hit the switch so that it stops. Now go east and up the stairs and search the mummy. You’ll fight a Grandmummy, and afterwards you get 5 ABP and a Cursed Ring for a treasure.
Okay so return all the way back to the first path that you skipped upon entering the pyramid. You’ll be trapped by some snakes shortly along the way but kill them and hit the right switch to open the southern door.
Next area, the northwest chest is for a Flame Shield and it’s against four Cursed Ones. Should be easy. The center chest yields a Dark Matter and against the same enemies too. The right chest has two Ushabti’s and an Archeosaur. and you get a White Suit / White Robe for that. Go east and wait for the spikes to not be showing and make your way up – otherwise you won’t make it and you’ll be damaged.
In this new room are MachinHead‘s, powerful enemy robots that you can see as you’re walking. Mecha Heads in FFV GBA. You can’t run, but they really aren’t too tough. Use Thunder spells. The northern part of the room has a tomb with three Mummies. Defeat them and grab the cursed Thornlet. There are two Elixirs (one on each side of the Thornlet). The far west has a switch and a monster in a box, revealing a Dragon Fang and a Black Suit / Black Robe. Fight the last mummy east of here and go up the stairs for a Save Point and floor 5.
Go southeast through the wall for a battle against three karate types. They are kind of tough with their Air Fist, but use Golem if you need to – Black Garb is your reward. Take the southern stairs, and don’t bother to hit the switch – just let the quicksand take you down a level. You’ll be right by a treasure which is Dark Matter, and you have an easy battle against The Damned to get it.
Now take the northwest path on floor 5 for two more fights and two treasures (two snakes as well). Crystal Armor is the right chest (5 Objet d’Art’s) and Dark Matter is the left one. Go south into the 5th floor and then all the way south in this room to where the quicksand and the switches are. Hit the switch and then go in the door to the right. There are two switches so hit the far one (otherwise you’ll get knocked down 2 levels). Take the 9000 gil and 8000 gil on the right and there are two battles and two Dark Matters on the left.
Go back out and continue all the way through to the next area. North a bit, then go west and through the wall for a battle (Earth Hammer / Gaia Hammer). Further up and east are 10,000 gil and a Cabin. Return back and go up the stairs at the beginning. Now wait and see how this rotates. You don’t want to fall obviously. Anyway, from left to right, there are a Ribbon, Guard Ring / Protect Ring, and Gold Hairpin. Ribbon protects status but only equippable for Freelancers + Dancers. Gold Hairpin slashes MP use in half. Overall, it’s quite a haul. If you fall down around here at any point you can get the Elixir in the floor below.
Up via the left side for an Elixir and a monster (Dark Matter). On the other side is another battle with Dark Matter and one treasure with 12,000 gil. Go up and you’ll be able to grab the first stone tablet!
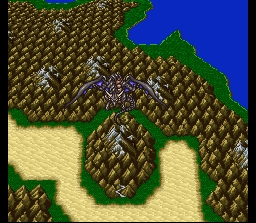
After you acquire the tablet, Krile reads something about The Dragon King Bahamut. the island with the airship sinks and turns into Bahamut. Bahamut flies to North Mountain and will wait for you to battle him there. Meanwhile, you end up at the top of the pyramid and can leave and find your ship. When you are back on the world map though, use a Cabin and be prepared for a tough fight.
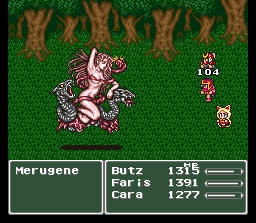
Guardian Tree – Melusine
As you get to the huge tree, you’ll see Lenna be dropped off. However she is possessed by one of Exdeath‘s minions, Merugene (Melusine in FF5 Advance). Before the battle, Exdeath sends Ghido and the Ancient Library to The Void.
Melusine can change her elemental barrier so stay on top of that if you’re casting magic, or just use physical attacks. Her physical defense is good though. She starts off weak against Fire, but then became weak against Lightning. She’s not too tough overall especially if you Slow her – her magic is most devastating but even that shouldn’t damage you too much. 20 ABP is your reward. Finally, you save Lenna and get her back in your party.
Exdeath has other plans though. As you travel northeast to your Airship, Exdeath sucks even more towns into The Void (Worus, Moogle Forest, Istory, and Lix).
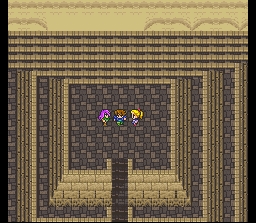
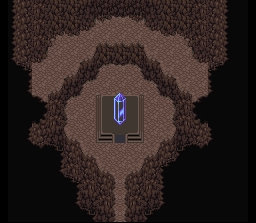
Sealed Castle of Kuza
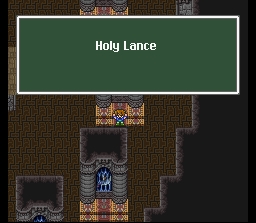
Eventually you’ll gain control, and you’ll want to go to the Sealed Castle of Kuzar. Talk to everyone inside and you’ll get an HP / MP recovery pot available and some new information that might be worth your time. Place your tablet in the far room in this castle and you’ll get a chance to take 3 / 12 weapons. Which weapons should you take first? It’s all dependent on which classes you like to use and which classes you are currently using. Remember, you’ll get another tablet soon and that’ll be 3 more weapons, so you might want to choose the weapons you’ll be using in the immediate future. I chose the Masamune, Holy Lance and Sasuke’ Katana (although it is actually called Hardened for some reason). The main reason I grabbed these three weapons was because I was building up a Dragoon, Samurai and Ninja at the time. Assassin’s Dagger is a good choice for one of the first three, since Ninja’s are used so often generally.

Pirate’s Hideout
Before you do anything else, go to the Pirate’s Base and you’ll get the Syldra summon, a Thunder attack much more powerful than Ramuh’s but more costly in terms of MP. Worth the trade off though considering we have been waiting for a better summon since Titan.
Mirage Town / Phantom Village
Leave and go toward Crescent but a few forest ranges to the southwest of Crescent is Mirage Village. You need to “get in a battle’ so to speak and when you do it’ll take you to the Cleft of Dimension (and Mirage Town).
Go to the pub to the west and enter via the back. Search by the bartender to find a Thieve’s Knife / Thief Knife. Go downstairs and you’ll talk to a guy who challenges you to go around the world on a yellow chocobo. You can do this with Boco if you want, just fly to where he is and travel all the way along the inner part of the continent (it’s like a ring, look at the shape of Crescent and the islands around it for help). You get a Mirage Vest for doing this. Go south out of the pub basement and into the next building you see. Continue north and search for full HP / MP, and continue along. Make sure you have a thief with so you can see the secret passages. If you go left through the wall you’ll see a set of stairs leading to a Black Chocobo and further left is the final piano! After playing this, you should have mastered it, in which case you can go to Crescent Village and talk to a bard in the southeast house. He gives you the Power Song and the Hero Song for your piano efforts throughout the game – also known as Sinewy Etude and Hero’s Rime.
Anyway, all the way to the right is the second Weapon’s dealer (Ninja Shop) and a door you can’t go in. Buy what you want and check out the magic / armor shops. Just go ahead and search the northeast part of the armor shop to make a path open behind the dealer. As for the magic, you can get the last of the level 6 spells if you go to the west part of the building and enter from the back. Arise, Dispel, Death, Osmose, Quick and Banish.
Fly southwest of Carwen and land in the water and sail in the northern area. You’ll run into a Stingray eventually, and make sure you have Control and Learning (or a Blue Mage) and you can get Big Guard, one of the most useful defensive spells (and blue magic spells) in the entire game.
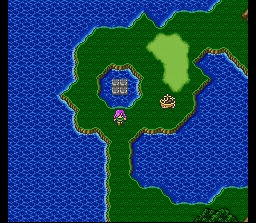
The Solitary Island Shrine
It is easy to find, just look at the center of the map with the water spot and then a little south is the Solitary Island with one long bridge being the only access. Can’t land on the bridge so just land on the grass and walk over. Beat the Gargoyles up at the entrance for 10 ABP.
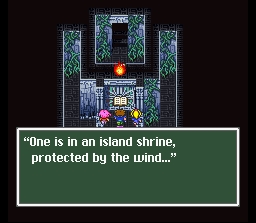
“Within an island shrine Kissed by wind One tablet rests”
There is a Tote Avis (Tot Aevis in FF5 GBA) around here that drops (or you can steal) the Aviskill, a very very good bow. Also make sure you have a Thief (or Passages) during this also, as there is one on the second floor (for a 12,000 gil chest). Continue along and you’ll be thrown into a room with two switches.
Hit them both and you’ll go back in the tube and get 9000 gil. Return back and re-hit the left one, and then you’ll get an Elixir. Finally, switch them around one last time and you’ll get to a treasure and the exit. Careful though, the treasure is a dangerous wolf (Pantera – but a Covert Ninja in FFV Advance. Just as tough) and it can use Blaster to kill you. Your reward is the powerful Rising Sun. Save your game in the northeast after this.
On this next floor you can get a Crystal Helmet in the northeast, and there is a powerful Prototype in the very north protecting a Guard Ring (SNES) / Protect Ring (GBA) treasure. Northwest is an Ether and the exit.
Directly north is a Beastkiller and attempting to go east through the secret passage will lead in a hole (and you falling down). Instead, go west and then north twice. You’ll get to a room with passages on the left and right and two treasures north of you. Don’t walk right up to them because again you’ll fall through. Instead, come at the sides and get behind these treasures to get an Ether and a Dragon Fang. In the next room you can get a Circlet on the right and a Dark Matter on the left (oh yeah, rest and save before you go in here).
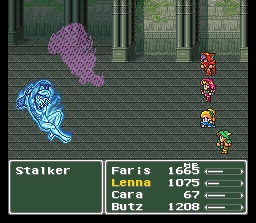
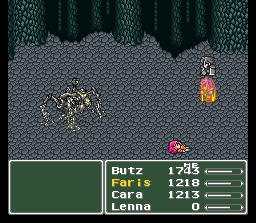
In the north is the second tablet, although “Stoker” is there to stop you. Actually when you get in battle the name is “Stalker“, or Wendigo in FF5 GBA. He is split up into four, and you can only hit one. Don’t use magic that attacks everyone as that will earn his disdain (he will spam Frost), you instead need to keep guessing and hope you hit the right one. I did use Slowga, which he countered with Frost but the Slow did work on each one so that helped a bit. Of course Haste is a huge help. He can use Mind Blast, something your Blue Mage can learn. If you guess right and don’t let him get your HP too low, the second tablet should be yours soon. A long battle actually – hopefully you have a powerful Chicken Knife to take off 2800+ like I did. Rapid Fire is nice too as one of the 4 hits is bound to connect and then you’ll know which one to attack (until it switches again). 20 ABP and you can steal Dark Matter from him. The gate to the Fork Tower also opens after this, for the ultimate White and Black Magic.
For the record, I went to the Sealed Castle of Kuza and got the Sage’s Staff, Yoichi Bow and Assassin Dagger (leaving most of the left side of the room to get).
North Mountain – Bahamut
It’s time to try Bahamut. You could really try this anytime after getting Lenna / the airship back. To get there, you need a Black Chocobo to fly you there from Mirage Village, and land in the forest. You can go to the southwest for the Phoenix Tower or the northeast for North Mountain, and since that’s why we’re here we’re going to go to North Mountain.
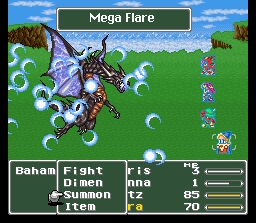
The monsters here haven’t changed since World 1, so it’ll be a breeze getting to the top. As for Bahamut, well, he’s actually pretty similar to the FF4 version, but much less dangerous. He has some dangerous attacks like Aqua Breath (700 damage to all), but as you might expect Mega Flare is the move you have to watch out for. Thankfully we can use Carbuncle to put up a Magic Wall on everyone at once, so this should keep you safe from it. Or rather when he does use Mega Flare it just takes off 9999 on him instead of 2500 on all of your characters. Moreover, Bahamut is terribly slow in this game. You can get Stop to work on him on occasion, and sometimes even Slow even though that is more rare. It’s already like he’s in perma-Slow status anyway. Use Hastega of course to give yourself that extra edge to make sure you are healed and have Carbuncle off. Bahamut nets you 25 ABP and we get the Bahamut Summon, one of the most powerful attacks of any kind in the entire game. It is very expensive in terms of MP so make sure your summoners have Gold Hairpins on.
Fork Tower
It’s Fork Tower time. You can get the ultimate White and Black Magic here, but you must split up into a physical attack party and a magician-based party. The physical party should go to the right and the magicians should go to the left. Chances are, you probably have two characters built up of each (Butz is my power-based physical attacker while Faris is more of a speed / Thief / Ninja type). You’ll control the magicians first, so make your way up and grab the Ether and Wonder Rod along the way. On the physical side, you’ll get a Hi Potion and a Defender.
You will fight Minotauros on the physical side first, and he can be a bit difficult. I had a Ninja with X-Fight to take off roughly 4000 per hit and a Dragoon to Jump and heal the Ninja. This made it pretty easy, but he’ll try to use Holy at the end – and fail in doing so.
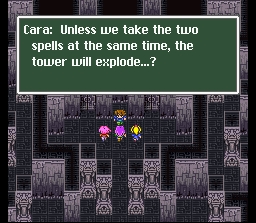
Now it switches to the other part of the tower and you have to pick up the Flare spell fast or the tower explodes. You’ll fight Omniscient and he can be a difficult battle, casting Flare at the end. Keep a Wall up with Crbnkl the entire time and you shouldn’t have an issue, just be sure to re-new that Wall before he can get a spell off. Syldra is a good summon to use and Aero 3 is useful as he’s weak against Wind. When he is done, the tower collapses and you can go to the Catapult to free Cid under the water. Mid will come too and they’ll work on the ship, making it able to fly, sail, and be a submarine! Now you can go to the next tablet under the water!
First go south of Karnak and talk to the crazy guy who gives you your game statistics.
Great Sea Trench
Use the submarine to go under the ocean and you’ll see a hole in the floor, towards the east. As you enter the Great Sea Trench, be sure to rest up and equip Holy weapons as most of the monsters are undead around here. Beat those Gargoyles up for 10 ABP and then enter B2 of the Great Sea Trench.
“Deeper than the bottom of the sea Yet enveloped by flames One tablet rests…”
Take your first south for a Water Scroll, and continue until you get to a section with a bunch of switches (the second room with a bunch of switches – take the north exit in the 1st room). Most of them make you fall down to the next floor but the upper-rightmost one will make a noise and open up a path to the north that leads to a Flame Ring. Eventually you should fall down and go north for a Dragon Fang and east for B6.
To the very south is an Ether in this room and a little east is a Phoenix Down. Hopefully you have a Geomancer or someone to cast Float so the lava doesn’t bother you. The next room east is B7. You’ll be at is the Dwarve’s Headquarters where you can save, rest and buy some things. The weapons / armor are obsolete at this point probably. Talk to the dwarves and the one digging the tunnel to the southwest will show you where the Mirage Village is (if you didn’t know already).
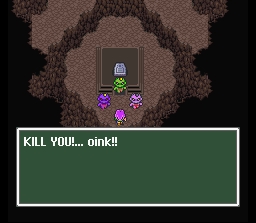
As you continue along the south spot in the water area will flash a blue light, and this is where you can restore the Magic Lamp (if you have it). Need to have reached the top of the Istory Falls waterfall with a yellow chocobo and search for it. In the next room, continue to the far northeast and hit a switch that will open a door to a Kaiser Knuckles treasure. Go to the south now and there will be three switches in the far south. Hit the upper left one, and then the right one, and finally the lower left one. Now go back up to the first switch in this room (the chest) and hit it, opening up a new room.
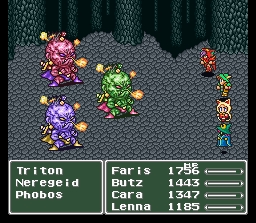
This is where the tablet is and three of Exdeath’s goombas will surprise you – them being Triton, Phobos and Neregeid / Nereid. Each has a simple elemental strength and weakness, but you should probably just focus on using Holy, Flare and summons like Syldra or Bahamut. You’re going to want to kill them all at the same time relatively, as otherwise they’ll revive and use a Delta Attack, stoning one of your characters. Not really a ton of MP especially if you’re spamming powerful summons. 20 ABP is your reward. You also get Time Magic spell Meteo down here, which was sealed in the flow of the Magma. Afterwards you can exit out and get three more weapons. I chose the Firebute (Flame Whip), Sage Staff (great for White Magic) and the Wizard Rod (great for Black Magic).
Sunken Water Crystal Tower
The Sunken Water Crystal Tower is southwest of Carwen and northwest of where Walse should be, near where you fought the Stingray. Sail to it and a timer will go off – you have seven minutes to get down there, according to Butz. That’s enough time but you should probably have someone with the Escape / Dash ability to make sure you’re ahead of schedule. Just make a Thief and use Flee / Smoke to run from battles.
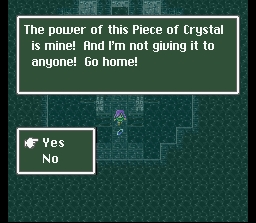
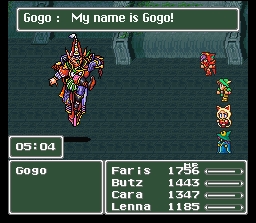
When you get down there you will find the crystal shard. “It has taken the first two acts, but now, the amazing power of this crystal shard is within my competent grasp. I shan’t allow you to take it, so turn back and begone!” – Gogo. Don’t listen to him, say no and the battle starts.
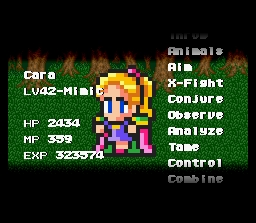
Famed Mimic Gogo is quite simple actually. If you try to fight him it’s one of the hardest battles in the game and next to impossible but if you don’t do anything you’ll win and get the Mime class at your disposal. One of the most valuable in the game. Famed Mimic Gogo is thrown into the Rift. Not before dropping off a whopping 50 ABP! Then, teleport out.
Jacole Cave
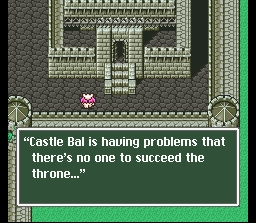
Go to the Jacole Cave / Jachol Cave and make your way to the other side, like you did in FF5 world 1. This time though, you appear on the other side of the Bal castle basement!
Bal Castle Basement
This is where you fought all those statues for ABP back in World 2. Maybe you still do it. But now you can head south and unlock that door forever, allowing you to rest in Bal and explore this place whenever you like.
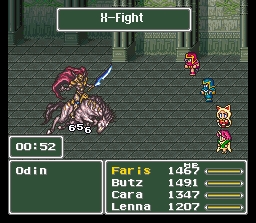
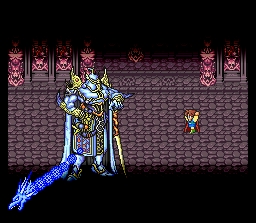
Save and head north and you’ll see a green light, and it’s Odin. Before you fight, make sure you have some firepower because you have to end this fight early or else you’ll never win. Just one minute. Use your best spells; Meteo, Flare, X-Fight, Chicken Knife, all that good stuff. Just don’t use Holy. Also note you can use L2 Old on him if you have it, a useful way to make the fight a lot easier. One minute goes up faster than you think so don’t waste your turns. Everyone needs to have a high-powered attack option. Maybe one healer because Zantetsuken can put you in a bad way. After Odin goes down, you get summoned monster Odin.
Phoenix Tower
Okay, so you need the Black Chocobo and you need to go southwest of North Mountain. Go in and search to the left. A path will open and this is how you go about the Phoenix Tower, as you either will fight an enemy or will open up the staircase to the next floor. This is a long tower so you’ll be doing a lot of guessing (although this can be ridiculously easy if you abuse the Save State option on an emulator). 30 floors to be exact. At the top you’ll see a scene with Lenna and a Hiryuu and you’ll get a choice (although im pretty sure it doesn’t matter). Afterwards the Phoenix Esper is yours and that should just about do it for Espers (other than Leviathan).
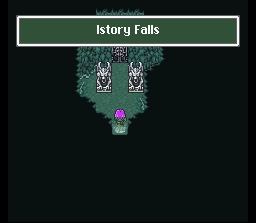
Istory Falls
This is the last tablet. To get here, use the submarine in the northwestern part (look at the light). You probably don’t even need the last three items but you might as well go through this – you’ll like your rewards. Beat the Gargoyles up for 10 ABP and enter.
To the west are a Turtle Shell and an Ether, and an Air Lancet / Air Knife is in the northeast. North is the exit.
Take the east path for a Giant Drink / Goliath Tonic and go to the southeast part for a Rune Edge (hard to see). Work your way to the west and hit the switch to stop the waterfall. Notice you have to do this fast so make sure you have Dash otherwise you’ll never get the item (Guard Ring – Protect Ring). Further along south to a new area.
Go down the right path at the first fork for a Phoenix Down and left to continue and another left for a Wall Ring / Reflect Ring. Go right for a Save Point, then the exit. Travel southwest in this new area but in the center look for a room to enter for an Artemis Bow. Go left for 12000 gil and north for an Enhancer (as you go north, stick to the west wall to avoid pitfalls). Back to the Save Point area and go south and take the south room to continue to the following floor.
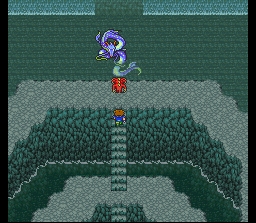
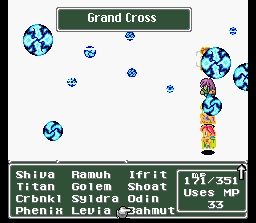
Go to the northeast and grab the pinwheel / Fuma Shuriken, and then to the west for an Aegis Shield. Hit the switch when you go south and grab the Giant’s Axe / Titan’s Axe. Dead end now, right? Wrong, jump down the hole’s in the south (by the Giant’s Axe) and you’ll see the final tablet just north of you. Grab this and go north and an Exdeath monster comes to stop you. Fortunately LeviathanC wipes him out. But now you have to deal with the water lord Leviathan. You have a moment to prepare before walking up to him after his appearance, so make sure you have plenty of Black Mages / White Mages / Time Mages (or abilities pertaining to those classes). And have Coral Rings equipped!
Leviathan is one of the most difficult fights in FFV if you don’t have a Coral Ring because he often times uses Tidal Wave consecutively (without even reaching 2 turns). It takes off 600-800 on each member, or heals them by that much if you have the Coral Ring. Careful of this, and you should probably have two people who can cast Cure 3. Stay in Haste status and try to Slow Leviathan to prevent him from using Tidal Wave multiple times. If you do have Coral Rings equipped especially on all four characters, this is extremely easy. You can Steal/Mug an Elixir from him. Leviathan will also attempt to Entangle your members, and his regular attacks take off a good deal as well. Bolt 3, Meteo, Syldra and Holy are some of the best options to use. It goes without saying you should take care of him as fast as possible. Thundaga / Bolt 3 is probably your best option especially if you have the Magus Rod equipped (ups elemental attack magic power). Hopefully you have some of these goodies to damage him because Leviathan has a whopping 40,000 HP! Probably the highest you’ve seen yet. 20 ABP and a Reflect Ring are your reward. But the biggest reward is being able to use Summoned Monster Leviathan in battle for massive water damage.
Now you can get the last 3 weapons and move onto the Cleft of Dimension!
Cleft of Dimension – Interdimensional Rift
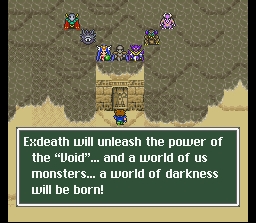
Go to Castle Tycoon, or where it once stood. As soon as you take your airship over the void-like area, you get sucked into the Interdimensional Rift. The quicksand area is first and you basically have to work your way east to the door. As you get there you’ll see several Rift monsters hovering above you. They threaten you and you’ll have to fight them along the way to Exdeath.
Now you are in the ruins area. Grab the Ether, Elixir, Cabin and Dark Matter in the four chests and go south. You’ll come to three ramps going up, take the right one for an Elixir and the left to continue. Go right for a Drain Sword / Blood Sword, then left and you’ll be in Mirage Town!
Work your way around and leave via Mirage Town’s entrance. You’ll be in the forest now, where you should go northeast for a Dragon Fang and then west and north to get around. Remember, on emulator if you hit 2 and 3 your vision will be much much better :) . As you head southeast, you’ll get a Ribbon, an Enhancer in the far south, and a Lilith Rod in the east. The tree in the very southeast will have a hole that opens a path up, but Calofisteri shows up. You can steal a worthless Plumed Hat from her. She puts a Wall up, so if you have a White mage cast Dispel to get rid of it. Then attack with whatever you have. She likes to spam Drain. Put Mighty Guard up and Hastega, then you should have no problem. 20 ABP and continue on.
Now you’re in the waterfall area. The Achelons around here are tough – they look like Shoat / Catoblepas but have stout defenses and come in packs of three. Weak against water though so use Leviathan. Go all the way to the right and walk north through the waterfall and get the Angel Ring. Return west and enter that place, getting the Coral Ring and saving at the Save Point. WARNING!
WARNING! Omega is outside. He is an optional boss (along with Shinryuu, a treasure-monster late late in the game) and he is much harder than anyone else in the entire game including the final boss. Think Ruby Weapon and Emerald Weapon in FF7. You really have to know what you’re doing to be able to even put anything up against this guy, so avoid him at all costs when you first see him. Definitely save at that save point, because even sometimes when Omega isn’t directly next to you, you’ll somehow encounter him.
Omega
This and Shinryuu are the two hardest fights in the game. To prepare for the fight, you’re going to want two or three characters to have the Hunter’s X-Fight / Rapid Fire ability along with the Mystic Knight’s Magic Sword Spellblade ability so that Bolt 3 can be cast and used through !Rapid Fire. You will also want the Ninja’s Two-Handed ability so that you can have two weapons per character (both Magic Sword capable). Or just make “Freelancer” job classes which automatically can equip two weapons. The other character should be a standard magician of sorts, with Dimension Magic for Haste 2 and White Magic for Cure 3 and Life 2 (maybe Summon or Blue Magic (Mighty Guard)). To be honest, you’re better served to bring two magician-types and just two attackers. Maybe even one attacker. This is because you have to attack Omega somewhat slowly, because he has some brutal counter-attacks. Thus, it’s better to have two magicians to heal up. Bring two White Mages, with one of them having the Time Magic ability (for Hastega / Haste 2) and a Blue Mage ability (for Mighty Guard / Big Guard). The Mighty Guard is absolutely essential because it seems to protect your party from many of Omega’s abilities. Plus if someone dies, you’ll need to be able to use Arise on them and then re-buff them with Haste/Might Guard.
This will take some time building up the ABP to do this, but in the Cleft you can generally get 25-30 ABP per battle and if you fight Movers (in the fourth level of the Cleft) you’ll get 199 ABP. So the moral of the story is that it doesn’t really take that long to get the needed abilities to counter Omega. Oh, and equip 4 Flame Rings to absorb any Fire-based damage Omega uses. Then cast “Float” before you start the battle to prevent Earthquake from destroying you. Equip Ribbons if you have any.
First of all, nothing to steal in this battle. As for the fight itself, one other thing you need is luck. Sometimes he’ll counterattack with Rocket Punch on everyone, which can be killer with the Confuse. Or Encircle, which just erases a character. If he uses Encircle on our main attacker (with Chicken Knife), may as well use Return to start over. Having Mighty Guard up seems to nullify both of these manuevers most of the time, thankfully. Omega likes to use Wave Cannon for ~700-1300 on each member. Nothing you can do against this move. I generally don’t heal after this, hoping he’ll use Atomic Ray or Flame Thrower soon after, which heal us since we have those Flame Rings equipped (right?)
Turn 1 – Use Spellblade / Thundaga with your two Mystic Knights. Then Mighty Guard with your Blue Mage and Hastega with your Time Magic. By the time you do all of this, Omega has probably used Delta Attack on one member and then Wave Cannon. I usually don’t worry about healing because he’ll follow up with Atomic Rays soon enough to heal your entire party. This sets you up well to use Rapid Fire the next time with all of your buffs up and everyone healed. Chicken Knife can do 5000+ damage with one attack, just absurd, so make sure that character attacks first (for well over 20,000 damage per Rapid Fire). Omega will counterattack four or five different times with Encircle and then a bunch of Rocket Punches. As stated above, Mighty Guard generally protects you from all of this. Otherwise, it can be mayhem. Heal up when needed and repeat. This won’t be a long fight either way – either you are going to win after 3-5 X-Fights, or Omega will have your party dead in short order.
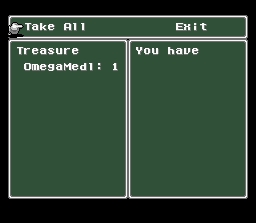
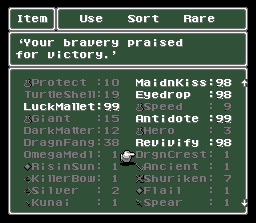
After the battle you get 50,000 gil, 100 ABP and the Omegamedl. Or Omega Badge in FFV GBA. There is no real use for this item, other than to look at it in your item inventory to see: ‘Your wisdom and bravery prevailed over the Ancients.’ not the most worthwhile item but it’ll remind you of beating one of the toughest monsters FF5 has to offer (and any FF, really). After the battle and getting the Omega Badge, the earth rumbles for almost 10 seconds with Omega leaving our presence.
Go east past Omega and north into the library. Read the Book of Magick in the back for a strategy on Twin Tania (use Odin when he prepares for Giga Flare) and a book on Shinryu and Omega, the two guys I was telling you are really really tough. The middle book leads to a battle against Apanda, a monster weak against Fire. Really though, this guy is like Byblos but is extremely easy, one of the easiest in the Cleft of Dimension. Will use Protect on himself multiple times for some reason, but that can be dispelled. Like Calofisteri, Apanda likes to use Drain often. Continue to use Holy, Meteo, Flare and X-Fight. 16 ABP and Ash are your rewards (you can steal / mug Ash from him too). With the middle book open, leave the room and you’ll be in a different area.
Make sure you have a Thief (or Passages) so that you can see. This area is simple and soon you’ll be at the castle of Tycoon.
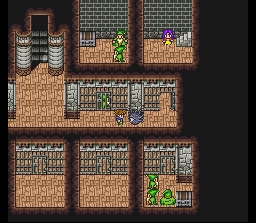
Go east and south for some Running Shoes / Hermes Sandals, and then west and south for a Thor Hammer. Take the north exit (leading downstairs into the basement) where there are a ton of bosses running around. The guy in the southwest is Apocalypse / Azulmagia and he specializes in Blue Magic. He uses some of his own and even can learn a few things from you, if you use them on him. He can be difficult but it’s all dependent on what he uses – so if anything, don’t use Blue Magic on him because it just opens up new possibilities for him. Although it is a good opportunity to learn some Blue Magic spells. Oh, and you can Mug an Elixir from him. We want to go after him first because he yields a valuable Save Point once defeated – and 22 ABP.
Catastroph might be worth a try this time. Use Float on everyone before fighting him. He is the black monster “protecting” the lady in the northeast part of the basement, and if you try to talk to him through the jail cell he’ll bum rush you to the left part and you’ll start a fight. He’ll use Earth Shaker which takes off roughly 1000, so you should heal and cast Float. If you continue to cast Float he’ll continue to cast Gravity G or 1000 G’s, which makes you not Float. He will ALWAYS do this so you can win easily, especially if your party is Hasted, he will never be able to catch up. Steal an Elixir and your reward is 21 ABP.
Next, try to open up the doors and talk to one of those crazy old men. They are Alte Roite, magician looking guys who morph into winged avis-like creatures, Tote Avis. They are more of a pain in the ass to deal with than anything threatening, although you can get screwed by beating them with low HP after Maelstrom and then having to fight another one of them immediately after if they’re right next to you. Red Shoes is the treasure in the north and a Rainbow Suit is the treasure in the southeast. The girl you saved will give you a kiss and run upstairs. Go up that way.
Work your way to the opposite side (go west) and get the Man Eater. Return back and you’ll be by the throne room. As you try to exit through the northwest, you’ll be stopped by the lady who blew the kiss of death at you.
She’ll turn into Halicarnaso / Halicarnassus, a dangerous boss that will use Frog / Ribbit on all your characters immediately. You can prepare for this by having your characters in Frog status prior to the battle, but it shouldn’t slow you down that much. Steal a Staff of Light from him. Start off with Hastega and Mighty Guard – Slow doesn’t seem to work, but Halicarnassus doesn’t act that fast. Use your best options, like Flare, Meteo, Holy and whichever legendary weapons you are using. And that Chicken Knife. 20 ABP is your reward. She’ll go down and you should rest up save and head to the roof.
Here you will fight a boss that you learned a tidbit about in the library; Twintania. It said that when a certain monster was preparing for Giga Flare that it is vulnerable. This boss at the roof, the large Twin Tania, is the guy that this applies to. He sometimes uses Mega Flare as a counterattack to high level magic spells and also uses Tidal Wave to counteract physical attacks. Keep this in mind so you don’t attack too many times in a row and die because of his counterattacks. Better yet, equip 2-4 Coral Rings before the fight and you can use physical attacks as a way to restore your HP with his otherwise devastating Tidal Wave. Holy is amazing, with the boost from the Sage’s Staff it does upwards of 8000-9000 damage! After a certain amount of damage (and it’ll be a lot -Twintania has a massive 50000 HP) it’ll begin to charge for Giga Flare. You’ll be done if it gets this off. So when this happens, cast Odin and Twin Tania will be sliced in several parts. Some times if you’re really wailing it and have your party Hasted and Twin Tania slowed, he might not even get a chance to charge up for the attack. 24 ABP and a bridge forms.
North and you’ll be in the final part of the Cleft of Dimension. Go right for a Pinwheel – Fuma Shuriken and south to see Gilgamesh (assuming you fought him at the end of World 2). He won’t recognize you and it’ll take some fighting to get him to do so. Fortunately you can steal a Genji Shield from him, which you absolutely should do.
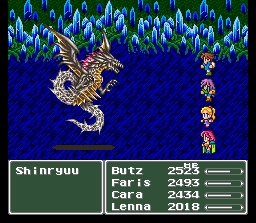
In the next room, get the Pinwheel and Elixir and continue on. In this third section, DO NOT GET THE TREASURE YOU SEE. It is a battle against Shinryuu for the Ragnarok sword. You won’t be able to beat Shinryu until you build up immensely (and have a carefully planned strategy). Don’t let the normal battle music fool you – there is no harder battle in the game, including Omega. And in FFV Advance, they gave Shinryu his well-deserved boss music!
Shinryuu
This is a really fun battle. Chances are you’ll run across him on accident unless you’re told otherwise. He is beatable, but like Omega, you need to know what to do. And the strategy with Shinryu has much more depth to it compared to the other ‘super boss’ Omega, and far less room for error. You have to be perfect, and you have to be able to pick your commands extremely fast because Shinryu will act and act and act. He just doesn’t stop doing shit. Anyway, first it’s time to go over what it’s going to take to even be able to give yourself a chance against the lord of dragons.
I can’t imagine it’s possible to defeat him without Dragoon Spears (ideally 8 of them, although 4 or 6 might suffice. Last time through I did it with as few as 3 Dragon Spears). Since this is such a key part of the formula, let’s take care of that first. In the 1st and 3rd areas of The Rift, you will find Crysdragon’s / Crystal Dragons. You have about a 1 in 100 chance of stealing a Dragon Lance. The other 99% of the time you will be getting an Elixir. But I found a trick for this recently. Bring a Time Mage with, and if you only steal an Elixir, use Return. This will bring you to the beginning of the battle, as if it were a new battle. So you may be able to steal a Dragon Lance, but you still may get an Elixir. Point is, though you may have to cast Return 50 times, this way you’ll get a Dragon Lance each battle and won’t have to wander around looking for another Crystal Dragon – which is good, because they’re somewhat rare to encounter.
Next step is to buy four Coral Rings. You probably have a few at this point, and money is obsolete at this point in the game anyway. Other items of use will be the two or three Gold Hairpins you have, an Aegis Shield and two Ice Shields. The Ice Shields allow you to absord the Ice Storm attack Shinryu has, which is really damn annoying (2700 damage on each member). The Aegis Shield will also help dodge this attack, and many others. Aegis Shield is very helpful for whoever has it. Maybe the Ribbons are worth equipping on the character / s without the Gold Hairpins, but I don’t know that that matters.
You are going to want two or maybe three jumpers, depending on how many Dragon Lances you bothered to farm. Besides that, you probably want two people with White Magic (for Curaga, Esuna and Dispel), one or maybe two with Time Mage ability (Hastega, Slow won’t work on Shinryu), a Blue Mage or maybe two (Mighty Guard), and a Summoner or two for putting up Golem Summon to protect against Shinryu’s brutal physical attacks. With the Ice Shields, try to give them to your White Mages so they can cast Arise to revive whoever dies from the ability. Obviously, make all four characters Freelancers, and it’s very imperative you know the order in which your characters act. I say this because you’re going to want to get up Mighty Guard and Hastega first thing in this battle, because the beginning is one of the few times in this battle against Shinryu where you actually have some time to spare. He’s really fast, and once he uses his Tidal Wave to start the battle, the shit is on.
If you got 8 Dragon Lances, by all means, let everyone Jump. It’s an easier strategy than what I explain, but I can’t be bothered to fight around for 8 of those things most of the time.
Also note that level really doesn’t matter in this. Most of Shinryu’s attacks when not prepared for are going to kill you whether you are at level 37 or 47 or 57, granted the higher level will buy you some time (and help you with Level 2 Old which can be a deadly factor in this battle depleting your strength).
So much luck is involved in this. Shinryu can really bury you if he chooses certain tactics, and you’re going to need some luck with that Aegis Shield and Mighty Guard being able to dodge tactics.
Starting off, Shinryuu will cast Tidal Wave (hence the Coral Rings). I think he only uses it this once.You should then be able to at least choose to use Mighty Guard and Hastega, which will help you a good deal. If you can manage to keep Haste on your main jumpers, it’s a real boon being able to skip 3-4 attacks by Shinryu that you otherwise wouldn’t have. Shinryu will probably use something like Maelstrom after this, which puts you at like 3-10 HP. Not guaranteed to hit, but generally does (I think Mighty Guard raises your chances to dodge this, along with Aegis Shield). Shinryu also has those brutal physical attacks, which are lessened by Mighty Guard, but you are still going to want Golem up for this purpose. As stated above, Ice Storm can be a dangerous ability. Aegis Shield often dodges it and the Ice Shield users will survive too, but surely it will off at least one of your characters. Shinryu’s Poison attack can be really annoying if you just got dealt a Maelstrom – or vice versa (if you are poisoned and then get Maelstromed, you basically will die in a few seconds from the poison). Shinryu also has Evil Eye which he uses as a counter after you do one of your crisp jumps for 16,000 damage or so. Evil Eye sometimes works, sometimes it doesn’t, but you’ll have to waste time de-stoning your character. Shinryu also likes to use Level 3 Flare and Level 2 Old later in the battle, which can both wreak havoc on you. L3 Flare is basically an instant kill unless you happened to put a Flame Shield on, while L2 Old as said can be a nuisance, sapping your strength.
A key moment the last time I played through FFV GBA was when Shinryu used Mighty Guard himself when he had lost about half his HP, and this is a problem because it’ll make that 8000 damage be more like 3700, which is not what we want. I was able to get off a Dispel with a White Mage right before two Jumpers came down. Shinryu killed my White Mage but the last Jumper took Shinryu down. Shinryu is probably somewhere near 70,000 – 75,000 HP, so you’re going to need to survive for a good while. The important thing is to be patient. You’re going to die several times in this battle going through, it’s too hard to explain in words what it’s like fighting this battle, mostly due to how fast Shinryu is. You’re going to have to be really quick with your fingers choosing abilities, because it can be the difference in you getting off a Curaga or him attacking you physically after Golem goes down. And while you’re dying over and over and probably getting close to beating him a few times, it’ll all start to make sense what you’ll have to do. Reading the above will cover you for most of his moves, but again, so much luck is involved in this battle. But that’s what makes this battle fun, because really, we who play RPG’s know that there are few battles that really challenge you like this.
The reward for beating Shinryu is much more notable than the Omega Badge you earned earlier. No gold, no ABP, but the Dragon Seal / DrgnCrest and the other-wordly Ragnarok Sword. The sword with runes of the gods carved in its surface, a whopping 30 attack power more than the Excalibur.
Okay, back to what you were doing. Continuing past the Shinryuu treasure, go west at the fork for a Pinwheel and east to the next room.
Left is a boss battle that opens up a Save Point. This battle is against Necrofobia / Necrophobe and 4 Barriers. Your first mission is to take these Barriers out as fast as possible – so have lots of Summoners (or Summon ability) so that Leviathan and Bahamut can be cast to do heavy damage to all the Barriers.
The Barriers will cast Flare on themselves (they have a Wall) so don’t bother with Crbnkl, they’ll get you anyway. Instead, do some damage control and make sure you are rested for the first 3 turns or so until the Barriers are gone. Then the battle gets significantly easier and he focuses more on physical attacks, so use Golem if you’d like. His physical attacks when paired with a Vacuum Wave can do a number on you unless you have Mighty Guard / Golem up. When he gets near death, Gilgamesh will come in (unless you didn’t fight Gilgamesh in Exdeath’s Tower, or unless you kill Necrofobia too fast). When Gilgamesh is there, you have a short period to steal from him – do so to get the last piece of Genji Equipment in the game, the Genji Armor. Gilgamesh will address each character and then blow himself up to destroy Necrofobia, and the Save Point is yours. You have maybe 3-5 turns before Gilgamesh ends the battle, so that’s only 3-5 opportunities to steal assuming you have only one character with steal / mug. Hopefully you get that Genji Armor. Strangely, no ABP from this battle.
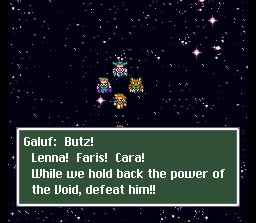
Further north is Exdeath, so make sure you’re ready to end the game before you go.
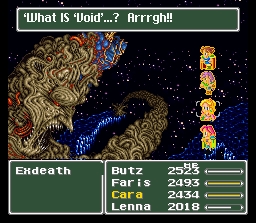
First of all, while Exdeath doesn’t compare to Omega and Shinryuu, he is far and away the hardest normal battle in the game. Neo-Exdeath is extremely dangerous and the battle takes a long time, forcing you to stay on top of things for a prolonged period. The first battle is against just Exdeath, and then it’s a battle against Neo-Exdeath. As for class projections, I tend to go with three Mimes and a Bare. The Bare has X-Fight and 2-Handed, with the Ragnarok and Excalibur. The three Mime’s each have White / Summon magic, while two of them have Dimension Magic and one of them has Blue Magic.
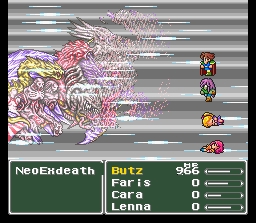
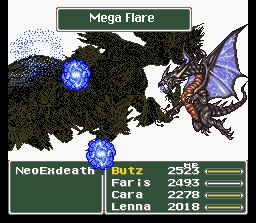
Use your best spells on him, whether that be Holy, Flare, Meteo, or Bahamut. X-Fight is also very useful for your physical attackers of course. This first battle isn’t really that hard but you should take the time to use Big Guard, Haste2, and keep your party in an overall good condition. When the battle changes to Neo-Exdeath, your status carries over (and now there will be four targets to go after).
You will want to basically just use Bahamut on this new form to take off 3000-3500 on all four parts. Continue this process but watch out as Neo-Exdeath gets downright vile towards the end so make sure to put him away when you have the chance. Again, Big Guard and Haste 2 are necessities, and with a little luck you’ll down Exdeath.

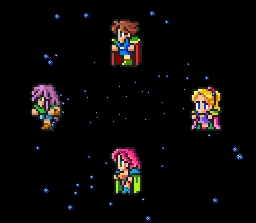
The ending is dependent on the last battle. If you have all your characters alive, there will be a letter to Cid and Mid from one of your characters, stating what has been going on lately. At the end there will be a meeting at the great tree of Mua but Galuf will be revived.
If you had one or more characters dead, you won’t hear their story in the letter obviously. The left over character (or one of the left over characters) will write the letter, and instead it’ll be the dead characters who get revived at the tree of Mua. Each character will then go their own way, with Cara on a Hiryuu and the other three riding Chocobos. Watch the credits and you can see the scores of your characters in terms of total abilities and other rankings.


Great stuff buddy thanks a lot!! Good walkthrough with solid strategies for every big battle. Got a little less detailed towards the end of the game but that s all good, kept me guessing on the location of some things but nothing impossible!!
Great game, solid walkthrough! Thanks my man!!