Zelda Twilight Princess
Start up Zelda Twilight Princess and rename Link and/or Epona if you wish. Choose your settings and then watch the opening scenes – you’ll have some dialog but you won’t gain control for a while.
Ordon Village
Eventually you control Link once he gets a visitor outside of his house. He wants your help, but your horse Epona is gone. Once the dialog is over run around this area and get used to the new controls. It seems much more smooth and fast compared to Ocarina of Time (rightfully so) but still you’ll see the similarities.
Go northwest on the minimap (west part of your screen) to exit. Go north now until you can go west to a water area. Epona is here with a lady and she cleaned your horse for you. Hop on Epona and dismount, talk to the girl again and she wants you to play Epona’s Song with some grass. Jeez. Well go to the grass on the ground and begin to do this, and you’ll recognize Epona’s Song.
Hop on Epona and go back south. The guy who wanted your help went further south. Follow him and you’ll be at Ordon Village. Talk to everyone around here and throw the rocks and pumpkins to reveal Rupees. In the south part of town is a building with a deck-like porch area. Catch a Cuckoo Chicken and go on this deck and jump off towards the east on the minimap and you’ll fly over the fence into a previously inaccesible area.
Continuing working your way up until you see a ladder on the back of this building. At the top is a Yellow Rupee and another grass that you can play. This attracts a bird that you can attack things with. Hmm. Remember that swordsman from the first scene? He’s here messing around with his sword, talk to him to hear about Colin and Colin’s Fishing Pole that is being made so you two can play together.
Ordon Ranch
Go due south on the minimap in Ordon Village to get here (ride Epona of course). Talk to Fado on Epona and he’ll initiate a minigame. You have to herd all the goats into the pen on the west of the minimap. Just position yourself behind them and slowly push them in – if you go too fast you might pass them and get them in a different direction, and if you press the A button (whoop) too much they’ll attack you. Be calm and steady, it’s not too hard though. After this is done you’ll have some fences set up for you to jump. This may entertain you for a bit but do what Fado suggests and jump the fence and go north on the minimap to continue.
Save when you are prompted to so.
Link will be back in his house and get woken up. This song must sound familiar to those Ocarina of Time fans. Go outside near Epona to see Colin, Link’s best buddy. He finished his Fishing Rod but it’s at home.

Ordon Village
Head back into village. You can’t bring Epona, it’s her day off. Go in Sera’s Sundries but she’s upset about her cat. Leave and go a little farther down to that large hill. Climb up it and talk to the dude. Jump across now (make sure you pick up a good head of steam (or just roll to make sure)) and play to summon the bird. This time line this bird up above the guy who was complaining about the bee’s nest – you’ll see that Bee’s Nest and the hawk or whatever will knock it down.
Jump on the Sera Sundries building and then go to the farthest grass pillar for some more grass to blow. This time aim the hawk at the jumping monkey – the hawk will retrieve a Cradle for you. Bring this cradle near the bridge in the middle of town to see Colin’s mom. Follow Uli to the house and get the Fishing Rod. It was just finished and she was supposed to give it to you.
Return back to the beginning of the village and behind Fado’s house (it’s locked). By the beehive you’ll see something you can climb up – a Yellow and Blue rupee at the top. In the far east portion of town is Jaggle & Pergie’s house and near that is a lake with the cat. You’re going to want to get that fishing rod out and wait until a fish is underneath it and press C down to yank it to shore. Get two and the cat grabs the second one and runs back home.
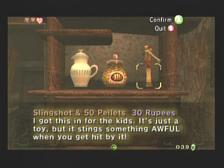
Follow it and Sera will be happy. She gives you some milk in a bottle – but the real prize here is the Bottle. Any zelda fan knows you can keep all sorts of good stuff like fairy’s and potions in these bottles so after the milk is gone there will still be use for it. For 30 rupees, buy the Slingshot and 50 Pellets. Go back to your house and blow some targets and scarecrows up to impress the kids. It shouldn’t be too hard and like they say you can L target them. After all the targets are destroyed go to your house and shoot the spider on the ladder.
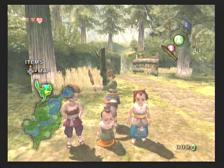
Climb up the ladder and enter. Grab the treasure for a Wooden Sword. This is a classic beginner weapon for Link. Go outside and start taking some shots at the kids, it’s fun to watch them dodge. Talk to them and a sword tutorial pops up for you.
Faron Woods
Get on Epona and ride north. Jump the gate and then go east after this as Epona can’t go north through water. The music will change in the following area so dismount and prepare to fight a Deku Baba. They aren’t too hard although their attack can be quick – attack with a jump attack from afar is useful. Go on through the path to see Talo’s sword. You can go further but you’ll be blocked, and it’s a bit dark in here.
Leave and take the east route before the cave. The guy you come to gives you a Lantern. Of course he has the fluid for the lantern that you’ll need to refill when it runs out. For now light the pit as he says and now you know how it works.
Go into the cave now and light the first torch. Fight through the enemies again and burn the web with the Lantern. Continue along west on the minimap until you reach a dead end with some keese and a rat. A treasure of a yellow rupee is here as well. Return back to the split on the minimap and go north. Finally, light.
Forest Temple path
You can see better and you’re in a really big area. The purple guy approaching from the northeast is tough and takes some hits. These are Bokoblin’s. A Deku Baba also lurks around. The west is gated off, if you go north though you’ll see some Keese and a cave entrance. It’s not that dark, so go through. Fight the Keese and Bokoblin along the way, you’ll see a Small Key in the treasure. It’s useful for locks like you saw on the previous outdoor screen to the west. Light the two torchs and a Piece of Heart appears. In this one you need 5 pieces of heart to get a heart container.
Go back to that gate in the west part of the big area. You can now enter the Forest Temple. Fight through some enemies and you’ll see Trill the bird. He wants you to buy a red potion (hp restoration) or refill your fuel. Since I wasted my lantern fuel i decided to do this.
Take the left path as you go up and jump down right on a yellow rupee treasure. Run down the hill now and kill the bokoblins and then start attacking the cage. It’ll break and the monkey and Talo are freed. Rusl talks to you before night time and reminds you that you’re going to Hyrule and could see Zelda tomorrow.
Ordon Ranch
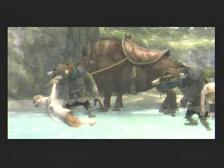
Herd those things again but make sure you do it fast – you’re timed. It’s not that hard, just get the angle and give them the boot. Jump out of the gate and a scene occurs – it’s time to go to Hyrule but Epona is hurt. Ilia takes her to the forest spring. A goat runs you over after this.
Go north towards your house and Colin wants to go see Epona and Ilia with you. Go to the nearby kids now and give them your Wooden Sword. North and west to Epona but it’s blocked off. You must go back and then stick to the east as you’re running back. Go through the hole and you’ll have some scenes with Ilia.
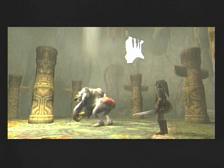
However someone attacks and Link is knocked out. Colin and Ilia are taken away and Link wakes up in a panic. He runs towards them, towards the Forest Temple but he’s taken in and messed with by some evil guy. Link turns into a werewolf eventually.
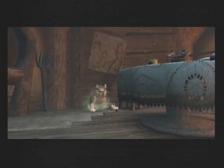
Forest Temple
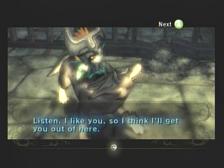
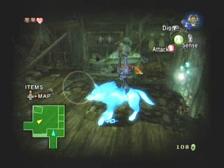
Now you’re in a jail. A little guy taunts you. Eventually he gets to the other side of the jail cell and you need to get there – attack the crate near the cell and start digging furiously. You’ll dig through. The weird guy joins you and will help you with Z. As you’ll notice the wolf has similar attacks to Link and his sword but is much more agile and harder to control.
Go to the other jail cell and L target that to pull a switch – you can run out now. You’ll come to a torch, so press X to use your senses. This is another cool feature so that you can see different things while this is used. The spirit near you is one of these things that you can see so talk to him.
North from here and west. Pull that chain and go in the tunnel, and then go east and south to pull a chain. This opens a door to the south. Take the east fork and pull the chain and dig around this area for some small treasures.

We can go north now that the water level rose. Careful of this area it’s infested by those black creatures and you can get killed in the water easily. This happens often since wolf link likes to jump around out of control. Another thing that complicates matters is that if these black creatures are around when you have something else targetted (like those chains) it’ll be really hard to hit them.
At the fourway fork go north for a path with a treasure and then west. You can dig in this one after you pull the chain. There is a second chain over here that lowers the water level. East and you reach a large gate but your new buddy ditches you. Yep, you’re going to have to make it over there yourself. Go towards the gate and east to go through a little passage. Talk to the spirit nearby and make your way across to rejoin your friend.
See the spiral stairs going up? You have to go up there but if you try to jump by yourself you can’t do it. Instead go up to a ledge and press Z to have your buddy help. L target him and press the jump button to get to where he is. It’s not that hard – do this until you get to the top.
You’ll have some Keese enemies to deal with here. Take them out and get on the stairs to the west part of the minimap. Press Z and do this fast – you’ll shoot up about 3 or 4 ledges.
Hyrule Castle
At the top we’re at a new place. Your new friend has someone he’d (it’d?) like you to meet. Go on ahead and talk to the spirit – he’ll mention about this being Hyrule. Continue to the right and push the crate against the wall and jump up them, and then go north more.
We’ll be stuck, but we can do the jumping trick with our friend again. Get on the wooden area and do the Z and L Target – jump thing a few times (3) until you get on a roof. Run across it and turn and go up into the new building. Go up the stairs and push the door open.
You’ll meet a mysterious lady. She tells of the shadowy dark figure who has taken over Hyrule. The king of the night. Took his army into Hyrule and made them surrender. People became spirits. After these scenes, you’ll meet Zelda. Your friend’s name is Midna. After the talk you are to leave.
When you do attempt to leave Midna reminds you of Ilia and Colin. Are they safe? You’ll transfer back to the other world, the light world, but you’ll still be the wolf.
Ordon Village
You’ll be back at the spring where Epona normally is. As you try to leave a shadow appears, it is Midna again. Go south back towards town. Okay, the male from Sera’s Sundries will attack you with a Hawk. This is a pain as it’ll continue to attack you and there’s nothing you can do. Well, go near Sera’s Sundries on a platform and use the L trigger to jump on the roof of the building, and then jump on a few platforms until you get to the husband. He’ll get scared and he’s not a threat anymore. Now jump down and go by the fishing dock to scare some humans – talk to the dog and then sneak up on the humans to listen to their conversation. They mention the Sword and the Shield…
Near the waterwheel there is another light colored platform where you can press Z and l target Midna to get on the house. Jump in, and then jump on the table. Another Z and L Target to get to the Ordon Shield, but you must attack the wall to get it to drop. The Ordon Shield will be burned by fire so remember that.
Get out of here now and go towards Rusl’s house. His wife is here as wel. Rusl will kill you if he sees you but you’s not fast. You want to go to the left of their house and use your senses – dig near the sparkly stuff near the wall. You’ll be in the house in no time – grab the Ordon Sword on the couch and dig back out.
Run to the spring now and a monster will come from the sky. He’s pretty tough and hard to hit. You’re going to want to L target him and do your jumping attack to bite him. The spring area changes to a golden color.
You will meet a light god, one of four that protect Hyrule, and this is Ordona. She explains the threat of darkness as they fiend the light power that Ordona the others have. If you are in the Faron Woods and can revive the Light Spirit you may be able to transform into your old self.
When you regain control go north and accept Midna’s proposal to go back to the Twilight. He’ll talk to you some more and hides your weapons for you.
Faron Woods
Go north when you gain control. You’ll encounter some evil dark beasts. They are pretty tough at first, taking off a heart but are slow with their attacks. Eventually you’ll get to striking fast attacks. Once two die the last one will revive them so go forth with Midna’s proposal to get all three enclosed while holding B and then release. The attack kills them all.
North of here and you’ll stop for a scene. Visit this spirit to the west and it’ll tell you about the shadows, the Twilight. You are to retrieve the light in a Vessel. The Vessel of Life. You are to fill it with Tears of Light. You acquire more of this by defeating Insects of Darkness.
Well go north and use your Sense skill and you will see two Insects of Darkness. Just L target them and rush ’em. Grab the blue Tears of Light.
Go north at the upcoming intersection. Enter the building via the east ramp – you can press Z and L Target Midna to get up on that ledge and drop in. Talk to the spirit of that guy who gave us the Lantern. Insects of Darkness come out so defeat them and grab the Tears of Light. Talk to him again but he’s scared of the other bugs.
Leave and go north of the house to spot an insect on the north side of the house’s exterior. Kill it for your fifth light. Go back to that west passage and dig to the other side (use your Senses to see). Kill the Dark Insects as soon as you get in for two more Tears of Light.
You’ll be at the cave where you rescued Talo now. By the first torch use your senses to see that you can dig to the end of this area – a big shortcut. Not that it matters, but exit north and you’ll be at the Faron Woods.
Kill the dark insects with your Senses just as you exit. These can fly. Now stick to the east wall but if you go in the poison lake you’ll be warned by Midna. On the east side you can Z and L-Target Midna to get to land on the east side. Go up the slope as it goes west and do some more Z and L Target action, ignoring the birds. When you get in this tree pop your senses up and kill the insects, there’s three of them.
Go forward now and you’ll have to do these Midna jumps past a deku baba and up the tree. Now get ready for some more this time by a lot of Deku Babas! Be fast. Lots more jumping now this time down the tree, and you’ll encounter two more insects. You have to dig to discover them. Go on after you gain their light.
Three more of those evil beasts and you’ll need Midna’s help to make sure they don’t revive eachother. Further is a monkey spirit, save him from the insects and fill your Vessel of Light up. Light returns to the forest and you meet Faron. He tells you that since you are the beast that You are the chosen one.
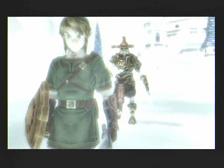
You turn back into Link, with his classic Green Tunic.
You must now go to the forbidden Forest Temple. Go north to the Lantern Oil guy who is hanging out. He is selling a Bottle of Lantern Oil. Buy it despite it’s 100 rupee cost as having the extra Bottle is worth it.
Light a torch if you want or just run and cut your way through.
Faron Woods (Link)
You are back here and the fog is still here. Pull your lantern out and the monkey steals it. But follow him he’s actually trustworthy. You’ll get to the west gate and he’ll drop your lantern (out of fuel). Pick it up and follow him through the west gate.
Go by Trill’s and then you’ll see a Golden Wolf. This turns into a skeleton warrior who knocks you down when you attack it. It then teaches you to Jump and strick by L targetting and pressing A. This will be the Ending Blow, a useful technique. To learn more techniques from him listen to the Sound of the Wind, he says.
Forest Temple
Go north and kill the Bokoblins and then use a Lantern to light the web. Kill the Keese in the tunnel and north for your introduction to the Forest Temple.
Take out a Deku Baba and go up some vines to the east for a Yellow Rupee. Defeating the Bokoblin and Deku Baba at the north part and then shoot down some more skullwalltulas. Free the monkey by destroying the cave and follow him up the vine. Clear out the next area and go through the door.
A Giant Spider will greet you as you go up the bridge. Jumping attacks are effective for killing it. Further along pull your Lantern out and light all the torchs. You can travel north now, grabbing the Forest Temple Map in the big treasure to the east. When you go in the north room an evil monkey will try to kill your monkey by cutting the bridge down.
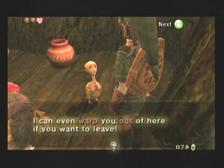
Return to the previous room and the monkey will set it up so you can swing on him to the east – release by pressing a at the appropriate time. Go to Link’s left as you enter and kill one of those spider bomb enemies near the far wall – it’ll blow up. Destroy the pots here and pick up Ooccoo who will teleport you in and out of dungeons when you want.
Go the other way and take it until you can use the Lantern to burn a spider web. In this area walk across and then to a gated door. Swim to the southeast corner for a Yellow Rupee. Take the door going north in this room and then go north again. The treasure to your left is a small key.
Go back to that locked door going east two rooms ago. Go through here and roll into the pole to get the cage to break. After that two Bokoblin’s come so kill them and swing on your monkey friends to leave. Go west two screens to that central room, and now that you have two monkey friends swing to the west end. Burn the spider web and enter.
Okay in this new room, you’ll see big plants that you can’t kill. Instead kill the red Deku Baba’s and then go up the stairs. When you see a spider bomb, kill it and drop it on the plant in the northwest. The plant in the south must have a spider bomb dropped from up top so that’s the next one to go after. Grab the Piece of Heart inside once that one is gone. Now go to where the first plant you killed was (by the first spider up the stairs. Grab a spider bomb and bring it across that gap and throw it so that it blows up the rock wall.
In this new room, go down and hit the totem poles. You’ll find a blue rupee and small key respectively. Run across the left side of this skinny platform as you’ll get sprung around if you take a different path. Grab the treasures (red rupee on the south minimap) on the outside and then light the torchs to create the path to the monkey. Kill the spider and use the key to save him, getting the rupees inside.
Leave this area and take the vine in the other room, and take this room you see straight ahead. Kill the plant that stole the Small Key. You have to throw a spider bomb in it to get the key back – save the monkey afterwards for a total of 4 monkeys.
In the central area they’ll all want you to go north now. Swing across them to the north room. Get the pots and get healed – the next room is the boss.
The Evil Monkey is here along with red Deku Baba’s to distract you. The evil monkey throws his Boomerang at you and you are to dive into the totem pole that he is on to stun him. When he tries to catch the boomerang he won’t be able to so go to town on his butt with jump attacks or regular attacks.
He has a decent amount of HP and when he’s gone a bug will come off him and his mind will be normal – he leaves the Gale Boomerang, the Power of the Wind. Good ole Gale Force Fairy Wind.
To leave this room hit the fan with the Boomerang three times. Go east when you exit and if the bridge isn’t facing you, hit the fan above it and it’ll switch to face you. Throw the boomerang at the monkey cage to free him and then go further south on the minimap and soon you’ll be in the plant / spider bomb room. Take the northwest exit into the room with the torch and the launch panels. At the end, boomerang the two torchs that are lit. They’ll then be unlit and you can get the Piece of Heart at the far west.
Return east to the central room where you can access all the different areas. Swing on a monkey to the center of this room and look up. See the treasure? It’s a Compass so throw the boomerang at it.
In the east room you can get the Big Key. You need to have the boomerang of course and get to the southeast corner of the room. There are four different fans but you must hit them in the correct order (press R to lock multiple Boomerang attacks) and follow the Z. If you follow the Z start with the awaymost when you boomerang and work your way in.
Now that you have the Big Key go north into the next room, taking the bridge north and following the monkey in the door. Hit the spinner in this next room to continue north.
In this room you’ll have to go on the left bridge and hit the spinner – then go on the next bridge and hit the spinner. Defeat the enemies around now including the skullwalltulas and climb the vine until you get on the platform above. Kill everyone and grab some rupees then enter the door.
Fight those red Deku Babas and then look to the north – see the Spider Bomb? Lock on and Boomerang the thing over here and then throw it on the flower monster. Grab the treasure for a small key. Getting the boulder to be destroyed is an entirely different issue as you’ll have to time your throw perfectly. Climb up and clear this area and get another spider bomb – this boulder will reveal a Monkey. You have six now. Go back a few screens to where there is one rotating bridge in the center – hit this spinner, and then get on the bridge. Hit the spinner again and go west.
In this new room, look up and attack the spiders. Kill them, but they’re tough enemies. Get the Lantern out and use it on the north spider web, and fall down. You’ll be next to a monkey, the seventh one. Break his cage and climb up the vines.
Go east directly now into a room you haven’t been through. Okay, stick to the northeast although you may have to kill some of the tiles with the boomerang. There is a path here and a vine. First, take care of the enemies though. At the top hit both of the fan switches to release the last monkey. The treasure chest in this room is a Red Rupee, by the way.
West a screen now and then north. The monkeys will allow you to swing over – you need the Big Key but you have it.
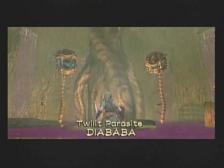
Forest Temple Boss Twilit Parasite Diababa
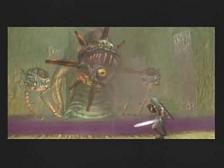
Twilit Parasite Diababa will appear in the poison swamp of the Forest Temple. Feed the two”heads” some of those spider bombs. How to do it? Target the spider bomb with R and then target a head and it’ll go to that head.
After this happens the real head appears – those two previous ones were arms. Okay, well now the baboon is back. He swings around with a spider bomb and you need to target that and then the center head. If you do this without getting attack by the two arms then the head will blow up and you can run in and attack with your sword. Get in the Jumping attacks by holding L and pressing forward and A. After you’ve hit Twilit Parasite Diababa it’ll start breathing poison towards you so avoid as best as you can. There is life and other items in the pots nearby. After the battle grab your first Heart Piece. Also you get a Fused Shadow. Talk to Midna to warp out and save.