
Eldin Province
As you leave the Forest Temple with Midna you’ll have no Colin or Ilia unfortunately. Talk to the Faron Forest Spirit for a while and then Midna some. Go east and north now to the Lantern shop – you might want to fill a bottle of oil here. North and you’re in Hyrule Field.
Hyrule Fields
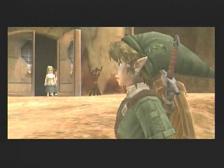
As you enter the Fields you’ll see Bokoblins around. You’ll also notice that to the north and east are clouds of darkness while it is light where you came from. This is because Twilight surrounds Hyrule.
Go north along the brown path that you see. Drop down the cliff and roll into the trees – one of them has rupees and the near tree will have a Gold Male Beetle drop down. You’ll have to wait a bit but go up to it once it goes down and choose Pick Up. You need to be still to do it. You can check the Collection Screen now to look at the Bugs and Beetles and other things you’ve caught and where you’ve caught them.
Back on that dirt path, where you just jumped off, you’ll see a Heart Piece in a tree. Lock onto it with the Gale Boomerang to snag it – you should have 4 Pieces of Heart now.
Instead of continuing north veer off to the east. A guy will run up to you, The Postman actually. He gives you a pointless letter but he’s basically here to teach you about the letter system – it’s near the collection screen and you can check it out to read important letters in the future.
Start heading north along the east side of the pond. See that steep cliff to the east of the pond with several trees? Check the north side of one of the northern-most trees and you’ll see a gold glow – Use that Gale Boomerang to bring it close to you and then it’ll start flying. Chase it and pick it up, it’s a Female Beetle.
You passed where you need to go, though. Head south from this female beetle and then east when you can. You’ll see a shroud of darkness, but Midna will ask you to go into the Twilight – choose to do this.
Elden Province
– Kakariko Gorge
You’re the wolf again so run north. You’ll come across Talo’s Sword – the wolf will smell it so that you learn the Youth’s Scent. You’ll see when you have your Sense on that you can see smoke arising from that scent.
Keep your senses on and dash, following that scent. Eventually three twilight beings will jump you. You’ve fought this group before, just take out one of them and then just use your charge attack to kill the other two (or charge attack to kill all three).
After this battle you’ll learn about teleportation. Remember those twilight portals that the darkness enemies came from? Well you can go on the map and teleport with your wolf among them. For now choose the North Faron Woods warp.
North Faron Woods
Warp here. There is a bridge right next to you up against a wall. Press Z to bring up Midna and tell him to teleport the bridge. Choose the destination – go to Elden Province and then Kakariko Gorge. The bridge is turned upright and taken to Kakariko Gorge and so are you.
Follow that scent across the bridge now. You’ll run into a gate to Kakariko Village. Enemies are on the other side (you can even attack them from this side). Of course on the right side you can dig through. Further east and you’re in Kakariko.
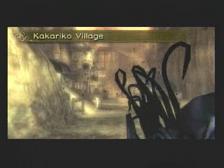
Kakariko Village
Three more shadow beasts to beat as you enter. A spirit of light will call you now. Go south into the water and further south and talk to the spirit – collect the Vessel of Light and then it’s time to start getting some Tears of Light. You now have a map full of locations to go after to get Tears of Light.
You’ll notice the scent leads to the southeastern house. Go to the back until you can do the Z Midna Jump. Do this three times to get on the house and walk on the suspicious area to fall through. You’ll see the kids and Barnes and Renado. Renado has a Cellar. Well, you’re gonna have to open it. Notice the torch in the center of the building? When you regain control, grab the piece of wood nearby and light both sides of it. Now go along the edge of the room, jumping across the ledges and lighting the candles on the wall. Light all four and the path opens up.
Drop down and you’ll have to fight three bugs. Just do the usual and jump attack them for three quick Tears of Light. Go north a bit and do three Midna jumps to enter the Graveyard!
Kakariko Graveyard
Alright, watch out for the Keese that swarm you immediately. Also get your senses out and look for a bug to dig out. L target it if you have to and then kill it for your fourth Teardrop of Light. Run west out of the graveyard.
Eldin Province Kakariko Village
You’re back in town now. Go due west on the minimap but ignore that ramp going way up for now. Instead stick to that wall and go north, killing the tough shadow bird. Further west and you’ll see a little chute the wolf Link can run through. Inside is a small area where you’ll want your senses on to see a bug. Leave this place now.
Go up the Dead End path (the huge ramp you passed earlier). Ignore the sign and jump, getting a dash to ensure you make it. Enter that door and jump down when you get in. Go by the oven door that isn’t lit, and then take the wooden stick and jump to light the torch. Take the lit torch to the oven and look, a bug comes out. Put your senses on and kill it, throwing the stick down first so you can attack.
Alright, exit this room to the east and you’ll be in the initial area of the hotel. Go up the stairs after you clear the shadow Bokoblin’s, and kill another Bokoblin at the top of the stairs. Inside this far room is a bug flying, kill it and then leave this hotel.
Get off this hotel balcony and go to the south part of the eastside buildings. You can climb up and start jumping north to different buildings. You’ll see one that has an area that you can fall through. In this building, see the block on the ground near where you fell? Push it closer to the wall (follow the indentation in the ground) and a bug will fall out – kill it and then leave via some Z and L-target Midna jumps.
You’re outside on top of this building again. Jump north and north more past that next building. Start climbing up that structure to the north and then you’ll see a shaky window. You can enter this building by Dashing and Jumping into this window.
Go up the stairs and put your senses on. Jump at the south wall where the dresser is. It’ll fall and a bug will come out. Kill this bug. Now that the dresser fell, get on top of it and climb up and exit through this little window. You’re on top of the building now. Go up the nearby ramp and then put your sense on and you’ll see a bug running away. Just look on the minimap where the two bugs are (a little big south) and go near here and you’ll see a building. Duck through the little passage on the side and you’re in. Get the stick up off the ground and light it in the nearby torch. Of course, you are to light the oven now. As this happens the whole house goes on fire! There are explosives everywhere so exit through the path that you came. Afterwards you’ll have three Tears of Light to pick up.
Go up the ramp that is a little north of this blown up building. At the end you’ll see a door that you can’t enter, but a little south and east and you can dig in. Attack the pots for the last bug in Kakariko Village. The others, they’re at Death Mountain. Jump down off this building a long ways (the wolf can make it) and you’ll be near a sign at the north part of town. From here you can enter Hyrule Field or Death Mountain but let’s go to the Death Mountain.
Death Mountain
Run up this path and go to the ledge on the side to Midna jump up. Talk to the Goron Spirit (use your senses) and run further up. You’ll have more Z and L Target Midna jumps to do. Move along and now you’ll be in an area with things being shot all about. Be careful where you walk. In the center of this area (use the minimap for help) you’ll see a bug crawling around, so L Target it and dig. Go north of this to the yellow glowing statue.
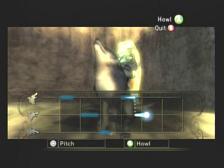
Listen to it and you’ll get a chance to mimic it to get it’s howl. Okay, you control the pitcher with the stick on the left and then you press A to howl. You’ll get some chances to practice this and then you gotta do the howl at the edge of the cliff. It is simple – Top howl, middle, bottom, top, middle, bottom. It may take a bit to get used to the controls but once you do it’s simple. You are to meet this golden wolf “with sword in hand” which means with Link later on.
Go northeast of this through a canyon and don’t worry about the geisers they can’t really hurt you. Just dash ahead and you’ll come to four Shadow beasts and you’re gonna have to beat two of them normally and then do the charge attack on the other two (or kill one and do a charge on three). As you can see there are Twilight Barriers throughout so it’s hard to make your way to one of them that is by itself. Overall this isn’t too hard and afterwards go towards the gate and ram it for a bug to start flying around. Kill the bug and you need one more Tear of Light.
Near the gate is a ledge on the east, and you’ll need to get here so you can do some Z and L Targetting jumps with Midna. Wait for the geysers before you jump. More geysers are in your way afterwards so just be patient and wait for them and keep running. When you see a ledge on the west, slow down and start walking up it. Another Midna jump.
Dash further north towards the last bug on the minimap and jump down some ledges. Watch out for the spiders and shadow birds and put your senses on for the last bug and last tear of light. You’ll be teleported now.
Eldin Province Kakariko Village as Link
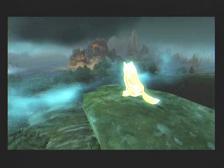
Back in Kakariko, light returns and you are Link in human Hylian form. Talk to Eldin the light spirit of Kakariko to learn about Death Mountain. The kids will see you and you’ll meet the shaman Renado, Luda and Barnes.
Death Mountain
Just go on ahead to Death Mountain. You’ve already heard the conflict between humans and Goron. Climb up the wall and try to stop the Goron rolling toward you. You won’t be able to do this even though it’s like that tutorial you did in the farm with the sheep. Return back to the village to talk to Renado. He tells you that Bo, the Major of Ordon can advise you with the Gorons.
Try to leave Kakariko and you’ll run into Epona. She seems wild so you’ll have to hold left and right on the directional pad (just keep rotating) and if you mess up she’ll throw you. Run back to her and get on should this happen. After some controlling of her you’ll see the Seize option light up for the A button. Do this and you now have Epona back.
Hyrule Field
Jump the gate with Epona and you’ll see the mailman. You just got a message from Ooccoo. Well it seems we’ll be meeting up with him later on. Go south along the east wall as you see a bunch of trees. Near some flowers and grass is the Female Pill Bug.
Continue along the main path as you go south past the bridge. Just a little past this is the Male Pill Bug. Go to the west now, the southwest of this area to be exact. See that cliff sticking out that’s really tall? Look at the top of it and you see a Piece of Heart. Use that Gale Boomerang and pull it close – if you’ve been following the walkthrough that should be 5 pieces of heart so you have one full heart.
Faron Province Faron Woods
Take Epona all the way back here now. Go to the pond now, which is just north and west of your house. Remember that Golden Wolf from the howling event in Death Mountain? He’s waiting here and he’ll teach you the Shield Attack. You’ll enjoy this maneuver as it can open up the enemy for more attacks or it can send back projectile attacks if the situation warrants it.
Travel to Bo’s house in the south part of town. Mayor Bo is a sumo wrestler and earned the goron’s respect through beating them. He teaches you the basics, like B is to slap and A is to grab and you can move left and right with the stick. Try to counter Bo’s grabbing with a slap and just circle around him basically. The first round is simple but the second he’ll actually try and it may be difficult for you.
After you defeat Bo twice you’ll get the Iron Boots. These Iron Boots should be able to withstand even the Goron’s roll. Talk to Fado at his ranch twice and another minigame will start up. You have three minutes to herd all 20 goats into the barn. This isn’t hard, it shouldn’t be at least. Your reward is another precious Piece of Heart, your sixth.

Eldin Province Kakariko Village
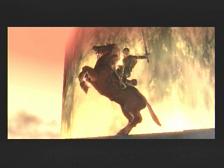
When you get back here that same enemy will capture Colin. Ride Epona north and talk to Renado, and jump the gate to the west. This Bokoblin that has been stealing your friends is named King Bulblin. You gotta chase after him with Epona while his friends attack you from behind.
This first chase should be pretty easy. Try to charge up near King Bulblin and when you get close start that charge attack. Connect a few times with it and he’ll be gone. His friends can be annoying but you’ll have to deal with them to regain your charges with Epona. Just spin attack them also, they’ll fall off their boar quick.
After this ordeal you’ll be one on one with King Bulblin. I had trouble with this part at first as he kept ramming me off the cliff. Try to charge up fast veering from left and right so that he can’t set you up as easily, and then time a Spin attack. The goal is to knock him off his boar and off the cliff.
Kakariko Village
All the little kids are safe with the town shaman Renado. When you regain control get your health back at the Eldin Spring and then go to the north and enter the first west building (the one you entered via the left with the wolf). Inside is Malo the little one. Guess what, he’s selling the Hylian Shield for 200 rupees. Snatch that up since you probably have the max right know for your wallet (300 rupees).
In the very northeast part of the graveyard is a Male Ant near the back of a tree. To get the Female Ant go to the third house in the center-east block and search the broken up bed.
Death Mountain
Time to go to Death Mountain. Equip those Iron Boots when you get to the top and you can grab the goron and chuck him. Continue up the hill and more gorons will come your way. Keep chucking them.
Once you get to the north end you’ll see two gorons on the ground. You’ll need to Shield Attack them until they roll up into balls and then get on top of them. They will then launch you up so try to angle yourself to get to the upper floor. Continue to do this up the mountain. You’ll get to a Smoke Geyser so throw your Iron Boots on and you can walk through it. Some more launching and you’ll be at the Goron’s pad in no time.
Goron’s Ring
You’ll meet the leader here Gor Coron. He challenges you to a sumo match and he’ll whoop you the first time. Put those Iron Boots on and then wrestle with him. He’s still hard but if you side step him and then grab him until you can throw him off. You’ll earn his respect and he’ll tell you of their situation and of Darbus. They need your help so they open up the Goron Mines for Link to explore.
Second Dungeon – Goron Mines
This first area is full of lava. Continue north jumping across platforms. You’ll get to a point where you’re blocked but use your sword to swing through the wooden blockade. When you get to areas that are blocked by fire step on the switch with your Iron Boots to continue onward. You’ll only have a certain amount of time to do so, so you may wish to use your roll (press a) to speed things up. Continue to work your way north kill the Fire Slugs along the way and climbing ladders and jumping on platforms. As you reach the north part jump on the northwest platform and you’ll low it, opening the door. Go through.
Head north in this gigantic area and then east and down the stairs. You’ll reach an area with some enemies to kill like Bokoblin’s and then get the Small Key treasure. Go back to where you started but take the west fork instead of east and you’ll have to jump across some rotating platforms. Time it right and don’t jump too far – you’ll fall off. After two of these is a door with a lock – use that small key.
You’ll meet your first Dodongo in this area. Swipe it’s tail to kill it and evade the fire breath by all means. Follow the platforms in this room until you can get a good look on a platform of the stone structure area. You can jump into this area but beware a Dodongo is near. Kill it and pull the chain you see – release when you’re ready to run. You’re looking for a west path so that you can make it before it closes.
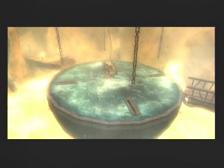
This room is full of water. Yeah, use those Iron Boots and watch your oxygen level. Step on the switch and you can climb on the ceiling. Go around west on the minimap until you can exit without those shoes on.
Past this water room is Gor Amoto’s room and he gives you a Key Shard. There are two more key shards. After this search behind him for the Goron Mines Map. Ooccoo is around here as well, in a pot up the ladder. Go through the upper door here.
Go across the room along the magnetic walls with your Iron Boots. Enter the door to continue.
Go to the switch and stand on it with your iron boots – now the magnetic field will have you on the ceiling so head to the northeast for a Piece of Heart treasure. Now it’s time to head back to the center and look on the minimap and you’ll see you have to go east to exit – just trudge with those iron boots along the path – unequip the boots to drop off.

Run over to the Bokoblins they showed and defeat them and the flaming keese around as well. Jump on the switch with your iron boots and the crane will start going – go to the east where it’ll pick you up, and unequip the boots to drop off at the north end. More Bokoblins and Keese to kill here and another switch but this time the magnetic field just picks you up before you have to move. Kill the Bokoblins nearby and enter the door.
Lots of Tektites around the water in this room. Clear the room of them and then use the Iron Boots (watch oxygen level) and go to the northeast corner for a Small key. In the opposite corner (southwest) you’ll see a block barring your way into a cage – well use the Iron Boots and drag the block away. go in the cage and get rid of the boots to float up. Jump on the switch here and you’ll be on the ceiling so walk the path on the magnetic strip.
Release to fall on the platform. Go to the ledge with the chest it is a red rupee. Look around to see a gate and a blue diamond. Attack this Blue Diamond and jump down and enter the gate that opened.
Two Bokoblin’s ambush you so make quick work of them. Go to the west part and get those Iron Boots on. Climb the wall and then take the south route first for a Piece of Heart and the north to reach a rope you can cut, revealing a bridge. Go through this way.
Slice through the wooden boards you see. Watch out for the Bokoblin archers shooting you and lean west as you get further north. You see a Beamos here (run! you can’t kill it…) but just south of it is a Small Key. Grab this and dash directly east to the locked door. Use the key and be sure to evade those archers.
Jump across and then go left and you’ll see a huge platform – wait until it shows three magnetic strips and jump on it. When you get to the first magnetic spot put those iron boots on and wait until it’s upright again to advance – continue this until you can exit.
You’ll meet Gor Ebizo here and get Key Shard #2. A new weapon is near for you. Behind Ebizo is a Yellow Rupee treasure, and then you are to climb the ladder and use that exit.
Look to your left and put your Iron Boots on – you can walk across and make sure you go to the ledge and go down all the way (look first so you don’t jump into the pit basically). Before you leave look around this platform for a yellow rupee and then the door.
You are in Biggoron’s room now. Biggoron is like fighting Bowser in Mario 64. He tilts the big island you guys are standing on so keep him in the center. He attacks slowly but hard, and that is the only time he is vulnerable to your attacks. When he attacks, do a jump attack to stun him. He will begin to charge at you after this so immediately backflip backwards a few times and get your Iron Boots on. Get ready to press a and then left or right to throw him in the lava (be close to the edge when he rolls). If you do this three times you will best Biggoron. He says to continue onward for the hero’s weapon.
The Hero’s Bow is your treasure. The smallest quiver is what you have and that carries 30 rupees. Rid yourself of the fire slugs around you and then look around with your bow and arrow – shoot the rope and you’ll have a doorway to enter.
In this room go to the far Beamos and it’ll begin to shoot – as will the other six or so. Return back to the entrance and get your bow out and begin to shoot them in the eye from safe areas. After this you can move them. Move the west one for a Compass and then the east one for a new room.
The last elder is here and you now have the Big Key. The chest near him is a Purple Rupee (50 rupees).
Back to the last room and move the south beamos to access a new area. Be prepared for the flaming keese around here – when you get to a fence roll into it to drop it. Now see the Dodongo’s on that little island? This is hard as it is a small space to fight two Dodongo’s. Kill them and then jump to the next ledge. Wait though, see the Flame Slugs on the ceiling? Kill them so that they don’t drop off and knock you into the lava.
Run forth to the gate. From here look up with the bow and you can shoot a dodongo, or fight it later on a magnetic strip (not smart). Go near the switch with the Iron Boots and then go north to where the locked gate is. Pull your bow out and don’t get dizzy, you’re upside down. See the blue crystal right in your face? Shoot it and then drop down and hop through the gate and into the new door.
Go south for a Purple Rupee in this room. Cut the rope on the other platform with your bow and arrow, and continue until you can jump on the switch with the iron boots. A magnetic crane will take you to the north exit so drop down and enter.
Get your bow out to shoot these Pollywogs. A Pollywog takes one good shot from an arrow to kill it. Go to where you can see the blue crystal and then shoot it with an arrow and continue through the door. You’ll come to two Bokoblins so kill them and then shoot the Beamos’ behind them. You can now continue on north this way.
This is that open area you probably recognize. Take care of the archers you see with arrows and the regular bokoblins with your sword. Go to that Beamos and the small key, or where it was. Shoot the beamos and drag it so you can go behind it.
Shoot the archers as you go across the path and then jump on the switch. Now jump into the water and onto the platform just across from the one the switch was on. Climb the pink ladder and go to where the magnetic crane is and it’ll take you to where you need to go – but first shoot the rope and then unequip the boots to drop down. It may make you sick but you have to do it. Get some recovery stuff before you enter the door, like a fairy in a bottle and hearts and so on.
Lots of Bokoblins in this room. You know what to do with the archers. When you get to a dead end, shoot the rope and the bridge will drop. Lots of melee bokoblins for your to charge attack and beat up. This is more fun than challenging here. Head on in.

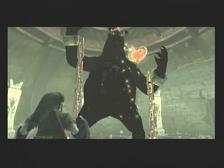
You are greeted by Twilight Igniter Fyrus. The Twilit Igniter Fyrus has a red eye that is ripe for arrows. His attacks are strong but slow and if you are far away he can’t do them to you. Shoot that eye and go behind him near the back chain. Put your Iron Boots on quick and then grab and pull the chain.
Twilight Igniter Fyrus will fall down and you can do jump attacks and repeat attacks to his eye. After a few of these you’ll do an ending blow and he’ll be done for. If you are having problems reload your arrows and hearts in the exterior pots.
Darbus will be free but confused. Midna tells you about the King of Darkness, Zant. Another Heart Container and Fused Shadow for you and then talk to Midna to teleport out.
Colin and friends will be here and the spirit will tell you to go to the Light Spirit Lanayru.
just letting you know you have a typo in your guide
The Hero’s Bow is your treasure. The smallest quiver is what you have and that carries 30 rupees. Rid yourself of the fire slugs around you and then look around with your bow and arrow – shoot the rope and you’ll have a doorway to enter.
17th paragraph, your guide is so professional I thought id let you know to fix it, it says 30 rupees when its 30 arrows or something along those lines