Lunar Silver Star Sega CD Walkthrough

Destinations > Cadin : Black Dragon Cave : Talon Mine : Marke : Black Dragon Cave : Ruid : Goddess Tower : Grindery : Ghaleon’s Palace < Destinations

Getting out of the Dark Cave, you’re going to want to head west and then south to see Cadin. Not much to do here except sell stuff and use this is a place to use the Dragon Wings back and forth for the Althena Shrine by Pao. Go east of this Cadin place and you’ll be at the Black Dragon Cave.
Go east and then all the way south for Holy Clothes. Go to the northeast now, and take the west path going up for some Rainbow Drops and take the east path going up for a staircase. Here, head west along the north wall and skip the path going east and south, but go a little farther west and hit that third south path for a Starlight. Return to the east and go south down that path, taking the north branch when you can and continuing west for a Holy Flute. Go back south and then west and keep on that path until you get to a new set of stairs.
Go south and take the second east path for a Wind Essence. Go back and take that first east path and keep to the outside wall the entire time, and you’ll walk a good distance and come upon an old man and a treasure with Dyne’s Sword inside. The one man meanwhile will give you the Hero’s Crest and suggest you show it to someone in Marke. Psychotron out of here.
Go to the southeast and you’ll find Talon. Venture to the north part of town when you’re rested up and enter the mine area. First off, go south and get some Gloves. Keep following the southern wall, ignoring the first stairs but going in the second pair. On the second floor, follow the outer wall again and ignore the path leading north but take the second path for a Putrid Lunch. Return to the previous path you ignored and take it and continue east until you can go south, which you should do to grab another pair of useless Gloves. Go back and take the path north for some stairs.

On this floor, go south all the way, west all the way, north all the way, east all the way and south when you can for some Meal Rations. Back north you’ll get some more stairs. Go south and ignore the first path east, but take the second path east and the next one you see also for a Putrid Lunch. Follow the path going south and go west when you are at the wall. Go north when you can for some more Gloves and then follow the path some more to see mom and dad. Grab the Special Rations and take the easternmost door on the north wall. Go north all the way for a Holy Flute. Return and take the next door for an Herb. Now go all the way to the west door and take that for some Tattered Clothes. Take the door east of that, and follow the path and ignore the stairs to find some Tattered Clothes. Go back to the stairs now and continue. Head east when you can and take the Jewel. Keep following and take the second path south. Again, take the next south path for some Meal Rations. Back at the northern wall, take the next southern path all the way south until you see a wolf guy with an axe. Intimidation. Heal up and talk to him a few time and the Wolf Captain will fight you with some goomba wolfs. Just use Dragon Tear or something to take out the weaklings and gang up on the captain. Nothing too tough if you keep yourself healed. Immediately after the Dragon Tank is called in and it can do a number on you if it gets close. However a few turns should dispose of it with the same tactics as the previous battle; high level spells if you’ve saved the MP. Leave the cave after this hard work.
Back on the Frontier, head north along the western wall until you see Marke. Go to the northwestern house and talk to the turban guy and you’ll give him the Hero’s Crest. In return he’ll have you go to the shrine in the north part of town to get into the Black Dragon Cave once again. Talk to the guy outside the shrine to rest up and go in.
Grab the Silver Claw and Saint Clothes when you see them to your north. As you re-enter, let me forewarn you that the boss at the end of this is very hard so save your MP. Okay, so follow the western wall to the stairs on the first level. Go south on this next level, getting the Cascade Ring and continuing. Follow the outside wall now in this level, until you get to a four-way. Use the northwestern path, going west for an Ice Cane detour. Keep following this around as you go north, east, southwest, and you’ll see an Herb of Althena in this area. Keep going south and around for the stairs.
On this floor, go west and then north for a Starlight. Continue along and ignore the next three northern paths. Take the fourth one though for a long route but one that nets the powerful Insane Armor for Kyle. Go back and take the lower path now twice when you get the chance, and keep going east along the southern area to find a Starlight. Return west now against this all until you get to another set of stairs.
All the way south is a Silver Light, and now head east and then north quick. East at the next split and south at the next one, and then north after that. Another split so go north and at the next one you’ll see a chest (Wind Essence). Go west now and you’ll see a set of stairs that you should hit. Follow the path to a Holy Flute and save / rest. Black Dragon time.


Okay you’re going to run out of magic with a few people probably. Just have Nash and Mia use their best magic, with Alex using Dragon Tear and then attacking when he’s out of MP. Jessica can attack or use support magic and heal in the necessary situations with Calm Litany / Rest Litany. Kyle can use Kiai Slice and then attack. This dragon will do some heavy damage to whoever is attacking, so be sure to heal them and be sure to plan on a longer battle than usual. This won’t last 4 turns like the past few boss fights, it’ll be longer.

Alex will come away with the Dragon Quake spell and the Dragon Armor, while everyone in the party will receive 1450 experience points. Head back out where you can use the Psychotron spell to get out and then go to Marke. Go to that northwestern-most house and talk to the girl to get the Ruid Key. You should probably rest and sell your inventory junk and then when you wish to continue, go all the way east passing by a few green spots until you hit water. Go south and follow the wall as it goes east until you get to Ruid.
What a fascinating place this Ruid is huh. You’re going to want to open the gates with the Ruid Key and then go north into the center building. This is a decent-sized tower so save your mp. On the first floor go around against the wall and go east to the middle area when you can. Enter those stairs. On the second floow, head west and follow that path to the stairs. Third floor, just follow the path and get the Starlight before you go up. Follow the path and take the first set of stairs and grab the Seed of Vigor. Exit and go further west for another set of stairs. Get those Holy Clothes, give them to Mia, and then go east. Heal up, you’ve got a boss after you talk to Taben, Ghaleon’s engineer.

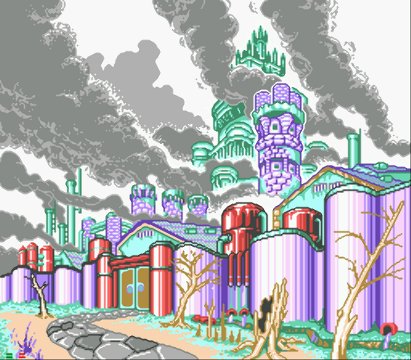
You’ll be in a battle against three of his tanks. Nothing too tough, although Kyle and Alex might get bulldozed. Kiai Slice helps out Kyle as usual, and Dragon Quake will do the trick for Alex. Jessica can cast heal / support spells while the other two cast their best offensive magic. As long as Alex and Kyle can sustain in front you should be okay. Afterwards Taben will have activated The Grindery and says Ghaleon is taking the world over now. Walk out and teleport towards Talon Mine. When you enter you’ll hear that Ghaleon has the Grindery on the way. Leave via the tracks eastward and you’ll get various scenes with Ghaleon and thet Grindery tearing through Vane.
Attempt to enter the Grindery and your army will be rejected because of Althena’s protection. Alex passes out and has dreams of Luna, and then wakes up in Reza. Go through the stairs and talk to the girls in bed, and then the guys at the bar. Return to the girls to get them to join and then the guys at the bar to get them to join. Rest up and go to Myght’s Lab where you will be able to ride the hot air balloon. As you get up there Xenobia will try to stop you, but Laike will aid you and let you go. On your way to The Goddess Tower you’ll be shot down.

Upon entering, go east for a Mint Essence. West for a Holy Smoke, northwest for an Herb of Althena and northeast for the stairs. The layout is the same on all the floors by the way. On the second floor, grab the Sun Drops, and then go to the southeast for some Cloud Drops. West of these are Rainbow Drops and the exit is in the northwest. Grab the Light Barrier in front of you on the third floor, and then the Power Barrier in the northeast. A Sage’s Cane is in the southwest for Nash, and the stairs are in the southeast. Two more floors to go. On the fourth, grab the Thunder Essence, and then go north for a Fire Essence and northwest for a Wind Essence. The stairs are in the southwest. So now, go east for a Silver Light, and then northeast for a Holy Flute and northwest for a Seed of Vigor. Enter the middle area and you’ll be ready to go. Head east to look at a picture of Althena, who looks strikingly similar to Luna. Get the Goddess Cane and Vigor Peach and then talk to the two angels. Alex has to fight this battle himself, so cast his best spells (Dragon Quake probably) and then attack or cast Light Rain if MP gets low. I didn’t need to heal much but you may wish to load him up with healing items for this occasion. Afterwards Nall will get Dyne’s Sword and Alex will change his look into that of a “Dragon Master”.


Walk out and use the wings to go to Meribia. Ramus will aid you with free items at his shop since he wants you to save the world. Before you head into the Grindery, realize you can’t get out so you definitely want a save slot and you’ll definitely want to be prepared in terms of level and inventory. When you want to enter, equip all the dragon equipment (yes this includes the wings) and you’ll be allowed in. If you don’t equip these you’ll be knocked out and will wake up in the Althena Shrine east of Meribia.

This place can be confusing. More importantly you’re going to want to save your MP and that’s tough when your magicians take off 1 against the tanks. Rely on running; build up before you enter, don’t plan on it while you’re on the way up. Onto the maze now. Go south until you reach a horizontal pipe and go west. You’ll get to a three-way, where you should go south and follow the outer wall until you get to another 3 way. Follow the northeast path, ignoring the first south path but taking the next one. Continue south all the way to the wall, where you should then head east and work your way to the northeast corner of the room for the stairs. It may be confusing, running from battles will help your memory as you try to find your way.
This is like Myght’s Lab now, except you’re not jumping in holes. Anyway, continue along the path at your first two intersections, but go north at the next one. Now continue along past the next two intersections. After this, you’re going to want to head north, west, south, west and south again. Continue past the next two and go north to get to floor 3. Another maze on this floor, but just head east (you’ll go south a bit, probably to the center area) along the outside wall and you’ll make your way to another staircase.
Fourth floor now, and you should walk along the path and go north when you can, taking the northeastern door. From here, follow the northern outside wall as you head east, all the way to the northeast part of the room. Now you’re on another area that is similar to Myght’s Lab. You’re going to want to go south, north, west and then continue. Now go south, west, keep going on the path, west once again, ignore the next split and go north for the staircase.
Follow the outside wall as you go southward. It’ll take you all the way around and you’ll see a fence north of you; follow that west and rest up as you see the flame.
Not a tough boss battle but a boss battle nonetheless. Dragon Quake and Landquake are powerful here, as is Thunder Thrust. Jessica should probably heal while Kyle uses the Kiai Slice and Slayride or attack. There are four of them, so try to eliminate them one by one for those that attack one target. Enter the door and go north to exit. Try to continue and you’ll have three battles against not-so-hard foes. Win them all and soon Tempest and Fresca will bail you out, allowing you to continue to My Secret Garden. A nice place, with fairies everywhere. Talk to the southwest one to get rested.

Ghaleon’s Palace is the large structure in the north. As you enter, go north and then west, taking the western-most door. On the next floor, go east and then north for the stairs. On this floor, grab the Seeds of Vigor and the two Herbs of Althena (hopefully you have plenty anyway). Go up the stairs now, and then go up the next set you see. Floor 3F now, do the same thing and go up the stairs. On this next floor, go to the northeastern section of the room, where you can see a singer and go up the stairs (not the fair east door). Fifth floor, head up the first set of stairs, where you’ll see another singer. Go up the next set of stairs and you’ll see Lily from Reza. Up the next set of stairs but remember where she was. In this floor you can go to the south part of the room to recover your HP / MP if you wish to level up one last time. Return to the stairs and go up the other set. Go west and north and through the stairs. Go down the next set and grab the Tower Key, and return back to the HP / MP pool and then to the previous floor where Lily was. Now go to the west section of her room and go up the stairs (not the far west stairs, the other ones). Go up the stairs, and examine this door with the Tower Key.

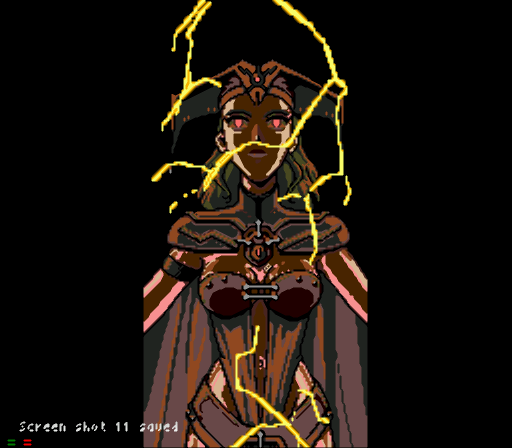
Rest up and talk to Luna twice. She’ll turn into Xenobia, so rest up and talk to her. Boss fight time. She morphs into a creature that gets four attacks and is quite dangerous. Try to attack with Alex and Kyle, but use Kiai Slice to increase his attack power first. Nash and Mia should use their powerful spells like Landquake, Byebye Air, and Thunder Thrust. Jessica can heal when needed, this shouldn’t be too bad.
Now you’ll warp further along. Grab the Seed of Vigor to the west and head north and then east for two more Herbs of Althena. The west part has two more. Go north towards Ghaleon when you’re ready (equip mp restoration items!). Depending on how much MP replenishing stock you have, you can be either conservative or let it all out.


You can win either way, but if you’re low on MP restoration items you’re going to want to make sure you leave yourself enough for the next battle. So have Alex attack or cast a dragon spell, while Kyle attacks after using Kiai Slice or Slayride. Nash and Mia should use the same mp that they did against Xenobia and Jessica should heal. Definitely attack with Alex and use the Goddess Cane with Mia if you’re the conservative type. He’s really not too bad but you’re not out of the clear yet.

The Magic Emperor Ghaleon is dead, so you can head north. Before you do, rest up and recover if you have the necessary items (you should since Ramus gives you anything free in Meribia). As you see Luna and are about to rescue her,
Ghaleon prohibits you from doing so. Definitely let your MP go in this one. Alex should be using Dragon Quake or other high-level spells or attacking. Kyle should be attacking after using Kiai Slice or possibly Slayride. Nash should stick to his usual Thunder Thrust and Mia should stick to her regular Byebye Air or Landquake. Jessica will be busy healing so you won’t be attacking (maybe a few support spells). Okay, so this is the last battle for sure. If your inventory is loaded you can outlast him. If you planned poorly he can easily kill you.
Now you are to walk up to Luna as she is uncontrollably casting lightning spells on Alex. If you play Alex’s Harp you can lessen the damage of this from roughly 265 to 35 (that’s what it was for me). Either way you’ll have to heal a few times as you walk up there, but no sweat. When you’re there, enjoy the ending! Hey, the Sega CD is useful for something at least.