
Zerard Gladius Towers
Back in Zerard you’ll notice you can go north of the Galaxy Corporation to the Gladius Towers. As you go in this new area, head along and take a left and start going west. You’ll come to a huge computerized barrier.
The party goes to Doctor Picocchio’s and he goes into the lab with Steve. He comes out with Burst Mode Switch for Steve. Teleport back to the Galaxy Corporation and go through to the Gladius Towers. Back to the barrier and use the Burst Mode Switch at the red ?. Steve will take the barrier out.
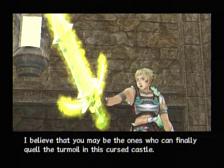
Inside you will be at the Gladius Towers First Tower 1F. A sword will talk to you, the Libra King. He wants you to vanquish the tortured souls of his sons. Jaster then acquires the Libra King’s Sword and a path will open up. Use the Transporter first and a few scenes with Mark, Steve and Picocchio.
Teleport to the Galaxy Corporation and then sign up for all the available hunts. Travel to Juraika and then warp to Path to the Ruins: Endpoint. Go a little north and use a Cursed Mask. You will meet the Jungle Master Beast Leone. This guy is tough, with a stellar defense and a good jump attack, along with fire breath. Obviously being prepared for the fire beforehand helps, and utilize your best abilities like Flash Sword 3 while Aromatic Boost is up. Your reward is a Heavenly Guide Bow.
Still in Juraika, teleport Creekside on the Path to Burkaqua. Go east and then use the path to get southeast. Use a Myriad Branch and the Sin-Steeped Drifter Tengulsam appears. This is the forest spirit the sign warned you about. You’ve seen creatures like this, albeit not as strong or big. The key to beating this one is the same as the smaller ones – outjump the lateral swipe it does with it’s hands, and then anticipate which hand it’ll attack with when it slashes at you. Your reward is Mist Edges, a weapon for Kisala.
Gladius Tower
Back at Gladius Tower 1F now. Make your way to the far northwest, up a staircase. You’ll see a Primeval Beef treasure. Now go east and up the stairs for Forbidden Add-On. Further north for a thief’s trap you need to untangle, and a Hyper-Gravity Sensor inside. Head far to the west into a new room and then you’ll see a new treasure before you go into another room. The treasure is Cursed Mask and further west is a transporter.
Use the elevator now. Now you’re on the 3F of the first tower. Head east and then north in the new room. Take this path until you reach Sticky Gum x2. Further east is Relaxing Aroma x2 and Divine Healing x3. Keep heading along and you’ll go south and see a treasure on your right – It is rigged and will drop your HP to 1. It is an Evil Cacophony for Simon. Follow the path a long way east and then northeast and you’ll come to a T intersection – take a right (go south) and you’ll come to Gladius Towers 2nd Tower 3F. Go back north and you’ll be at another T. Go east for a Revolva Alloy and then back to the transporter and the elevator.
Go through the door and you’ll be on the 2nd Tower 4th Floor. Go straight ahead and up the stairs for a Plasma Shield. Go back to the first intersection and go the other way, and then at the T go right (west). You come to another HP trap which is Flame God’s Stone x2. To continue you’re going to want to work your way to the northwest and you’ll reach a scene with Burton. Then go west for Smoked Rainbow Newt. Now go east to continue. Ahead, south is a dead end so go north. Take the first path you see and it leads to Snow Crest. Back on the initial track going east and you’ll come to Sealing Sunsphere. Eventually you’ll hit the Gladius Towers 2nd Tower 4F transporter.
Another elevator to ride up. You are on 2nd Tower 5F now. Go straight first for Dragon God Skull. Return to the previous intersection and go the other way (not towards the elevator). You’ll go up some stairs and then start working your way south. When you see a west stairs, go that way and get the Lunar Ribbon. As you go up the stairs you’ll have one way to go and it leads to a treasure – it’s a Mimic though. This eventually leads to a set of stairs going down and then another one going up. Take the first staircase you see going down again and you’ll come to another Mimic. Keep going for a Brave Symbol and then go back up the stairs previously. Follow this path north until you go up another set of stairs and see a Medusa’s Locks by you. Further north and west now and you’ll be at the 1st Tower 5th Floor.
Take a left as you enter then use the southeast stairs to reach the Skull Necklace. Back to the beginning of 1st Tower 5th Floor and go straight up the stairs. Take this path and you’ll reach another HP trap that has a Sacred Wanderer Bow. Up ahead is another intersection for you. Take a left and go through a few sets of stairs until you go down some to a treasure, a Captain’s Sock. Ahead is a four way intersection. Take the southmost path and it’ll lead to a transporter.
The elevator leads to the first tower 6F. Continue north and west a little until you reach Hoho Bird Feather x2. After you go down and are in the center with lots of places to go, head east for Perfect Heal x3 and Dreamflower Ash. Head the other way now and when you get a chance to go north do so and drop down – one treasure is rigged to set your HP to 1 but it is Guardian Sphere x2 and Stamina Extract x4 is next to it. Further west now and follow the linear path as it goes north until you reach Izerium Alloy. You’ll eventually head east up some stairs and then south. Take the first path you see going east and it leads to Ancient Scroll II. Take the next path north and follow it until you get to Gladius Towers 1st Tower 6F Transporter and then use the elevator.
You are now on the 7th floor of the 1st tower. Just ahead of you is Thunder Shield and Alluring Lamp and some stairs. Start going east and then south, just keep following the path until you reach Traditional Worksuit for Simon. Go east and you’ll reach a red ?. You need a Tri-Elixir and 20 hunting rank to get this enemy to come out. Continue east to the second tower 7F.
Grab the Max Heal x2 you see and jump down the stairs. Go east and up some stairs, and go north because the south is a dead end. This leads to Mirror Unit and Forbidden Add-On. South and then look west for Saba Garuda for Jaster. Jump down and Save at the Gladius Towers 2nd Tower 7F transporter, and of course use the elevator.
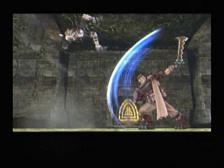
You are now on the 2nd Tower Throne Room. Jaster shows off the Libra King’s Sword. A battle with Phantom Gazel begins on the throne room. Phantom Gazel has two huge swords so watch out for that deadly range. He’s not really that hard and his HP is lower than you’d think. Flash Sword 3 up close with Aromatic Boost or some kind of attack boost should do the trick. Staying afar and using Guns, Grenades and Shuriken would enable you to disregard the swords. Watch out for when Phantom Gazel teleports, he may teleport on you. Your rewards are Stealth Pills x1 and Perfect Reviver x1.
Teleport out of the Gladius Towers. Restock your inventory if it’s low then teleport to the Galaxy Corporation. This time, go north and then east at the split instead of west. This takes you to the other tower. Go up and save at the Gladius Towers 2nd Tower 1F Transporter and then enter the elevator.
Go up the stairs to the west and get Famished Wolf. A bit farther for Queen Bee Stinger. Up some stairs and continue further and you’ll see Absolute Zero Stone and Myriad Branch x2. You’re going to want to head back and go straight after you get out of the elevator. Take the first east path you see and use the Star Key for Zeranium x2. Head to the north and you’ll reach Gladius Towers 2nd Tower 2F. Go through the elevator.
You’ll be on the 2nd Tower 3rd Floor now. Take the east path until you run into a Moebius Battery. Further east for Ultraspicy Pepper x2. Return back and start going west and south. You’ll end up working your way northwest and up some stairs, right by a Sun Key chest. Further west and you’re in 1st Tower 3F. Just continue north and west and you won’t run into anything for a while until you meet a Dark Music Box. Go south from here and west, just keep following the linear path. It’ll eventually start to go east, so stay east to get a Star Key chest (Nebuladon Egg) and a Mimic. The Mimic has a red front on it’s treasure chest (you may already have figured this out). Back a little bit and drop down the stairs south. Talk to Silma for some Info Edge. You don’t need to waste your time going north, just go south to the Gladius Towers 1st Tower 3F transporter and then the elevator.
You are now on 1st Tower 4th Floor. Get the Iron Cube x2 in front of you and go up the stairs. Head east as you get in (although north leads to the same place) but east gets you to Chaos Chip. The path then turns north and you’ll see a Ruby. The paths then join shortly north, and you’ll continue north until you reach an east / west intersection. Go east for a Sanchez Fruit and then west. Drop down the stairs and ignore the south path (dead end) and go further west until you reach Gladius Towers 1st Tower 4F.
1st Tower 5F now. Go east right away and then south for Star Earrings and then go all the way east for Star Key chest (Perfect Elixir). Return to the previous intersection and then go east up the stairs and shortly thereafter a Seventhmoon will show up in front of you. As you continue a path going down to the east has Conductive Liqui-Metal. Further south and then east.
You have a battle against Seed here. You can’t defeat him, just take his HP down pretty far. The usual like an augmented Flash Sword 3, but again this guy is so devastating up close that you’re probably better suited to stay back and spam your best L2 and L3 abilities. Or just shoot him. Afterwards you get a visit from Desert Claw and then Seed leaves.
Now you are on the 2nd Tower 5F. Jump down and follow this until you get to Lubricant. Continue east and go north, taking the north exit. Go west at the intersection, save at Gladius Towers 2nd Tower 5F.
You are now at the 2nd Tower 6F. Go west up the stairs for Exterminator. Now use the south path and then take the east route, and you’ll see a south exit. This leads to Limit Avenger and Hellpot Flame. Head further east to a cursed AP 0 trap that nets you Captains Sock. Go to the northeast and you’ll see you can jump down – two treasures are below, an Elixir x2 and Heal Potion x3. Go to the southwest for the 2nd Tower 6th Floor Transporter. Use the elevator.
You are on the 2nd tower 7f. Start heading west along the north wall, picking up the Absolute Zero Stone x2. Begin heading north and then west for Hot Breath x3 and Skull Necklace. North a lot more then west for Ancient Scroll II and a connector bridge. A red ? is here. Across and you will be in the 1st Tower 7F.
Go south and take the south stairs going up for Stealth Pills x3. Follow the path west and then north, and go west at the intersection for Sealing Sunsphere. Back east now and north into a new area. Go west and stick to the north path to get Resurrection x5 and then go up the stairs. Head due south for Max Heal x2. West for Gladius Towers 1st Tower 7f Transporter, and then hit the elevator.
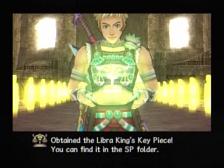
You’ll be at the First Tower Throne Room. Another spirit is here. Time to battle Phantom Logan. He really isn’t that much different from the previous battle – he’ll set you on fire and use his range and quickness to hit you and knock you down. Have Protection and Drunken Burst will allow you to handle the battle with hand to hand combat. Make sure to Tri Heal in the event you’re in trouble of course. You get Excelion Shard for your work. After some scenes with Logan and Gazel you’ll get Libra King’s Key Piece. Or Zerard’s Key Piece.
Zerard
You will be finished with those dreaded Gladius Towers now. Go to a transporter and you’ll have a scene with Picocchio and Steve / Mark.
Vedan
I went and fought The Cave Bandit Paul the Ripper. He was way too powerful and I wasn’t strong enough until recently when I neared level 50. Do the usual with your buffs and Flash Sword 3. Prepare to go through a lot of resurrections and tri-heals. He’ll begin to do jumping attacks so block before he comes down on you. Your reward is Winter’s Chill (a weak level 28).
Zerard
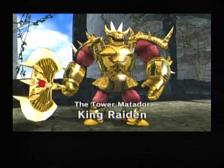
Return to the Gladius Towers. Go to the first tower, top floor (7th floor). Head east to the outside connector route. The red ? is there so use a Perfect Reviver to summon The Tower Matador King Raiden, the most powerful fighter in all the land. He looks more intimidating than he actually is. You’ve fought enemies that are basically the same thing as him, just half the size. Use your jump attacks and it’s best to have every attack so that you have three characters jumping and attacking. Having strength boosts will make this fight go even quicker. You get a Wicked Moon for this.
Teleport to the second tower top floor (7th floor). Go west and to the connector bridge. Another red ? so use a Perfect Elixir. Of course, The Tower Predator Lepognan Mammoth appears. It’s horns are the real problem here, as he’ll bum rush you constantly, knocking you over and messing your attacks up. Stay a decent distance away or spam abilities if you want, but if you get close you might want Protection up. Taking out Lepognan Mammoth nets you Genocide Beams for Steve.
Vedan
Take the ship to Vedan and take the southeast-most teleport (near the mine station). Go west now and into the tunnel. Put Lilika in the party and use a Magic Lipstick at the red ?. You will meet the Rumored Ladyhunter Garuski. Now the Lady Hunter Garuski is a big monkey, and he needs Lilika and Kisala to be in the party at the same time when you use the Magic Lipstick. Okay, he’s not all that difficult but he starts off with a barrier you’ll need to destroy. After that point it’s just a brute battle, so use your buffs and restore yourself and you should be fine. A Tribal Two-Piece is dropped for Kisala.
While in Vedan travel to the item shop and go west. See where the star is? You can now get there, and it leads to a battle with some Longardian Soldiers. Kill these lackeys and then they’ll be onto you – Harry helps you though. He wants you to help Borga in the Cancer King Ruins. Borga is trying to stop some Daytron robots. Harry gives you Harry’s Bell. Use the Orphan’s Hideout transporter to save and then get the Lupine Coat and Premiere Toy Box. Down the stairs for Hot Breath x2.
In this open area, go to the northwest corner for Thunder Stone. If you drop down into the water area you’ll find a treasure that is a Mimic. Go about due east from here and you’ll see a treasure off against the wall, a Bestla’s Spear. North of here for some Info Edge. In the lower part of the south area you’ll see a Hellpot Flame. In the southwest area you’ll see a Chamelon Particulate on the lower area Earth Key only though. Go to the north part and talk to the people around to get some plans – go up the ladder and talk to a few others for plans. Some treasures up here in Myna also, like Hellpot Flame x2 and Dream Mushroom x4.
Go back down and head to the southeast. This is a new area, and in the southeast part of this area is Energy Charger. In the southwest is Dream Mushroom x3 and the exit. In this new area you’ll have a scene (you can’t get across the water). Go to the northwest part of the room to get Medusa’s Locks and Heal Potion x4. Save at the Cancer King Ruins: Near the Stream transporter and then teleport to where the kid’s hideout is. He makes you a bridge to get across. Towards the southwest and you’ll see Max Heal x2. In the southeast is Divine Protection and Nebula Opal.
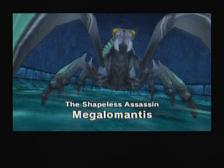
Drop down and you’re in Ruins Area 2. In the northwest is a Forbidden Add-On. In the southwest is a Mimic if you drop down. In the center upper path you’ll see Military-Grade Battery. The northeast has Perfect Hunter. Go to the south part of this huge area and then the southwest part of that to get Divine Blessing, Dragon God Skull and Hoho Bird Feather (this one is trapped, use thief’s to untangle). West of this is a waterway that leads to a fourway – a red ? is here if you bought the hunt. Choose a Rainbow Smoked Newt and out comes the Shapeless Assassin Megalomantis. The Megalomantis isn’t really that difficult. It’s another enemy that likes to disappear into the air and then come back down on top of you. Have Protection up or be ready to block when that split second happens. Winning the battle nets you Riding Outfit. Go to the southeast all the way now, getting the Absolute Zero Stone and save at Cancer King Ruins Near the Pit transporter.
Jump down and ahead is another encounter with Seed. Seed is his usual agile and deadly self. Make sure to have protection up and then just rush him, healing when low. Guns and other long range weapons are safer but Flash Sword 3 plus Drunken Burst is what’s going to do the meat of your damage.
Jump down and you’ll be in Ruins Area 3. Talk to Puccile and just west is Smoked Rainbow Newt. Look south and down for a Mimic treasure, and then northwest for Athena Shoes. Go along the southwest wall for Cancer King Ruins Area 3 Fork. Drop down north and look east for Ancient Scroll II. Head east along the north end of the bottom part, and you’ll reach a Black Owl. Southeast and towards the middle for another transporter. South of here for a Perfect Elixir (Star Key needed). Go about directly east of this for Dark Music Box, CO2 Powder x4 and another Mimic. Go back to the save point, go south, west and then you’ll reach Alluring Lamp x2 on the lower part. Work your way southeast and drop down to the lower part to find Lubricant. Near this is the final transporter in Vedan, the Cancer King Ruins Near the Altar transporter. There is a Sun Key chest here, so just drop down.
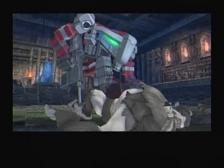
You are at the Cancer King’s Altar. Go ahead and you’ll see a disturbing scene as your party watches Borga get his ass kicked by three Assault Walkers. Okay, so why didnt’ we step in earlier? Remember to use the Barrier Break Shot so that you can hurt these guys. The only other way to do so is with a Burning Strike. The Cancer King shows up afterwards. Some scenes and then you get The Cancer King’s Key Piece. The Cancer King’s Keypiece is in the SP folder.
Back in Vedan go to a transporter to see a Mark and Picocchio scene. Now that you have all the transporters you can get all the Vedan chests easier, especially the Phantom Robe west of the weapon shop (you have to jump off the train). Go east of the item shop now and look by the garbage for some Info Edge and Rakshasa Heart. It is a rare item.
thanks for the info it really help’s xD
ciao… ebong
yeah………….
tnx
yours evilly,
darkness lighter
i have defeated first phantom logan, but i cant get piece libra key, & i can’t find the second phantom prince gazel,, can u help me please,,
answer to my e mail delliora11@gmail.com
Hey there, just letting you know that you forgot to mention the Angel slippers found in Gladius tower 1 4F, east after getting off the elevator. Thanks for the guide!