Dorgenark
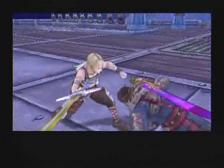
Back at the Control Room, Simon will report the key pieces being stolen by Zegram. Jasper goes out after him and you have a boss battle on your hands. Zegram is a difficult fighter, and has equipped whatever you gave him. Okay, so the battle is kind of weird and you can’t really do much damage to him (but you can damage him). He’ll eventually get near a ship and jump off.
Rosa Ruins
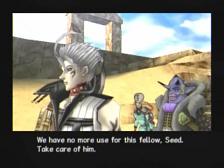
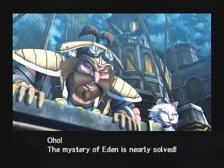
The party follows him to Rosa Ruins, but first a scene with Zegram and Valkog. Zegram begins a battle against Seed – Seed without the mask. Seed is just like the other characters in your party – he’ll do a long combo and then he’ll need to rest, so block his combo and return with a shuriken or sword. You won’t be able to do much damage so stay rested and soon another battle ensues.
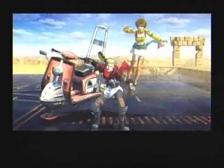
Jaster and Kisala are here and you’ll have to fight with Zegram against Seed. You can pretty much work him and overpower him, although he’ll have his moments. When he does his swirling sword shield attack try to surround him and then shoot him to interrupt it. Eventually you’ll get him low and realize you need to go to the alters and put in the key pieces. After you put in all three, yet another battle.
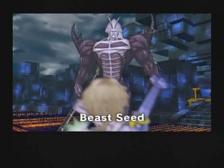
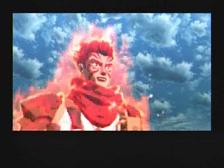
Well some scenes first with Seed and the puzzle. Then you’re dealing with Beast-Seed. He’s not much harder, but he’s huge and his swings take off a lot more, but they connect less often. Watch for his charges and he seems to go after Jaster. Once you take off about half of his health, Jaster goes through a transformation himself. His HP goes way up but he takes more damage – just make sure you stay rested and kill him off. You get Brave Symbol x2 and Perfect Elixir x1 for all this.
Back to Zerard now and get some more hunt information – a bunch more should have opened up.
Juraika
Planet Juraika has a few of the new hunts. Choose Path to the Altar – Crashed Cruiser and you’ll see a red ? near the transporter here. Use a CO2 Powder and then the Rock n Roller Burning Tortoise will come out after you. It has a shield on right away. Flash Sword 3 is convenient for knocking it off and then just get to work. Of course like other tortoise enemies it’s main attack will be it’s roll that continuously damages you and in many cases will kill one character. If you heal from this fast enough you should be okay. An Evil Breath is dropped for Simon.
Teleport to the Lion King Entrance. Go back (west) and you’ll see a red ? and use Deego’s Zipangu Axe. If you tried to combine it you’ll notice it won’t change from the Zipangu Axe. Anyway, use it and The Ancient Fairy Kemkul Muk will greet you. Kemkul Muk doesn’t really look like a fairy to me. This guy is ridiculously slow as he needs to turn around and face a character before he can punch – but his attacks are fast and take off a ton. That said just have everyone rush him as this will do the most damage and he can only really go after one character at a time. With Drunken Burst and Flash Sword 3 you should be able to mow him down if he doesn’t kill you first. You get a Unicorn Hatchet for this.
Rosa Labyrinth
Teleport back to the tablet pit and head south to the yellow star. You will be in the Labyrinth and you’ll see a scene. Save at the Labyrinth Entrance transporter and go south for a Trumpet of Glory and Ancient Scroll III, likely your first of both (and they’re both valuable). South some more and you’re in the Maze of Temptation. Make your way to the southwest area, and then go to the northwest corner of here for Resurrection x4 and Rose Pumps (star key chest). Follow the path west and south until you come to Paralysis Cure.
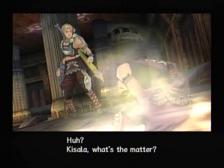
A bit ahead and Kisala will freak out. As you go south and then west, you’ll reach a room where a Biomemory is just north as you enter. Keep going south and you’ll come to Lubricant. A little west and you’ll be in another room where a chest is just north of you, but this time there is two. One is a thief trap that nets you Nebula Opal x2. The other is a Mimic. West of here for a transporter to save.
A strange scene with Kisala here. This robot named Ragnar seems to be nice at first but then it turns red and fights you. Not very hard – use the usual protection / aromatic boost / drunken burst to get a leg up with buffs. It uses a spinning attack that can mow through your party with it’s great length for a quick defeat if you aren’t on top of things. It also has flame lasers that follow you everywhere pretty much. You get Edensia x2 for this. Return back and save and you’ll get a Mark / Steve / Picocchio scene.
Go west past the robot and to the Maze of Chaos. There is a Spirit Shield just a little south and east as you enter (hard to spot). Go west into the next room and then northwest to find Vice Predator. From here work northwest until you get to an area where you can go to a new northeast area with treasures on your right (Flame God’s Stone and Firestone x2). Backtrack to the previous room and go south and west – you’ll come to Wake up Drops in the next room. You’ll make your way to a larger room, in the southwest there is a Star Key chest (Majestic Pocket). West some more and you’ll be in a much larger area where you can go north or south. Take the north path and you’ll come to Stamina Extract. Follow this path until you go through a southwest exit (get the Tri-Heal x3 before you go in).
Talk to the shop guy and replenish your restorative items. Further south and drop down, you’ll see an Earth Key chest ahead, it is Dark Music Box. Take the west exit and follow this narrow passage until you reach Izerium Alloy. Return back to the shop and go west, as continuing further past the Izerium Alloy leads to the entrance path. Some scenes and save at the Maze of Chaos transporter.
You are now in the Maze of Decision. Go straight south for an Ancient Scroll III. Run ahead and jump down for a Biomemory. Further down the path and a Mimic impeeds your progress. A bit north and you’re in a much larger room. Keep working your way west through large rooms and you’ll come to one with a thief’s trap chest just north of you when you enter (it’s a Tartaros Survivor). West of here is the Maze of Decision transporter.
Go north through some big rooms and then a small passage and then drop down in the next big room. You’ll see a Smoked Rainbow Newt in the northeast corner of the room and then take the northwest exit. Go north a little along the west wall and you’ll see a Nebuladon Egg in the new room. Continue forward and as you go south through a door look against the west wall for a Myriad Branch. You’ll get to a skinny path and when it goes east you’ll reach Queen Bee Stinger. Keep going north and after you get past the big room you’ll see a Earth Key chest (Trumpet of Glory). The next room has a Hoho Bird Feather in the northwest and the exit is here too. Further west and you’ll see another transporter this time it’s Near the Labyrinth Core.
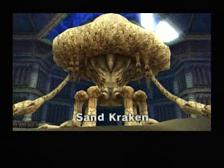
Make sure you are rested and saved. Up ahead is the Sand Kraken. This guy is not fun. First he starts spamming poison breath on you, so you’ll need to take out it’s many legs. This isn’t so bad when it isn’t facing you but if it’s facing your character he’ll just maul you with poison and jump attacks. after the legs are gone it goes underground and you can attack the head (actually damage the Sand Kraken). It’ll come back up and you’ll need to do more tentacle damage but if you have Illusion Sword at a high level you can attack from a safe distance. You get Edensia, Attack Seal and Guard Seal for your victory. You will also find an Ancient Circuit after the battle.
The Ancient Circuit is for that robot west of the Maze of Temptation teleport. Go up to the robot Ragnar and use the Ancient Circui. You’ll have some scenes now with Ragnar. It turns it that Mariglenn is Eden. Irieth is the princess of Mariglenn. And Irieth is Kisala. Ragnar tells you how to get to Mariglenn and then he gives you Eternal Keyplate.
Planet Rosa
Some scenes with Burton / Ragnar and Jasper / Munsha. Valkog will threaten you as you get out as he doesn’t want you guys getting to Eden. Raul comes out to give you guys some advice but an unfortunate event happens. Your party gets the Star Pendant. You are now to go to Kuje Desert. Teleport near the church and go north and then west to exit out.
Kuje Desert
After some scenes go to the northeast and get the two treasures, a Dragon God Skull and Divine Blessing x2. Go to the transporter for a scene with Mark and Picocchio. Turns out Steve is wanted and Picocchio is in jail.
A bunch of hunts are available, so sign up for them. Go to the first one at the Labyrinth – teleport to the Maze of Chaos. Go to the west wall and use a Nebuladon Egg. Out comes the Labyrinth Terror, Pandora. This is basically the master Mimic. He’s faster, shinier, and has a ton of HP. Flash Sword 3 isn’t as useful, as even though it takes off a ton of damage you’re extremely vulnerable to Pandora’s brutal close attacks. You’re going to want to use the Illusion Sword or Gun or other far away attacks. Stay healed and have your other members stay back while your one character does the work to reduce the likelihood of your entire party dying. A Trumpet of Glory, Dark Music Box and Sealing Sunsphere are your rewards.
Now you can continue to Kuje Desert. As you begin to head west through the low-visibility desert, stick to the southwest for when it forks you’ll come to three chests; Biomemory, Flame God’s Stone x2 and Moebius Battery. Head west and stay in the middle – you’ll see an Energy Charger west of you. A bit further for a shop and a scene with Chie and Mommy. The shop sells Rose of Passion’s. Very useful. Just give the guy water who asks (not sure what happens if you don’t).
Save at the Kuje Desert: Desert Fork transporter. Take the southwest path and you’ll come to a Mimic. Further this way and you’ll see a withered corpse. It is holding a letter and take the Bag of Coins. Save at the Kuje Desert South transporter you see. Further west is Cursed Mask and after that is a Star Key chest (Twin Uroboros). Then, the Kuje Desert Near the Monument transporter. From this, go directly east to get Spirit Bell. Further east for a red ?.
Hold up an Alluring Lamp and The Desert Idol Demonlord Ronfaoh. Ranfoah does a good job of keeping you at his ideal length from you so that he can stab you or do whatever with his hands. Try to surround him and keep the pressure on him with your best up close abilities after using Aromatic Boost or whatever buff you use. A Typhoon Shield is your reward for defeating the Desert Idol Ronfoah.
Keep following the east path now and you’ll see Tri-Elixir x3 and east some more for Trumpet of Glory. After this you can start exploring the north side now, so just flip around at the far east side and start going west along the north wall. First you’ll come to a Star Key chest Biofeedback Circuit and then Rose of Passion x2. Near the transporter you’ll see a girl who asks you to suck out the poison of her. Be a man and do it, and for some reason a battle started right after. Save and then further west to reach get back to the monument transporter.
You’ll see Ronnie and Emily. Tell her you’ve seen Ronnie, that he’s not alright, and that he had a Bag of Coins to give to her. Grab the Tri-Resurrection x4 as you go west and then the Near the Sandstorm Transporter. Now Jaster and Kisala see a village.
Johannasburg
You are now in Johannasburg, a village that just appeared. Go up ahead for a Lucky Clover (!) and Edensia x2. Go to the yellow star now and you’ll meet the old man who greets you to the illusionary oasis Johannasburg. You’ll talk some, then explore his house for Co2 Powder x2 and a Star Key chest – the Sun Key! Exit and go to the south part of town and enter a house to get Lunar Ribbon.
Go to the center with the fountain and hold up a Hoho Bird Feather. The Winged Traveler Brutish Hawk comes out. However you also need to make sure it’s Jupis because it only like’s Granshee meat. Just rush this boss so that it can’t fly around and attack you. Jupis is useful with his long ranged spear.
Just north of this is a Mimic and then north some more for Izerium Alloy. West near the exit for Ultraspicy Pepper x2 and north of that for Sunstalker Bow. Hit the transporter, and then go southwest up the stairs and get the Storm Shield (AP trap though). Head northwest and you’ll hit what should be the last transporter on Rosa Planet. Now you can see the treasures easily. Save here. Up the stairs and north for Ancient Scroll III. You’ll see two treasures on the east side of the house ahead – Perfect Heal x3 and Trumpet of Glory.
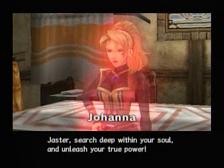
In the house for a scene. It is Johanna and she wants a fight. She is a difficult one especially when the duplicates come in and start casting about 4 spells. Illusion Sword is best for staying safe and doing the most efficient damage – if you use Flash Sword you’ll get whipped. You get a Sealing Sunsphere, Lucky Clover and Perfect Reviver for this.
SPOILERS +++
You’ll hear a lot from Johanna after this. She is your mom. You are of the Star King race. And Desert Claw is Jaster’s father. He is Mizel and he tells you the path to Eden is now unlocked.
 SPOILER END +++
Go back to Johannasburg and into Johanna’s house (or your house I guess you could say). You’ll find Star Traveler’s Outfit for Lilika, and also a Lunar Ribbon on the very west part (hard to see).
hey guys wtf is this what the hell fight me after school you little mexican terds