Planet Alistia
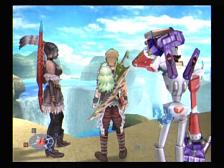
You can go to the Planet Alistia after chapter 8 – Zegram will ask to go for a vacation there. When you travel there you’ll see it’s really pretty looking. It was added for the US release.
Save at the transporter you see and follow the path north and west.
Lapatia Village
You’ll come to the peaceful Lapatia Village. A Captain’s Sock is ahead in the treasure. The shop might have some stuff for you too. Go north and east to a hut and overhear an argument about Mermel’s.
Some things and the Enigma Gem is missing. Get the treasure on the west shore after the events for a Phantom Slayer. In the far south is a Prominence Shield. If you walk up the stairs and go way up you’ll see four treasures in town – an Izerium Alloy, Alluring Lamp, Max Heal x2, and Lucky Clover x2 (Sun Key chest). Save at the Lapatia Village north end and go north.
Go up the path and look for a Silver Bangle. Use the elevator you see and get the Sealing Sunsphere x2. Go west and north and you’ll come to Nalvasa Seaway.

Nalvasa Seaway
Go to the far east for a Mirror Unit. Northwest across the bridge and then south for an Ice Shield whe you’re across. Go west and drop down for an Opinicus EX. Far to the west for Nebuladon Egg. In the center further north is a Lupine Launcher. A bit past this and you’re at the Nalvasa Seaway Beginning Transporter. Go south and a little west and you’ll see a path going down (which is southeast). If you can make the jumps it’ll lead to three treasures, Excelion Shard x2, Succubus Slippers and Spirit Chorus.
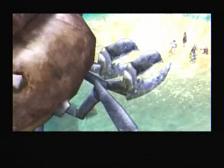
Go along the southeast beach until you see a red ?. Use a Pirate’s Grog and the Seaside Terror Skelton shows up. It pops up and drops back down after some damage and attacks. Nothing really complicated but another enemy that just can’t handle 3 of your pirate’s attacking it at once. Have your buffs up and start hacking once it comes out of the ground – grab the Vice Predator.
Against the east wall you’ll see a Nebuladon Egg. Go back to the previous Transporter and go northwest this time and you’ll see two treasures – one has a thief trap and it is Despera Tonfas and the other is Tri Heal x3. As you continue east look for a south detour for Star Earrings and then continue back east.
You’ll see a transporter but you may also see a battle with the shark and the dolphin. They get beat up by some monsters, specifically Jig’s and Panther Eels. Save at the Nalvasa Seaway Midpoint now. Go northwest along the west wall to see Tri Charge x2. Continue this route and you’ll see a Dark Music Box. North of the transporter is Mermaid’s Scale (Sun Key). Continue going northwest up this mountain and you’ll reach a Lunar Ribbon and Heal Potion x3.
East of the transporter you’ll see a treasure but it’s a Mimic. Continue east and then take the south path when you can and you’ll reach a Star Key Tri Elixir x4. Go back to that previous intersection and go across the bridge and keep going northeast. You’ll go a LONG ways until you start curving southwest and see a Mimic.
Soon you will be running north along shallow water until you reach a red ?. Hopefully you have a Dark Music Box to use here. They are rare but Dark Music Box is valuable for your revelation chart. Anyway, The Ferry to the Underworld Oedious’s Vessel. This guy can be a major annoyance, constantly pushing you throughout the area. Get your attacks in from the side on this guy and preferably with Illusion Sword or a Gun / Bombs or whatever long range you have. He has a high defense and it’s hard to get combos on him when he’s constantly moving and doing swipes to knock your party down. When you finally get Oedious’s Vessel down, you get some Pluto Drivers.
Now you can head north to the transporter and north more to continue on. I went south and east first, down the path skipped earlier. You’ll reach a narrow passage that will swerve west so follow it until you reach Stamina Extract. Now just either teleport back to the endpoint or walk there. Southwest of here is Recharge Drink x3. As you go past the transporter you can see that you can jump up on the hills – jump up two and go east for Perfect Reviver x2. If you go the other way you’ll get Divine Protection x2 and Hyper Crystal.
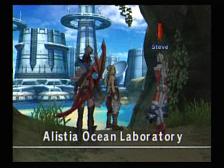
As you head east you’ll have a quick scene. Look on your right (south) and you will see an Electric Eel. Keep going for the Alistia ocean lab. You’ll see a Golba and Izel scene. Keep going and you’ll reach the Alistia Ocean Lab transporter. This is the final one on the planet.
A bit ahead and Nina will be with Daytron and the Enigma Gem. Some scenes and you’ll have a boss fight with Ganymedes. He is huge and is only vulnerable in the front. Illusion Sword is helpful to stay away from the slices and cuts Ganymedes tries but Flash Sword 3 up close is just as fine, you’ll just get knocked down a few times. After about 1/4 of the damage is done you’ll have some more scenes and then you’ll battle for good. Once it’s HP starts getting lower, Ganymedes begins to shoot two bullets at you that you’ll have to dodge or jump over. Ganymedes also stays a good ways away from you in this phase. Just keep doing damage, it gets more elusive as it nears death. A Spirit Calibur is your reward.
Some scenes and your work in Alistia will be finished. For this a Pirate Outfit (for Jaster) will be awarded.
bagus sekali game ini tp aq susahnya pas di gldius tower