Rosa
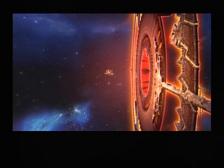
After going back to Johannasburg you can teleport to the Tablet Pit and then go to the yellow star. You’re going to have to use the Eternal Keyplate and then a bunch of scenes.
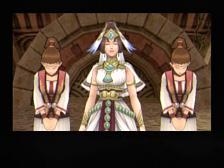
Mariglenn
The party makes it through the gate as only the Star King can do and make their way to Mariglenn, or Eden. You will have a scene with the Queen of Mariglenn as you enter after all of the stuff that goes on beforehand.
When you regain control, go behind the queen’s throne to find Her Majesty’s Attire (for Kisala). Also there is Perfect Reviver x2 to the east and a transporter down the stairs. Save and go down.
To the south there is a Lubricant and north use the Sun Key for Androphantes. Over to the east for Biofeedback Circuit and Mermaid’s Scale. Go north to exit until you reach town.
A shop should be near. Buy a Swordsman’s Gi for Zegram and then look at those nice weapons. Load up on all of those pretty much. If you go west from the palace exit you’ll see a Chameleon Particulate. Further west and south on the grass are two more treasures, an Ancient Scroll III and Magic Lipstick. Go to the very west jut in the map for Hyper Crystal. Start going north and you’ll see a transporter but west of that on the grass is a Sun Key chest – Pleiades.
Now let’s start exploring the east side of this area. East of the shop is Divine Protection x3. East of the palace entrance / exit is Speaker Pod. Across the river for Tri-Heal x5. About due north (a long ways) you’ll see a trap (AP trap) that is Unconscious Guard. West past the gates and look north for Absolute Zero Stone. Now go north and save at the Queen’s Palace Depot.
Back to the Queen’s Palace and take the elevator. Go north when you get out for Biomemory. Go west for Dark Music Box, Edensia x2 and Tri-Resurrection x3. South to the shop for some items, and then through the door for Ancient Scroll III.
Go a long ways south and then save and leave.
Ti’Atha Forest
Follow until you get to a larger area. You can go north for a treasure or south for a treasure. East for an AP trap (Tri-Elixir). East a little more and south (behind a tree) for Mermaid’s Scale. North of this for Shifa and Stella Crystal x3. Go south along the east wall for Firestone and further south for a Mimic. Keep going south along this east wall and you’ll see Ti’atha Forest Midpoint transporter. Go south of here for Lucky Clover. West of the transporter is Palao who gives you some Info Edge information.
East of this transporter is a Tengu Cross DX. Go north and you’ll see a shop and a red ? if you bought monster info. East and then go up along the south wall for Smoked Rainbow Newt x2. Begin going south when you can, get the Captain’s Sock and then save at the Mariglenn Ti’Atha Forest Endpoint. The treasure next to you is a mimic.
As you go south and east, look north for a trapped chest – untangle it for an Ancient Scroll III. Follow the path and going east you’ll see a Trumpet of Glory. When you can go south do so and get the Hot Breath x5 and save at Ti’atha Forest Near the Plaza.
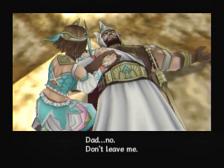
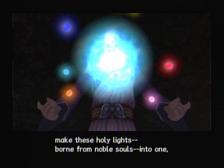
South from here and you’ll see Albioth the king of Mariglenn. Mother transformed him and now he has to be a beast because of his battle. He tells you more about Mother and her Rune Energy. We need Drigellum but Mother stops him from telling you. Mother then turns him into Beast Albioth. This guy can be annoying and he’ll deplete your Relaxing Aromas as you cure Confusion (and he’ll freeze you). The tornado gales are the biggest problem you’ll fast, and he’s hard to hit because he’s agile. A tri Charge and Perfect Elixir are your weak rewards. Kisala will create Drigellum, which can only be borne from one’s heart. This is the Drigellum of Kindness. He says the Gulza Sanctuary is near.
Gulza Sanctuary
Sure enough, go south and you’re in the Gulza Sanctuary. Go south and east when you can for a Hoho Bird Feather. Keep going south for an Ultraspicy Pepper x2. Further along for a Crystal Staff. This is a valuable revelation item and you need to use this to fight the Wayward Phantasm way back in Rosa. If you stay on the lower path going east you’ll see a Lucky Clover and then you can go north and east some more for Sanchez Fruit x4. Go north at the north and east intersection, and stick to the upper side (the right side) and you’ll reach a Plasma Shield. As you head east stay on the lower part and you’ll reach Dark Onyx x2. If you keep going east you’ll reach Gulza Sanctuary To the Plaza Transporter.
Now that we’re at the transporter I took the time to take the Crystal Staff and go to Rosa. Teleport to the beginning of the ruins and you’ll come to the lowerered area where you can use the Crystal Staff to summon The Wayward Phantasm Dark Messiah. At this point it will literally take seconds to defeat him. Grab your Prominence Shield and just be happy you got points for that. Go to the Galaxy Corporation and sign up for the last hunts.
Rosa
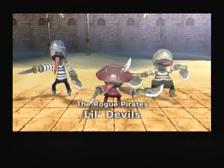
In the Rosa Salgin Spaceport and go south. Go to the courtyard type area and you’ll see a red ?. Use a Lucky Clover and The Rogue Pirates Lil’ Devils will show up. These Lil Devils aren’t a joke. They have one health bar so you can take off the most damage but using magic that attacks the entire group. They take off a ton and will knock you unconscious so if you try brute force you may lose. Enjoy your UFO Attack Set.
Gulza Sanctuary
Back to the Gulza Sanctuary Plaza Transporter. As you go east stay on the lower part and you’ll see three green treasures – Ancient Scroll III, Mermaid’s Scale x2 and a Mimic. Keep following this lower path until you reach Nebuladon Egg. Keep following the path and as you go south you’ll see a Sun Key chest and it is Omega Star. As you go further east look for a north detour that has an Alluring Lamp.
You’ll run into a relative small shop. You’ll come to a Stella Crystal further north and when the path goes east you’ll see a Gulza Sanctuary Plaza Transporter. A red ? should be here if you bought boss information. Hold a Sealing Sunsphere up and The Envoy from on High Sacred Thunder Dragon will appear. Shoot him right away to break his barrier and then use your buffs. This guy can take off a ton of damage like you’d expect from one of the last hunts.
Use Illusion Sword, like you probably have been doing, as staying farther away from the Sacred Thunder Dragon’s thrusts is your best strategy. A Demon Rouser is your reward.
You will see several paths around this transporter. You came in from the west, so just take the path north of that. This leads west and then take the north fork for a Star Earrings. Continue with this route and as you start going north get the Destructo Attachment for Deego. It is an AP trap by the way. Further north and you’ll see Mirror Unit. North more and you’ll see a giant red barrier.
Deego will see Angela and Gale. Gale gives him a silver coin and Deego gets the Drigellum of Friendship. The silver coin is actually the Officer’s Coin transforming into the Keepsake Coin.
You’ll be back at the transporter now so save and take the path going north that is just east of the first path. You’ll go north for a ways and when it goes east you’ll see an HP trap that is an Izerium Alloy. Follow the path a good deal east and you’ll come to a Sun Key chest, a Ganymede. North more and we’ll be at a darker red area with Jaster and Raul. And a younger Jaster. He makes a realization about his dreams when he was younger, and acquires the Drigellum of Dreams.
There is another path going north that is east of Jaster’s path. Take this north and east, and before it breaks north you’ll see a Pirate’s Grog x3. The east path and north path here converge so take either one, and then go east and get the Revolva Alloy, then go north. You’ll come to a purple barrier. This is for Zegram, and Jane. You see how Jane dies now. And you get the Drigellum of Love.
After warping back, lots of shots come from the sky. You’ll see Mother and she takes your drigellums. Ragnar and Burton begin flying around. You get your drigellums back.
Take the path that is east and a little north of the transporter. You’ll come to an Energy Charger. Further along on the shallow side and you’ll see a Chaos Chip. Keep staying on this lower path until you reach the end with Izerium. Go on top and across now and as you go up you’ll fight a Mimic. Farther ahead you’ll see a green treasure below the path – when you get to this area, drop down and get the valuable Crystal Staff x2. Further ahead and you’ll come to a Brave Symbol and a transporter. Further ahead and you’ll reach Yuvan who tells you that you need the rest of the drigellums. Go to the end transporter and teleport to the Plaza.
Go east but take the path just a little south of the Mother’s Lair route. Take the lower path and you’ll eventually come to two green treasures, the first being a Mimic and then Excelion Shard. As you continue south and then west over a bridge, jump down again and look for an Elixir x4 chest. More north for the blue barrier. Steve has some scenes and then you get the Drigellum of Desire.
There is yet another path south of Steve’s so take it. Take the east detour for an Ancient Scroll III. As you go south and east you’ll reach a Hyper-Gravity Sensor on the top part. East and we’re at the light blue barrier. Jupis then gets the Drigellum of Pride.
Take the path that is due south of the transporter. Continue for a long while and as you’re going south, look east for a green treasure (Tachyon Motor). Stay on the lower end and you’ll come to an AP trap with Seventhmoon. Farther on and you’re with Miri and Lilika when they’re younger (green barrier). The Drigellum of Courage is then yours.
One last Drigellum, for Simon. Take the southwest path. Stay on the lower part and you’ll see a Star Key chest, Typhoon Shield. As you continue south you’ll come to Divine Blessing. The yellow barrier is up ahead and some scenes with Simon. Turns out he is the husband of Miyoko and dad of Chie. The last drigellum is yours, the Drigellum of Compassion.
Go to Yuvan now that you have everything. After some nifty stuff Jaster will get the Sacred Blade Zeo Sychros.
Mother’s Lair
Just ahead and you’ll be in Mother’s Lair. As you go east you’ll see a Perfect Heal and south for Tri-Charge. When you reach a south / north / west intersection (you come from the west) go north and get an Electroless. North more for Stealth Pills x4. North and then east for Phantasmic Glaive. Then go south at the initial intersection for Skull Necklace and then it’ll go east and you’ll see a Silver Bangle. North some for Lucky Clover and the next chest you encounter is a Mimic. Soon you’ll be at the Mother’s Lair Beginning transporter. Stick to the east wall and go south for Electric Eel. Take the west path for a Gigaton Arm. Take the path going east for a Sun Key chest, a Hyper Crystal, and then more east for Stamina Extract. East across some lava for an HP trap and Tri-Resurrection x3. As you go north stick to the east wall to get a Strength Star. Go north and watch out as you jump down from section to section – you could fall into the lava. Stick to the west for a Galactic Compass. Keep going north and you’ll reach a gigantic skull and Mother’s Lair Midpoint Fork.
First, take the path going northeast for a Crystal Staff. The path will wind southwest eventually and a Premiere Toy Box will be in plain view. Turn around and go back to the transporter at this point.
Of course, take the northwest path and it’ll lead to a thief’s trap Galactic Assault. You can go south or north, so go south first and you’ll come to Perfect Elixir x3. Go across the lava and get the Galactic Compass on the other side. Keep going south and west and you’ll reach a Smoked Rainbow Newt on the cliff.
Back north now and you’ll reach Co2 Powder x5 and the mother’s Lair Midpoint transporter. A bit farther along and you’ll meet Charles, a shop. North more and then west for Sealing Sunsphere. As you run west you’ll see a pit, but look east when you jump down to get the Dream Mushroom before you continue. Follow the path more until you reach Mother’s Lair Endpoint Transporter.
Look in the nearby pit for Myriad Branch and then begin working west and then south along the path. As it winds east and then south again, you’ll see Snow Crest. A bit ahead and you’ll see another big skull with fire eyes. You can go west or south now, so go south and east for a Mimic. That’s it.
Take the west route and this will lead east down a large ramp to Guardian Sphere x3. East some more for the final transporter on Mariglenn, Mother’s Lair Core.
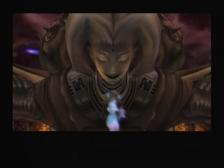
Mother
is ahead. You will only be able to hurt her when she gets her head up close. Otherwise she’ll take no damage, so just dodge her attacks. She doesn’t have much HP, fortunately.
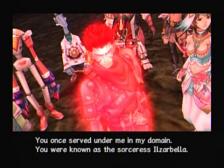
Mother will turn into Ilzarbella and Jaster will turn into the Star King. The Star King confronts her. When the battle begins, again you’ll need to use Illusion Sword to damage her. She’s not really hard, just dodge her attacks as best as you can – you have little room to dodge though. The Star King will attack her with the Zeo Sychros blade afterwards, killing her.
Valkog’s Ship
It begins with Deego against Valkog’s Ring. You have to shoot his ring when he hand stomps you. Then it opens and you can attack it with the axe. It will still hand stomp you and also shoot beams from it’s hand. You need to get your hits in while Top Dog is in effect.
Simon gets a Bomb Walker to fight. Basically, run circles around the thing and shoot it, or use Missile Squall Lv3 if you want lots of damage quick. Shouldn’t be that hard for you.
Next up is Steve against a Bomb Walker and two Batteries shooting from the side. This walker seems quicker with kicks and bites. Use your subweapon with Steve for massive damage. Just watch Steve’s health.
Lilika is stuck with a Bomb Walker and a Core. Kill off the Bomb Walker with your subweapon and Warrior God’s Cry, and then use Serpentine Arrow to shoot the core down. The Bomb Walker regenerates fast, so you may be better served to just kill off the core as fast as possible.
Now Jupis will have to fight another Valkog Ring. Use the same strategy, hitting the ring to open up the hand and using Aromatic Boost and then attacking it.
Zegram has Izel. This guy can be real damn confusing. If you get too close he’s just gonna light you up with those green lasers. Take a shuriken and throw it at his right shoulder, using the d pad to target it. Izel will be confused and will slam his arm into the ground and it’ll stay there for a good 15 seconds or so. Run up it, hopefully with drunken burst or twin sword, and then do your three jump attacks continuously until he’s dead.
Kisala has Norma. Norma is really simple, just jump and attack with either weapon. Dodge her lightning though and use Electroless.
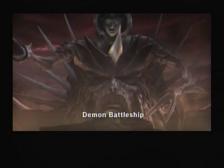
Now it’s time for the final battle, with Jaster and his Mariglenn Sword fighting Valkog’s battleship. This really isn’t that hard, just make sure your HP doesn’t get too low just like all these other single-ally battles. You need to attack him to get him to counterattack, and you can attack him when his hands aren’t covering him. You can use jump attacks faster, so do a quick jump attack and then when he counters, try to jump over his hands and then attack him. If he hits you, which he still likely will do often, it’ll take off a lot so stay healed.
Enjoy the ending as the party members escape Mariglenn.
Thank you so much for the help with the final boss. :)