Suikoden 5 Headquarters Suikoden V Index : Walkthrough/FAQ
HQ
 It’s about time we see what Lordlake looks like now. Afterwards, we’ll take a trip and see who we can recruit. Lordlake looks wonderful. Toma, Goesch, Talgeyl, and Silva will all join you for restoring Lordlake. Head east from this area and south across the bridge, and search this area. You’ll find an Iron Hammer and a Wall Orb. Return to the Beaver Dam and go back to the HQ. Now it’s time to recruit some new members.
Just as you return you’ll see Muroon near you. Talk to her, she’ll join if you ask. Check out the HQ, and go to the second floor. Walk outside from here and you’ll see a scene with Killey. He’s an arrogant fellow but be nice and you’ll go see the Dawn Rune room on the fourth floor again. He’ll figure out what he needed to know and he’ll leave, but worry not. Put Viki, Lun, and Takamu in your party and teleport off to Raftfleet. Go to the Inn and you’ll see Mueller and Wilhelm, the guys that fought with you for a while when you were in that last war battle with the Barows. Anyway, ask them to join and they thankfully will.
 Leave here and go north of the Save Point and you’ll see a fisherman complain about Raftfleet moving. It’s Lun’s friend Subala and if you ask her to join you’ll be back at your place in a fishing contest with her. Not too tough, took me a few rounds to get it done though. When you catch more cumulatively than her, she’ll join.
Take that Iron Hammer you received in Lordlake and teleport to the Dwarf Camp. Go to the blacksmith from before and he’ll take it, but he can get your weapons up to level 10. Do so immediately with Lyon and your prince. Dongo the blacksmith will be happy but his master will scold him for working on weapons. He won’t join yet but you’ll get him later; until then, utilize that level 10 sharpening skill he has now. Go near the Rune shop and climb the ladder; you’ll see two dwarves, one being hidden behind the other. Talk to the hidden one, the female dwarf Zunda. She’ll ask for a Window. You have these, probably in Chuck’s inventory. The funny dwarf-girl will run with you until you get to Lunas with Takamu.
Get Urda along the way and go out to the left of her. The enemies around here are much improved by the way. Enter the mansion and go in the first room on your left and walk near the window. Her creative thoughts will begin to flow and she’ll join you now. Return to the HQ, dropping off Urda in the process. Then it’s off to Yashuna Village again.
 Belcoot and Marina are here. Belcoot will join only on the condition that Marina goes with; fortunately, Marina is turned down at the local Inn, allowing you to swoop in and recruit the two of them. Go to the other Inn now, the Tricolor Inn. Follow the stairs and then take the first room, to talk to a fortune-teller who believes you have an ominous fate. He gives you a strange book, which you should take to Chuck. Now, teleport somewhere else and rest, and then return to Chuck and he’ll give you the book back, saying it glowed at night. Strange book indeed, well take it back to the guy in the Yashuna Tricolor Inn. The Innkeeper is there but the fortune-teller isn’t, so give her the book by choosing the second option. Back at HQ, teleport to Estrise and head north, talking to Alhazred whom you met in Rainwall earlier. Mention that you saw a strange tome and he will go crazy and say you must go to Yashuna ASAP.
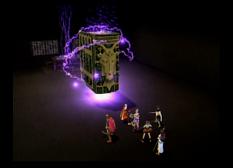
Save and then go there; the fortune-teller will be dying while the Book of Condemnation is working it’s magic. A boss fight with the huge book begins. If you’re prepared it should be easy, just throw all the tough runes you have (I killed it in turn one). A Resurrection Piece is your reward along with plenty of Potch and SP. Alhazred will join you if you ask and give you the Condemnation Rune. The seer? Just Euram Barows, who got impatient because you didn’t open the book and opened it himself, causing all of this.
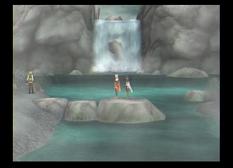
A few more trips to go. Teleport to Beaver Lodge and exit via the west exit. From here, walk along the river until you get to the Waterfall Basin. Head south upon entry and east along the rocks to get to the other side. Then head north for some Pale Moon Beads, and then go directly south (ignoring the right path). You’ll cross some more rocks into the southern area, where you should follow the road until you get a Resurrection Piece and a Stone of Luck. The Stone of Luck is along the path north of the Resurrection Piece path, but it’s hard to see so just continually press X at the end of that path or something. Head back to that eastern path you ignored and take it until you can south across another river via rocks. Immediately head east for Voice Set 4.
Further south is a long path that leads to Richard. He will not join you, even if you ask, but will mention Mueller. Go back to HQ and talk to Mueller in the Inn (southwest of floor two). Mueller will give you some information to relay off to Richard, who will then join you when you talk to him next.
 Time for a quick advancement of the plot line, and then another Star of Destiny. Go to the Beaver Lodge and try to get Maroon to join; he won’t though. In the chief’s hut, talk to Fuwalafuwalu three or four times. He’ll tell you different things each time. Try to get him to join; Fuwala, just like many other beavers, enjoy being neutral, so he won’t yet. He will mention something about “boss” and about old people. Bring an older person (I had Alhazred in my party) to the Waterfall Basin, where you found Richard. Alhazred will make note of a large boulder, but it’ll be a huge talking tortoise named Genoh. He didn’t join for me right away; evidently you need an old man who is a level below or higher of the hero. Alas, Alhazred was a few levels behind, but taking him to the Lunas woods got him up to speed. Genou takes up two spots, and you can only use the Blue Dragon formation. He has a Parent Turtle Rune, which prevents half of your status ailments, not to mention some gaudy attack and defensive stats.
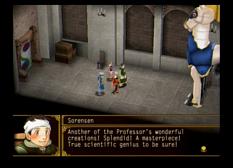
More recruiting to do. Teleport to Estrise and go to the Inn to meet Linfa, who challenges you to a card game for 2000 potch. You can’t win, so just raise all your tokens to end it early. She takes your 2000 potch and gives it to a mysterious guy and leaves. Obviously you’ve been cheated. Well, talk to Sorensen and Babbage on the southeastern end of town and then go to Logg and have him bring you to the East Wharf. Head north and talk to the soldier at the Revolving Bridge, and then go back to Sorensen. Pick the second choice, and those two will join you and go outside for Lu to join you (pick the second choice). They’re both underdeveloped so you may wish to do something about that, so speak with Logg to go there when you are ready.
When you get there, four giant and bright green mechanical guards will come attack you. They go down pretty easily though and give up the ?Painting item, which will be used in Haud Village shortly. Anyway, head west for an Epic Skill “Armor of Gods”. Go east a little and up the stairs. The stairs immediately to your right is a Lightning Ring, while the left stairs advance.
An Equilibrium Piece is right in front of you here, then head south to continue further up another flight of stairs. Sound Setting 3 is here, then rest up and head in. This big horse is the Differential Gear. Again, it’s pretty big, but it couldn’t handle a Meteor Shower and two Furious Blows. Babbage will shut the Revolving Bridge down and you can then leave. Return back to Estrise though to recruit Sorensen.
 One more recruit left. Go to the northeast section of Haud Village and check out the appraisal shop (with one of the ? Painting’s you just received). Bastan will randomly ask you about the painting, and will find out it’s an Ivanov Painting (Ivanov from Suikoden I). Bastan will then join you.
Okay, that was a lot of recruits. Time to head to the war room to advance the plot finally. Sable will have backed it’s support off and combined with the Beaver’s turning you down, this is demoralizing. Head south out of the 2F area to get a scene with the reporter Taylor, who will ask you a series of questions and then will be brought into the War room. It is decided that you will be going to Lelcar; Lyon and Kyle will be going with you, as Kyle grew up there.
Fill up the rest of your party and head out to Logg who will take you to Lelcar.
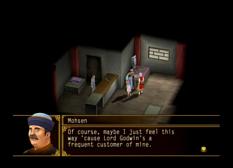
 As soon as you get off the boat, Wasil will come running up to you and will be able to recognize both you and Kyle. Time to explore Lelcar. Keep heading north and you’ll find a White Rose Brooch. South and east (between two buildings) is a Guardian Casque, a very good head defense choice for the Prince. Further to the southwest you’ll see four townsmen bickering between you and the Godwins. Around here is the house of Wasil, so you’ll talk there for a bit and head out to experience the culture here at Lelcar. Well, head south past the Trade Shop and past the house next to it, but search near the tree on the west end of the last house. You should see a treasure, which is a Tri-Tactic. Go to the West Inlet of town now, and go to the south for the Anklets of Destiny. Check out the Armor Shop now; be sure to buy several items, as Mohsen will appreciate it. Go to the Inn and talk to Nikea. She’ll be eating, you’ll remember her from the Stormfist contest. Leave and head to the north, across the rocks for a Rage Piece.
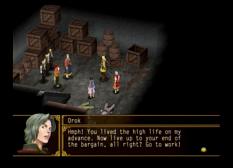
It’s time to head to the east part of town now. Go to the south part of the east section to strike up a scene with Volga and the townspeople, who are talking about a revolt. You’ll volunteer to go see this jerk Orok who is kidnapping and stealing but claiming that he’s “drafting soldiers” and “collecting taxes”. The Inn on the east end has a Basic Combat, by the way, very useful. What’s more, a Sacrifical Jizo is in the northwest part of town. Time to return to the west end and confront these Godwin supporters. Head to the south of this part of the area and you’ll be at Orok’s. They’ll let you in, but some guy will recognize Kyle because Kyle stole this guy’s girlfriend in the past. The battle isn’t hard, don’t waste your spells. Head left and grab the Raging Lion Epic. Go down the stares to meet the coward Orok, who will have bought out Nikea. You’ll be fighting Nikea and five thugs now, so throw everything you have. She’s tougher than the thugs, but you have six characters that are probably better than she is. You’ll get a Baked Cheesecake and a Master’s Robe for your trouble here.
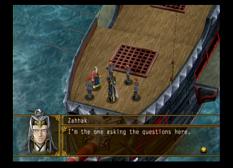
 Orok will leave and so will Nikea. You should also, and when you do you’ll see a scene with Orok being interrogated by Zahhak. Zahhak knows the prince is there, in turn he will order everyone to advance and take the town over. You’ll be back in Wasil’s place, and you’ll learn that Zahhak is putting the town under martial law. Lucretia is busy but you’re backed up from Raftfleet. Pick the second option twice and you’ll be in battle.
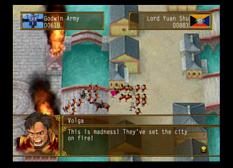 This battle was the first tricky one I experienced, if for no better reason than it’s so hard to juggle between the ship fighters and the land fighters near town. I dominated near the town, but I was suffering in boat warfare. Luckily, I held my own and wasn’t blow out there. Change your troops up though, before you get into battle. You’ll want a Cavalry Unit to deal with all the Spear and Infantry Troops, especially Zahhak at the end. Once all the town troops (including Zahhak) were gone, they set the town on fire and the battle was over. You receive a Guardian Chain for your victory.
You’ll be around town now, and six Godwins will attack you. The city is ablaze, and when you go to look around you’ll see Orok helping out.
Wasil, Volga and Orok will all join you now. Head into the Rune Shop just north of you (or any shop for that matter) and then go outside of the Armor Shop to see Mohsen. If you bought enough stuff from him, he’ll join you. If not, he won’t but you can get him later. Head back to the HQ and the War Room specifically, where Kyle will leave you and Sialeeds will join, as you’re going to Sable to surpress the “Bandit Prince” who has taken over your identity. Before that though…more of the 108 to get.
 At your very own HQ, you’ll see Taylor by the Inn. Talk to him and allow him to do his documentary or whatever he’s doing. Then, go to the Dawn Rune room on the top floor, where you will see him again. Give him permission once again, and then go near Georg’s room to give him permission again to check things out and he will join you.
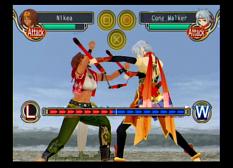
Teleport to Estrise now. Nikea is at the Inn, and she’ll duel you if you ask her to join. Accept it, and be careful; she’s very aggressive. That said I didn’t get hit, because she’s so obvious with her choices. She looks out of shape too. Oh well, she’ll join you now and she’s actually formidable and leveled up. Make a quick trip to Yashuna Village now. Linfa will be to the north east of the Rune Shop here, and she’ll give you the 2000 potch back (since she screwed you out of it) and then she’ll run off once she’s pursued by another debt-collecter.
 Take a trip to Lelcar again and go to the west part of town. Murad will be towards the north part of this area, and he’ll be very upset at the Guardian Knights actions. Finally, he’ll break his neutrality and join your cause (I believe you have to talk to him in Raftfleet and Rain Wall as well, and possibly Lordlake. If you failed to do this, you’ll have to continue to ask him when you find him in other places). Go to the Rune Shop now, where Jeane will be situated. Ask her to join, and she’ll request you help her get something out of the Big Hole that is northwest of Rain Wall. Go along with all of this and put her in the party; she’s a deadly magician. Return to HQ and go to Logg; have him take you to the East Wharf. Now you’re at Raftfleet’s initial location, so head northeast and you’ll be at the Big Hole.
If you’re a nosy fellow like me you’ll have already messed around at the Big Hole before and met Levi and Bergen. They still won’t join you but they’ll notice the Dawn Rune you have. Just a tad north is a sealed door than Jeane unlocks, previously inaccessible. This Sindar-created area is huge; you’ll get a far-view of the entire place and then you’ll have to make your way north. One nice thing about this area is that it is littered with Magic Drain Piece’s, which are crucial to making your top-flight magicians (Viki, Zerase, Jeane) unbeatable. First, head left, north and then left for a set of the Anklets of Destiny. Go all the way to the right now, then south, then right, then up. Not too confusing when you’re walking, a lot of quick turns. As you are heading north, turn off east for some Devil Beads, and then west (FAR to the west) for a Prosperity Tunic and a Holy Amulet. Go back to the four-way intersection and go north, west, and north again. Head into the central structure and take either staircase; you’ll be going to the opposite one soon enough. The left staircase leads to another stairway that has a Sorcery Tactic, while the other side has a Mother Earth Piece. The Sorcery Tactic, need I mention, is one of the best in the game in my opinion.
It makes an already-abusive Zerase even more destructive. In the center area, Jeane will go get a treasure; then it’ll be time to go, but not before you are prompted to ask her to join via the second option. Do so, and she’ll finally be on your side. Don’t leave quite yet though. A Magic Ring is up the northeast stairs, while a Dragon Incense is in the northwest. Furthermore, if you head southeast you can get the Mystic Ring (Magic Defense + 10) and in the southwest corner is a staircase that takes you to the Champion Rune (no random encounters for enemies that are far under your level). You probably won’t be able to see the chest, just do the usual pounding of X to make sure you get it.
Toma, Goesch, Talgeyl, and Silva will all join you for restoring Lordlake.
Return to the Beaver Dam
Lyon say >> princes, let’s go talk the beaver elder
where the beaver elder ??
beaver lodge>> not the beaver elder
where is waterfall basin
Teleport to Beaver Lodge and exit via the west exit. From here, walk along the river until you get to the Waterfall Basin.
I missed recruit gnoh for thr first time. After the great lighthouse event, i want recruit him. But I can’t find the elder beaver (fuwala) everywhere. Where is he ?
very dificult
why i didn’t find richard in waterfall basin
A Map for the Headquarter would useful, is hardest dungeon to me xD can’t even find the gear room ?
WHERE DO I GET THE ? PAINTING. SO THAT I CAN GET BASTAN.
IF YOU KNOW PLEASE EMAIL ME AT ZHOUTAI_DAWN@HOTMAIL.COM
NO CAPS.
What exactly did Jeane get during this mission???
And if will it ever be of any use?