Suikoden 5 End Walkthrough GuideSun Rune : Twilight Rune : Dawn Rune Finale
 Before you go, understand you cannot bring females to this location. Instead, bring your best male rune users and attackers. In case anyone is keeping track, I put Roog and Rahal in the Entourage since I didn’t have the money to build their weapons up. Instead I brought along Gavaya, Alhazred, Cornelio, Levi and Zegai. That’s a classic representation of the Lord Yuan Shu Army, although Goesch should probably be in there somewhere.
Go through the mining cart area and into the Twilight Forest. Then, go through Port Spinacks and south past Sauronix to Gordius. Head into the left tent for the Old Book 13. South of here is Ax, Nick and Yoran, who will join you. Go back to the tent to the far west in the initial area. You’ll plan to investigate what those three were investigating, and you’ll need to get the jump on the guards to do so. All the way down and another scene. Choose the first option to bring them along and head in.
 Save your game, then take a left at the first intersection. Sound Setting 2 and the Spun Silver Armor will be your rewards. Head all the way to the right now for a Pale Moon Necklace and then northwest to continue. You’ll come to four assassins and the Dragon Horses, and Ax will yell. Use high-level spells here to knock these four down. A Crazed Orb (again) and a ? Painting are your gifts after this fight. There will now be a standoff between Dolph and your army, as he threatens to destroy the eggs. Fortunately, Georg cut off Dolph’s reinforcements so Dolph is forced to retreat and Georg joins, while Roog and Rahal leave. Before you go, get the All-Out Strike north of you and then walk out. Finally, return to the Dwarf Camp via the Twilight Forest.
 Back with Lucretia, you’ll talk with Georg who will prompt you a question (choose the first). The time to re-take the castle is coming. Go back and come in, Craig and Lance will join. Pick the first choice and you’re off to the Ceras Lake ruins with Zweig. Oh, and take the mining cart, it will take you there. Grab the Earth Ring along the way too. Continue to take the trail all the way up and you’ll be there shortly. You’ll use the rune and then head back to Lucretia.
The rest of the Sauronix people will join your forces and you can march on your HQ when you wish.
Childerich will be messing around your room and Lucretia’s plan will work to perfection. The water level will rise, causing the Armes and Godwins to panic and get upset at eachother. Jidan, Childerich and Maha will be discussing things and then they’ll hear that you are waiting outside the castle to lay siege. As for this battle, it is not as difficult or fast-paced as the other one. The enemy is in disarray and you generally can send whomever you like at whichever unit you like, the enemy is rather passive overall. Childerich will suggest using the Godwin soldiers as human shields, being the nice/considerate guy he is. Half of Armes has fled and the soldiers left don’t care at this point.
You’ll have a few Dragon Knight units, and make a few Beaver units. They’ll quickly swarm the two weak ship units the enemy has to offer, and then there is just an Archer, Jidan, Childerich and Maha. I didn’t even touch Childerich or Maha but took Jidan pretty low, and then they all retreated. A Fog Robe is your reward here. Oh, and there’s the little thing about you getting your HQ back. Your morale is high and the Godwins is at an all-time low. Their relationship with Armes isn’t exactly healthy and Gizel is running out of options.
Meanwhile, Alenia will be getting on Shula, and then he’ll talk to Sharmista. Shula basically will tell Alenia off to her face, while Alenia is in disbelief.
 Back at the castle you are given the option of going after Childerich or Jidan or waiting. Choose wait and then save. Personally, I’m choosing Childerich this time around. As for your battle formation, well, you should have a pretty good handle on what is successful for you and what is not. As I’ve said before, Beavers and Dragon Horse units are versatile and that helps, but try to get an even amount to match up the weaknesses/strengths (again, this is another passive-enemy battle, so it is easier to match up). Childerich has locked himself in Doraat while Luger is in the lake and Dilbur is in front of the gate. Now those Beaver and Dragon Horse units, have them help the ships to take out the enemy naval units. After this is done, converge on the castle. All you need to do is get the Prince in Doraat. Your reward is a Windspun Cape.
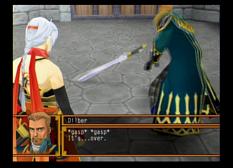
Inside, Childerich will be desperate, saying he’ll kill anyone if the rebels attack. Luger and Dilber will finally stand up and complain that Childerich lost the trust of the people because of his malicious tactics.
Luger then is looked at as a traitor and denies it, saying he’ll prove he isn’t a traitor. Meanwhile, you’re just arriving at the scene, and you are prompted to choose your allies; Roog and Lance are in your party already, so choose a bunch of magicians and a few good tanks. My party (these guys are regulars for me) is Gavaya, Prince, Zegai, Jeane, Levi and Eresh, in the Sorcery position. Levi is an unstoppable force in the back while Gavaya has four Eyeball Rings and a Drain Rune to make him invincible.
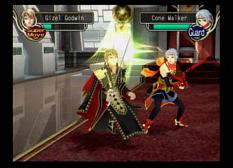
 Luger will be attempting to escape, but Raja will cut him off. This gives you and Lance some time to catch up. Bahram Luger, with his unwavering defense of the Godwins, will fight you with five Imperial Guards. The guards will waste their attacks on your tank, which was Gavaya, thus enabling your Rune users to cast at will. Bahram can use the Water Rune to attack you, but alas he should be gone in two rounds if you have some quality runes. You’ll get The Shredding, Resurrection Piece, and a Berserk Blow Scroll. Luger will pass away as Raja and the Prince look on, saddened to see one of the few quality people in the Godwin army go down.
The rest of the Godwin army fled.
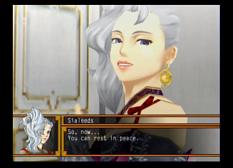
Meanwhile, Dinn and Boz will take out the Southern Mountain Corps of Armes and kill Jidan Guisu. Lucretia and friends are still worried though, as Gizel is getting desperate and must have some more tricks. A scene will show him asking something of Sialeeds, and then it fades out.
One last non-storyline Star of Destiny to get (unless you missed Eresh and are planning on getting Euram later), so go to Hershville and talk to the guy in the Administration office. In fact, talk to him three or four times, then go to the bar (very bottom floor) of your HQ. Kisara will be yelling at Logg for doing illegal business but Logg will run out. Go back to Hershville now, and go in the shop two doors down from the Armor Shop. You’ll see Logg with that Bureaucrat who you saw in the Administration office. Actually, Logg introduces you to him and his name is Haleth, a guy working for the Godwins but one that is apparently a good guy and helps the Lord Yuan Shu Army out with “access to vital foreign commodities”. Those two will leave, so return back to the castle, and quickly go back to Hershville. At the Administration’s Office, the guy in place of Haleth will say that Haleth was caught smypathizing with your army and fled. Return to your castle again and check out the bar. Haleth will be hanging out, so ask him to join (second option). Again, this should be the last optional star, assuming you got Eresh. In fact, you should only be missing four stars currently, and they are all automatic.
 Back at the War Room you’ll receive a message from some of the Armes troops from earlier, and they are in Yashuna. Teleport there and go to the Great Hot Springs Inn to see Sharmista, and you’ll go upstairs and talk to Shula, the guy who ignored Alenia in the last war. Basically he says Armes knew that the Godwins would never pay up and that they just wanted to buy time for the Sun Rune to be analyzed. Be nice to them and trust them, and Nifsara, Shula, and Sharmista will join you. One more star left! 107 stars total (106 if you’re getting Euram). Back at the castle, Josephine will walk by and Shula will recognize her as his sister Yuma.
Again, go to the War Room and you’ll discuss something important; the use of a powerful rune at Stormfist. Zerase will come in and mention that whoever is wielding the Twilight Rune is the true bearer of the rune, thus creating a difficult situation for you. You can probably guess who it is if you think about it. Anyway, accept this idea of attacking Stormfist and you’ll be in another battle.
This is a siege battle so don’t expect the enemy to move. After a bit, a unit that looks like it is being led by Shoon will show up and aid you. Immediately take that unit away from the castle and put it with the rest of your army. Remember, just get the Prince inside Stormfist, and then the Twilight Rune will be used on the Prince’s unit. A Master Garb is your reward.
After the battle Shoon will talk to you. He will advise you to go in with a small party so as not to expose yourself to the power of the Twilight Rune. So it is decided that you, Shoon, Zerase, and Georg will go. I brought along Levi, Jeane and Zegai (one of them replacing Shoon). Go south to the Underground Passage. Follow your way to the cell, and go left when you get out. Head to the center area where the duels were long ago and Childerich will have plenty of archers waiting for you. Fortunately the bearer of the Twilight Rune will take them out for you, but then Childerich will challenge you to a duel. If you have Zegai/Belcoot/Richard with, they’ll offer to fight. I had Zegai with and allowed him to fight, and I didn’t have much of a problem. Childerich will drug himself before the fight, so he’ll only mumble what he is going to do, although you can still get the impression regarding when he’s going to do a regular attack or a special attack.
Unfortunately, Childerich’s drugs will have killed him. Go south and then upstairs, working your way to the north part of the castle so you can leave toward Godwin’s castle. At the gate will be Dilber and four Imperial Guards. If you have Georg in front, he can probably handle everything the guards and Dilber will throw at you. Dilber then didn’t have much of a chance against me, since I had Levi, Prince, Jeane and Zerase casting high-level runes on him, along with Zegai taking off a heavy chunk. He lasted two rounds, and he drops a Killer Orb, Thunder Piece, and a Clay Guardian. Another one of the more commendable generals passes away, such a loyal and quality general to pass away like that. Georg tells everyone to move on, so head into the castle area.
Go right first, getting an ImmortalMedicine and the Windspun Greaves. A hard-to-see room on the east side (before you get to the previous treasures) leads to a Royal Paradise EP. Take the west path now, and go into the first west room for a Platinum Hammer. To the northwest now there is a pair of Windspun Gauntlets which you cannot see but you should search around to get anyway. Exit out west now to get a Pale Gate Piece in the southwest near the lake, and the Blood Scale Mail in the northwest.
Go back to the central area and take either set of stairs up. In the lower left room is Sialeeds with the Twilight Rune. Before that though, go to the upper-left room for a Windspun Helm and the lower-right room for the Old Book 3.
I’m not sure about this battle. She used the Twilight Rune on me in turn one and it put Zerase to sleep, and she didn’t get another attack off. Sialeeds will retreat to Sol-Falena and you cannot catch her. Go downstairs and you’ll see Boz and Craig; Stormfist is yours! Lorelai will get you quick, saying to check the upstairs, so check the upper-right room on the 2nd floor. Zweig will find documents that were left behind, but nothing too important. Go back downstairs and you’ll see a scene with the Godwins and Sialeeds. Explore around and talk at the War Room, when you go to your room it’ll fast forward to the night where Sialeeds will kill Salum Barows, leaving the incapable Euram to pull for the family. Seems this was the plot of Gizel.
At this point, you can get Euram Barows if you didn’t get Eresh. Otherwise, Euram won’t be in Rainwall (likewise, Eresh won’t be in the ruins and you won’t be able to get to that second underground level). When you are ready to advance though, go to the War Room like usual and say to advance.
However advancing on Sol-Falena means advancing on the Sun Rune, a dangerous proposition. At night, head into Sialeeds’ room, where Kyle will barge in and talk to you for a bit. Talk to Lyon and Georg and whomever you’d like, then talk to your maid to sleep. The next day, it’s the final War.
Again, nothing too hard. You just need to get the Dahak to Sol-Falena; however I had the enemy retreat before I got there. You’ll be at Raftfleet now, with Sialeeds about to do something. Hurry to the first floor to Luserina to change party members; put in the best members you have, it’s another boss fight. Leave the Dahak and Logg will take you there, where Zerase will be losing to Sialeeds. The fight begins, and use your best moves, she has some dangerous moves with the Twilight Rune. Actually, all she did was one weak move with the Twilight Rune on the Prince that took off less than 100, and she died in the first round from a Zegai critical hit. A Magic Bracelet is your reward.
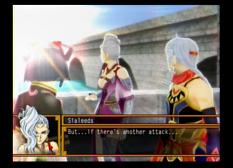
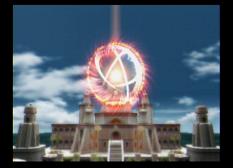
Alenia will say that Sialeeds is dying, and thus Gizel will use the Sun Rune and all hell will break loose. The dam will break and the Dahak will be in some trouble, but all will be okay. They will attempt to use the Sun Rune once more, but Sialeeds and the Prince block it with their runes.
Sialeeds will lay down and the Twilight Rune will choose Lyon. Lyon and the Prince will then run off for the rest, while Sialeeds talks to Lucretia and others. Time for the final war battle.
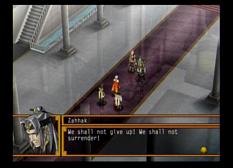
A lot of units are set here, but try to make two Beaver units. They will help you survive in the water. Unfortunately, the water units can’t go on land here and vice versa. You can however go from the east and west sides of the lake via north of the Sun Palace. Careful on the bridge; it’s hard to manuever, luckily there are only a few units here. Push through Zahhak or Alenia or both with Charges or Arrows and have the Prince go in to end the battle. A Fortune Piece is your reward.
 Choose your party well before going into the Sun Palace. Characters like Zerase, Jeane, Eresh, Viki, Levi, Zegai, Richard, Belcoot, Georg, and Gavaya are all suitable options, although it really comes down to who you have been using throughout the game and who you are comfortable with. Remember, Lyon has the powerful Twilight Rune (while your Dawn Rune advanced to level 4). Head in and save; you’ll meet Zahhak and Alenia at the entrance past the second save point.
Nothing too tough, but don’t blow everything in this battle. You’ll get a Viper Orb and a Lion Orb. After the battle they’ll drug themselves and you’ll have to fight them again. It’s sad how persistent these two have been throughout the entire game. They yield a SilverWhite Emblem, Rage Piece, and a Soaring Bolt Scroll. They’re a bit tougher here and more aggressive with physical attacks, but if you saved a decent amount of spells you’ll be fine. They go down in Culgan/Seed fashion, a la Suikoden 2.
Save, rest, do what you want, and go to the Audience Chamber to duel Gizel. Before that though, go to the eastern part of the 2nd floor to get a few treasures (Advanced Magic and a Sun Ring). Duel-time. Gizel is pretty obvious, nothing especially tricky despite this being the great Gizel Godwin. After the battle you’ll go to the rune room to find that it is gone, that Lord Godwin took it. Sniveling fool he is.
After the battle head out to talk to Lorelai and Zweig. Killey of all people will know what Lord Godwin is doing; he took the rune to the north, to a different set of ruins to attempt to harness it’s power. The light flashes you saw at the previous runes (your HQ) was these very mountains which you must go to now.
You’ll end up in your room, with Lyon coming by your room when you leave. Go down to the hall now, and you’ll be going to Lunas now with Isato and Zweig. Go to the bath area and use your two runes to open up a path to the ruins. Isato and Haswar will leave you now so replace them and head in. This is the end though so don’t go through here quite yet.
Teleport back to HQ and then go to Stormfist. From here go east to the West Palace. Head west and take one of the north bridges to an Advanced Combat. You should have both this and the Advanced Magic at this point, so building up abilities should be easy from here on out. Far west of here is a Windspun Cape, and then go in the Rune Room to the right of this for the Zen Sword Epic. The building to the right of here has an Illusion Tactic in the southern part of it, and a Windspun Ring on the east exterior of it. Last, in the southeastern house, there is a Resurrection Piece. Note that it seems rather hard to enter this house, for some reason.
 Go to Lunas now, and Haswar will show you the entrance via the bath-area from Lymsleia’s retreat to Lunas way back at the beginning.
Save at the save point and make your way east for a Dragon Incense. Just a tad northwest of here is a Hunter Orb. Try to direction yourself northeast of where you came in and you should find an ice bridge leading to the second part of this area. From here, heading east a bit and then taking the south exit gives you a Blinking Rune Piece. Heading all the way west gives you the Mixed Herbs (all MP back). When you reach the end (which is to the northeast of this second section), you’ll come upon an entrance and three doors; one for each rune (Twilight/Sun/Dawn). In turn, you’ll split up into three groups, with you going the Dawn Rune route, Georg and Zweig going north to the Sun Rune, and Lyon going west to the Twilight Rune. Luserina will be there to form parties (and to leave when you want to). Also note that you MUST get at least to this point to get Luserina to appear back at the HQ, otherwise she’ll stay in Sol-Falena which is a huge inconvenience to switch party members. Thus it is advised you at least get this far and then pull out to train for the last battle.
Try to build up your parties evenly; you’ll want some S’s with level 16 weapons and solid armor and you’ll want plenty of spellcasters with high-level runes and Magic Drain Runes.
Each group of seven (1 entourage) fights a Mini-boss, and then joins together and you choose another group out of those three groups that you brought along. Basically it’s like Final Fantasy VI, and you switch between your three groups with the O button.
Starting off with the Prince, go right and up to a wall and switch. With Lyon’s group you should do the same. Zweig’s group however has a panel in front of their wall, so stand on that to lower the wall. Get the treasure north for a pair of Sun Boots. Move to the right a little for another wall and switch to Lyon’s group. Take the elevator up and stand on that panel to reveal the Prince’s path. So, switch to the Prince and go up the elevator, and then down the elevator north of you. Further north is another panel, so switch back to Lyon again. Go north down the elevator and then west for a Gray Hat. Retreat back south a little and then left to take a platform up. North of here is yet another panel, and now you should switch to Zweig’s party. With Zweig, go right for a platform up and then one down. North leads to a wall and south leads to another panel and a Royal Garb, so go south. Back north, the wall will be gone and you can go through, and take the long passage to a Sun Armor eventually. From this treasure, go west to a panel and switch to the Prince.
North a bit is an elevator, but skip that and go east for a Sun Helmet. Return to that elevator and take it up and then down, following the path to a wall. Switch to Lyon now who will have a long path and then a west/north intersection. Go west first for the Sun Gloves, and then north to a panel. Switch twice to the Prince’s group, where you should go east to an elevator and eventually another panel. Continue north and then right for a Fantasy Half Coat and north to move on to a wall. Switch to Lyon now and a boss will be shortly to the north of her. Girtablulu isn’t too tough if you saved some Rune firepower. In fact, all he did was attack Gavaya for three turns (powerful attacks, but Gavaya had a Drain Rune and four Eyeball Rings). His defense is tough, or rather his magic defense is. Physically, you should be able to take him apart. He drops the ImmortalMedicine and Tachibana Greaves. Defeating him will also open a path east for someone else. Before you switch though, take Lyon to the end of her path (it’ll switch automatically when you are there, no intersections).
North for Zweig will illicit the appearance of Gudalim. He’s a quick little creature who also happens to have a decent magic defense, but a poor regular defense.
Seems Suikoden V learned (but only at the end) that any boss can be killed in a turn or two with runes. The magic defense upgrade prolongs the battle for a few more rounds, but Gudalim still shouldn’t bother you. Another ImmortalMedicine and a Wind Ring is your after-battle plunder. Take Zweig the rest of the way north and only the Prince’s group will be left.
The Prince has a battle against Enmesharra, who again has a high magic defense. Physical attacks work better, but either suffice really. The third ImmortalMedicine is yours, as is a Water Ring. Take him to the same place the other two groups are at, and you’ll be prompted to take a small party further north while the others fight the guardians pursuing you. However your party can only be from the members you brought along in the three groups, and furthermore it cannot be Georg or Zweig but Lyon and the Prince (obviously) must be included. You can have four Entourage members also. Look, it’s the final battle, so bring who you’d like. For the record, my party was littered with my best rune users; Bernadette (Flowing/Pale Gate), Viki (Magical/Thunder), Jeane (Magical/Thunder), and Zerase (Magical/Star/Cyclone). Other rune users Eresh, Levi, Alhazred and Cornelio are in the Entourage. Cornelio and Alhazred you say? Well, they are nice with the Flowing and Condemnation Runes, respectively.
Anyway, you’ll move on and can’t go back. Dolph will be in front of you, but you have to advance north to trigger the event.
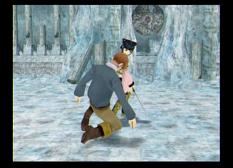 Lyon will ask to duel Dolph, as he is all that stands between you and Lord Godwin. Dolph will be cocky as usual and is probably the trickiest duel to figure out (it is the last). If you lose with Lyon the Prince will fight him. Careful of his super move, where he turns invisible and attempts to recreate the previous scene he had with Lyon where he stabbed her from behind. After the duel though, Dolph gets up and suggests he may have overdosed since his wounds don’t bleed and he feels no pain. He attempts to attack you but you pull out the Dawn Rune and disintegrate him. Now…walk in.
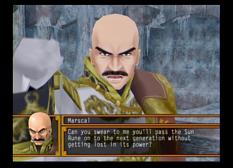
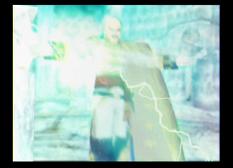
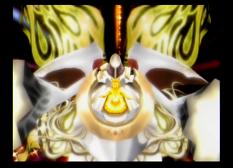
Marscal, Lord Godwin, admits he underestimated you. Eventually he tells you you’re no different than him and that you’ll abuse the Sun Rune’s power just as he did. He then releases something and his body burns up quickly, while you and Lyon hold your runes up and a battle ensues.
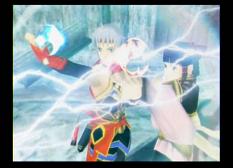
 The Sun Rune Incarnation, Guardian Heat Sprite, and the Guardian Light Sprite are your final enemies.
The two Sprites revive even if you kill them, so focus on the Incarnation. The Incarnation has some crazy looking spells. The Green Sprite has an absorb attack that attacks you and heals the Incarnation, which can be pretty annoying but it isn’t much. Bernadette was my main healer but was slower than all the enemies, so I tried to use Lyon (my other healer, who had high agility) if I needed to heal before the enemy attacked. Really, that is the only thing that can prevent you from losing, since the two Sprites don’t too too much damage if you are prepared, and the Incarnation has some powerful attacks but you can probably heal between the time it attacks next. Do not use Earthquake against it, as that will do nothing. All in all, if you’re a cautious and patient fighter, this should be easy for you. Most Suikoden bosses are, and this is no exception (although I will say I was overprepared for it, but that’s beside the fact).
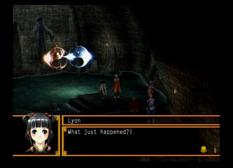
 After the battle, you’ll hold the hand of Lyon and she’ll collapse strangely. She’ll then talk a bit and pass away. You’ll see a vision of her outside of her body talking to you and then she’ll run away and burn up in the fire.
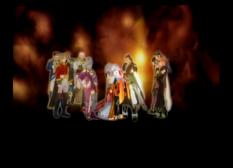
More of these will come up, with Ferid, Arshtat, Sialeeds, Gizel, Marscal, Dilbur, Luger, Alenia, Zahhak, seemingly all praising you. For whatever reason this revives Lyon. Leknaat then comes and explains what happened and then the scene will be in Sol-Falena.
 The senate is now going to be represented by members from each area. There will then be a scene with Lyon, Prince and Georg, where Georg takes off his eyepatch saying he was never blind. He then says he must leave because he killed the queen, and asks if you want to come with. You’ll be going along on your ship and see the Island Nation people (Bernadette, etc) and the rest of your allies will appear on boats also. A very nice scene if you ask me. After this is the what-did-this-character-do-after scenes, which are much more witty than past ones. Finally, the credits, with a Suikoden 1 guitar remix and the Suikoden V character sprites floating through the screen. It’s best seeing Cornelio and the five Do Re Mi Elves, I must say.
 Finally, it’ll be The End and you can save. If you load this saved quest, you can start a New Game + sort of.
You’ll know it’s a New Game + because the time carries over and the name of the Prince is green instead of white.
After this is done, converge on the castle. All you need to do is get the Prince in Doraat. Your reward is a Windspun Cape.
Nope you only get a reward if you go after Armes soldiers instead of Childerich. I had perfect health after the map and got no cape. But no biggie.