Suikoden 5 Twilight Forest Headquarters
Suikoden V Index : Walkthrough/FAQ
Twilight Forest and HQ Defense
 Go to the infirmary now, where Lyon will still be getting looked at. Miakis will join you and it is suggested you go to Zerase and find something out about saving Lyon with the Dawn Rune. At the rune room, you won’t get much help from Zerase other than that you’ve only harnessed half the Dawn Rune’s power. Zweig will be sitting there listening in and reminds you of the Sindar’s connection to the Dawn Rune, and says to explore the Western Ruins because of this. So, west of Doraat is the Deep Twilight Forest, and that is your destination. Zweig and Lorelai will join you for this. Return to the War Room to explain this to Lucretia, who says that it’s probably a selfish thing to do. You can agree or disagree, but she mentions going to see the Dragon Cavalry, as they only help when foreign nations are involved. Considering the Godwins and Armes relations, the Dragon Cavalry could very well aid you now. Before all this though, it’s time to get a few more SoD’s. Leave out the first floor and you’ll see a scene with Galleon leaving. Ask him to join (first choice) and he’ll still want to leave until Silva comes and changes his mind. Galleon, a powerful knight, now is yours.
Teleport to Haud Village and go northwest to the Lunas Northern Forest (with Takamu, mind you). Bring Urda back to the Master’s Mansion where Haswar will apologize for Sialeeds’ act and will ask to join you. Pick the first option to do so, and Isato and Urda will come with also. When you leave the Lunas North Woods they’ll join you permanently.
 Check your comment box often. After a while you’ll get one from Jeane regarding a return to the Big Hole. Actually I went there before getting this comment and Eresh was still there waiting to explore the lower levels. So yeah, go to the Big Hole with Jeane. Eresh will be where Levi and Bergen were, and she’ll talk in third person and you can offer your help. Do so and she’ll join you. She is a solid magician, a tad underdeveloped though. Take her into the dungeon and to the last part where she will request to go further down! Scary, you haven’t been this far before.
Follow the path for a while, and then go left for a Dark Amulet. Return and continue, taking the next left for a Pale Gate Piece. Further down go straight south for the Voice Setting 5, and then right to continue on. You’ll be at a large gate, but go east for a Stone of Magic before you go in the gate. Now you’ll be down one more level. Go straight north for a Windspun Ring, and then left to another intersection. Left once again and then a quick north for a Resurrection Piece. South leads to another intersection, where you should go left for an ImmortalMedicine. Further south is another intersection, where south gives you a Blinking Rune Piece and east leads to the exit. On the third floor, take the north path for the Old Book 4 and then go south for yet; you guessed it, an intersection. North leads to a Fog Robe, south leads a left/south intersection, with left being the Armes Armor and south being the last intersection here. Finally, go right for a Prosperity Hat and north for the gate. Be sure to save, a boss awaits.
 Expect a tough fight. Shepcesska has some powerful attacks at it’s disposal. It has a multiple physical-attack that will kill nearly anyone in one hit, unless they are a tank (I had Gavaya). Other than that it’ll use a Lightning attack that hits everyone for a decent but not fatal amount. It can stun some of your members for a turn though.
I got very, very, very lucky when I fought him, as I had only Eresh left and I was able to get Yell off twice to revive Jeane and the Hero for two last spells that finally did him in. Bring all the firepower you have; you’re going to need it. Your rewards are 33000 potch, 150 SP, Cyclone Piece, Mother Earth Piece, and a Sacred Oath Epic. I just pray that you have an Escape Scroll in your inventory so you don’t have to walk all the way back. Remember now, that since you have Eresh you cannot get Euram Barows later in the game, as they share the same star on the 108 Stars of Destiny chart. Anyway, that about does it for now, so talk to Logg when you’re ready to go to Spinacks Harbor.
Upon arrival head to the northeast for a set of Pale Moon Boots and a Thunder Helm. Work your way around the exterior of the port to get to the northeast, where there is a Rage Piece and a Stone of Skill. Along the way you’ll meet Hazuki who will be looking for Belcoot. Tell her you know about him, then go get him and bring him there to get her to join. Don’t bring Belcoot to her first though, make sure you meet her alone. Also, talk to the guy in the southwestern part of town, near the save orb. He’ll mention something regarding Hershville Naval Base. Go back to your port guy and tell him to go to Hershville.
The shops at Hershville are very nice. For items, go up the stairs in the center past the two Godwin guards for Intermediate Magic and a Blinking Rune Piece. What does Intermediate Magic do? Oh, just allows your tutor to upgrade to S. Inside the Administration building next to you is a Thunder Rune Piece and the Voice Setting 2. Now go a ways north and you’ll find Cathari looking for Sol-Falena. Return to Spinacks and head to the east part and you’ll run into her again. She’ll catch a Nether Gate assassin behind you and then ask to see Lucretia. Bring her there and notice she has the Godspeed Rune; 100 % escape rate and 2x field movement. Makes the game faster that’s for sure. Take her to HQ and you’ll talk in private and she’ll join if you let her. Note that she is a commonly missed 108 Star of Destiny so be sure to do this as soon as you get to Spinacks.
Head to Sauronix Castle now, another place to search around. Don’t go in the gate quite yet. Head to the northeast and check the houses; one of them has the Elementary Combat. East and a little south of here is the Old Book 12. Two houses west of this has the Stone of Evasion and the Sound Setting 5.
Further west is Rania’s Workshop where you can talk to the lady and then leave. Three Dragon Horses will be outside, and Rania will too come out and then go back in. Follow her in and ask her to join (second choice) and she’ll join. Give her all the Sound Settings you’ve accumulated. West and through the gate and you’ll get a DragonHorse Choker.
Inside you’ll have a scene with Craig Laden, the head of the Dragon Horses. Exit out now and get the Thunder Piece east of you. Leave the interior completely and when you’re outside go to the northwest and take the long walk up the ramp and then circle around until you get a White Rose Brooch. Southeast of here (where the southernmost Dragon Horse is looking) is the Untold Clarity EP, although it’s impossible to see, just search around. Hopefully you had the Godspeed Rune for this. Back down the ramp and all the way west for a Flowing Piece. Talk to everyone else, then you can leave. Return to Spinacks and go west to get to the Twilight Forest.
Around here you can fight the last Do Re Mi elf, La Si Do. It is white, and by getting all of them you can reveal the games tracks at HQ if you talk to Cornelio. Now, time for the forest. Skip the first east path and take the next one; Window Setting 5 is your treasure.
Work your way to the southeast as the path wraps around for a Pent Tactic. Then, go to the northeast and work your way northwest to get to the next screen. Save and go into the ruins, picking up the Cyclone Piece as you get in. The next two intersections have the same path so don’t worry which direction you choose, and eventually you’ll come to a Mother Earth Piece. Further west from here (eventually) is a Cape of Destiny and another intersection. Go right and up for a scene and two treasures (Guardian Gloves and Fujiwara Gauntlets). Continue on and choose either path, they both lead to the Golden Hammer and another intersection. Either way leads to a save crystal, so save and rest up. You’ll be at a door with a Twilight Rune symbol, but you’ll use the Dawn Rune to open the door.
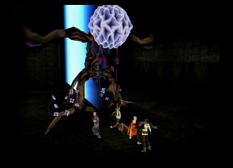 Killey will reveal he is searching around here also, and Miakis will ask him to join. You can accept by choosing the first option; he comes with a Rage Rune, so that is good. Anyway, boss-time. You’ll be fighting a huge tree, and it’s tough. As usual, strong magic is the key, despite it having a good magic defense. This Ancient Creeper has a tough physical attack that hits the front characters several times.
Also it has a move that hits everyone and potentially puts them to sleep. Keep your health up though and you should be fine. As usual, you get a hoard of treats for this boss. 45000 potch, 70 SP, ? Painting, Cyclone Piece, Silver White Robe and a Pale Gate Piece.
You’ll now be in front of the Twilight Rune, as it reacts to the Dawn Rune. Leknaat will come and say you’re witnessing the past in these visions. She also lets you know that your encounter with the Sun Rune is going to happen soon. Use an Escape Talisman to leave and Killey will join, if you ask him. Leave and return to the HQ, and don’t forget to drop the Golden Hammer off with Dongo so you can get weapons up to level 15 now. We are missing one optional recruit now, and we’ll get that in a bit.
Back in the Infirmary Lyon is saved by the Dawn Rune. Lucretia then talks battle plans with Lelei, and finally Gizel hires a new Guard, which looks like Childerich. The next day Miakis will come in your room and say to visit Lyon again. Go visit her and Miakis will go get Silva. Then Lun comes in and says something terrible is happening but won’t tell what. In the War Room, it is reported that Childerich, Dilber and Luger are invading Doraat currently. Meanwhile, Sable and Estrise are being invaded by Armes.
Evidently Armes must have got a sweet deal because they’re sending a lot of troops that you can’t handle.
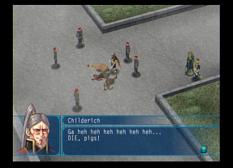 Jidan, Zahhak and another Armes general are in Sable, bickering over terms. Meanwhile Alenia and Shula Valya of Armes are in Estrise. It’s evident that Armes is not communicating well and is acting on their own agenda. Childerich will be killing townsman in Doraat, while Bahram and Dilber talk about how insane Childerich is. You are then to go to the cave dwarves to have them dig to Sauronix Castle, since the enemy has Doraat (just east of Sauronix).
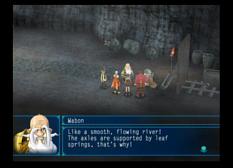
Teleport to the Dwarf Camp, where Wabon and some village folk will accuse you of being murderers. Of course good old Gunny comes in to bail you out. Wabon evidently can hook you up with some mining carts, the fastest way west. Check the cart to the east of camp to go. Some of your friends from Nether Gate are around unfortunately. Don’t waste too much on them, you’ll get a Crazed Orb for your troubles though. Afterwards, Gunny, Lun and Logg will go back to help the dwarves. You are to continue your journey to Sauronix. West a little and another Nether Gate guard will be near you. You’ll try to escape but you can’t, as this is a “Raging Assassin”.
Now drop everything you have left on this guy and he should be gone, assuming that Lun/Logg/Gunny leaving didn’t leave you too shorthanded. A Crazed Orb and a Thunder Piece are your rewards. Evidently Nether Gate has been drugging their warriors and they can fight for extended periods of time but when it wears off, they die. So that cracked out Nether Gate assassin you just fought had these symptoms.
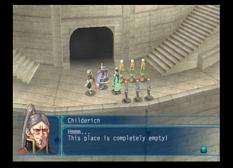
You’ll end up in the Twilight Forest at the end of all of this. Wabon and Gunny will join your cause as well. At Sauronix, Godwins will be everywhere so you can’t go in. Return to Spinacks and the guy right in front of you will say you just missed Roog and Rahal and that you must meet them in the Twilight Forest. Roog and Rahal will say that shady things have been going on and they’d like you to talk to the commander first. So, go up the stairs and go east into the building. Go all the way up, and then to the northwest room, where Craig refuses to tell you what is going on. Roog and Rahal however cannot stand this neutrality and join you. Lance and Flail can’t come with unfortunately.
 Save your game and then go to the War Room. You can either defend Lelcar or Lordlake here, and I’m not sure if it matters either way. I am choosing Lordlake, as for some reason it seems like that’s the proper town to be protecting. This battle is tough, as the enemy is MUCH more aggressive and merely being patient will mean you’ll be overrun. Load up on people with Charge abilities and good Runes. Let’s face it, the flawed battle system of V shows here. The enemy takes off ridiculous amounts despite having twice the size of each of your units. You must in turn rely on your Abilities obviously, and realize that you only have to defeat half their army. Do realize though that they will storm after you and you mustn’t let them get near Lordlake. Be wary of their “retreats”, another poor aspect of this game. For example, the enemy will often times retreat in a favorable position (say, right in front of Lordlake). Really though, keep your force all in the center, as the enemy will concentrate it’s forces there. Jidan will pull back halfway so you won’t have to worry about him. Still though, the enemy Archer units will use Barrage on your Cavalry and absolutely demolish them; be careful of this.
Afterwards they realize that soon the enemy will bear down on your castle. Well, Lucretia brings up fleeing the castle. Take the third choice and go save. Now if you wish to get all 108 Stars of Destiny, you have to flee here. The idea is to prolong this and to increase the likelihood that the lack of loyalty on the other army’s part sways the war in your favor. However Childerich and Jidan have taken over your base and are meddling around joking with eachother. Meanwhile, Roy is in Raftfleet convincing the enemy that you are located there. Fortunately, you are in the Dwarf Camp! This will buy you some time to go to Gordius.
how to pass through twinlight forest to get sindar ruin in suikoden 5??
hey ronnaldo, Just read this guide here, it tells you how to get everything in the Twilight Forest
http://www.lordyuanshu.com/suikoden-v-hq-defense-twilight-forest
Can you provide an actual map of the Twilight forest and ruins? Please and Thank you in advance :)