Battle 1 – Valley of Thieves – 3 Brigands – 2 Hunters – Zoot Gach
Items – Mad Book, Light Sword
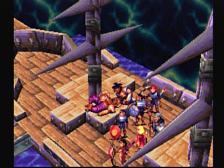
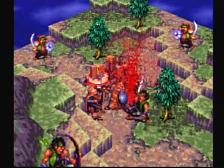
Watch the opening scene for some background on Ishtaria and Arris the Sage. Ash Lambert is the leader of the party while Clint and Diego are the first two members to join. Unfortunately they are ambushed by Zoot Gach and his band of thieves and the first battle begins.
Some things about battle. First of all, press circle and move your character to an enemy. Your likelihood of succeeding and doing more damage is best from behind, but is also good from the side. Attacking right in front of an enemy is as low percentage as you can get. Elevation is also very important, especially long range weapons as they can shoot farther and take off more the higher they are. Enemies and allies will always counteract physical attacks if they can. Press square to cycle through the active characters that can make turns, and then choose end turn. Also, try as best you can to matchup with the enemy (bows against flying enemies, melee fighters against bows, magicians against heavy armor, etc).
You’ll have control of your army first, so clear out the area away from Zoot Gach, specifically the south and west Brigands. Careful on the next few turns as the enemies begin to come at you, faster than you’d like probably. Use an Herb on the character that is ganged up on (try to make sure it’s not Ash, as you’ll lose if he dies in any battle). Try to kill all of them and then wound Zoot Gach so that he retreats and heals himself. There are two items to get now. Go one step north of the southeast corner for a Light Sword and then one square west of the southeast corner for a Mad Book. Now defeat Zoot Gach. Look at your first battle results and then watch the scene. Save and return to Shumeria.
Capital Shumeria
Go to the shop and sell off your short sword (you gave that Light Sword to Clint). Buy a Light Bow for Diego, Light Helmet for Ash, Leather Bandana for Diego and then a few pairs of Padded Leather. Go to the Security Force HQ for a chat with Clive. Then go to the bar and talk to everyone and leave. Some dude approaches you and tells you about the Dover District being in trouble. Count Claymore of the church is being apprehended.
Battle 2 – Dover District – 4 War Ghosts – 2 Hunter Imps
Items – 2 Herbs, Light Bow, Mushroom
You’ll get your first look at the Crimson Guard and Kane. However you don’t fight them, instead some War Ghosts and Imps pop up.
First take Clint and attack the nearby chest to get an Herb. Have Diego go near the north house, just on the east edge of that elevated area and shoot the War Ghost. He is especially useful against them with his bow. With Ash, go three spots east and then three south and search for a Light Bow. Clear out the rest of the War Ghosts, and start going towards the bridge. Go south of the switch to see a cracked stone area against the south wall, so search for a Mushroom.
If you examine the switch the bridge will fall down. The Imps are easy for Clint and Ash to mop up in a hit. You’ll notice once they’re dead, the battle isn’t over. That’s because you have to go on the steps right in front of the church. First get the Herb in the chest and then move all three characters up there.
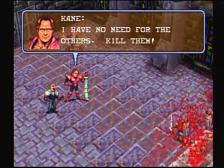
Some scenes inside with Ash and the church people. Count Roland Claymore and friends drop their weapons but Kane slaughters them anyway. Ash doesn’t like it and they’re about to fight, but Clive Beckett runs in and acts as the peacemaker of course. Then you meet Dolf Crowley afterwards. He has an assigment for you to go to Gillbaris Island and investigate Magnus Dunbar and his whereabouts.
Battle 3 – Palace Ruins – 9 Clay Golems
Items – Herb, Elixir, Fire Gem
This battle can be a little difficult actually because you don’t yet have a character who can cast magic spells, which is what Golem-types are weak against. Just gang up on them with all three, making sure Diego attacks first or second to reduce the counterattack opportunities.
After you kill the first one, and then the other two that rush you, start moving towards the south wall where the treasure is. It is an Elixir. You should attract the attention of two golems over here, one closer than the other. Also, one of the north golems will start coming at you from where you started. Kill the two on your side and then go near the southeast corner. You should see a patch of dirt that yields a Fire Gem. You might as well kill off the golem chasing you and then climb the stairs towards the boulder.
You can wait to push the boulder on the remaining golems or just rush down there. Just know that it’s difficult to get that corner treasures because you generally kill all the golems before you have the time to push the box around so that you can climb up and get the Herb. A Mad Book would be great and you found one two battles ago, so use it to paralyze a golem and buy some time (it may miss).
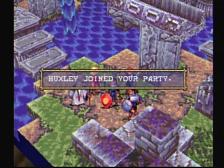
Afterwards, Eleni Dunbar and Huxley Hobbes join, a Mage and Priest respectively. Meanwhile, a scene with Dolf, Hel, and Kane interrogating Claymore.
When you regain control, you might want to go back to Capital Shumeria to get some new weapons and armor for your new members. Go to Rhine Bridge when you’re ready.
Battle 4 – Rhine Bridge – 6 Brigands – 4 Hell Bats – 2 Hunters
Items – None
Now you have a Healer and an offensive magician. In this battle though you need to escape the bridge fast as it’s exploding one space each turn.
Move a little bit ahead but not so far that the Hell Bats can attack you. After the enemy’s turn you’ll see the bridge blow up, one piece that is. Try out Eleni’s Dark Star right away and get rid of those bats, they can be problematic if they poison you. There will also be two brigands and two hunters on you right now also though.
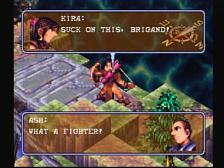
After this turn you’ll meet Kira Wulfstan. She is a bow and arrow user like Diego. Have her push the boulder then kill the Blood Bats, hopefully you don’t get poisoned. As long as you don’t slip up and have a character fall off the bridge, you should be okay on that front. Just clear out the enemies and then move on for the four Brigands at the end.
More scenes with Kira after the battle.
Port City Minato
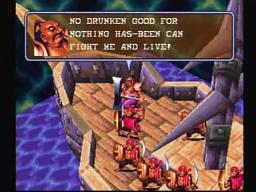
Go to the tavern and talk to everyone. As you leave, the bartender mentions you of Grog Drinkwater. Now go to Grog’s House and you’ll see that he’s an alcoholic. He won’t help you yet, he wants you to prove yourself against the sand dune monster.
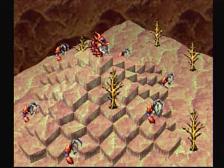
Battle 5 – Sand Dunes of Sea – 6 Ant Arms – Death Ant
Items – None
The six ant arms regenerate, so don’t waste time intentionally killing them – you’ll do so with counterattacks. They are weak, but add up. The Death Ant isn’t weak though. It transfers the sand mountain with it, so if you can position yourself so that it goes in the middle of your group, then you can maximize the amount of hits you get off on it – otherwise it’s hard to surround the thing when it’s constantly moving.
Magic and Archers are your best friend. Definitely don’t let him isolate Ash, or if he does heal Ash asap. Let it come to you, and use Ice Storm and Dark Star and your archers to get it down. There is a good chance it kills a character but you should prevail.
After the battle you end up in Grog’s house. It’s time to go now, but we’ll have to deal with Hassan and the pirates. Before you go to Gadar Sea after Grog joins, make sure you go to the tavern. Speak with the Woman who gives you The Key of Nova for killing the Sand Dune Monster. And also be sure to purchase new equipment for Grog, your new member – he’s basically just like Clint.
Battle 6 – Gadar Sea – 8 Buccaneers – 4 Corsairs – Hassan
Items – None
These blokes latch onto your ship as soon as you go out. Hassan Madcaptain talks some trash and then the battle begins.
Try to split your party up in two as the battle begins. Have Clint and Grog on opposite sides, Diego and Kira on opposite sides, Ash and Eleni on opposite sides and then Huxley healing in the middle. If you can stone the enemies advance with one of your fighters, then you can use your bow and arrow members behind them and the mages on the sides. Careful though – your front line members may get overpowered.
Hassan is one to approach with your entire party, after the other enemies are cleared. He hits hard, has low movement, but can heal himself. As long as Hassan doesn’t get involved in the battle earlier than he should (like, when other enemies are around) then you should be able to thwart his offense.
Hassan is actually Grog’s brother. Grog is extra motivated after this battle and wants to continue with you.
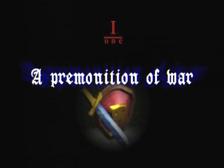
This is the end of Chapter 1, A Premonition of War.