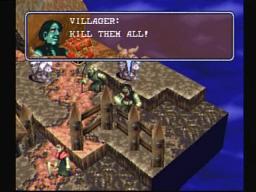
Battle 7 – Village of Yuzu – 9 Villagers – 7 Evil Statues
Items – Herb, Mushroom, Moon Pie, Mage Oil
Okay, this battle can be very difficult your first time through. The goal is to not kill the villagers, but you only need one to survive to win. So without killing the villagers, you must destroy the evil statues controlling the villagers. Of course, every time you counter attack you’re going to kill a villager (unless they block!)
You can try to kill the northwest statue first but that’s a little risky and Kira may not be able to kill it with one attack. So, take your entire party towards the south wall and go east, killing the statue along the way. Push the yellow crate east twice and then all the villagers will head to the north wall and take the long route. Wait a turn or so, just long enough so that the villagers can’t make it to your side of the gate (press circle on them to see their movement range). Have Ash and Grog or Clint push the yellow block east a few times and then north to block the center gate.
Now have your archers or Eleni take out the nearby statue, and you can also have Eleni kill the statue that is on the north side of the gate. Also, with one of your characters in the back be sure to pick up the Moon Pie that is by the gate you just passed further west (it’s the first step that goes down a level, you can see the weird indentation).
At this point it’s just a race to the east wall to defeat those two statues. If you get too close they’ll throw Piercing Light at you. The villagers will likely be against the west wall right now. Going uphill here, you’ll likely lose some time. The treasure over here is a Mage Oil.
Wait to push the two blocks west. As you’ll see, there are a few villagers that are a good distance ahead of the big group. This big group lags back because there are so many so this can be a problem. Gather all of your members near those two yellow blocks and then wait a turn for that big group to get a little farther away, and then push those blocks west. There should be three, maybe two statues here if you defeated the west-most one at the beginning of the stage. If one of the villagers gets too close to you, Spellbind them with Eleni to paralyze them. Remember, the villagers cost money if you kill them, just like if an ally were to die. A few more items to get before you destroy the last statues to end the battle. The spot against the north-central wall is a Mushroom. In the chest is an Herb. As you defeat these last statues, try to get all of your characters to level 10 if you can (you’ll see why in a second).
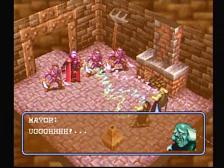
Village of Yuzu
After the battle you’ll hear of Magnus Dunbar and the curse that befell them when they came back from their mission. Once the conversation is finished go to the Dojo.
Since you should have most if not all of your characters at level 10, go here and promote them. Ash only have one choice, but the other characters have two choices. The best suggestion is a balanced party, so for example have Kira and Diego be different classes. The new classes are Hawknight, Monk and Guardsman. A Guardsman is basically just a bulkier and slower Swordsman, a Monk has some healing abilities but is more attack-based than a healer, and a Hawknight is really powerful against melee fighters but weak versus a bow. You will absolutely want a hawknight if you intend to complete the Trials of Toroah with the Key’s you are finding in each chapter. One battle requires you to fly and only the Hawknight can do that.
To be exact, I generally have Clint be a Guardsman, Diego a Hawknight, Grog a Swordsman, Kira a Bowman, Huxley a Ninja and Eleni definitely should be a Sorcerer – they’re one of the most powerful classes in the game. For the new classes like Hawknight and Monk and Guardsman, you get new weapons. However you should go to the Shop and sell your old ones, and then you’ll have to buy new weapons for all the other characters and new defensive equipment for everyone (you do this every chapter basically).
The tavern has some interesting information. A young man dropped a banana in a poisonous swamp – remember this.
Battle 8 – Ygdra Canyon – 10 Madsoldiers – 5 Guarddogs
Items – Elixir, Macroman, Mad Book, Mood Ring
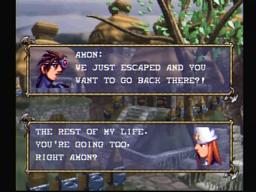
This battle starts off as you see three of Magnus’ former soldiers. They’re fleeing from those crazy madsoldier enemies. Ash comes and says he’ll save them, so Dolan, Amon and Sara have joined. Dolan is a swordsman like Clint / Grog, Amon is a bow user like Kira / Diego and Sara is a priest like Huxley. They are all weak with poor equipment and aren’t promoted, by the way. You’re going to want to get Amon and Sara up a level so they can be promoted after the battle.
You’re going to need to rush to the switch to stop the water so you can get both parties by eachother. Dolan is like Ash in this battle – if either dies, you lose. Also I’ll just say that there is a very important item here, the Macroman, so you’ll want to make sure you leave enough time / enemies to get it.
To start, move the Dolan group to the south part of the bridge on the ground, so that they’re ready to go through once the water stops. Retreating towards the tree and treasure in the northeast is the last thing you want to do. Get the Mad Book in the southwest by where the party starts, and then rush towards the switch, killing all dogs in the way with your new promoted party.
Once the switch is pushed rush over and kill the Madsoldiers on the other side and have someone get the Mood Ring in the southeast. Once you kill the first set of Madsoldiers that were at the northwest starting point you’ll see the other four begin to move. You’re going to want to Spellbind at least one of them so you can get over to where they were and get the Macroman one spot east of the northwest corner. The treasure on the other side is an Elixir if you want it.
Some scenes with Dolan and friends after the battle. You’ll be back at Yuzu Village. Now that you can promote those three, you should do some thinking. If you made Huxley a Monk, make Sara a Bishop or vice versa. Try to make Amon the opposite of what you made Diego, you’ll see why in a bit. As for Dolan, he’s the third and final of the Clint / Grog swordsman types, so choose whichever of those two classes you like the most. I tend to choose Guardsman because despite how slow they are, they do pack a punch when they get there. Swordsman are just too weak and die too often for my tastes while Guardsmen are great meat shields. Moreover there is an optional battle (well the battle isn’t optional, but defeating all the enemies is) where you fight a huge array of soldiers + bosses, and having the extra Guardsman puts you in a great position to win. Buy new weapons / armor for your new characters and then move on.
Battle 9 – Loris Beach – 6 Madsoldiers – 3 Bloodghosts – 3 Shooter Imps – 3 Dark Golems
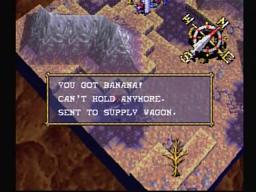
Items – Banana
Your new party should be pretty dominant in this battle. Use your archers to take out the southwest Bloodghosts and then work on the party that is in the middle of your base party and then Clint / Kira.
Watch out for the poison swamps – the enemy Shooter Imps like to spot up in them and poison themselves.
There really isn’t anything much of note in this battle besides the Banana. Since you probably have your parties split up in this battle, have your south character go to the middle of the plus-shaped poison swamp, in the center of it, and examine. You’ll find the Banana. This is easiest with a Hawknight who can just fly in there and grab it.
After the battle there will be a campfire and some talking. Clint will confront Kira about her fighting style.
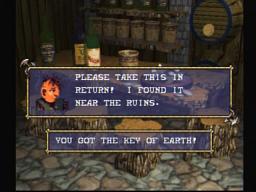
Take that Banana to the Yuzu Village Tavern, and to the young man. Since you returned it he’ll be happy even though he can’t do anything with it anymore – he gives you the valuable Key of Earth ( you should have Key of Nova from Chapter 1).
Battle 10 – Castle Ruins – 6 Madsoldiers – 2 Evil Statues – 2 Dark Golems – 3 Bloodghosts – 4 Shooter Imps
Items – Mage Oil, Iron Boot, Chain Mail, Mood Ring
This one of the first battles that introduces you to elevation and why you hate it when the enemy starts on top. The Shooter Imps will pick you apart if you don’t approach wisely. Also, you’ll have to ride those elevators and you can only do one side at a time, so split your party up evenly. As far as those Shooter Imps up top, you can take care of them when you get there, or you can go against the wall and try to use Eleni’s Piercing Rays on them. Or have a bow and arrow user attack them from below. Still, it’s likely the ground and top enemies will kill at least one of your characters unless you keep them all healed and near the wall, away from arrow attacks.
Once you get on top of the structure you should be okay. The north wall treasure is a Mood Ring and the south wall has Mage Oil. Push the boulders down against the Evil Statues, but don’t rush down there yet. Go to the center of this top structure and then go west of the healing pits. You’ll see a weird grey colored area that you should search for an Iron Boot.
As you head down the stairs and kill the Evil Statues, the Bloodghosts will rush you. At least two of them. You’ve turned the tables on them though and have the elevation advantage so just have your archers snipe them away. The golems won’t be damaged much by the archers so save them for Ice Storm and Eleni’s spells (or Stone Shower for your Monk maybe). That should about do it, but this is another battle where you have to bring your entire army to the entrance. First go one spot west of the northeast most point in this area to find a Chain Mail.
You have the option of leaving and coming back or going in. There is really no reason to go back, but if you want to save or get something at the shop then do so.
Battle 11 – Castle Ruins II – 4 Madsoldiers – 2 Dark Golems – 3 Bloodghosts – 3 Shooter Imps – Magnus Dark Lord
Items – None
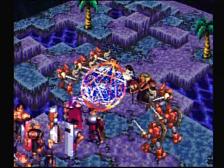
This is a real test of strength, as Magnus is a pretty powerful boss. There are no items in this battle and there are a lot of strategies you can try, but the one you shouldn’t is to rush up there too fast. Try not to spread yourself out because you’ll get rushed – choose a side and go heavy that way. The other side will slowly come toward you, so just make sure you respond to the long range shots you’ll get from shooter imps.
If you go up the center you’re going to get lit up. The first few turns are rough anyway with so many Shooter Imps and high-movement melee fighters.
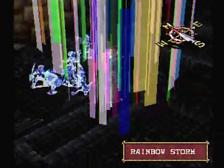
As you work your way up you’ll attract the attention of everyone but Magnus. Don’t move up too far, you don’t want to deal with him until he’s alone. You probably won’t have a full party for him, but stay spread out. The one thing he has going for him is Rainbow Storm and it does pretty decent damage to a pretty big group of allies. Just rush him, stay healed and he won’t be able to last more than a few rounds.
Magnus regains consciousness after this fight. As you talk to him, he gets an arrow in his stomach from the Crimson Troops. Kane and Dolf Crowley are here, and they were behind it the whole time. How did they know? In the next scene, Ash makes his way to save Magnus and the others, and the rest of the party catches up to him – that is except for Kira.
Battle 12 – Castle Ruins III – 12 Guarddogs
Items – Mage Gem, Gold Coin
Another one of those tricky gimmick battles. The party is spotted by dogs, and you need to kill them as fast as possible.
When you get to the southeast, look for a weird dirt spot that has a Mage Gem. In the northeast is a Gold Coin you can get in the same manner. The guarddogs generally gather up in the northeast and southeast sections anyway. Just remember, you only have 6 turns to kill them all.
After the battle Ash saves Magnus, Eleni and Huxley. But they are met by Hel Spites and Dolf Crowley as they leave. Magnus and Dolf fight and create a time warp. Magnus, Ash, Sara and Grog have been teleported back in time.
It would probably be a good idea to let whoever would be reading this know that they’re going to need a Hawknight later in the game if they want to complete the Trials of Toroah. This being that I got each key up until you have to fight the Salamander, which requires a Hawknight to find the Logos Key in the lava pool. I did not have a Hawknight. I ditch the Guardsmen, Monks, and Hawknights entirely when I play. I want to cry.
Whatup arocco. Hey, I never thought of that. I’m boring I guess and usually balance my classes evenly, though I’ll use different characters for the class each time (like I’ll have Diego be a bowman one play through and a hawknight the next, etc). Ditching the monks might be a good idea next time I play, to have two Bishop-type healers. I like the monks movement range that’s about it: almost all of their magic attacks you have to be right next to the enemy, which I dislike. Guardsmen I prefer though. The Swordsmen types are faster but they just always seem to get killed for me. Though at the same time there are plenty of levels where my Guardsmen are so slow that they don’t do anything the whole battle sometimes.
Anyway, I’ll update this page to make note of that, and the Trials of Toroah page too. Thanks
You definitely need that hawknight and yah, its a good idea to make sure you have at least one.
The hawknight are actually quite excellent, though fragile. Against swords enemies they can usually take them out in one hit but often succumb to getting beat on. I actually much prefer the guardsmen myself, my swordsmen only ran up to the fight to do little more than pathetic damage, get blocked all the time and die via anything that targeted them.
The way I use guardsmen is set them up as walls; if I position them in front right off the bat and move slowly, keeping them clustered in front of weaker party members they counter attack for MASSIVE damage, often taking out anything they strike in a single hit. Magic rips them apart, but nothing else touches them.
Word. Hawknight’s are definitely boom or bust. High attack but their love defense and high move rate often puts them in precarious situations.
I’m with you Moooo regarding Guardsmen + Swordsmen. Swordsmen are just too weak for my liking, plus their defense is poor like you say. The Guardsmen are slow and require some waiting around by your other member so they can keep up, but they’re the heaviest hitters in the game right up there with the Hawknight’s (but obviously the Guardsmen have stellar D outside of magic D). So I almost always get two Guardsmen. Clint for one and then either Grog or Dolan. I should try making all three of them Guardsmen :P Would be slow but powerful. I just know that there were times in the past in one of my first few play throughs where I took two Swordsmen and was upset about it because of how weak they are.
Re: Guardsmen as walls. This is just what I was going to mention. Know the battle with the Crimson Knights or whatever all come at you? And you’re supposed to flee? I love trying to win that battle, it’s the most challenging in the game imo. But the Guardsman are so key in that battle. You hide in the corner where Dallas Greatarmour is, and then you use your Guardsman to absorb hits while the enemy slowly works it’s way towards you.
I almost regretted making everyone a guardsman just to have a lil added mobility for someone to run in and pop in with the finish off blow. I used ranged to soften up swords when I can’t get my guards in because, frankly, they are seldom in a position to be counter attacked.
I tend to use ash that way. It’s just too crazy to base an entire match on wondering if ash will up and bite it. Even if if he is a uber swordsman I find he is often blocked, can’t take a hit well and is only a good finisher.
I had beaten the scarlet commander scene once years ago and tried it again. My last time though I made it without a single loss. Just as you predicted; use the guardsmen as freaking walls. The enemies in that fight are tough, a few levels above us so you wont have too many one hit kills. I locked out their Kurtz by using clint to push that one yellow crate to the side and he still has some mobility left. That forces him to go around back. By that time, Dallas is all but defeated by pouring on magic, just stay on him and dont let him run. If you can beat him before self heal, its sweeet. His heavy armor go down like punks after 2 mage spells.
The soldiers are kinda rough, but my guard took their abuse and I could heal them. I dont bother with the monk, having 2 Bishops is waaaay too useful with a rack of guards. After taking out that lot, stay in the back area where dallas was and let Kane and sabina’s men work their way out, taking out the flyers. Be careful; the flyers can take out a clothie in close to a single hit.
After they get in range. I pummel with arrows while moving my guards out to the center of town you started in. Spell casters are vital for this part, have magic left over for a pair of back to back phase shifts. I find using roman fire works great on dallas and his boys and costs 1/2 the mana.
After that, its clean up in aisle 1; all hell breaks loose but after 2 phase shifts and arrows, sweep in and go to down. Make sure your gear is tip top. After that you still have to walk everyone to the freaking exit, but at least one of the treasure chests has a holy h2o. It actually wasn’t nearly as rough as I expected. Keep you clothies close and make sure you have enough mana via potions and keep in mind how to use positioning to you advantage and you get some great bragging rights.
I just recently started playing VH again (mor of a FFT fanatic) and this was a game where I tried many combos, my fab is Diego -bowman- Kira -nighthawk- Amon -nighthawk- and Darius – bowman-. VH is one of the best strategical rock, paper, scissors, strategies and although it is possible to beat this game (not the ToT w/nighthawk) in every combination including 4 monks ( which if you’re looking for a challenge I suggest trying this one lol) the best strategy is have a balance but with the right characters. Each character seems to have stronger class (huxely is the better monk over Sarah) thus using huxely has a monk seems to have the better advantage based upon placement in levels. Gaurdsmen should have 2 since ash could be considered to be a swordsman. Dolan is your best choice, not because he s a good swordsman but he’s the weakest gaurdsman and always seems to fall behind the most. I feel, although he’s a weak character, he is utilized better as a swordsman. The only exception to the balanced team would be zohar, I feel he is better as a monk early on but salamander makes him way to useful later in the game (prolly my only buggaboo with VH since it makes Ch. 6 a cakewalk) but then again it’s to each it’s own. 2 sorcerer 2 priests, 3 gaurdsman creates a solid defensive game, and I personal like to Dobson battles in the quickest fashion possible
Good point about the Guardsmen. There is a stretch in the game where terrain is treacherous and their poor mobility causes them to be far back. So in that sense it is nice to at least have one Swordsmen to go along with the Hawknight’s, Bowmen, Ash, and the other reasonable-mobile characters.
Ash seems to basically be a Swordsman +. Now quite as porous defensively and stronger attack, but identical mobility I think (but he does get some spells too).
Good strategy post on that battle. It is similar to my Vandal Hearts Crimson Guard Strategy. I too find that Mages and particularly Roman Fire is essential, because you end up bottling up all the enemies in one area behind the Guardsman + whoever is fighting on the front line for them. I rarely ever use magic restoring items but that would be as good a time as any to do so.
Clothies lol? You mean all the mages / swordsmen / bowman types with weak armor that die quick? I do agree that those flying Crimson enemies are maybe the toughest; their attack is just brutal.
One thing that is nice is that when the enemy is on both sides of the Guardsman, the other enemies won’t advance (outside of the Hawknights because they can encounter you across the water). But the other characters don’t bother to move any closer. This allows you to deal with the enemy slowly so as to have time to heal and not be overwhelmed. So that strategy we use is pretty flawless, most of the time you will only lose 1-3 characters tops. Pretty amazing considering the amount of damage even their normal crimson soldiers do against even the Guardsmen. They’re strong, so it’s pretty much outsmarting the AI.