Hillside Ruins
Mess around with Dean and get used to the controls. Enter the Hillside ruins in front of you and get the three gella inside. Hit the switch and continue through. Take the east path for a Break x2 and Heal Berry x2. Return to the previous room and just push the block with x onto the switch to continue. Smash the crates up and then Dean will grab Rebecca’s Journal. In the following room you can dig around the shiny areas. You’ll get some Water, Golem Parts, and gella. Time to return to Capo Bronco.
At Capo Bronco, talk to Tony and then head the other way. Talk to the lady you see for a Gella Card and then save. In town you can find Heal Berry x3 and Rebecca. After she joins, you can exit to teh world map. Head south a bit and then northwest. You’ll eventually see the road lead up a mountain so follow that and you’ll be at the Celestial Peak.
Celestial Peak
As you get here, Rebecca will give you a Dungeon Viewer. Head through the first few areas and get used to the environment and the battle system. After about 6 screens you’ll encounter your first boss, Camazotz. There is nothing you can do but attack it. Watch out for it’s Life Drain ability and crunch as well. It’s possible you’ll need a Heal Berry or two but keep shooting it and it’ll go down after about 1000 HP.
 Grab the 250 Gella and Tent x2. Kick the log down and you have a new path. Jump down and continue east to the exit. Head through a few more areas and then a scene with Dean and Rebecca.
Get the gella and go up the path. Kick the log down and get the Heal Berry x3. Since you pushed the log continue to the southwest across the river. After a bit you’ll reach a save point. Continue on for some gella and you’ll eventually reach a fork. You can go left to a new screen or right to jump up a few plateaus and push down another log. You can’t continue through this new path so return to the fork and go in the new area. Grab the Heal Berry x5 and go on.
Take a left in the next area for a Lucky Card, Gella Card, and a Sol Niger. Since it is dark you must cleanse it of enemies before being able to use it. These enemies are harder than normal monsters and generally can be considered bosses, or close to that status. This Sol Niger spent a turn looking around. It’d be wise to get Rebecca a few spots away from the Sol Niger and blast away while Dean fends off the enemy on the front line. This enemy has a strong attack so you may wish to guard or use a Heal Berry on Dean. The Sol Niger dropped a Revive Fruit. You can recover your HP / MP again but no saving. However with the R2 button you can shut off encounters once you cleanse the Sol Niger.
Take the other route and continue on to area 12. Something falls down and then you’ll enter a cave for more scenes. Once it’s finished, backtrack out and save in area 7. Eventually you reach a point where another boss pops up and you get a new weapon, Twin Fenrir. Kalivos is the toughest boss you’ve faced yet though. It’s Cross Slash attack will take off around 350 so that might require a Heal Berry. He also has a fire attack that takes off about half of that. Dean is more of a threat with the new weapon.
Even though they are Avril’s Twin Fenrir ARMs, she gives them to Dean. Tony has a parting gift for you and Rebecca will pass along a Field Viewer. You can buy some things at the shop but leave the town when you’re ready.
Abandoned Path
Northeast of Capo Bronco is the Abandoned Path. You’ll fight much tougher enemies near here so you may wish to build up for a bit.
As you enter you’ll be introducted to drawing your guns with r1. Shoot the blue crystal to continue (destroy the jars for Gella). In the third area you’ll see a save point you can use. Enter the room on the opposite side.
In area 5 you’ll have to push a block on a switch. Then shoot the far wall to restore some MP. In the next area you will come across two Gomorrah Toads. They are weak against Fire and strong against Water so remember this as you see the Hex spots. These guys like using Bullet Tongue for decent physical damage but Hydro Press does about twice the damage (350) and from far away. If you get hit twice with this from the same character you may be in trouble. Don’t pursue the one on the right side, just let that sit in the fire-based hex so you can do more damage to it.
Grab the Fighter Badge and then step on that switch. Return to the save point and continue through the newly opened nearby door. Break open the jars at the end of the hallway for Neutrino Medal. There are two paths going east – take the first one that you saw for a fence. There is a treasure behind the fence, so shoot it to get a Dragon Fossil. Return to area 6 and take the corner path for a scene and a Lucky Card.
Shoot the crystal in area 8 and then get the Witch Badge. Continue east to area 3. You will acquire the Sky Medium, Sea Medium and Blank Medium. It is at this point that you learn a lot about the GC Graph, Originals etc. You can make the Blank Medium either a Sea Medium or Sky Medium. This way each character can have one so they have new ability’s. Grab the Heal Berry’s and shoot the jars across the ledge for a Revive Fruit. Enter the nearby path, get the Gella Card and save.
In area 10 don’t go up the stairs quite yet, get the 200 Gella behind them first. Then go up the stairs and a scene will occur. Step on the switch in the next room and drop down. Save and now you can go up the new stairs. Shoot the blue crystals and then enter the door.
Shoot the Thief Badge to your right, get the gella and shoot the jars to the left. Up ahead for a boss fight against Unknown. Try to get on the Wind Ley Point and spam Blast, as physical attacks don’t do too well in this fight. Unknown likes to cast slow down and use tentacle, but it has a more damaging attack (mid 400’s).
As you continue onward, take the left path and shoot the barrels in this room for Devastate. Enter the door to area 15. You’re going to have to jump to shoot the two blue crystals in the south part of the room. You’ll see a place to blow up, and two treasures – but you can only get the 600 gella here. Return back to the fork where you ignored the straight path and turned left. Now go straight for a scene with Volsung, Persephone, Fereydoon and the Reaper Kartikeya. You’ll be outside of this area once you’re done but re-enter to defeat the Sol Niger. Just get on the Wind Ley Point and spam Blast. A Potion Berry is the spoils.
Mirapulse
As you get out of the Abandoned Path, head straight until you reach Mirapulse. There is a save bird right away. Speak to the towns folk and you’ll learn of a missing license. Check the rest of town for 600 gella, Fast Gunman, and an LVL Apple in the bar. Get some new weapons, armor and badges if you want.
There are lots of treasures in this new open area of Northwest Filgaia. Northeast of the village is a save point and south of here (about x 312 y 687) you can search for the Hunter’s License and you’ll see it reads Apprentice Chuck Preston. Before you return you should build up levels and check the rest of the treasures. You’ll find a Sky Twister (x 344, y 663), Gella Card (x 200 y 586), Dragon Fossil (x 361 y 727), Priest Badge (x 275 y 724), Bronze Moon (x 300 y 633), 2000 Gella (x 346 y 585), Silver Sun (x 298 y 508), Positive React (x 336 y 538).
To continue on, you’re going to want to head north of Mirapulse and north of the save point you find. This is where the Lightless Shaft is.
Lightless Shaft
Enter and you’ll see a Big Man. Once the scene is finished backtrack a bit to the entrance. You’ll see a Gella Card nearby. Continue through the blue path to advance.
Walk all the way around via the left route. This will circle around to two treasures but one of them is locked. Grab the Dog Chain and go through the north exit. In the third room you’ll want to go straight ahead and look down to shoot the 1000 Gella chest. Also shoot the jars for a Fire. Hit the switch in the middle where the fork is to switch the route. Now slide to hit the cart through the path and follow it across. Get the Light Coat and continue on. Area 4 has some MP restoration squares to shoot and little else. Shoot the Lucky Card and Heal Berry in area 5 and prepare for a boss.
Spriggan is weak against blast so get on a wind ley spot (actually he starts on this spot, so coax him out). He’ll use Stone Bullet for about 500 HP if you’re not on an earth ley spot. Basically, have your Blast user / s go on the wind ley spot and then the others should gather on the earth lay spot to reduce damage to half and just attack. By the time you get to the wind ley spot, one blast for 1000 should end it. You’ll get a HIT Apple and then continue onward.
Go right in area 8 to get 1000 Gella and Fairy’s Feather for Avril. Continue north for the exit. Collect the gella and 2 Revive Fruit in area 9, then hit the switches in the southwest, and then the one north of it. Go to the southwest in the lower ground and hit the cart. Follow it and hit the north switch. You can now slide into the cart, get the gella and continue.
There is not much other than MP restoration squares until floor 13. You can’t get the treasure but hit all the switches so you can get the cart all the way to the crate obstacle at the end. Take the left route in area 14 and shoot the jars for a Vortex item and the exit is to the south.
Check out the Sol Niger in this last area (15). You will want to isolate it on the earth ley point to do extra damage with Blast. A Witch Badge is your reward. In the next area is a Prism Staff and Hard Denim. Further ahead is a save point.
In area 18, you’ll see some guy babbling about the VR Factor. Soon though, two Spriggan’s show up. You’ve fought them before but they seem to use Hyperion Ray a lot this time. Try to gang up on the lower left one (on the wind ley spot) so that you can get your Blast users on the Wind Ley Point. Get them on the Earth ley point and use Blast. Try to isolate the eastern Spriggan during this with one of your characters.
Your party still doesn’t have the mirror so a battle with the Professor looms. I can’t imagine you can win this without some serious leveling up or cheating. After the battle an earthquake stuns Professor and you gain the Mirror of De Soto. Leave and head for Mirapulse.
Mirapulse
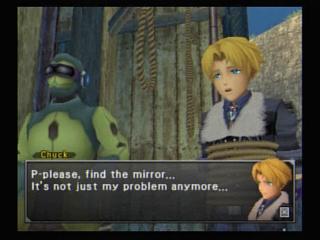
As you enter, the Veruni Executioner will have none of it. Avril gets him to change his mind and Chuck will thank you. He gives you some FX Tickets, train tickets. Then he heads off but he tells you of a big city and of Greg, the big guy you’ve met.
Return to the Lightless Shaft. Since you purified the Sol Niger you can turn the Encounters off and run to area 18. Shoot the jars for Revive Fruit and Neutrino Medal. This is what you came here for, so get it and run out.
Caram Valley
Head due south of the Lightless Shaft to reach Caram Valley. The party is on their way to Laila Belle. Greg is here though and some stuff goes down so the party gets re-routed towards Gounon. Greg does join and seems to know about Johnny Appleseed.
Now that you are in a new area, some new treasures are available. A Chain Vest (x 21844 y 653), Gather Golem Part (x 147 y 621), and a Knight Badge (x 181.5 y 671) are the treasures around here. Head for the lower white mark on your map for the Wayward Path.
Wayward Path
Go through the first two floors for a scene. Shoot the crystals in area 3 to advance.
Look to the left and then right for a chest. This is no ordinary chest though. It is a Mimic. They are pretty tough as Gimmick Hand can take off about 500 damage, and their hp is pretty high. If you can manage a few blasts on the wind ley spot (Mimic should be on the Earth Ley spot) that should help quite a bit. Your reward for winning is a lot of exp and Crescendo Step. Get the 1000 gella chest in straight ahead, and then return back to the entrance and go up the ladder on the south side.
You’ll find some MP spots and a Dragon Fossil. If you take the lower path on this side through area 5 you’ll get a Lucky Card. Finally, climb the left part of area 4 to get a Heal Berry (inside the jars) and the exit to area 7.
There is a save point ahead but go left and shoot the crystal. Then go to the save point and save, then go right of it to shoot another crystal hiding behind a jar. Save and rest up as the next area has a boss.
The Ruin Guarder is stiff test as it’ll have Protect up most of the time. Having Hi Blast helped and either the Fire or Wind ley spot will do just fine as he’s weak against both. The Ruin Guarder’s Crush attack can wipe you out if you’re below 500 HP. For finishing this battle you’ll get a RES Apple.
Return back to save, then go up the area 8 ladder and left to get 51 gella and Fire. The right chest is another Mimic. Defeat it for a Spirit Saber for Avril. Up ahead for a scene and then you’ll have to shoot all three crystals fast to get the door to open.
Take a right in the new area for two more chests. One is a Bronze Moon and the other is yet another Mimic. This one yields a Black Shirt. Return, jump on the crate and continue to the two crystals. This part is a little tricky. You’ll have to shoot the crystals for a while until the door is up high enough for you to run through it (be close to it when you’re shooting the crystals).
In area 12 go right for a Gella Card. Use the other way for a Vortex and 44 gella. The other side of the room has a save point and a crystal above the door. Shoot it and go through.
 There is an ugly duo waiting for you. Tarasque Gorath and Tarasque Mons are here. Obviously, Gorath takes heavy damage from the fire ley spot. Hi Blast started the battle taking off half his health (1800). Unfortunately it is easy to die in the early going when two of them are attacking you with various attacks(depending on your HP levels). Big Press can take off 500 and if they both do it then you will be in a dicey situation. The key is getting rid of Gorath as fast as possible with Hi Blast. Tarasque Mons can be killed by physical attacks.
The Sol Niger is ahead, so might as well defeat it. You’ll get a Potion Berry and full hp / mp. Take the northwest exit (you can’t use the other one with the 4 crystals) and continue on until you’re outside. Return back in for a Neutrino Medal.
Lots of new treasures in Northwest Filgaia, starting with a Dragon Fossil (x 236 y 833), Light Vest (x 379 y 764), Bronze Sun (x 437 y 733), Hydro Pressure (x 510.5 y 797), Silver Sun (x 474 y 849), Heavy Guard (x 279 y 827) and a Wing Robe (x 326 y 847).
Orsaeos Station
To the northeast as you get out, you’ll run into Orsaeos. You can’t travel anywhere here without the permission of the Veruni.
Gounon
West and a little south is Gounon. Easy to find especially if you go right away. Greg will leave you right away, so go up ahead and save.
Head up the northeast ramps and then turn south at the top. On your right you’ll see something flashing on the other side of the gate – it is a Neutrino Medal. Near the other side of town, talk to Paladienne and choose the first choice to get the Music Box. Near her is a RFX Apple. In the nearby winery you’ll learn that Johnny Appleseed is the wine they make there. Also, search the southwest corner for an ATK Apple, HIT Apple, and the northwest for a Rabbit Badge.
Go to the cemetary for a scene and then back to the winery. Talk to the first guy inside on the left, the Mayor. You get Holy Wine and an Amulet. Save and get ready to leave.
Temple of Rejection
Northeast of Gounon is the Temple of Rejection. Use the Amulet at the gate to get to area 2. Take the west path and grab the Duplicator x 3 in the area 3. Use one of the Duplicators on the blue chest near you for a Freeze Ray cartridge. Press L1 to use them and shoot the fire at the end of the room to re-open the door. In area 4, freeze the floor and save.
Get the Antidote x5 in area 5, and then rotate the middle switch twice. You’ll be in a battle with a new character on your side, Carol. The enemy is Twilight Venom and it likes to use Blast and poison on you. Poison will infect a Hex so move if you’re on that Hex. My Dean didn’t have any attack spells but if you do happen to have that sort of Medium on him, have him go on the Fire ley spot as Twilight Venom is weak against it. Grab the Dragon Fossil when you regain control. Follow the light path to area 8. Freeze the path ahead and then get the Refrigerator. In area 10, shoot the treasure above for a Lucky Card, then shoot the freeze gun at the flaming torches. Head through to the new area and get the Antidote in the jars. Continue on to floor 13.
The blue chest (duplicator use) is a Moonstone. Shoot a few of the crates so you can get up on the switch. In the next room is another duplicator chest for a Spiral Edge (rotate the middle thing twice). Rotate it left once more for a room with a Sol Niger and 3000 Gella. There are two Sol Niger bosses in that battle – try to get on the Water ley point as they are strong against Wind and Earth. The Water Ley point will do massive damage as they are weak.
Return back and rotate the middle switch twice so that the west path is open to area 16. Get the Potion Berry x3 chest and shoot the torches with the freeze ARM. Go straight ahead in this next room for 83 Gella and a Neutrino Medal.
Two scrotum bosses sneak up on you. Actually they are Water Scutum and Fire Scutum. Their weaknesses couldn’t be any more obvious. As usually this is most difficult at first. Fortunately you should start on the water ley point so if you have attack magic, start spraying the Fire Scutum with it. By the time you eliminate it you should be able to move your magicians to the Fire ley point in the northeast part.
After the battle, return to the mayor in Gounon. He has 5 Revive Fruits and a Blank Medium for you. This is really all you have to do back in town.
Orsaeos
Orsaeos is marked on your map and is a long journey east. It’s likely you’ve explored around here already. After some scenes, you get two more Blank Mediums from Chuck.
Provectas
You will end up in Provectas. Since you are now in northeast Filgaia there will be lots of treasures for you to find. The treasures include Bronze Moon (x 620 Y 86350), Dragon Fossil (x 784 y 831), Bronze Sun (x 71850 y 756), Regeneration (x 700 y 908), Protection Robe (x 758 y 627), Bad Omen (x 787 y 705), Protect (x 84450 y 705), Berserker Badge (x 762 y 68350), Stone Bullet (x 68150 y 71850), Dragon Fossil (x 78450 y 771), Silver Moon (duplicator – x 82850 y 726), Dragon Fossil (x 797 y 63750).
Laila Belle
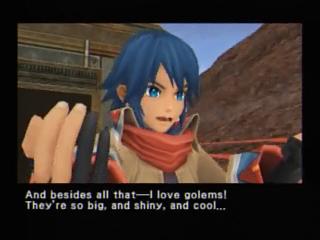
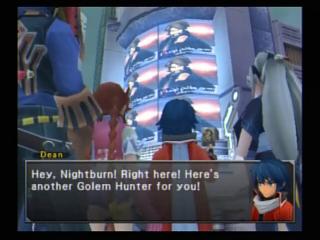
You’ll see a scene with Nightburn. Dean will want to go to the Golem Hunter’s Guild upon entering. The guild will be right next to you when you get control. In order to join the guild you will need to go to Mithysmere to clear out some monsters. There is a Gella Card and a Red Cheeked Parrot that keeps track of your Neutrino Medals. At this point I acquired Potion Berry x3 and a Blank Medium. Go east of you upon entering for a Lucky Card and Duplicator x4. Other treasures include High Vortex, 3000 Gella, Comet Mark (duplicator), and an Attack Apple.
Once you are done exploring the city, you should save and prepare to head due south. You are looking for Mithysmere, a slum where those who can’t make it in Laila Belle end up gathering.
Mithysmere
As you enter you’ll see a save point near you. Save and continue through the north path until you get to the exit. Look to the left of it for a Mimic that drops a Dragon Fossil. Entering the new room and do a jump attack on the switch to change it.
Take the left path (going northeast) and get the gella along the way. Shoot the jars for an Antidote and then lower the bridges. You’ll see a chest so shoot it for 4500 Gella.
 In area six, take the northeast path for a Nectar x3 dead end. Return back to six and go west to area ten. Here you can find a Sol Niger that halves all magic attacks. The duplicator chest is an Hourglass. Back in area six, go south to area 7. There is a Mimic that drops Brave Guard nearby. Take the southwest path and go through for Duplicator x2, 47 Gella and a Neutrino Medal (shoot the jars across the path to get the latter two). Return to area six and go northwest to area 10.
Go near the four blue flames and a boss battle ensues. There are four Lizard Man and they are weak against fire. Better yet, you’ll start off on a fire ley point. Despite the fact that there are four of them, this should be a quick battle.
Backtrack to area 4 (or lay the bridge in area 10 to make it easier) and the party will talk. Return to area 10 and the torches for another boss battle. This time it is against a real boss, Baram. All of your physical attacks will be blocked and Baram halves fire damage. The key is getting on the Water ley spot although it’s easier said than done and will take a while. Until then be sure to stay in different hexes so he doesn’t get a big 1000+ damage attack to more than one person at a time. Use hi heal to stay rested and Hi blast once you get on the water ley spot.
Laila Belle
As you get back to laila belle you’ll be right by the red-eyed receptionist. You will meet Duo and he’ll talk about the TV studio.
Go to the save bird and then to the TV Studio area for a cutscene. Sure enough, as you enter there is a boss waiting for you. Elebart is a stout enemy, but one that is weak against wind. When it charges up it will use Lightning Strike for about 1000 so heal up and guard.
Not much else you can do but run forward. Save your game and take the right path. In this area you will need to find the correct door. To do so, go north to the third row of doors, and then go all the way to the end to enter the true door. The next time, take the far northeast door.
Now save the game and take the middle path. You will need to hustle to find the lit pathway and the door. The second time you do this you can find an LVL Apple near the beginning in a jar.
Save, and in the left and final room, you will get to pick one. For the first one, choose the door near the beige little jar. The next time, go through the yellow door. Third trial will require you looking at the top of the door to go through the one with the unique picture on the top (north door). The final trial will require you to destroy the jars to find out which one has the 5 gella (east door) and go through it.
Save your game and go through the left door. Duo summons two Igoronak. Physical attacks seem to work best as most magic is halved. Rebecca especially does high damage. Nightburn is next but this is likely a boss battle you can not win.
Mithysmere
Leave Laila Belle and go south. Someone with Zopt Syndrome is here. There will be a lot of scenes and eventually Carol will join up. Not much else is new around Mithysmere although there is a Badge Synthesis shop. It requires lots of spare badges but it can really be worth your time with some valuable badges.
Memorial Sanctuary
Just a bit north and west of here is The Baskar Shrine, Memorial Sanctuary.
Go up and hit the panel. Input Dean to enter. After some scenes, go south when you gain control. In this room you can shoot a chest for 5000 Gella and one for Fire Bullets, your third ARM cartridge. Return to area 2 and shoot the two torches near the west exit to continue.
Push the block on the switch and continue west. Shoot the jars for 273 Gella. In the following room, shoot a crate and push the other onto the switch. The duplicator chest near you is a Shooting Star and another duplicator chest in area 6 (Hazel Sprig).
Save and go south for a boss in area 7. The Gigamantis is the perfect boss to use the ley change force ability. This way a wind ley spot will appear and you can do extra damage to Gigamantis (it’s weak against wind). The two Ropers in the way should not last long after a few blasts on the fire ley point. Scythe can take off a decent amount, and if you are stuck on a Disease Hex you won’t be able to cure. End the battle at the top point for a HIT Apple. Run back to save, and then continue on up the ladder. There are many torches here but four of them need to be lit with the fire bullet. Notice how the wall glyphs have light coming through them, and some don’t? You need to light the torches that are sandwiched in between lit wall glyphs. Go down the ladder and across the new bridges. Grab the Duplicator x2 chest and go through the nearby door to area 10.
Run along and shoot the jars for a Neutrino Medal and then follow the path to the exit. Look for a Gella Card in area 11. To get to the other side where the switch is, you need to use the fire gun to defrost the floating blocks.
More torches to light in area 12. Grab the Treasure Tone on the balcony of area 13. Continue to light torches and shoot through the frozen door in area 15.
To activate the elevator here, you will need to shoot three of the crystal torches with fire and one of them with ice. Go to the nearby elevator and take it up. There is a Sol Niger in this area for you to defeat. Focus on physical attacks for this battle unless you can get your FP up to 25 for a ley change tactic (you are looking for a water ley spot to do extra damage).
Thankfully you are rested up as the Plague Beetle is a few screens ahead. It’s Blade Arm takes off around 1000 damage so have Hi Heal ready. Heavy Crush can kill just about anyone with 1500+ damage. The best option for attacking is getting on the wind point and using Hi blast. 2000 damage on the wind ley spot is not uncommon, and that will help whittle down the 10000 or so HP that the Plague Beetle has.
A saved point is just up ahead. Further ahead you’ll see a flame pointing east, so follow that path. In area 17 you will have to shoot the torch with your own flame to reveal that it points south. The next torch you see will point towards the northeast wall – search it to find a secret passage.
Lots of history of Filgaia scenes coming up. You’ll meet some Baskars who are very willing to help Avril – they give you some Baskar Medicine and a Mountain Medium. Not much else to do besides talk to the Baskars and leave.
Mithysmere
If you’ve been fast enough in bring the Baskar Medicine back to Mithysmere and Pastel, you’ll be rewarded with some goodies as you leave, like Duplicator x 3, Lucky Card, Gella Card, and the Detector Cartridge. Carol talks of Honeysday and the professor maybe being there. Before leaving town, shoot the torch in the east house just as you walk in the village. A pathway opens up and a Duplicator chest awaits you, the Rapid Shirt.
Now that you have this new weapon, the Detector, you should return to Memorial Sanctuary, Area 3. There is a Lucky Card and Dragon Fossil chest if you use this in area 3. Area 11 has a Gunstar Sign.
In Laila Belle, you can get a Silver Moon for the seventh Neutrino Medal you just got.
Starlit Path
Southeast of Laila Belle is the Starlit Path. In the first area is a Refrigerator, and use the Detector in area 2 to uncover a bridge. You can find a Fire and Break in area 3.
In area 4, an Imitator is to the left of you. Hi blast on the water ley spot is your best option as usual. A Gella Card is your reward for victory, and to continue you need to light up the torch that is closest to the south wall.
In the next area, just jump across, save and enter area 7. A Sand Stag and Sand Crab are waiting for you. The crab is vulnerable to fire while the stag is weak towards water. Unfortunately they also have the ability to ley change so you may need Avril to ley change back to get the proper elements. If you can manage to camp out on both the water and fire ley spots, you should try to isolate the enemies with Shut Out. Their Giant Scissors type attacks do a decent amount of damage especially if they both target the same character. For this reason, take out the Sand Stag as soon as you can get to the Water Ley spot. The crab will be tough to bring down as Maelstrom will require healing.
Shoot the Detector off to find a switch in the middle of area 7. This open path leads to two duplicator chests, Nightmare and Silver Sun. Return and take the other path.
In floor 9 you’ll see some jars in front of you, one of which yields the Neutrino Medal. Climb a pole to get a Geo Amulet, it’s a duplicator box though. In the southwest on the upper part is another Imitator. It drops Ryan’s Shield. Take the door here for a Lucky Card and a Dog Leash (another chest too, but you can’t open it). Jump down to floor 10. Push all the crates horizontal to the altars so that when you blow one up, all of them will go and the torches will be on fire. Up ahead you can find some Medicine.
Return to area 9 and climb the northeast pole. Make sure Dean’s head hits the switch and then you can continue to area 13. Grab a Potion Berry and shoot the southeast, southwest and northeast torches. Save, hit the three switches, and don’t forget the fourth on the northeast ceiling.
The Rhinoceros is an easy boss, if you have a good strategy. Use Shut Out right away to lock the Rhinoceros away from you. Get on the fire ley spot and use Quicken and then Hi Blast. Watch out for when Shut Out ends, because if he gets close to you it may be trouble.
Another Imitator near you in area 15. Not much to it other than getting on the water ley spot and using magic on it. As you can tell, these Imitators are a lot more dangerous with their Blow Away ability. A Hazel Sprig is the reward. The Sol Niger is a tough fight too as you are up against three of them. Fortunately they are weak against Wind so get on the ley spot and start casting Hi Blast and Crush.
In area 17 you can find 312 Gella and the exit.