
Wild Arms
To begin the game you can choose between three characters. Choose whoever you like but I’ll start with Jack and Hanpan.
Jack’s Quest
This is a good tutorial on how to use Jack. After they run around in the opening, go south and get the Heal Berry near you. You’ll notice you can send Hanpan around to get treasures for you, remember this for later. Take the right path and go north along the wall and hit the switch. Go west all the way now and use Hanpan to get the Cowboy Hat for Jack. Now go through the door that opened from the previous switch.
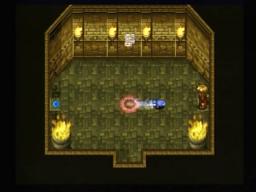 Go south and use Hanpan for the Heal Berry. Take the lower left path, use Hanpan for the switch, and goup the stairs. In the next room, go left for a Heal Berry and right for another, and then through the door. In this room, be careful not to fall off and push the boulder in the middle so that you can have Hanpan hit the switch.
The next area is tricky – you’ll have to run across the spikes, and then in the north part Jack will have to be fast in nailing the switches (or use Hanpan). Hit both, and then the one in the center to continue.
The terrain is difficult here and the Skeletons around here should be a bit tougher. The southwest corner has a Heal Berry and Hide Glove but be fast by the spikes. In the northwest room, step on a switch and then have Hanpan hit the other.
Jack and Hanpan open a portal to an Elw travel device. An Elw talks to Jack, and then you can hit the teleport. Leave for the end of Jack’s quest.
Cecilia
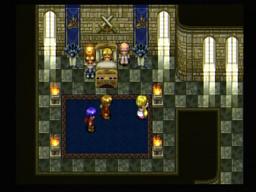
Cecilia is in Curan Abbey. A guardian calls to her and tells her some things. She wakes up in class at the abbey though.
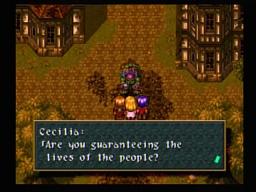
Talk to everyone as Cecilia is about to leave. The east room is messed up and the person is looking for the Pocket Watch which you don’t have yet. Further east and you’ll get a Crest Graph from the teacher. Take this south and west and you’ll see the Magic Guild. With the Crest Graph you just got, Cecilia can choose spells to bind to her (that she can use). Black Magic is attack based and White Magic is restorative / protective etc, but you already knew that likely. You’ll see Cec starts off with Flame and Heal already. May be wise to get Shield for an upcoming boss. Also there is a Heal Berry in a pot in this guild.
Go up the stairs nearby and save, and get the 20 gella in the southeast corner pot. Anje up the other set of stairs has a guardian stone that responds to your Teardrop. Anje then gives you the Pocket Watch.
Now you can go to the library to use the Pocket Watch but you’ll see a book that speaks to you. Return to Sister Mary and then talk to the others. On the west side you will see a few that know about the switches on the guardian statues. Return to the center courtyard and hit the switch on both of the guardians. You can now move them and switch their spots, then use the Teardrop. Now go north and use the Teardrop and you’ll be teleported.
Cecilia should be able to just attack these enemies but Flame will kill them fast. Use the Teardrop on the door, and check the northeast crate in the following area for a switch. In the next room, use one of the crates to hit the switch, and then get the Medicine and Magic Carrot. Follow the path and you’ll reach more crates. Throw them all except the last one, as you need to hit the floor switch and then throw the crate at the east switch. Grab the two Heal Berry’s and go north.
In the actual library you can read the books, but there are three blue ones scattered about that need to be burned in the far north. The first is in the southeast, and you’ll see a Capuche along the way. Look east from the fire for the next blue book, and then go south down the stairs and west immediately for the partially-hidden third blue book. Don’t forget the Magic Carrot west of the Capuche before you enter the next area.
Heal Cec up and prepare for a boss fight. Nelgaul has regular attacks and brutal attacks, both of which can do nothing if you cast Shield a few times. Then just attack or cast Flame while Healing when necessary. If you don’t have Shield you’ll need to Heal more basically. Winning nets you Stoldark who you should equip on Cecilia (Water Rune).
You’ll eventually be transported back and met by Sister Mary. Say your goodbyes to the others, save, and leave. Cecilia’s scenario is over.
Rudy
Rudy is next, as he is doing meaningless jobs in Surf Village. At heart he is a Dream Chaser though.
After work Rudy is rewarded with a Heal Berry. Then he can go around town and search for gella and items. There is a Hardy Apple, 17 Gella, Power Apple, 20 Gella and three Heal Berry’s. Go talk to the Mayor for the Bombs Tool for Rudy, and then a villager runs up. A little boy named Tony ran to the Berry Cave south of village. Naturally, take Rudy there.
Berry Cave
It’s not too hard to find, but do save before leaving Surf. South of there is Berry Cave. As you continue ahead, destroy the huge crate for a Heal Berry. Keep going until you reach a switch that you need to pull to move the guardian.
You’ll have to bomb a lot along the path, but eventually you come to 50 gella and then another 50 gella later. Bomb the sign you see and go north. Eventually you’ll run into a boulder that you should destroy, and then use the switch to move the guardian. When you see a sign that says to walk, be sure not to run, because you’ll be cursed otherwise.
Keep going southeast and you’ll see a Heal Berry, and then a Holy Symbol a little farther ahead the other way. Another huge crate to destroy for a Heal Berry, and then look north as you go west for a boulder to destroy. This opens up a cave with Agile Apple, Hardy Apple and Power Apple. Blow up the crate to the west for a Heal Berry and then go east for another. South of here and you’ll have to press the left then right switch to continue.
Grab the Bullet Clip then save. Rest up with Rudy and then go to Tony, and blow up behind him. Go north, grabbing the Bandanna on your east and then get the Holy Berry in the far north. An eruption happens as you leave. The villagers greet you but a Zombie followed you.
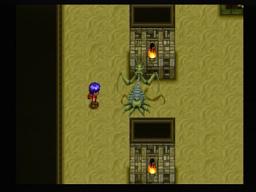
Zombie should be hit with the Hand Cannon constantly. Use Arm Lock if you get your force meter up enough, which you should be able to. Use a Heal Berry if you get around 40 because Rudy is slow and you shouldn’t risk getting killed. Zombie’s regular attacks are weak but his breath attack is tough.
Afterwards, Rudy is denounced by the villagers. The next day he is kicked out, so just save and leave Surf.
Adlehyde
Now that all the single quests are done, you can take all the characters to Adlehyde and “Change” at the save bird to bring them all there. Cecilia needs to go east, Rudy south, and Jack southeast. Bring one of them to Emma, who is in the building north of the Inn with the drill on the front. She hears of some excavation going on at Lolithia’s Tomb and hires you for 500 gella to clear the monsters out. Return to the other two and “recruit” them and you now have a party of 3. Buy all of their equipment so they are caught up and upgrade Rudy’s Arm strength if you have the spare cash.
The town has all sorts of neat things. Most are easy to find in barrels, but there are a few things that are hidden in crates (in the center of town) and the northeast past the trees. Overall, you’ll find 50 Gella, 200 Gella, 7 Gella, Antidote, Magic Carrot, Heat Salve, Power Apple, Hardy Apple and Agile Apple. Also in the castle you will find a Crest Graph on the outside (in the northeast) and a Moon Stone (in the southwest). You should be ready to go to Lolithia’s Tomb now.
Lolithia’s Tomb
Go up and left and enter for a Potion Berry and two Heal Berry’s. Return and go right but not up the ladder and you’ll come to a Power Apple and Mystic Apple. Now go back and up the ladder and follow the path until you reach Emma. Bomb behind her and get the Buckler, then bomb north to enter.
Keep heading north until you reach a room with purple blocks and crates. Destroy the crates to reveal a switch, and have Hanpan get the yellow chest (Heal Berry). Go up and right for 50 Gella and then west and drop down.
Take the north path here and push the blocks out of the way to hit the switch. Grab the Crest Graph and return south, hitting the switch and getting back up top. Take the northwest route now to a new area.
In this new area, go right and up, blowing up bombs as need be. Grab the Revive Fruit and on the third level or so you can work your way west and drop down in the center to where a rock is. Block this rock up and a switch emerges. Go to the other side of the purple barriers and have Hanpan hit it, and then all the exterior barriers (the ones you want down) will be down.
It is easy to get the 130 Gella in the west now, and you can exit to the north.
Save at the save spot and go north and east. In this area, there are two block puzzles in the north. They reveal a Magic Carrot and Heal Berry. Use a Teardrop nearby here to enter the door, where you will get a hint on continuing. Go back up and then southeast to a cliff with a switch. This opens the purple barriers from the far west chest, which is 300 Gella. Now take the straight south path from the Teardrop room and you’ll make your way to a gargoyle. Search behind it for a button, and then push the blocks onto the four corners. Not too hard. Rest up and use the Teardrop.
Magtortous is here to stop you from continuing. His physical attacks are pretty tough and EM Laser attacks each member for about 100. Stay healed especially weak Cec, Shield is useful. PsychoCrack and Arm Lock with Jack and Rudy, and Cecilia can use attack magic if she gets the chance.
North of here, getting the Heal Berry and Magic Carrot. You’ll see Lolithia. Return back to Emma (yes, you have to walk back) and she’ll excavate the thing out. Time to go back to the castle.
 Adlehyde
As your party gets back, they decide going to the Inn would be a good idea. So, Reload your ammo, Save, and stay at the Inn. Cecilia leaves the other two to go to the castle.
The next day, the festival is going on east of town. There are some useful things you can do here for decent rewards like Nectar. Also there are Small Flowers to buy to raise your luck (a lady in the center sells them). There are some Gella treasures around here and also Emma who will reward you with 500 Gella. About this time you can talk to the lady in the northeast who can’t find her son with the red balloon. Head back to town and save. Now go to the boy with the red balloon who is just north and west of you.
An FMV starts as the sky cracks. Enemies are ransacking the village and it’s on fire. As you are standing still you can see Cecilia surrounded be enemies. Work your way north to find her and then defeat the Lizardmen and Skeleton to free her. She’ll join you and you’ll have five minutes to save all the villagers. There should be ten total, remember to check the church, very northwest, northeast and in each and every building. There are a lot of dead people that you can do nothing about. Once you find ten, just go north to exit. Five minutes is more than enough time, and the time doesn’t run in battle if you happen to get in one.
The demons and specifically Belselk want the Teardrop and the party is stuck in Adlehyde Castle. Go talk to the king in his room (3rd floor). He orders you to stay here even though the enemy wants the Teardrop. Cecilia though wants to get the enemy away from here and is willing to sneak out and give up the Teardrop.
Save, and prepare for something that is kind of hard. There are guards on the rooftop that run after you so you need to be quick. If they catch you, back you are in Cec’s room. So, leave the room, go south and west all the way. When you take this exit, quickly run west and south as a guard will be coming furiously from the northwest. Your goal is to go south all the way, east all the way, and then north until you can go west. Enter here and down the stairs. Go north and then west quick and south. You’re in the kitchen, and the west-most cook will hook you up to the underground.
Adlehyde Underground
Head to the southeast and pick up the crate in the way. Eventually you’ll will be working your way back southwest a little and then south. There is a path that splits east that leads to Mystic Apple and 3 Gella. West of here is a Power Apple. In the very south you’ll come across an Agile Apple and 120 Gella, and a Hardy Apple that Hanpan can reach. Southeast a little and south more for a Magic Carrot, a save point and stairs.
You’ll be outside now. Get the Potion Berry and leave. Go west and north to see Belselk. Cecilia gives him the Teardrop, but Jack wants to kill him. Be careful with this battle; Belselk is tough and Disruptive Flail can knock you out, with Cecilia being especially prone. Just continue the Arm lock – Hand Cannon and PsychoCrack. Stay healed because if Cec is under 200 HP you’re in trouble with Disruptive Flail. Survive this battle and Belselk will leave.
With peace restored for now, you still need to get the Teardrop back. Cecilia is willing to journey to do so but Jack doesn’t trust her. She cuts her hair and he changes his mind.
After the opening sequence you’ll have control of Jack and Rudy. Take them to the Princess’ room to pick her up, and then go south into the map room. Talk to Johan, and then get the Magic Carrot, 1000 Gella, Power Apple, Mystic Apple, 100 Gella, Revive Fruit, Lucky Card, Bullet Clip and 500 Gella. Leave for the town. It’s destroyed but you can still upgrade your arm and go to the shop. In the center you’ll find a big building that plans on restoring Adlehyde. Donate 500 Gella to this.
Mountain Pass
Go northwest of Adlehyde until you reach a sign. It tells you to go southwest so do so.
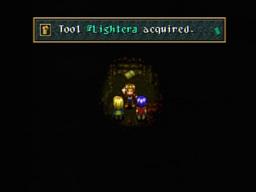
You will be at Mountain Pass. Go north and then you’ll be in a dark room. Go north more and you’ll see a lantern, but go west and north to find a Lighter. Now you can light that lantern. Go north of where you got the lighter and eventually you’ll reach another lantern and a north path. Don’t take this yet, but go southeast for a Magic Carrot first. Take the north path now.
Up a bit and light the lantern. The west path leads to a Heal Berry and Antidote. Then you can take the east path, blowing up the rocks and continuing north until you reach a Save Point. West from here and you’ll be outside, where you’ll continue west and see a treasure south of you. It’s just a Heal Berry so continue west and Jack will learn a Fast Draw Technique as the winds draw his attention. When you get Fast Draw techniques, keep using them in battle until they are successful and you’ll learn a new ability. This one is Sonic Buster. Most Fast Draw’s are harder to find than this. Around here you’ll fight Harpy’s often so hopefully you can cope with the Poison.
Further west and go south when you get to the other side. There is an Antidote at the very bottom and also an Antidote at the first west path. Go to the very south and then west to find the exit.
Northeast for a lantern and then west more for another to light. There is another one to the east as you are going south but you likely don’t need it. Keep going south for a fourth lantern and then southwest for an Olive Branch. East a little and then south more but look for another west path that you need to bomb through to get another lantern and a Crest Graph. South more and bomb through the wall to the east for a Magic Map, and then you can exit.
Milama
Head due south for a long ways and you’ll eventually reach Milama. To the east is Sand River Cave and to the west is a Guardian Temple, but we don’t need to see either of those.
As usual, the first thing you should do as you enter is get all the treasures available. East to the Inn for a Hardy Apple, and rest up while you’re there. West all the way for a 10gal Hat and then go in the building to the northeast of the Church for a Cute Ribbon. North of here is a guy acting as an Armor Shop, so upgrade with him. Further north and the building has a Crest Graph in a barrel on the back side and the house itself has a Mystic Apple. Head to the northeast now to find a Heal Berry and three huge crates for Potion Berry, Agile Apple and Power Apple. North of here for 690 Gella and return back to the center of town. Check out the weapon shop and then head southeast to where a dog is guarding a house. Get the 123 Gella and Metal Band in the house. North a bit for a Violet Rose by the pub and then talk to the owner about the Guardian Shrine. Your party will eat there for a bit and then learn more about the 2-10-6-12 password. The owner also gives you the Holy Medal.
Guardian Shrine
Northwest of Milama is the shrine. Go up the stairs on either end as you enter. There are 12 candles here, unlit. Remember what the bartender said, and light the 2nd, 10th, 6th then 12th one (think of it as clock hours) and then all of them will be lit. Return to the first floor, go in front of the center sealed door, and use the Holy Medal to continue.
Go straight south for three Mystic Apples. West of here for a Magic Carrot and up then west for a Crest Graph. Return west but go south back to the initial room, and then east to find another Magic Carrot. Go north and then east for a Crest Graph yet again. Now go north and you’ll see the paths merge. Save and go more north.
You’ll be at another candle puzzle. This is tricky because thet maze appears as you light a candle. In order to succeed, you need to start with the northeast, then the east, then the northwest, and just continue on until you get the center one.
The party goes into the pool. They are separated, so you’ll do one by one. The characters gain a ton of EXP by themselves so the enemies will be useful. Jack just has to utilize Hanpan for hitting switches and he’s more than capable enough to handle the battles. When the paths split to three, take the left one first to get two switches, and then take the right one to continue. Jack will come to a sword and he thinks he’ll finally be able to get revenge. After the scene switch to someone else.
Cecilia has blocks to push. Push the left one twice and then the right one to continue. Next room push the right block north and move on.
Rudy has to bomb boulders and his can be difficult because you’ll be blocked off often. Bomb left twice, then the middle twice, the right side three times and finally you can go all the way west. From here just go north all the way and east then north to the end for Rudy’s scene.
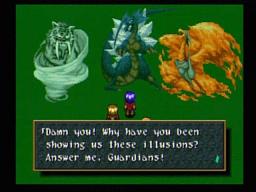
With all the characters here, they meet the Guardians that were testing them. They are friends of Stoldark – Gurdijeff (Earth), Moa Gault (Fire), and Fengalon (Wind). They join you and you get the second force, the ability to summon Guardians (50 % full force gauge). Some more scenes and then the party lands in a distant area.
Baskar Village
Just go northwest from where you start off. This is a very remote village. Go west and talk to the guy nearby as he has upgraded weapons / armor for everyone. There is a Power Apple directly to the north, and then 98 Gella and a Heal Berry to the right. In the far north part of town is an Agile Apple, Magic Carrot, Heal Berry, 800 Gella, and a Crest Graph.
Visit the elder in the first part of town. He tells you of the guardian statues sealing Mother, an evil you don’t want resurrected. You must first go to Mt. Zenom to defend the one there. Then he tells you to go to the Wind Altar to see Zephyr. So, go north but you won’t be able to summon it. Rest up and leave town.
Mount Zenom
Enter and move the right statue north to continue. Follow the path and you’ll be outside where you go west for a Heal Berry and Lucky Card (hidden on the north part). Further to the west for a Blue Circlet and the exit.
Keep following north, burning through the grass to get to the stairs up. Once you get outside, go northeast and north when you can for a Secret Sign and then east back into the cave. Take the south route so you can push the non-glowing guardian east and then north to continue. Keep following the path, burning the grass as you see it.
You’ll be back outside, where you can go south for 5 Heal Berries that you need Hanpan for. As you come back up, Jack will get another Fast Draw hint. It is Meteor Dive. Go west for a Potion Berry and then back in the cave. Keep burning through grass because one of them is hiding a switch in the north area. Soon you’ll be back outside.
Take the right path and push the guardians north into place. Grab the Mystic Word and go back to the snowy exterior. Take the west path and save. Keep following the path and you’ll get to push more guardian statues into place. Rest up because there is a boss ahead.
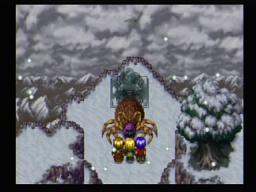
Belselk
destroys the statue at the end and sends the Orga Widow at you. This enemy can be meddlesome with ailments like Poison and some decent physical attacks. Use Meteor Dive, Hand Cannon, and Stoldark Summon with Cecilia for maximum damage. After the battle you get Tenoginos the Summit Rune.
Although you have to run out of here (or cast Exit) you will be able to get an extra Crest Graph from jumping off the light brown planks. Leave back for Baskar after the scenes.
Baskar Village
Talk to the elder to learn about the other two statues in Port Timney and Saint Centour. You get a Kizim Fire to light the Elw Temple so that you can warp.
Elw Pyramid
You’ll find this Elw Pyramid to the northeast. Go up and west when you enter, and north through the door behind the waterfall. Administer the Kizim Fire to the control panel. You can go up and to the center to find a glowing warp. Leave the next pyramid but get the Hard Guard for Jack.
Saint Centour
Go straight south to find Saint Centour. You are blocked initially because of Hanpan but then get in.
Begin scouring the town and you’ll find 100 Gella in the southwest, an Agile Apple north of that and a building just south of here. Enter and the guy has a key to Cage Tower where all the abductions are leading to. There is 100 gella in the southeast and a Crest Graph too. In the northern area is 250 Gella, Hardy Apple, Power Apple and Magic Carrot. Not much to do here besides the usual weapon / armor upgrade and a trip to the Magic Guild / Arm store.
Cage Tower
With the Key Plate (Cage Tower key) in hand, rest up and travel northeast to find the tower. The Key Plate is used right away to open the main gate.
Take the left stairs and hit the switch, and return and take the other path. Go south and to the west, eventually to the north for a Crest Graph. Take the stairs below this and hit the switch, and return back to the previous floor and take the far east stairs. Now you can continue past where the barriers were.
In the next area you’ll have to walk fast across the falling squares. Make it to the other side for the stairs up. Be careful on the second floor though. As you get to the south part of it, quickly, move onto the platform and don’t waste any more platforms. Grab the Round Shield, Bullet Clip and the Prism Laser ARM. Continue back along and up.
The third platform area is tricky. As you go south, take a west to reach land and hit the switch. Now you want to get back on and move to the southeast for another switch and then you can go up. Just keep going now until you reach a save point.
Reach the inscription on the wall, and then go to the south with the three stairs. Go east, west, and then east, and continue until you reach the three Goat Dolls. They are an instant revival if you die (get used to these things). Now you’ll have to go up a ton of stairs and eventually you’ll find a south exit. Rest up and climb. The next boss is weak against Earth so give Cecilia the Earth Rune.
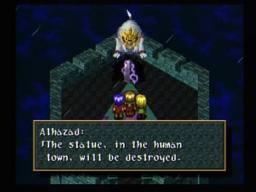
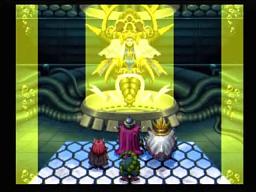
As you get up there, Alhazad appears and summons Night Gaunt to bother you. Meanwhile he makes a threat about the town and the statue there, but you have to defeat N Gaunt first. Use Meteor Dive and Hand Cannon as usual. Cecilia can do a lot of things, from casting Arm. Down to Break or using her Earth Rune Guardian (best idea). Of course she has to heal too, although N Gaunt really only attacks and uses Mysterious Ray (100 damage on each). Gurdijeff will take off over a 1000 if equipped on Cecilia, and even without this you should have no problem with this boss.
Afterwards, you have to pay a girl named Jane Maxwell 2000 gella to free you. Otherwise known as Calamity Jane, she travels with McDullen. Cast Escape (hopefully you have this at this point) and go back to the town.
Saint Centour
The town is empty. Take a rest and save. Let’s explore and get some of the treasures we couldn’t earlier. Beware though, there are monsters roaming.
You can now get two Potion Berry’s and a Secret Sign in the bar. North for a Lucky Card, and north more for a Bone. In the southwest part is a Bullet Clip and north of that is an important Duplicator. Back to the center for an Ambrosia and the Saint Rune, Ione Paua. Not much else to do here although the free Inn and fighting up in town is kind of useful. Save and leave.
Just south of the Cage Tower is another Elw Pyramid. A scene with the demons preparing for the revival of Mother.
Elw Pyramid
You can stop at the shop by here first if you need items. Take the active warp in this pyramid and leave the next one.
Port Timney
Just southwest and then north of the Elw Pyramid is Port Timney, where the final guardian is.
Grab the Hardy Apple just east of you and the 480 gella at the north part of this building. In the northwest are weapons / armor you already have and an Arms Meister. Chances are you couldn’t afford all those weapons and armor from Saint Centour anyway.
In the south part of town is 30 gella, 2000 gella and a Crest Graph. In the north part of town, blow up the huge crates and a guy is hiding in one. Jack will learn the Fast Draw Technique here. There is a Potion Berry right by this guy and a Revive Fruit in the building near him. One last treasure, blow up the crate behind the Bar and go west for a Duplicator.
At the bar is Bartholomew who talks about the Crystal Bud at the Maze of Death. Of course the party will have to go get it.
Maze of Death
In the desert to the northwest of town, you’ll find the Maze of Death. Actually, it moves around here so you have to be quick. You can tell you are getting near when it zooms in, so use that as your best source of judgment for finding it. This place is pretty wild to keep track of where you are.
Push the block north when you come to it, then push the right one and go down. You’ll come to an Agile Apple, Hardy Apple, Mystic Apple and Power Apple.
Go back to the center room and push the middle block horizontally and take the north path to save. Take the northwest path quick to push a statue in place. Next, take the southwest path and it is linear to a point. When it splits up, go east and south to a room with a guardian you need to push and a Crest Graph just before that. North of here and you’ll see a floor switch that reveals a staircase. Go down here to push another statue. Take the north exit and you’ll see a Heal Berry and Magic Carrot. Keep running east and jump down.
East and north for another statue to push into place. South of this for a button that reveals a staircase, and then you can just keep heading south. You’ll reach a Clear Chime and another statue to push. Back north, take the east path when you can and all the statues should be pushed over. The Crystal Bud awaits you but it sets off a timer as the Maze of Death is about to be destroyed.
You have three minutes to get the hell out of here, but battle does make the timer stop. The general idea is to be sprinting south out of here. So go that way and that turns west. Then you go north until you can go west, and take the south exit up ahead. This leads to the six rock room so you can leave if you want. However go north in the center to where the save point was – it is gone but you can bomb the north wall.
Go north and grab the Crest Graphs on the side (two of them) and take the stairs. Again, take the west stairs and go north. Rest up, give the Saint Rune to Cecilia and go to the white thing. Use Meteor Strike and Hand Cannon like usual. Cecilia will be healing but she could cast Holy on Jack’s weapon or use the Saint Rune for massive damage (1000 +). Chaos however can put your entire party to sleep, and use Gamma Ray for 350-500 damage. Purple Electric is decent but more in the 250-300 range. The biggest issue is when he puts you to sleep and then spams Gamma Ray (although he’ll sometimes cast Sleep and Silence constantly).
You’ll get the Death Rune afterward, which adds a ton to your Sorcery (good for Cecilia to have as a base rune for a while). You should have enough time to run south and exit, or you can just cast Escape.

Port Timney
Bartholomew will buy the Crystal Bud for 5000 gella. Before you know it, Bartholomew is getting married to Cecilia!
When you’re on the boat, there are no treasures but talk to everyone for the correct answers to the wedding. Save and rest and the wedding will ensue immediately after. The “correct” answers are b, a, b, b, a, b, a, b, a, b. Soon though, a demon named Zed comes to destroy the guardian statue. He’s easy to defeat despite his dominant agility. Just be cautious, realizing he’ll go first every turn. Heal up accordingly. Cast Arm. Down on him, having Cecilia heal and the other two use Meteor Strike / Hand Cannon. Zed’s best move is Garyu Ichimongiri and that takes off about 400 while Doom Bringer does about half that. You get 1400 for this battle.
However, there is an enemy in the back. It is Lady Harken and she blocks a Jack attack and then slashes the statue in half. You get Nua Shakks, the Thunder Rune.
Back on the ship, save, and go to the far west to talk to Bartholomew. He gives you 5000 gella, Mega Berry, Full Revive, Lucky Card and a Magic Wand, a tool for Cecilia so that she can talk to animals. This is useful, actually. Agree to go back to Port Timney.
Re-fill your ammo, save and leave. Stoldark realizes that the Queen Mother, Lord of the Demons, is going to be revived. Sure enough, the Quarter Knights watch as Mother is now alive and well.
Elw Temple
Go south of Port Timney for another Elw Temple. Unfortunately you need two Duplicators, one was in Saint Centour and the other in Port Timney.
Milama
Head to the southeast part of town. Use the Wand on the dog to get the Radar. This is a one of my favorite tools and makes finding treasures so much easier. You’ll hear a noise if a treasure is in the area and it’ll flash if you can see it.
Sand River
Save and go to the Sand River, just east of Milama. This place can be tricky as you may find yourself on quick sand moving to a new area.
Talk to the Monkey with the Wand and then follow him right into the wall and then north all the way. Take the nearby staircase and grab the Hardy Apple you see south of you. East of here and south for a Power Apple and then enter the cave.
Straight north and bomb it for an Orb of Power. Continue west and follow the path (don’t jump off the plank) and you’ll find a Power Apple and Hardy Apple. Now jump off the east end of the ledge.
There will be a cave directly north of you, and a Lucky Card just east as you enter. Go into the sand north of you, and get the Hardy Apple to the northwest before you exit to the southeast. Save and continue along.
Hop in the sand to the east as you go south. Light the two lanterns and Jack learns a Fast Draw technique, Heal Blade. This is incredibly valuable with Jack’s high RES. Get back in the sand and you’ll be near the beginning now. Go east and south, back in the cave and en route back to the Save Point. When you reach the save point, save and then go all the way south to a staircase down. Just keep going east and up another staircase. Next room do the same but you’ll come to a Power Apple and then the staircase. Just go south to leave the Sand River.
On the World Map, head east and northeast to the Ship Graveyard.
Ship Graveyard
A desolate former port. Get the Serenade to your west and Agile Apple northwest of that. In the northwest is an Arms Meister with a Power Apple outside. North of town, a Revive Fruit and Toy Hammer have washed up. Check back at the beach often as more items will come later. The two crates southeast of here have two Heal Berry’s. Not much left, but the Inn has two Heal Berry’s east of it and a Hardy Apple. A Potion Berry is to the east in another huge crate.
Buy the expensive yet worth it equipment, and then talk to Dan in the southeast. He tells of the Guardian Blade in the Pleasing Garden.
Pleasing Garden
Save and go outside in the desert. Like the Maze of Death, you need to walk all around to find the Pleasing Garden as it moves around. Again, just watch for the zoom. This one seems a bit more difficult to find than the Maze of Death though.
Go north to the teleport, and then continue north but take the east exit. You’ll reach another portal. Head east and look for an opening in the light. This takes you to a save point.
Up ahead is a four way, taking a left leads to a Heal Berry, north leads to a dead end (for now) and south leads to a portal. Grab the Duplicator to the right and hit the portal again. You’ll be at an area with purple barriers so hit the portal once again. This area has a portal in the west building that takes you to the beginning. Don’t take this portal though – instead, take the portal that you appear by. Go north, west, and south all the way to where the Heal Berry was. Now go back north and left and hit the switch (you have to go in the Heal Berry room to get it to appear).
Return back to the initial fourway with the portals to the south. Take them and eventually you can go south on the second one. You’ll reach a room with a Gigmantis crawling around. Rudy has to bomb it and then you have to walk into it to begin the fight.
Rest up and do so. Mantis Fist does a few hundred damage, and Zero Armor does about 400 or so. Use Arm. Down right away and then the Meteor Strike / Hand Cannon combo. Jack can also use Heal Blade to relieve Cecilia of the healing duties. She should be casting Freeze and using Stoldark (for about 2000 damage). Just stay healed because the mantis is fast.
Take the Mantis head and throw it at the north switch. Go south and Jack gets another awesome tool, the Grapple (Grappling Hook). Take the portal to the north, and then take the west portal. Go all the way west now for two Crest Graphs that are now available. Go back east and take that path going north through the sun.
Save and go north, west, then north again. You can grapple across (I’m sure you remember plenty of other places to grapple as well, like Lolithia’s Tomb and Elw Temples) and will reach three portals. Take the middle one for the Bracelet. Escape and return to Dan.
Ship Graveyard
Jack gets Sonic Vision, his third force level, after giving the Bracelet to Dan. You’ll hear of a Ghost Ship at the end, so rest up, save, and go to the dock. Bartholomew is here and wants you to get rid of the Ghost Ship in the lake that is disturbing everyone. He’s willing to take you there when you’re ready.
Ghost Ship
Take the left path when you enter, and go down the stairs. Get the Potion Berry to the right, and then try grappling southeast. There is a candle down here so you can explore the east side more. There is a Secret Sign and a Potion Berry that Hanpan can get. Take the stairs going down in the north, and light the candle nearby.
In the second room to the left a Cybergeist will attack you. In the third left room is a book that tells of a switch next to a bed. Go all the way to the right and enter that room. Another Cybergeist to defeat, and in the northeast corner is a switch. Press the X button when you are facing the northeast wall to push the switch, and a staircase down opens up to the left. Light some candles and just keep going west to another staircase.
Three blue treasures here that you can’t get to. Just take the staircase and then grapple to the east side and take that staircase. Hanpan can get the Magic Carrot and Potion Berry, and a Lucky Card on the deck to the south. Return to the grappling area and take the west path. Save your game and go on deck.
Grab the Potion Berry, rest up, and go left. Captain Geist is here to stop you. This is another great fight to abuse Ione Paua for 2000 damage a hit (on Cecilia mind you) or cast Holy on Jack’s weapon. Try out Jack’s Sonic Vision too. He likes to Stun you and do some mediocre attacks like Banishing Buster Anchor. You get a whopping 7800 gella for this (could be a good Lucky Card use).
You have to walk all the way out, but when you leave the Ghost Ship you’ll see the evil be purged from the sea.
Ship Graveyard
Bartholomew rewards you with the Sweet Candy, kind of. He’ll let you use it. A Wind Vane, Crest Graph and Goat Doll washed up on shore. Rest up, save and leave. You can now travel by ship.
On the ghost ship after you defeat the captain there is a ladder made of rope hanging on the side of the ship. If you walk onto it it gives you the chance to leave the ship right away so you don’t have to walk all the way back through the ship after the fight unless you just want the extra exp.