
Inner Sea
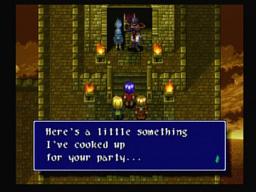
Now that you have Sweet Candy you can travel the Inner Sea. Go north and a little west from where you are to see Volcanon Trap (inaccessible now) and a bottle floating by Adlehyde. This is a Duplicator. You can use this in Adlehyde Castle if you want for four Crest Graphs and a Secret Sign.
In Adlehyde you can learn more about what is going on. There are three places of interest, with the Volcanon Trap being one and the Tripillar and Giant’s Cradle being the others. Talk to the swordsman in the southwest and agree to give him a Secret Sign for a new Fast Draw technique (Soul Breaker).
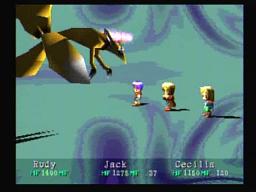
Leave Adlehyde and travel northeast for a Lucky Card. Now travel to the far southeast, towards Port Timney. Since the sea monsters are hard generally, you’ll want to rest and save here. Head due east to find the Tripillar, but go northeast of it first for a Crest Graph.
Tripillar
This is the only place out of the aforementioned three that is open to you currently. You must split into three and it is essential that you pick the correct teleports.
For Jack, have him go to the west portal. Get the Potion Berry and go up the northwest stairs. The next area is the reason why Jack is here. There is a statue on the east side. Go up to it and accept the challenge of fighting four Critter’s. Then two critters, then one critter. Finally, the statue rewards you with the Fast Draw Divide Shot.
Continue up the stairs until you get to an area where you see a treasure on the east side. Go all the way south through the door and entire the nearby door to grapple over and get the Secret Sign. Up the stairs yet again for a Potion Berry and switch.
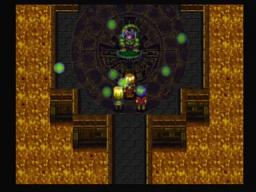
The top floors have tough enemies, like Raidbuster’s. They will attack in numbers and kill you, and will not allow you to run most of the time. Hurry and get the switch in this area and go up the stairs. There is one more floor to go with the Hanpan switch hitting, so go up there and examine the gargoyle to make it glow.
Switch to Rudy and take the right path. Grab the Potion Berry on the first floor and hit the stairs, and then just take the stairs again on the next floor. The third floor, go all the way to the southwest and go up for the stairs.
Keep going along, grabbing the Bullet Clip on this floor. The next floor has a Potion Berry and a switch, and tough monsters (Raidbusters). Get the switch on the next floor and you should be at the gargoyle that lights up.
Cecilia is difficult to get through with her low HP. Anyway, take the north portal and grab the Potion Berry. Continue up a few floors until you get to the east side that has a Magic Carrot. One more floor and Cecilia has a save point. The next floor up has a Potion Berry and a switch to hit before going up another level. One more floor to go and you’re at the top. If this is your third and last one, you’ll all be teleported to the beginning.
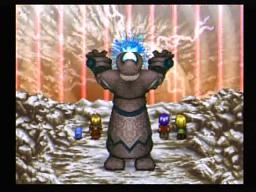
Search the yellow box to elicit the attention of the Mage Fox. As you can tell this guy is all about using magic, until the end when he seems to run out and just use physical attacks. He likes to use a spiritual attack called Valkyrie that can take up to 600 off on a character. A lesser spell he uses is Blast but this also attacks the entire party. Towards the end, he’ll heal himself and then just start attacking. Your party members are probably worth out but just keep using the best moves the two men have and Cecilia should heal and use Ione Paua when her summon is built up. Grab the Blue Virtue after the battle and leave.
You should probably return to Port Timney to rest and save.
Rosetta Town
This place can be tricky to find. From Port Timney, travel west along the south end and you’ll eventually see a whirlpool with a dude watching it. You want to get on the land he is at, so get off just north of here and walk southwest to Rosetta.
There are some great weapons and armor just to the northwest. Outside of the weapon store is 498 gella. Northeast of here for the bar and a My Grand Hat. The pub exterior has a candid dog who is looking at a 1 Gella Coin pot. West of here for a Crest Graph.
The mayor to the north has a Hardy Apple and Power Apple, and a Magic Carrot upstairs. Southeast is a Headgear and the Elw in her home. Look at her flowers outside and she’ll talk to you again. Rudy and friends stick up for her when some townspeople come by. She talks some more and you learn her name is Mariel. She wants to find the Arnica just south of town.
Forest Mound
Go up to the shiny herb and the kids from before come up. Rudy slaps one in the face and then they leave. Take the Herb Arnica back to Rosetta. Give it to the mayor and that will be it for this sidequest. Mariel will give you a Small Flower if you visit her.
Before you leave Rosetta you’ll see Calamity Jane and McDullen. She wants to get in the Volcanon Trap in the west part of the Inner Sea. Rest, save, and head for Adlehyde. Just south of here is the Volcanon Trap.
Volcannon Trap
As you enter, the “special key” is a huge bomb from McDullen. Head north several screens until you get to a staircase going down.
Go east for a Potion Berry, and south for 971 gella. Southwest of here for a Bullet Clip and Secret Sign. Further west for 1800 gella and then begin going south more. You’ll see another lava-hidden chest that has a Silver Harp inside, and east of this for a Magic Carrot. Now go south for the exit (grapple over) and down the stairs.
Head to the east and finally Rudy has a powerful new ARM. The Rocket Launcher awaits you. South a bit and west of here for a Lucky Card. West a bit more and you are at a gigantic lava pit. In the southeast of it is a Crest Graph, the southwest has a Potion Berry, and then start going north for a Revive Fruit and the exit. Two exits actually, so take the right one and follow it through. Jane and McDullen will leave you here.
Go down 4 or 5 staircases and examine the north wall. Zed pops through. You can use the Rocket Launcher but your Hand Cannon is probably better and more accurate right now. Meteor Strike is still probably the best ability Jack has. Cecilia should cast Arm Down and then Heal, using her summons when they’re up. Zed has some new attacks like Ougi-Kyoujin-Ranbu, and then the older ones Garyu-Ichimongiri. Just stay healed above 500 and you should be able to best him fast.
Rest up and waste some Magic Carrots (trust me) to restore MP. Save and go north. Turns out there is no Guardian Blade but it’s just been a ploy so that Belselk can slaughter you. Unfortunately for Belselk, in the treasure room is where his augmentation device is, and Jane is destroyed it. He is still a Night Crawler, so beware. Do the usual on turn one, getting his Armor Down. His Disrupting Flail still only does 300 or so, which is nothing at this point. His Belselk Breaker will take off a 1000 though, and can wipe out Cecilia easily. Putting a Shield up on her (or someone else) might be a good idea. His Blaster Howling can paralyze you as well. Overall though, the only way this is a hard battle is if he uses Belselk Breaker often, but he should be using Disrupting Flail most of the time so put him away and grab the Red Malice to the north.
As you leave, Belselk is assassinated by a mysterious character. Leave Volcannon Trap.
Later, you’ll see Boomerang and Luceid called in to see Mother. Zeik doesn’t like this and is scared. You’ll see a barrier around the Photosphere as well.
You’ll be back in Rosetta Town temporarily, so rest up and save. I also suggested pouring about 40,000 into the Rocket Launcher so that it has 9-10 bullets, 85+ % and 140+ ATP. Then you’ll begin to see the power Rudy has.
Giant’s Cradle
To get here, travel north and you’ll see a beach with just a cave. This is the Giant’s Cradle. Put the Red Malice and Blue Virtue in here and you’ll be allowed in.
Take the left path and grab the two Crest Graphs and save. Then take the right path and use the southeast grapple to get across. Sprint through this next area or you’ll get hit by the spikes and spears. The next area leads to a block, a purple thing on the ground and a locked door. Push the block south, then east, then north, and east to the purple glyph. Take the stairs down and push the block onto the glyph again to continue. Watch out for the spears up ahead, grab the Potion Berry and dodge some more spears. Grab the crate and throw it at the switch and take the stairs down. Another area where you’ll have to pick the crate up and hurry past the spikes, and manage to throw it at the switch. Two Magic Carrots in the next area, and pick up a crate in the following area to hit the switch. Grab the Potion Berry and soon you’ll find a huge golem. The party decides to go visit Emma in Adlehyde.
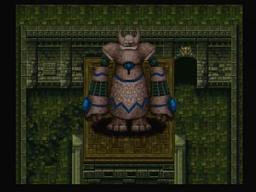
Sure enough she wants to go see it. Just travel there and you’ll appear where the golem was. It is called the Earth Golem evidently and it’s not used for fighting. Cecilia wakes it, and you can use it on the world map.
Court Seim
Now that you have the Earth Golem on your side, you can travel across the shallow water. Go east and south when you can to buy status-resistant stuff. Travel a bit east to see the Photosphere and then go southeast and southwest eventually to find Court Seim.
Head to the northwest for a Crest Graph and Agile Apple. A Mystic Apple is to the east by the Ring shop. To the very northeast for a Power Apple. The big north house has a Hardy Apple and Nicholi Maxwell. Some scenes with Rudy’s past, and then you get the Wind-up Key for a tower to the southeast.
Epitaph Sea
This is an incomplete tower that Nicholi suggested you visit. The left path leads to nothing so go right and use the Wind-up Key to continue all the way to the stairs up.
Take the two sets of stairs to the Potion Berry, and then go south to blow the wall up and go upstairs. Hit the switch and get the Magic Carrot after riding the elevator, and then ride the far east elevator to get back to the beginning. Walk south via the east wall route and you’ll get a Lucky Card and the stairs up.
The door will shut behind you. Luceid the Black Wolf has locked you in here, so talk to it with the Wand, follow it, and talk to it again to continue up.
Save and head to the southwest for Mystic Apple and Agile Apple. Go to the east and shoot Hanpan through the southeast hole to hit the switch. Grab the Metal Bird and hit the switch to go to the northwest room. Input Metal Bird as the password and you can continue through the northeast room.
If you want to use a Duplicator to get a Crest Graph, Secret Sign and Bullet Clip, you can. Up ahead though are the Skates for Rudy. Now you can take the center south path for a Full Revive and the ladder.
Grab the Reflex when you’re outside, and use the Wind-up Key on the three robots in the east part of the following room. Jack will learn Blast Charge, a nice new Fast Draw.
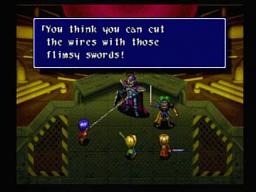
Rest up because at the top is an unfun experience. Boomerang and Luceid are here and this is by far the toughest boss fight yet. Both are fast so use Slow down on Boomerang and then just plan on healing with Cecilia on most turns because the two enemies can cause up to 1300 damage at once. Boomerang Dynamic takes off around 700 while Crescent Fang only does a few hundred. Luceid spams Black Fang with a high agility. You’ll want to kill this thing fast, so after 3 or 4 turns you should have it dead (if your Rocket Launcher is built up enough). Jack can be using Blast Charge now if he has the MP to spare and Sonic Vision definitely. Sometimes Jack will need to use Heal Blade to help Cecilia. Be conservative because Black Fang plus Boomerang Dynamic spells death if used on the same character.
If you’re fortunate enough to win, get the Rune Drive and escape out of here.
Court Seim
Back in town go to Nicholi and he’ll be glad you have the missing Rune Drive. A banquet occurs after this, so talk to Nicholi, Jane (with Rudy), and then McDullen to rest.
At night, Rudy and Jane chat. Unfortunately Alhazad comes in to say everyone will die if you don’t give back the Rune Drive. The party stays in town but no one attacks. The enemy must have went to the Sacred Shrine to the southeast.

Sacred Shrine
A kid is here to tell you about the monsters being in here. Take the stairs in the north and then the west exit. Use a Duplicator on the door here, it’s worth it this time because you get another Duplicator. Also, a Magic Carrot, Potion Berry, Crest Graph, Revive Fruit and Secret Sign. Take the right path now and go south when you can for a Potion Berry and Secret Book. The Secret Book is just great for Cecilia. Then take the stairs going down.
Continue along for another Duplicator door (a 3 Ceracenian battle for Jack for a Fast Draw (Slash Rave) and 320 Gella) and then go northeast for stairs up. There is 4800 gella and 2130 gella in the room with all the people. Save here and go back to the duplicator door and take the door east of it. There is a Potion Berry and a dog here. This is no dog though.
Agaless is a smart enemy, most of the time. He’ll likely begin with Arm Down, so start using Shield on Cecilia to cancel it out. He happened to continue to use Arm Down and waste turns, but when he did attack the other two he took off about 1300 damage. You’ll have to expend a Potion Berry immediately when he hits you. Fortunately the Rocket Launcher and Sonic Vision should be able to put this enemy away in 7 or 8 turns. If you get a chance to Summon a Guardian with Cecilia, make it be Nua Shakks (Thunder Rune) for 3200+ damage.
Go back and save, and it may seem like you’re at a stand still. Go to the west part of the Sacred Shrine with the priest that you can’t reach. Shoot Hanpan at the little boy to move him and get to the priest. After talking with him, Hanpan has a revelation. Just like at Saint Centour, the enemy must have snuck in with a human. Continue his questions with Saint Centour, Huddling against your body, Got through with a human, Got in with a Human, and Villager became a monster. After this Alhazad tells you about seeds the Metal Demons plant in humans. Now that Alhazad knows you’re smart to what’s going on, the party knows they have to act fast before he gets the Rune Drive back. Head back to the little boy in the north guarding Maxwell in the treasure room. This isn’t a little boy but a demon.
Defeat the three Ceracenians, rest up and go up. Alhazad is here to curse you out, but you just took out his tough pet. This may mean you’re low on MP or Rocket Launcher bullets, but Alhazad has low HP so try to not waste anything. He only seems intimidating because he’s one of the smarter devils. Use the rest of your Rocket Launcher and Meteor Strike or Blast Charge with Jack. Cecilia should cast Slow Down and Arm Down, if she can get them to work. Alhazad is weak against Holy so Light Blow and Ione Paua will destroy him. Other than that just heal – Esperanza and Alhazad’s regular attacks take off about 500, and he’s definitely easier than the last two boss fights. Grab the Rune Drive and you and Nicholi will go to work.
Actually you’ll be back in town, so spend some more money on the Rocket Launcher and some Aqua Rings (you’ll see why later). Talk to Maxwell again so that the Golem is powered up.
Photosphere
Save and take the Earth Golem north to the Photosphere. Cecilia will get it to destroy the barrier.
Inside the first area of the Photosphere, you can go west or east to blow up the flashing red / blue machines with a bomb. This gets rid of the alarm on the first floor.
Take the left path for a Potion Berry chest. Go on the north part of the area to drop down and bomb the machines to get rid of the alarms. Before taking the center exit though, take the northeast and then go north for two Potion Berry’s and a Full Revive. Keep following this path to the right and north to get to another machine to bomb. Now return to the previous area and take the center path that you cleared of alarms.
Grab the Hardy Apple to the west, and then go north to another area. East for another Hardy Apple, and then go to the southeast part of the screen for an Agile Apple. The northeast path is littered with alarms so take the center one. A Blue Robed Figure approaches you and tells you of the Teardrop. He’ll also open the door for you to go north in the center.
Two Potion Berry’s right by you and then the stairs. Go to the very east part of this next room for the Twin Orbs, a poor gun if you ask me. The shadowy figure will appear again and tell of common goals between the two of you. Take this north-center path that the figure opens up. Go up the stairs for a long while, use the Skates so you can skate up them and not fight enemies. Grab the Magic Carrot and take the stairs up.
Scary music plays. Grab the Teardrop, you finally get it back. Go all the way back south to the first door that the figure opened for you, and then go right and north to the stairs down.
In this area you’ll see lights moving around. You need to dodge them. At the first fourway, go east for a Revive Fruit. Another Revive Fruit southeast of this. Yet one more Revive Fruit in the northwest. In the very south is a Gauntlet and Mega Berry.
To continue you’ll want to go to the northeast. The dangerous golem Lolithia is here to spam Cold Sleepand Absolute Zero on you. Equip the Aqua Ring’s if you want some defense from those two. Also, cast Awaken constantly so that you awake from Cold Sleep, if you fall asleep. Rocket Launcher is your best friend, Meteor Strike helps too but Jack should be doing a lot of Healing also. Stay above 500 and you should be able to work down the 15000 HP Lolithia has.
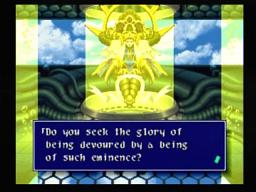
Take the north stairs now. Keep following the path and you’ll get to a strange and cold door. Rest up, this is probably a boss. Sure enough, you are at Mother’s Lair. She is the queen of the demon race, and although not completed revived, she is still a boss. Her attacks don’t take off too much, but Als Magna can change your status. Use the appropriate item or Heal Blade to cure. As long as you aren’t too fatigued from Lolithia, you should be able to get off enough Meteor Strikes and Rocket Launcher’s to put her away. She’s weak against Holy so Ione Paua is another good option.
Mother is destroyed and the party escapes with Sweet Candy. While on board, the shadowy figure shows itself as Zeikfried, and the rest of the demons appear too. The battle isn’t over despite Mother’s death.
Adlehyde
Back in Adlehyde the party, Emma, Bartholomew, Jane and McDullen will be going over plans. The other demons are on the prowl and you need to reach the Outer Sea.
Talk some more around the area to find out that the whirlpool in the south (east of Rosetta) needs to be taken care of so you can make it to the Outer Sea. In Rosetta the mayor asks you to look into it, so take the ship there and Lucadia connects with Cecilia.
Dragon Shrine
Lucadia takes the party from Sweet Candy to the Dragon Shrine. To begin, take the left path for stairs, and then go northeast for more stairs. Go left for some stairs, a Magic Carrot and a Lucky Card. Return to the previous section and take the south path with the stairs going down.
This is a block maze. The key is to start at the very north and push west, and then go down a few levels until you can push the 2nd level-far left block east, and then go south and west for the stairs down.
Go east and north for a save point, and then southeast for stairs down. Go north, taking the left path and pushing the block on the glyph. North more and take the right path, doing the same thing but with two blocks this time (north one first). Grab another Crest Graph, and go north and left for another block puzzle. Push one of the slightly towards the other, and then go to the other one and push it all the way over and on the glyph. Another Crest Graph. The fourth block puzzle actually yields a Shining Cape for Cecilia, something useful and not obsolete like Crest Graphs. At the very end is another block puzzle and Cecilia gets the Vase as a tool. Go all the way south to the staircase and west back to the Save Point.
Use the Vase on the fire to the north and hit the switch. Take the left path and push the blocks ever so slightly so that you can fit in where the fire is, pour the water on it and get the Duplicator. Take the right path now and do the same but go north. Heal yourself before you go all the way.
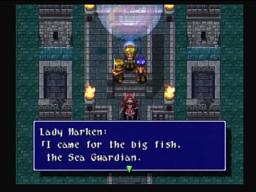
You’ll meet the Sea Dragon Lucadia. Before you know it, Lady Harken is here too. She uses Laser Silhouette on one character for 300-400 damage and an all-party attack that does the same damage. You’ve fought more potent bosses recently, put it that way. Use Blast Charge / Meteor Strike with Jack and Rocket Launcher (hopefully maxed out in ATP). Have Cecilia cast Arm Down a few times and that Rocket Launcher will be doing nearly 4000.
Lady Harken flees, unable to destroy the Ray Line. You get Lucadia, the Triton Rune. Very nice statistical increase in Sorcery and Vitality.
Outer Sea
You’re finally here. Careful though, the enemies are very difficult in these parts. There is a lot more for you to explore considering you haven’t seen anything around here yet.
Isle of Conflict
Sail straight to the south and land. Southwest here and you’ll find an Isolated Guild. Spend some time here dissolving the low-level spells that you don’t use too often and begin getting advanced magic. You probably have lots of Crest Graphs left over. Get about 20-25 of the new level spells and Cecilia will be a new woman. Most importantly your healing spells will be improved, as her Heal was pretty poor for the last few hours of gameplay.
Ancient Arena
West of the Isle of Conflict is the Ancient Arena. Go right for a Duplicator, and the Inn has a Full Revive and Power Apple. Leave and travel to the southwest near Baskar, and you’ll find a Duplicator.
Deserted Isle
East of Arctica (northeast part of the continent) and you’ll see a Deserted Isle. You’ll get Heavens Rune, Solus Emsu’s Rune.
Since you’re in the area, go to where the Photosphere was. You’ll see Rigdobrite, the Star Rune. Another good for for multiple-attributes.
Snow Ravine
North of the Deserted Isle and Arctica, you’ll see an island with a Snow Ravine. You get Aru Sulato’s rune, the Ice Rune.
Demon Lab
Cast Teleport to Milama and sail north to the Demon Lab. Blow the structures up on the first floor and continue north to the stairs going down. There is an elevator here that takes you down a level.
Go north to the wall and west, down the first set of stairs for a Bazooka ARM for Rudy. This hits all enemies but isn’t as good as the Rocket Launcher for one enemy. Back to the stairs and then take the next set of stairs for a Revive Fruit. Another elevator around here.
Take the right room when you get off the elevator to get two Potion Berries and a Mega Berry. The left room has a Potion Berry and Energy Saber. Take the center route for a save point and the elevator.
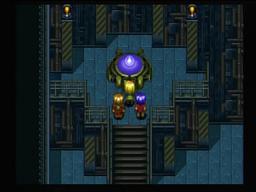
In the following area is a big door and four little doors (two on each side). You are to go in each, starting from the far left and work your way to the far right. Defeat the scientist and the other enemies, and turn on each CPU they were on. At the fourth one, choose next parameter until you get to Change Data. Do this, and then Display Data to find the password.
Take the front door now. Enter Demon Gate and go north. Harken is here with the Dark Teardrop. She likes Magnum Fang (600 damage on one), Asrael (300 damage on one) and Harken Tempest (500 damage on each). Have Rudy assault her with Rocket Launcher and Jack use his best Fast Draws. Cecilia should be casting Arm Down and Slow Down, and heal when necessary (really not that often). Since Harken is a pushover, you have time to use Trickster to steal a Secret Sign. Alhazad comes in after the battle to get Harken and the Dark Teardrop.
Go north and go west / east for a Bullet Clip on each side. Go to the north CPU now. Look at it and then cast Escape to get out of here.
Baskar Village
Teleport here and talk to the chief. He has something to say to you about Courage and Power, etc. You can also go to Court Seim to learn some more things.
Forgotten Ruins
From Court Seim, travel southwest (Get the Crest Graph) and get off on the beach to the west. Travel south and east to the Forgotten Ruins. You’ll see an Ocarina here to call the golem to wherever you are. You can also get a Bullet Clip here.
Wandering Isle
Go south of Court Seim for the Wandering Isle cave. Just continue north here until you reach a grapple. Travel west via grapple to a new area.
You’ll be in a new area now with tons of grapples. Explore this to find several items. In the northeast is a Crest Graph, north and west of this is a Magic Carrot, southwest of this for a Red Jacket, and in the very south is a Sioux Poncho. Continue along, take the west path, jump down to save, and then continue out of here.
Dead Sanctuary
Walk southwest of here first to an Isolated Guild to rest. Now use the Ocarina to call the golem. You can travel across the shallow water to the Dead Sanctuary.
Continue along the path and you’ll see a Gray Statue on the right. Push it up a little bit and go north. Push the next grey statue west all the way onto the green glyph. Now push the west statue west and then go south to get a Wise Slate. Back to the other room and bomb the central-north door. Use the Vase to get rid of the fire and push the statue on the green glyph.
Return to the other room and push the statue facing the right on the green glyph. This opens the right door. Get the Mystic Apple in front of you, and then the Mystic Apple in the southwest corner. Go north now.
Take the west path and go south for an Elder Scroll. This will be put on Cecilia immediately. Go to the southeast so that you can get the Crest Graph. Work your way west and northwest for the stairs. Next room, go south, west, and north for the stairs. The next room actually has a treasure, two Mystic Apples in the southeast.
Three paths to go here. Put out the fires, and take the middle path twice. Now take the left path and you’ll be in an open room. To continue here – push the red statue on the left glyph, the gold statue on the middle glyph, the blue statue on the right glyph, and bomb the green statue. North for the stairs.
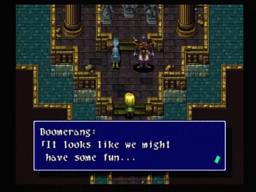
Follow this path until you get the Lunar Rod for Cecilia. Definitely save here and rest up. Use the Teardrop and up ahead we have Battle #2 with Boomerang and Luceid.
Starting off with Hi Shield would be good, or try to slow Boomerang down. Boomerang (Double Boomerang Dynamic) and Luceid (Large Moon) both have attacks that take off around 1200-1400. Fortunately they mostly use their attacks that take off 300-600. Luceid seems to use the most powerful attacks and likes Purple Electric (900 damage) a lot. Chances are you’ll be spending revive fruits on getting Cecilia back alive or whomever. Just keep Rudy in long enough to have his maxed out Rocket Launcher blow Luceid away, and then it’ll be all downhill for Boomerang after that. The first 5 turns or so are pretty damn hard to stay alive so good luck. Your only reason for optimism is their relatively low HP totals.
Get the Goddess Idol, Lion Idol, and Dragon Idol here. These are the fossilized essences of Courage, Love and Hope. Cecilia gets High Guardian Force here. Before you leave, go north with Jack to get Shadow Bind Fast Draw hint. Just save up for Sonic Vision to kill him.

Gate Generator
Go south and save, then case Escape to exit Dead Sanctuary. As you leave, Zeikfried will capture you. You are in the Gate Generator and he pits you against three Amplifiers. These guys are a pain with their Slow Down and Sleep tactics. They do give a ton of EXP though.
When you gain control, go left for a Bullet Clip and two Magic Carrots. Save and go east and south to exit. West in the next room to continue, and then stairs down in the northwest. You’ll get a Heal Berry here, but as you come back you’ll see Zed. Use the Grapple on him and he’ll run off.
Fortunately he opens the right door in the previous room so go up the stairs. You’ll be stopped by electricity but just use the Skates to go south until you reach a fourway. Go north to flip the lever Zed flipped, and then south to go through.
Flip the southeast lever, and then the lever just northwest of that. Then grapple west and the southwest corner has Secret Sign, Crest Graph and Bullet Clip. Return to the fourway and take the east path for stairs up. Take the first path you see for two Potion Berry’s and a Force Unit. The next area you’ll find Zed again but go south for a Nectar quick. You’ll see Zed use a lever so just use this same one. Continue until you get to a room with lots of blocked paths.
You need to be smart here, as the lever opens the door to the right of it. So, hit lever 1, 2, 3, 2, and 4 to make sure Zed doesn’t lock you in. Save and continue north to meet Diablo, the Crimson Hellstorm. Diablo has a Flame Shooter that does about 400-600 on each, physical attacks that do about 600-700, and Rolling Attack for 1200-1500. Diablo is weak against Freeze, so Snow Rune and Stoldark will do massive damage (like 8000-9000). Hi-Freeze does around 3000-4000 too. Not really a tough battle although the Rolling Attack can knock you out.
Rest up before you go further north. A tough boss battle looms and you may wish to re-charge with a Bullet Clip for your Rocket Launcher or Magic Carrots for the other two. Put any password in and the door opens. You’ll be warned if you are to go in so you’ll know where the boss is.
Ziekfried is definitely the toughest of the Quarter Knights. He likes to use Negative Rainbow for 800-1000 HP on everyone. Glumzamber takes off the most at around 1000-1200. Make sure to cast Remedy and Hi-Heal, and Hi-Shield to reduce damage beforehand. Slow Down will allow you to make sure you get a Heal off. Like usual, the Rocket Launcher will be what gets you through this fast. Have Remedy ready at all times and you’ll be okay.
Lots of scenes here but I won’t spoil it. You’ll end up in Adlehyde and the party is with Emma, Jane, McDullen and Bartholomew.
how to get lolitha golem?
help me plis