Zora’s Domain
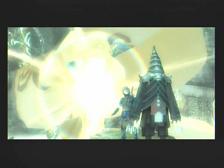
Right when you get out you’ll be ambushed by Zant. He steals your Fused Shadows and Midna curses him out for using magic. Link will attempt to attack him but it will be futile. Zant tries to get Midna to join him. Midna defies and is taken to the light world. You are still wolf link, stuck in the Twilit. You are told to go to the princess in the castle.
Run southwest near the Hyrule Castle Town. Enter there and go to Telma’s Bar. You’ll be kicked out but Telma’s Cat spots you and helps you. Push the crate towards the wall and climb up.
Hyrule Castle Town – Telma’s Bar Rafters
Walk across the tightropes to make your way around. Unfortunately you’ll see pots that you cannot knock down or the people there will see you. As you make your way to the third tightrope large pots will be barring your way so you’ll need to be fleet to make sure you don’t fall. Climb into the opening.
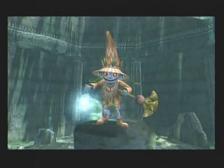
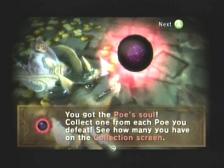
Put your senses on and kill the spirit next to you – you will get a Poe for this. Talk to the guy on the left he is Jovani. He wants you to find the other 19 poe souls and he will also open the Underground Waterway for you. You can enter this room easier by digging near the cats – for now jump in the treasure chest.
You’ll fall into the Waterway by some Sewer Rats. Kill them or just go to the north and L Target the handle – jump on it to pull it down and open a gate.
Link will slide down near two skulltulas to the north. Kill them and pick up a stick – light it on fire with a torch then burn the cobwebs. Run north and light the three torchs in this northern-most room. Now re-light a stick and climb to the upper east. You’ll see a cobweb to burn. Run the northeast room here and put those senses on. See the glowing spot? Dig and you’ll be in the Sewers.
Go to the north and east to get to a spiral room that Midna helped you through before. Since Midna is unable to do anything you’ll have to kill all the enemies and slowly cross through the ropes. As you get further north more enemies will pop up unfortunately and some of the Bokoblins are dangerously close to the ropes. Try not to attack them too often as it’ll result in you falling off the cliff. At the top, go north for the door.
On the rooftops in Hyrule Castle now. Go north and then east, up the brown boulder. You’ll be near a south / north pass where the wind will be pushing south very fast. If you go south when the bridge is flailing about you can make it over for a Purple Rupee. Going north though, you’ll see another bridge flailing about but this time you need to time it so that right when it starts doing that you jump north and get to a safe spot. Look to your left and jump on the blue house. Run north along the top and then west until you go in a window.
Go up the stairs counter clockwise and you’ll be in Zelda’s Room. Midna begs of her to restore Link from the Curse that troubles him. It is a new Evil Power that she cannot stop right now. Go to the Sacred Grove Deep in Faron to find a cure. The Master Sword is there. Zelda has special triforce powers. Midna tells Zelda to tell you about the Mirror of Twilit. Zelda restores Midna to help you again. Hyrule Castle is blocked by a Triforce type power when you leave. Talk to Midna and teleport to North Faron Woods.
North Faron Woods
You are here now. Go north as if you were to go back to the Forest Temple. A monkey will be ambushed by Deku Golems so destroy them (they’re easy) and the monkey will mention a secret forest path.
This new section is accessed by doing some L Target Midna jumps farther past the monkey on the left (if you’re heading north). Start doing 3 and you’ll have a quick break to position yourself closer to the edge, and then start up another 3 step midna jump.
Further along here and you’ll be by two wind bridges. They’ll rotate after a bit so wait until you can get on the second one and wait a bit until you can go east. Careful time the tightropes now so you don’t get sliced by the thing going perpendicular to you.
On the other side is another Howling Stone. You learn a new Howl here (it is the Prelude of Light song from Ocarina of Time). It may be a little hard to get at first, but basically you start at the top for 1, then you go to the bottom for 1.5 and stay there until 2.5. Then you take the pitch to the top at 2, the bottom at 2.5, the middle at 3 and the top at 3.5 and you’re done. This is the Prelude of Light and in doing this a Golden Wolf will appear to teach you an ability in the South area of Lanayru Province when you’re link. For now enter the nearby cave.
Another Howling Stone you’ll see. This is Zelda’s Lullaby in Ocarina of Time. Start in the middle at 1, then go to the top at 2 and the bottom at 2.5 and keep it there until 3.5. At 4 you want it in the middle and 5 you want it at the top pitch and 5.5 you want it on the bottom and you’re done.
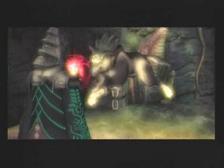
This summons the Skull Kid. You’ll want to chase after him now and ignore the Deku Golems that will chase you – they will re spawn and you’ll always be fighting four of them. Anyway as you get closer to him you’ll hear the Song of Saria being played. Jump attack him when you see him. From the start, you’re basically going to want to stick to the left and you’ll eventually run across him. After this he flees the other way through a cave with flowers on the left of it, and you’ll find him up a waterfall several screens back. Hit him and he retreats under a passageway. Jump down and follow him and eventually you’ll drop down in a large room with stone formations everywhere. You need to hit the Skull Kid three more times here and he gets more Deku Golems to guard him as you continue to attack him. Try to kill them all at the same time as he’ll try to summon more even before he gets out of them. By the way the only time you can attack the skull kid is when he is blowing that flute.
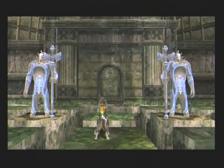
Run up the passage that opens. Get on the Triforce to your left and play that Zelda Tune (look up to see if you forgot). Now some square platforms will arise and two guardians talk to you about a Sacred Grove. To get in you need to get the two guardians on those platforms they started on. It takes a while to get used to the controls as the guardians move based on how they are facing not on which way you move. If you want to figure it out yourself that’s fine but I simplified how I did it
Left = L, Right = R, Up = U, Down = D.
Start with L, then D, R, R, U, L, U, U, L, D, D, R, U. They’ll be in place and the door behind them opens up. Go through and touch the Master Sword. It turns you back into Link and now you have a more powerful sword. You also get the Shadow Crystal which will allow Link to talk to Midna at any point to change him into a wolf. This opens up lots of things now that you can warp and change at will. Midna talks about wanting the Mirror of Twilight as he has in the past. For now, some sidequests.
Heart Pieces, Poes and other Things
Hyrule Field – North
Lets tie up some loose ends. Remember that howling sequence with the gold wolf? Warp to the Hyrule Castle Town. Go through here and exit at the south and you’ll be in Hyrule Field South. I got a message from Telma saying to go there but I didn’t do that yet. In Hyrule Field South go to the west end of it to see the golden wolf. This guy will tell you that the trick is very hard – do you still want to do it? Say yes and learn the Helm Splitter. This is a pretty nice look skill – use that Shield Attack and then follow it up by press A and then the Jumping A attack. Only three more techniques to learn.
Hyrule Field – West
Go to the west end of the area (right before the Lake Hylia area). See the ivy against the wall? There are flowers and the Female Butterfly up here. Use that Clawshot and catch the Female Butterfly bug.
Lake Hylia – Lanayru’s Spring
Warp here and transform back into human Link. Head east along the south wall to get to the spring of Lanayru. Go inside and take a right. At the end of the path use a Clawshot to get the ivy you see to the south. Climb up and run south to the door. Grab the rupee treasures by you and light the torches with your lantern. After this happens a Piece of Heart treasures appears
Lake Hylia
Warp back here. Turn into a human and go towards the wood bridge west on the minimap. Climb the stairs and go to your right – transform into a wolf and do a howl. At 1 start at the bottom, at 2 put it in the middle, 3 at the top, 4 at the bottom, 5.5 in the middle, 6 on the bottom and 6.5 at the top. Do the song like usual and then do it in front of the gold wolf – you’ll meet him later in the Gerudo Desert.
Lake Hylia Cave
Go south of this Howling Stone and you’ll see the Hylia Cave. Blow it open and enter.
It is very dark here and long. If you fall in you start at the beginning so don’t fall in. Have lots of Lantern Oil available here.
Run straight ahead and light the torch. The north boulder has a Yellow Rupee and some Keese, the west boulder has 5 more bombs and the east continues. At the end of this path is another torch to light and you can kill the Yellow Chus and use them for Lantern Oil if you’re low. Bomb to the west for a Red Rupee, and east to continue. You’ll run across some Fire Slugs immediately so shoot them down. Turn into Wolf Link as you’ll see a poe at the end of this area. Take the Poe’s Soul.
Now the east area you can bomb for ten arrows. Bombing to the north leads to a new area. Be slow here – you have a small area to walk across in many parts. Having the lantern out might be smart. Tektites are here as well. Shoot the Beamos statue that you come to and light the torch. If you bomb north you get a Red Rupee. If you bomb west you get a new path.
More Chus to deal with and you can replenish your lantern here. Light the torches here to reveal an Orange Rupee treasure. Bomb to the north and kill the Tektites. A Red Rupee is here. The west has a tunnel to a Dodongo. Kill it and bomb the east wall if you want to exit (but don’t do it) and north for two more Tektites and 5 bombs. The boulder on the west continues the path so get to the torches and light them and kill the beamos.
The west boulder is a Purple Rupee. The south is ten arrows and some Keese. The north wall continues. Kill the enemies like the slugs as you go. You’ll have to sway left and right to avoid pits. Light another torch at the end and then kill the poe you see. The north boulder leads to another purple rupee. The east boulder has ten bombs and two tektites and the south boulder continues onward.
Kill the Dodongos and bomb north for 50 Slingshot Seeds. Bomb east to continue. Light the torch at the end of this area and bomb east. Take out the keese on the other side and get the Orange Rupee chest. To the south you can bomb to continue and you’ll get to use your lantern to make sure you don’t fall (otherwise you probably will). Kill the Keese with arrows to ensure they don’t knock you in.
Another Poe in this room for Wolf Link to acquire. Light the torches here to get a Piece of Heart to appear and head out to the south to be out of here.
Outside Lake Hylia Cave
Go west at night and you’ll see another poe by the stone tower. Kill this one and warp to the Lake Hylia warp again, but this time go east and a little south. You’ll come to some platforms you need to jump through and you’ll see a poe far ahead. Get up to it and kill it.
Go to the east shore now and you’ll see a third poe outside of Lake Hylia. Kill this one as well with Jumping attacks. Return to the clown and get shot up. Go through the door and you’ll want to do the cuckoo thing with Falbi. You wanted to land on the second to the top one to get the piece of heart the first time you did this – now land the third highest and turn to wolf link to see another poe.
Okay you’ve met that bird by Fyer’s by now it’s time to go by the grass south of Fyer’s place and howl. Do the designed one (1 – up 2 – down 3 – up 4 – down). You’ll begin a race going upstream with a beast. The goal is to get as many points as you can and if you get 10,000 you get a prize, a Piece of Heart. This is easier than you think – just get Strawberries as they’ll double in points and eventually get you over 10,000 after about a dozen or so. Just make sure you don’t hit anything or you’ll lose it all! You can restart in the middle of the course or just restart after you fail / are done.
Upper Zora’s River
Since you’re up here now go to the south part of it and wait until nighttime – another Poe emerges. Kill it and then teleport to Zora’s Domain. Right the wave down and jump off the waterfall – a poe is on the east and west side. On the east side just walk south up the hill to see the poe (turn left at the top of the hill). Turn senses on, kill it. Go west now and you’ll have to do some Midna Jumps north to get to the Poe. Kill it when you get there.
Kakariko Village
Warp to Kakariko Village for some poe souls. You should have plenty already. Go to Barnes’ Shop with human Link and climb up to the top and out the passage. From here go to the east to see a Poe to kill. One last Poe to get in Kakariko and it’s just northeast of this one, up a few ramps. Kill it with wolf link and go to the graveyard.
Kakariko Graveyard
Go straight ahead to kill one Poe. Now look to the right, the first grave on the right can be pushed to reveal a Poe. Those two were tough huh.
Death Mountain
Another Poe that you need to take care of is here. Go up the path and when you reach the second goron that shoots you up, lean west. When you get up here (you can see the poe way before you get here) turn into Wolf Link and be careful not to fall off when you attack them.
Go north and stick to the west wall – don’t drop down. You’ll see an opening eventually and when you go in, a Heart Piece.
North Faron Woods
Warp here as you’re done with Death Mountain. Go east in the initial screen and then stick to the south wall and east. You’ll get to do some Midna Jumps that take you to the south. Now go east and north a little for a few more jumps. Up a ramp and face towards the middle for some more jumps and the poe.
Hyrule Field Kakariko Gorge
From the warp that you get out of, go straight south from the bridge until you see a boulder. Blow it up and enter.
Basically the point of you going to this cave is to go to the northeast parts of the cave. A Heart Piece is in the far northeast and just west of that is a Poe. You have to light two torches to reveal the Heart Piece.
Hyrule Field Faron Province
Teleport back to the Kakariko Gorge and go southwest from here to the Faron Province. See the lake to the west? Go to the north part of it to kill a poe with wolf link.
Lake Hylia
Enter Lake Hylia from Faron Province and go near the south of the bridge. See the blue boulders in the wall that don’t stick out too much? Well shoot them anyway to reveal Clawshot spots to use. Use the Claw Shot to get up there and you can already see where the poe is. Just Claw Shot there and have Wolf link kill it.
Hyrule Castle Town
Warp here and go south and west from when you enter into that little peninsula by itself. This leads to a Poe if you use your senses on the wolf. Kill it and the bokoblins around.
Hyrule Field North
Go to the far west to see a Lizalfos and a few trees and flowers. If you have your senses on you’ll see a huge area you can dig leading to a cavern. Two poes are down here for you to take but there are tons of Deku Babas to distract you. Exit after this.
Run north to this stage. Go east when you enter to the big bridge. There are two Lizalfos around here to kill and a poe on the center of the bridge.
Eldin Province Hyrule Field
Run to the Lizalfos / poe screen and you’ll be in Eldin Province. Go to the north side of the big bridge and look on the east wall – see the Clawshot spot? Use your abilities to claw up there and enter the cave at the end.
This cave is a little tricky. Have your Iron Boots not equipped but ready to be equipped. Run along and get a dash head start as you jump straight ahead – Equip those Iron Boots after a good part of the jump and hopefully you’ll make it onto a magnetic force. Remove the boots and you’re on a platform.
Run up it and kill the keese that are flaming and the bokoblins that get in your way. At the end is another sequence where you dash and jump and then equip your Iron Boots at the last minute to make the magnetic move. Another catwalk for you to maneuver past and then dash and jump and Iron Boot your way on. Release the Iron Boots and you’re in a new area. Kill the dodongo and get the Piece of Heart treasure. If you light the torches you’ll get an Orange Rupee (100 rupees). Go west to exit.
Hyrule Castle Town
Enter the town and go out the eastern gate. If it’s night time (like all other poes) you’ll see the poe on the bridge. Kill it and then go through the south area of Hyrule Castle Town.
Hyrule Field South
Another Poe to grab. It is on the west enter as you leave the stairs of Hyrule Castle Town to Hyrule Field South.
Hyrule Castle Town – Jovani’s House
Okay take an east passage in Hyrule Castle Town and you’ll see a house with a bunch of cats outside. Dig on the left side to get in. Okay great, now talk to Jovani. I have 26 Poes currently so that was over 20 and he gives you the Fourth Empty Bottle. Have the 4th Empty Bottle allows Link to have pretty much an endless supply of whatever he needs. It actually comes with Great Fairy’s Tears. He wants you to complete all 60 Poes. Jeez, this will take a while.
Back near the west end of Hyrule Castle Town is a multicolored tent. Enter this. Inside is a goofy guy who runs the STAR Game. The STAR game is where you are locked in a cage and you have to Clawshot around and collect the stars. Be as efficient as possible with each Clawshot attempt in order to finish under 30 seconds. When you do, you get the Big Quiver which puts your arrows at 60 which is double what it was.
Kakariko Village
Warp here and enter Malo Mart to see whats new. Inside is a Goron, one who is looking for funds to repair the east side bridge of Hyrule Castle Town. Give him as much as you got, preferably 600 and then go to the Hyrule Castle Town to sell bugs. After this you should be able to come up with the 1000 Rupees to repair the east Hyrule Bridge.
To get the shop to go to Hyrule Castle Town though you need 2000 Rupees.
Well, talk to the goron outside of Malo Mart. He has an idea but he wants his goron friend from the east Hyrule Castle Town bridge to come. Go over there to see him and he can’t move – return to Kakariko to the goron outside the Malo Mart. He gives you Hot Springwater that you need to bring to the East Hyrule Castle Bridge.
The only time I had success was running along the south and then west border, otherwise the Leevers would attack me and then destroy the barrel. Dodging the Bokoblin’s Arrows is easier than I thought it’d be – don’t stop for anyone just keep running west and then throw the barrel on the goron to awake him. He drops a Piece of Heart. Back at Malo Mart just give the guy 200 Rupees and they’ll be traveling to Hyrule Castle Town to set up shop.
You’ll get a letter from the postman about Malo Mart. Go to Hyrule Castle Town and to the center square, and then to the southeast of this area. Malo’s Mart is here and people are dancin’ inside. Talk to the guy dancing on the other side of the counter and he’ll show you a bunch of things to buy. The real noteworthy thing is the Magic Armor for 598 Rupees. You probably don’t have this but you’ll want this as soon as possible. For gaining rupees for this and the previous events, just sell bugs and do the Lake Hylia Cave and that should give you a significant amount.
Telma’s Bar
is where you need to go. You’ll hear about a western desert and of Auru an older guy. Go to the guys in the back and they’ll have a map and Auru’s spot will be marked red.
Lake Hylia
Warp here and go to the far west. You’ve already done the Howling Song here I imagine, assuming you followed this. Further west is the tower so climb it. Talk to Auru for a while about the Gerudo Prison and the Cursed Mirror. Auru asks you about Fyer (the clown guy who shoots you to the upper part of Lake Hylia) and then when you tell him you know him, Auru gives you Auru’s Memo. Go to Fyer and give him Aurus Memo to get booted west to Gerudo Land for free. Take the Oasis Flight
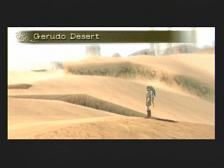
Gerudo Desert Province
As you get in, Midna gives you more information about the sorcerers and the Twilight Realm. Midna also talks about the Twili and about how he is a descendant of the tribe that was banished to the Twilit Realm. Zant basically screwed everything up as you can imagine. Zant has a great evil power. He concludes with saying we need the Mirror of Twilight.
Now when you get control run to the far southwest. If you go along the south wall you’ll likely see a Male Dayfly to the east of you. (northeast of the south wooden gate). Further west and take the northern trench and you’ll see a Female Dayfly. In the very southwest you’ll see a weird-shaped plant here and if you Clawshot it and then Clawshot the thing flying, you can get to the top plateau (just make sure you release at the optimum time). You’ll fight three Shadow Beasts and then a teleport will appear here, which is important. Further up the stairs and on the other side is a Poe for Wolf Link to kill. Examine the area a little closer. You’ll notice you can press Z to talk to Midna about the bridge sitting there. Well have him warp it to Eldin Province – Bridge of Eldin.
Back at the Gerudo Mesa go to where the bridge was. There is an opening here and it takes you to the Cave of Ordeals. This is a very difficult and long place that we’ll deal with later.
Go to the northwest area now. Some Bokoblin Archers spot you and they send boars after you. Kill the boar riders and then hop on one of the boars after it gets up. If you dash you can destroy towers and fences but they’re hard to control then. In this northwest area though you can find some rupee treasures (I found two 20 Rupees and a 50 rupee treasure) and the northwest passage after blowing up some fences with a boar dash.
Before you go through that north exit, let’s go east (at night) to get a poe. You’ll see it on the plateau there, and you need to Clawshot the tree south of it to get near it. Since your senses are on you surely see the place to dig then.
Gerudo Mesa Poe Cavern
A poe is next to you when you get here. Another one pops out shortly after. Take care of it and then bomb the stone boulders in your way. If you light all the torchs you get an Orange Rupee! You should be close to having enough for the Magic Armor at Malo Market in Hyrule Castle Town soon.
Go to the very southeast part of the map. A poe is here, and so is another cave after you dig. Inside are about 8 Skulltulas that you must kill. Use the wolf so that you can see. After they’re all gone, another Orange Rupee chest appears.
Time to enter the northwest part past the Bokoblin fort. You’ll climb up some stairs and to the east for some arrows and rupees. Back west and you’ll see a Gold Wolf but go past it to kill the Poe first. There are more rupees over here and Leevers. Talk to the Gold Wolf now to learn Mortal Draw. The Mortal Draw Technique allows Link to counter an enemy attack with A. However you cannot be L Targetting so you are up for risk – basically if you’re fast enough to pull it out it’ll be useful but if you can’t time it right you’re just going to get killed trying to get it to work.

Bokoblin Base
Keep going north and you’ll come to a bunch of archer bokoblins and regular bokoblins. Kill the ones that rush you and then try to take out that annoying archer by the gate and the flaming torch. East from here is a dead end but west leads deeper into the Bokoblin Fortress and another archer spots you.
Continue north and then east. In the northeast corner you’ll see a pit with a roasted Boar. Attack this boar several times and it’ll blow up. Get the Heart Piece (you may not be able to see it) in the pit after you destroy it. A Bokoblin Archer should be around here to drop a Small Key.
Back a bit and look for a gate facing south. This is locked but that’s what you have the small key for. Use it and enter to meet King Bulblin. This is a small enclosed area and he has a huge weapon. Don’t fear though, he’s easier than he looks. First off he’s tremendously slow so if you keep swinging you should be okay. Slow and not agile as you can get behind him with ease. Jump attacks work great as do the L Target + Shield + Helm Splitter. After several attacks he’ll go down and leave. He’ll light the area on fire so get on the boar and ram through the north gate. You’ll be in front of a new place now.
South first, back to the old screen. A Poe should be right in front of you, so kill it with the wolf. Back north to the area that the boar charged to.
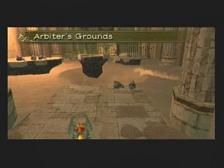
Arbiter’s Grounds Exterior
Run up the stairs and go left to kill another poe.
Dungeon #4 Arbiter’s Grounds
You can mess around on the quicksand but it’s soon obvious that you will be sinking if you choose to do this. You’re going to need to Clawshot to the northwest Platform and then start jumping northeast and then northwest until you get to an area where you can run northeast to a gate. This gate is closed so go easy and then kill the Mini Stalfos. After they’re gone use the Clawshot to drag that chain to you, and then press R to pull it to open the gate.
Run forth but you’ll be blocked by a key door. Go right to destroy some treasures and then get some Lantern Oil if you wish. The other way is some wood that can be destroyed and then roll to the treasure. Little Scarabs will rush towards so just spin attack them or regular attack to get them off your back. Go through that locked north door now.
This room is dark and there are a ton of Mini Stalfos. As you can see there is a ton of quicksand as well. You’ll want to use the wolf and use his Senses so that you can have night vision and actually see where you are going. At the north end are two torches that you need to light to advance north.
Poe Chamber
You are in the Poe Chamber and you’ll fight the first Poe right now. They are more difficult and require you to bite them when you attack them – and use Ending Blow to finish them. The other three will take off before you defeat the first one. Sniff the poe with the wolf to get the Poe Scent. Go to the northeast of the room and across the quicksand for the Piece of Heart treasure. On the northwest side is the Dungeon Map for Arbiter’s Grounds.
If you go east you’ll see a poe has gone under the floor. Go over there with the wolf’s senses on and dig. You’ll reveal a chain which you can pull, and then a stairway opens up. Go down here.
Kill the flying skull enemy, the Bubble. Push the pillar in the middle counter clockwise to open a path north. However you also get to meet the Gibdos enemy and Gibdos can freeze link. Kill it quickly and grab the Small Key it was guarding. Turn back and see the opening in the roof? Move up so that you can see the red Clawshot target and then use it to get up there.
There are Rats up here you need to kill. As you can see with Wolf Link’s Senses that the exit to the north is where a poe is. Kill the Bubbles in this new room and then put your Senses on. You may have already noticed a lantern moving but it’s true, the Poe is posing as one of the lanterns on. Remember when fighting these things that they must be glowing bright blue to be vulnerable to your attacks otherwise they are invisible. This basically means you have to attack them shortly after they perform an attack on you because that’s the only time they are susceptible to attacks. Your second poe has been captured.

Back in the previous room and then jump down the ledge. Push the middle pedestal clockwise to return it back to normal. Back west and then up the stairs, but take the east door near you.
Turn your senses on and go through the east door that the Poe Scent is coming from. Travel across the north islands and kill the Bubble on the plateau ahead. Watch out for Spikes that come out of the quicksand to bar your progress. Be human link and pull the caged box north and then push it east. Go up the stairs you opened up and then on the west ledge. Now get a running start and jump east off this ledge and you’ll be on a new area by a chain. Pull this chain far back, to the end of the caged box where you can’t pull it any longer. Now begin to run / roll south as fast as you can, climbing over the ledge and making your way past the chandelier that will fall back down. Go south up the stairs and kill the bubbles and you’ll be in a new room shortly. Keep your senses on.
Go further south to find the Compass in this room. Go to the middle of the room for another pedestal to push – again do it counter clockwise first. Take the east room and attack the wooden doorway to get through. Kill the Gibdos and get the Small Key and turn around and take the west room.
Use the key to get through and then you’ll have to run through this hallway, killing all the Mini Stalfos and the two Gibdos that bother you. Turn the senses on after you defeated the enemies and you’ll see the Third Poe’s Scent travels into the ground. Dig and pull the chain to open the door just south of you. Of course the poe comes out now and you can defeat it. Go north through the door afterwards. One more poe left!
In this north room go to the middle south part for a key. Lots of mice will jump on you but you can’t see them unless you have your senses on. Use spin attacks to clear the room. Get on the top part of the area and go counter clockwise towards the west exit. Use your key and enter.
You’re in the first poe room, but you’re on the top. Jump across the chandelier to the west exit to follow the Poe’s scent, the fourth and final poe.
Drop down in this room and push the caged box forward into a pit. As you push it look to the right to see an area it opened up revealing a red rupee. Return back to the caged box and jump on top of it – pull the chain back and go south past the chandelier behind you. Grab the Red Rupee chest again and then Clawshot to the east – you can drop down and go north to get back to where you were, with the chain and the chandelier. Pull the chain again but this time step in the dip on the bridge, and the chandelier will land around you but not on you, and you’ll be in the middle. Climb on the chandelier and jump off the west end and enter the nearby door.
Destroy your way through and then a Stalfos appears. Do a Jump attack or Helm Splitter to get this guy to crumple. However you need to do more than this as it’ll just come back to life – bomb it after you get it down and it’ll be destroyed. Destroy the pots and the wood blocking passages – you’ll see a bunch of bomb treasures and go through the south door.
Get Wolf Link to dash across the quicksand here and then light the far east torch and the one that is by itself in front of the others. This will open a door to the east. Any other combination will cause many Mini Stalfos to come your way so kill them and use the Gale Boomerang to get rid of the fire and try again.
In this room is the fourth poe against the wall. This poe battle is different because you’re going to have four different poes going at you and you’ll need your view far away (press C down) to make sure you can see which ghost is the one to attack. There is only one that glows bright blue, so you’re going to need to find that poe (in the short amount of time you have) and attack it. After a few attacks finish it like normal and you’ll have all four poes. Go north through the door. Clawshot onto the target east and go through the door to the first poe room.
Now that you have all four poes you can enter the north door. In this room take the east exit. Drop down and kill the Bubble. Push the pedestal clockwise twice so that the floor raises two levels. Take hte west passage for a Small key and some stuff to blow up. Go back to the center room and push the pedestal counterclockwise until you are at the very bottom floor. Key out of the south door.
This room has lots of quicksand and lots of spikes. You need to avoid the spikes, going to your right at first, then a little forward, then left. As you run across the quicksand you’ll attract Undead Rats that you cannot see so be sure to put your senses on and spin attack them off. Eventually you’ll weave your way back right (west end) and at the southwest end is a Gibdos. In the southeast corner is another chain for you to pull – this opens that middle – south door so that you can run throw with wolf link but have your senses on because you’ll surely pick up some Undead Rats along the way. Remember you have to go around to the west to avoid the spikes so be fast.
In this new area, get Wolf Link ready to run through this west passage. Scarabs will be nice and annoying along the way and you’ll have to avoid the spikes flying around. In the southwest corner of the room is our buddy Ooccoo who lets us return and leave dungeons. Go north of Ooccoo to exit.
This room is huge. First avoid the spikes in the room ahead of you (and the Scarabs) and continue north. In this second area two Stalfos will appear to trouble you. Take them out and bomb them, and then go to the east cove with all the pots. Another Stalfos is here and once this one is destroyed a door opens. Return to the previous part of the room with the two long spike things going around. Take the east path here and you can go through now. Use the Clawshot to get up here. There will be a ton of Scarabs here to bog you down so spin attack them off. Jump across the gap and enter the door.
You have to fight a miniboss here against the Undead Prisoner. To release the Undead Prisoner you need to attack the rope with the sword. Get the wolf out and use your Senses. Dodge the attacks via side jumps and then he’ll glow bright blue and you can jump attack him. Take a bunch of bites out of him and he’ll start flying around now.
But Hylian Link can actually see him so shoot him with an arrow and then he’ll fly around in circles and then try to do one big attack – again, side and back jumps are the key to getting out of the way and then he’s vulnerable to jump attacks to his head. You’ll have to repeat this (the Arrow / Dodge sword attack / then jump attack combo) a few times to kill him. Run north and jump across to get the Spinner. This is a pretty unique item. You can pull this out and ride it with Hylian Link and you can practice in this room along the tracks that run along the exterior of the wall. Take the south exit to leave.
In this room you need to ride your spinner along the wall to your right and then switch off to the other side as you see the track begin over there. Press A to jump off the track and get on the other side. You’ll be by a door now so go through.
You’ll have a lot more Spinner practice here. Start with the spinner on the right side and then jump to the left. You’ll want to be jumping left and right and when you see spikes flailing around in circles make sure you’re on the right set so you can go past then on the right. Jump to the left once more after this and you’ll spin into the middle of a room with a Stalfos and a spinning spike. Bomb Arrow or Bomb the Stalfos Knight and then climb up the tall east ramp for a Piece of Heart. Ride the Spinner west along the north wall and jump across so that you can make your way to the upper part. You’ll come to an area where you’ll be spinning in circles and you’ll want to travel on the upper part of this railway with the Spinner. This will finally take you to the north part of this room. In here you can go east for some Stalfos and a Yellow Rupee. Ride the Spinner up the ramp to the west. Get off and head to the middle passage and use the Spinner. You can see the floating spikes going back and forth so you’ll need to jump left and right to avoid them until you get to the door.
The chest you see is the Big Key for Arbiter’s Grounds. Ride the Spinner down and to the center thing – your Spinner will fit in there and you can then start tapping A fast to get the door to open.
Go to the new room you opened up. Ride the Spinner along the right wall until you go a full 360 degrees and are on the east wall (it’s a little more than 360). You’ll be close to the center plateau – you can jump here if you get a dashing head start. When you are on, start using that Spinner and the torchs will light and you will bring a ramp further up so you can take the Spinner up it to the top.
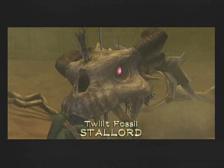
Boss of Gerudo Arbiter’s Grounds – Twilit Fossil Stallord
Enter the boss door and ahead you’ll see a giant skeleton. Run down to it and Zant will appear. He gives this undead skeleton “life” and it’ll thrust itself out of the sand. You’ll now begin a battle in which you’ll have to use your Spinner basically the entire time. You need to ride along the exterior around Stallord and jump at him with your Spinner as you get close to his spine. Attacking him from the back is best but beware of spikes chasing you around (the more times you’ve hit Stallord the more spikes will be after you) anda also of Fossil Stallord’s skeletal minions that appear near the spine to protect it. They are basically bumps that send you the other way but if you use the momentum properly you can bounce off another one right back into Stallord. After three hits the sand will be drained.
Get in the Spin indent and start Spinning – a tower appears. Twilit Fossil Stallord isn’t finished and you have to fight it for real this time. This part can be pretty annoying. You have to ride the Spinner along the walls until you see Stallord. Then you have to dodge his Fire Breath by jumping from one side to the other. When you get close enough to hit it do so quickly – it’ll shoot Fire Breath at you and knock you down forcing you to start all over. After you hit him with your Spinner you can go at him with your sword – I got him 8 times with the jump attack the first time so he definitely stays down for a while. Spikes will then start coming at you on the right rails and then when you get him again they’ll start coming on the right rails and left rails. This really isn’t too hard though – it’s just another thing that forces you to jump. Just repeat these Jump attacks and you should have no trouble of this guy once you get the hang of the jumping from side to side and timing of his fire balls.
Once defeated, Twilit Fossil Stallord leaves behind his Heart Piece and you can continue on.
Mirror Chamber Arbiter’s Grounds
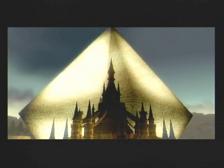
Go left and up the stairs, until you can go left and take another quick left. Follow this new path until you get to teh Mirror Chamber Grounds. As you are up here, a battle with the shadow beasts occur. Again, the hardest part here is getting them all killed at once – but with Wolf Link you should be able to get this done easily if you separate it into groups of 2 and 3. There is your Mirror Chamber teleport. Use the Spinner to get on top of the statue and then start spinning – you’re excavating the Mirror of Twilight.
You will hear from the sages who guard the Mirror of Twilight. They then tell you of one who is harnessing power – Ganondorf. He’s an evil guy. They tale more of his personal tale and of how he got sent to the Twilight after killing a sage.
You are to get the Mirror Fragments. They can be found in a Snowy Mountain Heights, Ancient Grove, and even the Heavens. You already have one from Arbiter’s Grounds here.
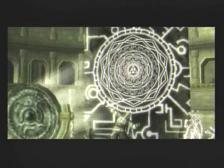
I was wondering if you have the .jpg files for the pictures you posted. The one of the Mirror Chamber specifically. I have been searching for a decent screen capture and that image is by far the best, save for the small size. I was hoping if you still did have the file, that the original size resolution is much larger and you might be so kind as to send it to me.
Hey Adam… Sorry to say, a few years back I made all of these pictures between 40-50% of what they used to be (for bandwidth reasons since this was a popular guide a while back). Must have wrote over the old photos too as I don’t have them on back-up.