Final Fantasy VI Party Splits

Sabin on his own
You don’t have to choose Sabin first but I do, generally because his is longer and more interesting (in a new area with new characters no less). Go to the house you see right away and you’ll see Shadow and a merchant. You’ve met Shadow before (not with Sabin consequently). He’ll join you but will mention that he’ll leave at any time. You are to head through Doma to get back to Narshe.
The merchant has some nice things, especially at the bottom of the list (for Shadow). Inside the house is a crazy old man who speaks of a son he banished to the Veldt. More on this later, but you can sleep in his bed if you want! For free even.
You can walk a great deal west if you’d like, but it’ll still take you to a dead end. Instead, go east a little and then south. You’ll be at an Imperial Base eventually where you’ll have to keep a low profile.
Imperial Base
Turns out the imperial army is storming Doma. The Doma Sentries won’t be able to keep them out, but a new character steps forth. Cyan Garamonde is a longtime veteran of Doma and you get control of him outside. Swdtech is his ability, which is useful to an extent but very slow (Cyan is slow in general). You can fight the brown imperial soldiers but you don’t get EXP. Instead, just go south and fight the Commander. He should be easy to fell, and you’ll get a Black Belt relic for your efforts.
Back at the base, your party’s order will be messed up so change it back to normal. Go to the east hut and you’ll have some options. You can “Hit It”, but you’ll have to hide from an imperial soldier. Or you can kick it, resulting in the dogs outside coming in and fighting you (3 Doberman’s). I kick it for fun, and after the battle you get a Star Pendant.
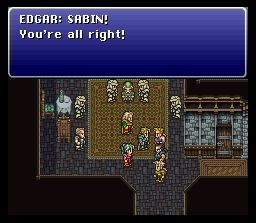
Further south is a scene with General Leo being summoned from the Imperial Station to Emperor Gestahl’s side. Kefka is now in charge and he poisons Doma. You’ll gain control of Cyan but you really can’t search through Doma that well because of all the dead bodies. Go to the south area and search a pot for a Remedy, and then go see your family after you see the king. They’re all dead, and Cyan charges the Imperial Base.
You are in charge of Sabin and Shadow now, and you’ll have to aid Cyan in a few battles. You can get another treasure (Green Beret) but you have to fight a flying mechanical monster, not too tough but if you forget to do this you can’t go back in and do it later (not a big deal though).
Phantom Forest
The Phantom Forest is next. Walk around in here, it’s kind of easy to get lost but it’s also pretty small so you should be able to find the Recovery Spring and Phantom Train easily. After a few battles, Shadow decided to leave the party. Sometimes he leaves, sometimes he leaves later, it’s really all dependent on who’s scenario you choose first (also how many battles you fight possibly).
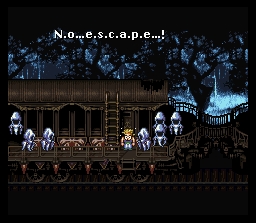
As you make your way to the Phantom Train, Sabin’s curiousity will end up with your party locked on the phantom train. You can go east to save and talk to the train manager, also there are ghosts around that you can talk to. Some fight you, some sell things, some will want to join you. If you lost Shadow, you can get up to two ghosts at one time.
Work your way west and eventually you’ll get to a train section where ghosts will block your exit. Fight your way out, but there will be seemingly an endless amount going after you! Sabin goes on top of the train section and jumps to the west a few times and then falls down. At least you escaped the ghosts. Enter the section to your left and hit the switch, detaching the cars to your right. Back inside, hit it again, save, and hurry west. In the next section you’ll be in a diner, where you can sit down and be fed (restoring your status / hp). Be sure to walk around and enter the back end of this section to get a pair of Earrings.
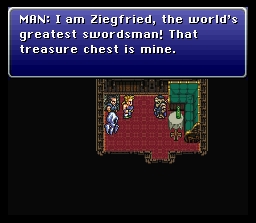
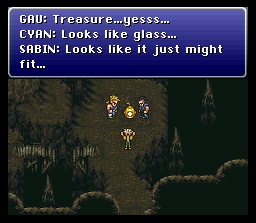
Now the sections west are a little different. The first room in the next section has a treasure, but Ziegfried will come out and battle you for it! He’s very easy, and you get a Green Cherry for getting him to run away, but he does manage to get that treasure.
West a bit more and you’ll be in a room with four treasures. The west-most one is a Hyper Wrist but you have to fight a dangerous Specter to get it. Then, it’s a Fenix Down, Sniper Sight and another Fenix Down. West a little and any ghosts in your party will leave you – the next room is a Save Point and then the commander’s room. Save, and when you’re in the commander’s room, hit the first and third switch and then go outside and left to hit the long switch at the end. The train will talk to you and you’ll be in a battle against it!
The Phantom Train has some powerful attacks, like Acid Rain and another light-based attack each taking off roughly 100 each. Use your best moves (or you can use a Fenix Down to kill him immediately like any other undead monster). You won’t get much for defeating him but you can go on past the Phantom Forest now, after Cyan sees a scene.
Baren Falls / Veldt
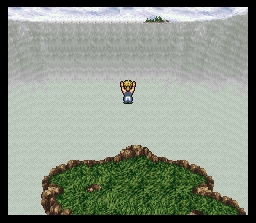
After a short walk you’ll reach Baren Falls. This is another common place for Shadow to part. Choose to jump and you’ll fight a series of Piranha’s and then a boss paranha (Rizopas) at the end. He’s not that hard but if he gets El Nino off (200 – 230 hp damage each) then watch out! After the battle your party will be tired and will wash up on shore. Gau will run up to and you’ll get his introduction and then he’ll run off. Head east to Mobliz for now.
You’ll notice you’re fighting battles against monsters you’ve fought before. After the battles Gau comes around sometimes, but you can’t do anything about him until you get to Mobliz, and since you can’t get experience points on the Veldt you might as well run. When you get to Mobliz, just buy some Dried Meat and go back out there until you meet Gau after another battle. Use the Dried Meat on him and he’ll join (and you’ll get a brief explanation on Gau’s ability).
Return to Mobliz and buy some stuff. Gau can’t have weapons but there is a bunch of armor that you can buy for everyone (including some of the characters not currently in your party). The relic shop has White Capes for sale (you can also rest for free in the back!) There is a letter mailing sidequest you can do but I won’t go through it as it doesn’t really net you anything. When you have bought everything, go back out on the Veldt.
You’ll notice Gau already has some monster abilities but most of these default ones aren’t that useful. I tend to use Hornet or Brawler until I get something better. So starting off with Gau I would fight around the Veldt for a decent amount of time and get him maybe ten new monster abilities. Or more specifically, look for the Stray Cat, as Stray Cat has the Catscratch ability, an insane physical attack that Gau can use to be a powerhouse until the end of the game! Other good monster abilities at the moment include Hazer (Bolt 2), Templar (Fire 2), Overmind (Elf Fire), and anything else that seems that it would fit the particular situation. Again, Stray Cat is probably the best standard one to choose for him although Overmind is quite powerful also.
Crescent Mountain / Nikeah
When you are ready and feel that Gau is properly built up, leave via the south cave (Crescent Mountain). Gau was saying he had a treasure here, so work your way north, east and then south to find an underwater mask (evidently there is three, or maybe they all wear the same one?) Go further south and you’ll jump in. During this underwater stage you fight battles against some pretty decent water-based monsters, most notably Anguiform which uses Aqua Rake (200 hp each). Anyway, when you get a choice to choose your path, choose right both times to visit two caves (X-Potion in one and Green Beret in the other).
Your party will end up washed up at Nikeah. Don’t talk to the port guy yet, go north instead and buy some stuff. There is a Fairy Ring at the Relic Shop but nothing too new other than that. Remember, you can buy some Gold defensive wear that can help your other characters later if you have the cash to spare. When you are ready, talk to that port guy and it’ll transfer to Locke’s quest.
South Figaro
Locke meanwhile was sent to South Figaro to see what the empire is doing more or less. I tend to give Locke the Genji Glove with the Iron Helmet and Armor and he’s usually good to go. Head to the item shop above you and talk to the merchant – steal his clothing and go to the house south of this and enter, talking to the little kid. He’ll let you through, and go directly north up the stairs and to the far northwest to talk to the green guard. Steal his suit from him and go back to where the weapons and armor shop is, and go west of that. The guard will leave his post thinking you’re going to take over.
Now go to the cafe and go downstairs and talk to the merchant with the cider. Steal his clothes and cider and return back to that little kid in the house by the item shop. He’ll let you through and you can give the cider to the old guy upstairs. He’ll mention a secret entrance but he won’t tell you the password to tell the little boy downstairs.
Go to the boy and choose “Courage” and you’ll make it through. This will take you to the rich house by the weapon / armor store. You may have already used this path, and also the following secret path. Go upstairs and enter the first room and go by the beds / bookshelf and you’ll hear wind. Head west and you’ll be going downstairs, and head straight south at the fork to go down to the second basement, another secret room. There is a very valuable RunningShoes (perma-Haste) and another Hyper Wrist. Both of these are great relics (and again you may have already got them the first time here).
Back east and you’ll see Celes getting beat up by the guards. One of them leaves and the other is sleeping, so go in there and unchain her. She’ll suggest taking the Clock Key from the soldier so do so. Check the next room to save and continue on. The next room will have four treasures, 500 GP, 1000 GP, 1500 GP and empty. The clock in the northeast can be winded with the key, opening up a new room.
This area is huge, with monsters roaming about and tons of secret passages. Get the first treasure you see, an Iron Armor, and then you’ll see a staircase south and a little east of that. You can get here by walking through the wall just east of it, and downstairs you can get an X-Potion, Ether, and a Ribbon just south of the X-Potion (can’t see it though). The Ribbon protects against all status ailments – one of the best Relics in the game.
Back upstairs go to the northeast for a Heavy Shield and a Regal Cutlass. Celes probably didn’t have a weapon until then (unless you had a spare in the inventory). In the very southwest is another pair of Earrings, very powerful if you combine the two and equip on Celes for example.
That should about do it, and you can go to the southeast corner for a staircase leading outside, so you can escape South Figaro.
Locke / Celes Return to Narshe
You can go to Mt. Kolts and see that the empire took possession. You can also go to the house north of South Figaro to rest. To advance, go to the South Figaro cave.
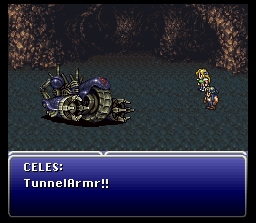
If you remember back to when you initially went here, I said to leave the first treasure (or the last treasure when coming the back way) for later. Now is when you should get it, as it is a Thunder Rod. This is a vital item for the upcoming battle. As you ready to leave the cave, you’ll hear plenty of weird noises. Rest at the recovery spring and hopefully you are ready for a battle.
TunnelArmr can be a tough fight. If you know to use the Runic option every time though, it can’t hurt you with it’s big spells. Having a Genji Glove on Locke will make this go faster, and using the Thunder Rod will make this guy dead very soon. But make sure Celes is not using Runic or she’ll absorb it and you’ll waste the Thunder Rod. You can steal an Air Lancet from TunnelArmr although it is hard. Locke’s scenario is now done.
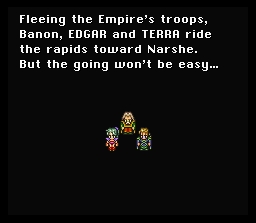
Raft to Narshe
Edgar, Banon and Terra are still to get back to Narshe after that Ultros fight. You might have to fight a battle or two, but soon enough you’ll be just east of Narshe. Head north when you get in, but you won’t be greeted nicely. You’ll have to use the path that Locke showed Terra eons ago.
There is nothing really tricky about going this way, although you will have to memorize a path and follow it exactly (or risky fighting a tough monster). You’ll make your way to where Terra fell down and needed the moogles help – and just north of this area is where the moogles reside! You can get a Rune Edge here and exit out the south end. Soon you will make your way to the man’s house who found Terra initially (Arvis is his name).
Arvis will fill you in on what’s going on and the scenario will end.
Battle For the Esper
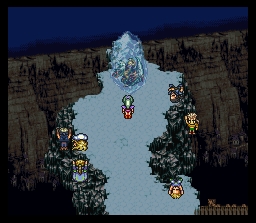
Assuming you’ve completed all three scenario’s, they’ll all make their appearance as your party talks to the village elder of Narshe. You’ll find out that the emperor has sent Kefka and his men to Narshe to get the esper and everyone agrees to guard it. It has been moved up on the mountain top and your party will walk there.
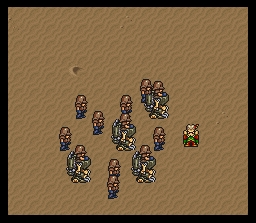
This is one of the most fun parts of the game. It is basically an expanded version of the moogle / Locke battle early on. Before it starts you’ll get a chance to go through each character to make sure they are properly rested / equipped.
You must split your party up into three groups. You can do this 3-2-2 or 3-3-1. I’d rather have two great groups then 1 great group and two mediocre ones, so I choose 3-3-1, although this definitely isn’t the conservative approach. Put the group with 1 (I put Cyan by himself, I hate his slow ass) in front of Banon, as you lose if an enemy gets there. Other than that, I’ve got Gau/Locke/Celes and Edgar/Sabin/Terra, two groups with two powerhouse and a magician each. Have them each take a side of the battlefield.
Hopefully you’re stocked on Potions / Ethers and that sort of thing. There really are a lot of enemies to fight. The best advice I can give is to fight as efficiently as possible at first. The enemies aren’t hard and characters like Edgar and Sabin can really dominate with their multi-enemy attacks. Locke with a Genji Glove is pretty formidable and Gau using level 2 magic spells can be very useful (as is Stray Cat as always). The M-Teks towards the end of the line are tougher and can wear on you as physical attacks don’t do much and they put up a magical wall.
When you get to the end you’ll see Kefka standing around and another officer running back and forth. Go up to this guy, he is a Rider. He’s tougher than the monsters you’ve been fighting but you should be able to put him down easy. Kefka is next, and it’s not really a tough battle. He has some potent moves, but if you can get Gau to do two Catscratches (2500 each) he’ll be dead. You can Steal an Elixir and win a Peace Ring from him.
Terra and Espers
Afterwards, the party will check on the esper. Terra will sense a flicker and Locke will be pushed back, and then the entire party will be pushed back. Terra than turns into an Esper when she gets close enough to Tritoch, and then she flies away.
At Mobliz, if you do the little mailing sidequest, you get a priceless relic called the Tintinabar. The only way to get it is at the Colosseum, but you have to give the Megalixir. The Tintinabar, when equipped, cures the character with every step!
Oh woops, silly me, I meant the the only OTHER way to get it is at the Colosseum. Sorry for the confusion!
Hey bro, you forget Emperor Gestahl gives you the Tintinabar for talking to all of his soldiers during the meeting.
Thanks though, I never do that little mailing sidequest.