Final Fantasy 10 X Besaid Tidus
Zanarkand
Tidus is the star blitzballer around here. Watch the opening and then you’ll have to sign some blitz balls. Great, just continue running along and enjoy the graphics. Eventually you’ll run across Auron who will join you, and then you’ll see Sin. Sin will spit out several Sinscale and then Auron will give you a sword from Jecht, Tidus’ Father. These Sinscale are easy to cut through.
You’ll get to a battle against a boss Sin creature. Your Overdrive will be up meanwhile. An Over Drive is a Limit Break of sorts, and with Auron it is Bushido – Dragon Fang. Type in that combo as fast as possible for maximum effect. Tidus meanwhile should continue to attack the Sinspawn Ammes. It can use Demi and that’ll generally bring Tidus up to his Overdrive which is Swordplay – Spiral Cut. You have to hit it while the trigger is in the middle, as fast as possible of course. After the battle continue on and you’ll see a Traveler’s Save Sphere. Use it.
Continue to the next screen for another fight. After a bit of killing Auron will bring up you destroying the Tanker. Begin to do this and you’ll get a nice looking full motion video. Now, you are to swim through the air down to Jecht. More scenes and you’ll be in a different area by yourself.
Ruins
Go to the upper left portion of the screen with Tidus and get out via the stairs to find your first Al Bhed Primer. This is another language in Final Fantasy X, that being the Al Bhed Language. Your characters aren’t familiar with it so you need to grab these books along the way to unlock more and more letters. This is an Al Bhed Compilation Sphere so if you have other quests with more books you can accumuluate them here. Further past this are two Potions. Take the north exit and save.
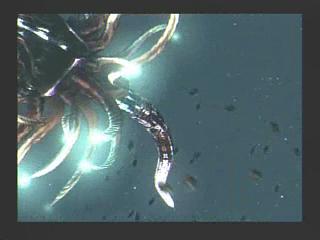
Now you are in a new area, where you should take the left fork for a dead end and a Hi-Potion and then to the other route. This time though Tidus falls through and then you should swim toward the light north of you. Along the way you fight three Sahagin but they’re easy. After a few are dead you’ll get in a fight with Geosgaeno but this is one you clearly can not win. A couple of swings will take place and then Tidus flees.
Okay, go to the next area and you’ll be a at a campfire. It’s cold, so head southwest and save and go in the nearby door. Grab the Flint and then go back to the center and then to the north room. An Ether is on the south part of this room and just north of here is a Withered Bouquet which you will also need for the fire. Continue along this path though into the next area for a Hi Potion and then return back to start a massive fire. Tidus will be warm but hungry, and begins to dream.
Tidus wakes up and the fire is out and the Klikk monster has ambushed him. Just attack him and after a few turns an unknown female shows up and joins you in battle. Use a Grenade on Klikk and then begin to Steal Grenades from it. You can do it as often as you’d like. More scenes and Tidus is on a ship.
Salvage Ship
Save your game and then talk to the Al Bhed Girl that knocked you out. She’ll tell you of the Sphere Grid which is more or less how you gain ability in Final Fantasy Ten. As you gain more strength spheres, ability spheres and so on you’ll be able to move around the sphere. You start off in your general area (black mages start by black magic, white mages start by white magic, and tidus also has his own area of the sphere) and can move into other areas and eventually get everything. For now though just move Tidus around so that he can get Cheer and then that should be about it.
Talk to the guard near the save point for three Potions. Grab the Al Bhed Primer near the save point and then talk to the mysterious Al Bhed Girl to learn about a treasure underneath. You can return to the deck if you wish but just Dive and then swim north towards the red marker. Examine the machine and Tidus will begin banging on it and a door will open. Go to the far right of this area and float up to examine the generator.
As you leave a battle against Tros ensues. This thing will move around to where you can’t attack, in which case you should use Stand By to recover some HP. It’ll use Nautilus Charge to take off about 150 to both but that’s about the toughest thing it has. The next time it moves away you can choose to use a Pincer Attack instead of waiting for Tros to attack you. Just continue to attack and use bombs. After go to the red marker and then there will be some scenes. Swim towards the mysterious al bhed girl and the red marker and soon enough you’ll be back on the ship getting fed.
The girl reveals herself as Rikku. Then the two talk about their past. Evidently Zanarkand was destroyed 1000 years ago and Rikku thinks Tidus is lying because he was near Sin’s Toxin. After this talk Sin attacks and Tidus is separated from Rikku and the Al Bhed.

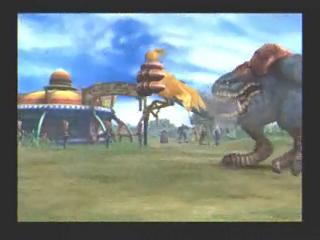
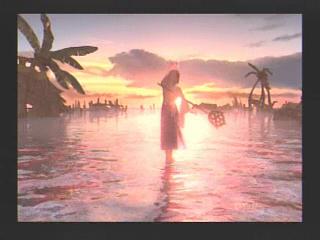
Besaid
Tidus ends up on the beautiful beach of Besaid and a blitzball is thrown his way. Swim to the right for a Moon Crest chest and then to the left for two Antidotes. Talk to Wakka a few times and you’ll get more dialog that is about what Rikku said. Save and follow him.
Wakka pushes Tidus off the cliff and then you are to swim towards the red arrow. As you begin to head north you’ll see Antidote x 2. Continue along for some more Wakka Tidus dialog and you’ll get to land. Walk down the hill towards the red marker and you’ll meet some Crusader’s and later learn the Prayer of Yevon.
In Besaid Village grab the Phoenix Down near you. A little north and west for a secret path with 400 Gil, Potion x 2 and a Hi-Potion. Enter the house nearby and talk to the Crusaders. Go to the other side and talk to Wakka in his hut and he’ll suggest going to the north part of time and present yourself to the summoner. Go here and talk to everyone and then return to Wakka’s hut to rest.
Tidus will wake up to an empty room. Back to the temple and Wakka will tell of the summoner not returning yet. Of course Tidus runs in and you’re in your first Cloister of Trials. These are all over the land of Spira and there are Aeon’s and great treasures within each.
Besaid Cloister of Trials
Touch the glyph in front of Tidus and then the one to the right of him. Go down the stairs and grab the Glyph Sphere. Down some more stairs and put it in the wall to open it. Grab it after the door opens and follow the path until you get to another whole in the wall. Put the glyph in it and the door opens, revealing a Destruction Sphere. Skip past this and instead search the white glyph wall a little farther down. This opens up a path to Besaid Sphere which you should take. Put it in the pedestal nearby and that’ll open up a room.
First go back to the Destruction Sphere and take it. Put it straight ahead of you, where you found the Besaid Sphere, and then go to the end of the hall to grab the Rod of Wisdom that opened up. Go back to the pedestal where you put the Besaid Sphere and then push it straight ahead.
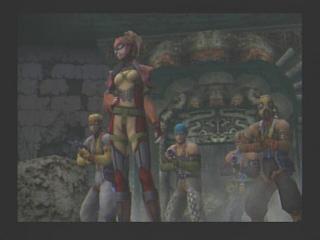
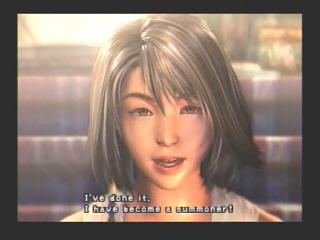
You’ll meet Lulu Kimahri and Yuna here. More scenes and you can go out the temple and to the center of town to see Yuna summon Valefor. Talk to Wakka and then Yuna and then Wakka again to rest. Tidus will be dreaming, so when you get the chance in the dream walk to Yuna for more scenes.
Besaid
As you wake up search nearby for the Al Bhed Primer Volume II. Leave and your party will leave the village. You’ll fight some easy tutorial type battles as you leave to get accustomed to flying creatures and magic-weak enemies. Pray at the statue and then save, leaving via the exit with the red marker.
A battle with Kimahri Ronso will occur in the next screen. Just attack or use Overdrive, you may need to heal. Continue along and you’ll be in a battle where Yuna will bring in Valefor. Just use Sonic Wings and it should be an easy victory. Next battle will be with Wakka using Dark Attack. Go through these tutorials fast and head towards the red marker.
S.S. Liki
You’ll get to the SS Liki soon enough. Talk to everyone to get their parting gifts, the villagers I mean. You’ll get a Seeker’s Ring, 400 Gil, three Phoenix Downs, an Ether and a Remedy. As you board you’ll travel from Besaid to the Kilika Port.
Go searching around the boat. Start off in the back with the stairs leading down (not the command room or the stairs leading up). You’ll meet O’aka XXIII. Oaka 23rd will ask to loan money so give him a few hundred gil if you can spare it, it’ll mean better deals for you in the future.
Go to the power room to see chocobo’s acting as the power, and you can get the Al Bhed Primer III here. Grab the Remedy in the room near Oaka and the save point and then kick the briefcase for as many potions as youd like.
Back outside talk to Wakka, the group around Yuna, Wakka again and then Yuna. You get in depth with Yuna about your dad’s Jecht and Lord Braska. After a bit you’ll be attacked by Sin. Notice that you can only attack it physically with Wakka and that Lulu and Yuna are the only others to be able to attack it (with magic and summon respectively). Valefor works especially nice with Sonic Wings. You’ll want to wipe out two of those Sinscales before you take on Sin itself. Shouldn’t be too hard once you get over the long distance issue, just keep healing and make sure Wakka and Tidus are healed well before the battle ends.
Tidus falls in and Wakka goes after him. A boss battle ensues with three more Sinscale’s that you shouldn’t kill and a Sinspawn Echuilles. Cheer by Tidus should be used and Blind the Echuilles with Wakka’s Dark Attack.
Kilika
You’ll be in the destroyed village of Kilika. Save and then follow the path, going left to see the sending.
The next morning, go west and north into the other house for Potion x 3. Outside and west of this is a little girl stuck. Face her and press the action button and her house will begin to fall so Tidus rushes and saves her. Return to the bar for an Ether for this service. The Al Bhed Primer IV is here as well. You can talk to the lady south and then west of the bar, and she’ll sell weapons and armor. Could be useful for you. Go east when you want to meet with Wakka and leave.
Go west and then north, a previously blocked path by a Kilika worksman. In the forest you’ll be introduced to Lancet so Kimahri can absorb the Seed Cannon Ability. Go west and then north when you can for a Scout and further north to talk to some crusaders. One gives out a Remedy. Return to the Save Point and go west for two Mana Spheres and then save.
North and you’ll meet some crusader’s who try to persuade you to skip the boss Lord Ochu here. Ignore their advice because you saved and you’re up for the challenge. Lord Ochu is weak against Fire so use this of course and Valefor with Sonic Wings and it’s overdrive can be very useful. When Lord Ochu is sleeping and you wake it, it will cast Earthquake. You’ll likely want Valefor out there for that so that it misses instead of kills you. A ton of AP and the Beladonna Wand are your rewards. One of the crusaders gives you an Elixir for your troubles. Go west and north of Lord Ochu for a Luck Sphere. You can fight up some more around here if you’d like but head east of where lord ochu was and you’ll find a path to the kilika temple. Save and head up the stairs.
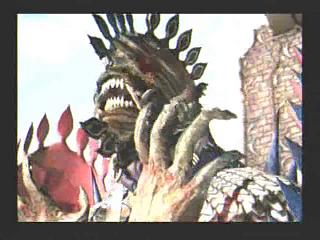
Hopefully you saved cause a big battle looms. You’ll want to take out the Geneaux’s Tentacles first and then that’ll open up the battle for Lulu and her fire magic on Sinspawn Geneaux. It can use Sigh, a dangerous attack -all move. After a bit of damage Sinspawn Geneaux comes out of it’s shell. Valefor of course is a quality option should you choose to use him.
Follow your way in the shrine and you’ll meet the Luca Goers first. What dickheads. Inside the temple Save. Pray with Wakka and you’ll see a Summoner named Dona. After this go up the stairs and Tidus will be forced to stay back, that is until Dona and Barthello force you to go on the elevator.
Kilika Cloister of Trials
After the elevator enter the door straight ahead and take the flaming Kilika Sphere on your left. Put it in the door and take it out and that opens a path. Bring that sphere straight forward and put it in the wall and you’ll see a glyph. Take the Kilika Sphere back out and put it in the east wall for now. Touch the glyph on the north wall and the door will open. You can now put the Glyph Sphere from the Pedestal on the left wall. Step on the flickering floor switch in the northeast part of the fiery room ahead and that’ll cause the pedestal to teleport over here. Take the Kilika Sphere on the right wall of the fire room and place it on the pedestal. Return to the Glyph Sphere and stick it where the Kilika Sphere just was and you’ll stop the fire and open up a new path. First though push that pedestal with the second Kilika Sphere onto the flickering floor switch to lower it. Go down and grab the Kilika Sphere from the wall and put it in the door to see it burn. Back to the Destruction Sphere where you should put it in the wall that just had the Kilika Sphere. You’ll open up the Red Armlet for Kimahri with Fire / Ice / Lightning Ward. Take the Kilika Sphere out of the door now and head in.
Tidus will have made it to where the other guardians are at and he gets bitched at for coming. Just talk to Lulu and Wakka and eventually Yuna will come out with a new Aeon, Ifrit. You probably could have guessed Ifrit from all the fire based Kilika Spheres.
Kilika and S.S. Wino
Leave towards the forest and use Ifrit along the way. When you get to the docks head to where the ship was and you’ll be ready to embark to Luca.
You’ll be on the SS Wino after this. Get the Hi Potion that is barely visible on the left. Outside of here is Oaka who you should give some more cash too if you can spare it (which you should be able to now). Go outside and talk to the Luca Goers and Yuna. By the captain’s deck is a Al Bhed Primer V and then after that you can go up and listen to Wakka and Lulu talk about deserting you.
Save again and examine the blitzball on the opposite end of the boat. It is imperative that you succeed here and now so you can get the Jecht Shot. Press X and the direction in which Jecht’s comments are and if you get enough right you should pull it off. If not, hold select start and the top 4 buttons to reset and do it again because you’ll need this to have any shot in Luca.

Luca
As you get here the teams will be announced and Tidus will take a microphone and start talking shit to the Luca Goers. You are then instructed to find Maester Mika so save and follow the red marker. Mika and Maester Seymour will come out.
Wakka says the Auroch’s got seeded and they play the Al Bhed Psyches first and if they win they are in the finals versus the Luca Goers. Yuna says someone saw Auron so its time to go out and look for him.
When you finally get the chance to walk around go to the stairs on the opposite end to find a narrow room with two Hi Potions at the end and the Al Bhed Primer Volume VI behind one of the blitzball players. Exit out and go left and you’ll see Oaka who is actually selling stuff now. West and down the deck for 600 gil on the right side and a Tidal Spear on the far west part. In the next area north of this is another path leading west towards a dock and this has Phoenix Down x 2. Okay, return back to the center area where the locker rooms are and where you started. From here go right to the next dock and then follow east to the end of that dock until you see an opening on the right that you can walk through, allowing you to get the Mp Sphere and HP Sphere.
Back to the center once again and now go south towards the red marker. You’ll get a scene with Yuna, and then you can head north to the theatre if you want or east to the marketplace where the red marker is. Take another east route to go up some stairs for a 1000 Gil treasure chest. When you are ready enter the care and a scene with Kimahri and his friends will occur. The Blitzball game will have started but just as you hear that, you also hear that Yuna has been kidnapped by the Al Bhed Psyches. Tidus, Lulu and Kimahri are to go to Dock 4 to find Yuna.
Save of course and then head west towards the red marker. You’ll fight some machina battles, specifically against Worker enemies that can be dominated by Lulu and her Lightning magic. Have her cast Thunder after Tidus uses Haste on her is especially effective here. Save and head east afterwards.
You’ll be ready to battle the Crane and Oblitzerator. Okay, you aren’t really battling the Crane but if you cast Thunder on it three times…you can use it to do heavy damage on the Oblitzerator. When I used it the crane ripped the top off for 5400 damage, leaving it for dead. Yuna is saved and then you see Wakka win it for Besaid.
Talk to Wakka and he’ll be sitting out this final game and Tidus takes his place. This is your first blitzball game and it’s hard since your opponents are better than you in every category. Spend the first half building up Tidus’ skills by making easy passes to his teammates. You probably won’t be able to score in the first period and they’ll probably score on you. At halftime you can equip the Jecht Shot on Tidus and if you passed enough you should have received enough EXP to make Tidus a little better. In the second half it is imperative you score with the Jecht Shot before the three minute mark as that will be when Wakka joins for Tidus. Tidus only has the HP to get off one Jecht Shot anyway. It blocks the first two defenders automatically so it gives you a lot of wiggle room as far as having defenders on you go.
After Wakka joins things get harder as you dont have a trick in your sleeve like Jecht Shot. I had it tied in this particular go through and in overtime Bickson scored on me, so good luck. You get a Strength Sphere and a trophy should you win.
 After Wakka and Tidus will be fighting enemies in the sphere. Lots of Sahagin to fight. After you’ll finally see Auron fighting a battle by himself against a Vouivre enemy. More battles with Auron and then Seymour summons the Aeon Anima to wipe out all the monsters. Auron and Tidus will talk and Tidus learns that Sin is Jecht. Follow the red markers for scenes and an exit from Luca to the Mi’Ihen Highroad.
Mi’ihen Highroad
Now at the save point you’ll see playing blitzball is an option. If you want to max out Wakka (a good idea since he’s one of the top guys later on for monster hunting) you’ll need to do tons of blitzballing to get his best overdrives and weapons. Because of this you may wish to do this slowly instead of all at once, that said it’s a lot easier at the end when you can just hire the guys who are more talented in which case you’ll be more or less unbeatable as opposed to your current blitzball outfit.
Talk to all the people along the road, a few more tutorial battles and some tough battles actually. The people will have a Hi Potion right away, a great Hunter’s Spear a litte farther down, two Antidotes, 600 gil and an important Level 1 Key Sphere. You’ll see a scene with the pilgrim or whatever and near that area leading west you’ll find an Ice Brand hidden.
Okay so you’ll come across the Djose Temple Chocobo Riders and they’ll warn of the Chocobo Eater. Further along and to your right is Belgemine, who asks to fight Yuna just with summons. Refuse at first unless you’re prepared with the following – She uses Ifrit and you use Valefor so have Valefor’s overdrive ready and have the beast healed completely before the battle. You’ll want to use the overdrive right away likely, and then Ifrit will get two turns. Fortunately the overdrive will put him in a bad way. Since the Sonic Wings don’t work as far as moving Ifrit’s turn back like it does on most monsters, you’ll want to cast Blizzard, a much more effective method. Not too hard but if you win you get an Echo Ring (anti silence) and if you lose you get the mediocre Seeker’s Ring so it may be worth re-loading if you lose.
In the next area get the Remedy on the side path right away and continue on. A villager will give you a Red Ring around here. Further along into the next area and you’ll talk to someone with a L1 Key Sphere, very important for freeing up Kimahri. Further down are Antidote x 4 and a 2000 gil treasure chest. More people to talk to and an Eyedrops x 3 treasure at the end.
In the next area is a rest place and Auron suggests staying there. Go outside right away and a scene with Yuna and Tidus. After you’ll get another level 1 key sphere (which is your second, allowing Kimahri to go through Rikku’s path (my preference for him). Rin here will give you the Al Bhed Primer Volume 8. Once finished talking to him you’ll be told by Auron that it’s time to do your business outside.
Alright this Chocobo Eater can be quite a bitch if you aren’t prepared. As you can see right away it’ll begin to knock you towards the cliff but you can do enough damage to put it on it’s back and push it back (500 damage once it’s on it’s back). Don’t bother wasting turns with poor attackers, only have Auron in there attacking (Kimahri can take off a good amount too) but Wakka and Tidus are a little too weak. Dark Attack might be useful though and so is Haste, especially on Auron and Lulu. Lulu’s fire magic is a huge asset in this battle especially when she’s hasted. As always having Yuna ready with a overdrive for Valefor or especially Ifrit will be key.