Final Fantasy 10 X Mt. Gagazet Seymour

Macalania Forest
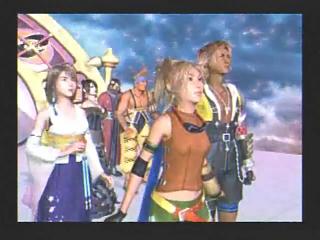
Your party will end up around Macalania. Save, talk to your friends and go south past where Kimahri is. Tidus and Yuna will have a scene. A long one. When you regain control go back north for a Lucid Ring by the campfire and then go east. A save marker coming up and then the Calm Lands.
Calm Lands
You are in the Calm Lands now and nearing Mt. Gagazet. Talk to Maechan if you want but head to the center of the Calm Lands. You can buy from Rin before reaching an Al Bhed trading area.
Notice you can play Blitzball now. After acquiring some decent players like Rin, Naida and especially Brother, I spent a good amount of time on Blitzball since you have to do it to get Wakka’s best weapon. If you plan on doing the special hunts (more on this soon) then you will need to do Blitzball.
When you want to leave, go far to the east to the green dot. This is a Training Arena. Listen to his deal and start capturing monsters. Only buy the weapons for like Wakka, Tidus and Auron so that you can just have a heavier hitter come in and do the job.
In order to fight the toughest of monsters, you need to gather 10 of every monster in the game. This is another time consuming side quest to final Fantasy x but you can certainly hone your skills there.
Might as well start collecting monsters around the Calm Lands, heading to the northwest tip. there is the Al Bhed Primer XXIII around here and a chocobo rider. Talk to him and agree to train chocobos with him. Or her, whatever. Go through these races until you get to do Catcher Chocobo. This is the final and important one. If you can get a 0.0 time, you can win the Sun Sigil for Tidus final weapon. I don’t know the exacts, but I finished at 35 seconds with 13 balloons and 0 hits and that was good enough for 0.0. After you get the Sun Sigil just go on and ignore these silly races.
Back at the Monster Arena hopefully you have captured at least one of all 9 species in the Calm Lands. If this is the case then he’ll give you a treasure you can’t open and 60 Farplane Winds.
Grab a chocobo from the trainer and go to the entrance of the Calm Lands, and then veer off to the east by the chocobo feather. The chocobo will jump and you have an entrance to the Remiem Temple.
Remiem Temple
Run across the bridge and save. Go west and check out the sphere, and further past is the Al Bhed Primer XXIV. Go to the other side of the Remiem Temple and get on the chocobo. Race it to the center, forget all the treasures and other stuff that catches your eye. If you beat the other one you get a Cloudy Mirror which helps unlock your Legendary Weapons later.
Inside the Remiem Temple is Belgemine. She reveals she is dead and you can fight aeons against her. First you fight Valefor, then Ifrit, and so on. If you didn’t get Aeon’s Soul from her earlier you get it here.
On the other side of Calm Lands toward Gagazet, Defender X is the boss that the guado bring for you. This will be a tough physical battle. He counters your attacks with a move that takes off half your HP every time. His physical attacks and Haymaker are devastating so prepare to heal or revive. This will be a long battle, and Dispel the Mighty Guard he puts up at the end.

This opens up a path to Gagazet and the underneath valley that leads to Cavern of the Stolen Fayth – you can acquire the Aeon Yojimbe here but it is not suggested you do this quite yet.
Mt. Gagazet – Head to Mt. Gagazet and you’ll be greeted by Kelk, Biran and Yenke. After some deliberation Kelk will allow you to go. Buy some Holy Water, save and go up. Biran and Yenke will fight Kimahri two on one. This battle isn’t so hard. It will depend on which way you took Kimahri. I took him Rikku’s way so I stole a bunch of L3 Key Spheres and used Mug and Al Bhed Potions to stay alive. Be sure to use Lancet to get Thrust Kick and Mighty Guard and White Wind and Doom and so on. Of course, just attack them when they are by themselves, otherwise the other will block it for no damage. Not a tough battle, more like an all out race to Lancet new Overdrives for Kimahri.
Before you leave for the Mt Gagazet depths, Biran will start singing the hymn of the fayth. After this go to the right for a 20,000 gil chest and to the left for 2 mega potions.
As you continue along the path you’ll see plenty of dead summoners who couldn’t make it. When you see a short, skinny path going north be sure to take it. It’s a Braska Sphere. Auron gets another Overdrive.
Go further along the path now until you reach a huge t split. Get the Defender Bracer straight ahead, and then go back and right.
You’ll run into Wantz, Oaka’s brother. He wants to help you, and buy the Booster Cactuar if you can, its expensive but dominant. As you go down the path push Tidus against the near wall as you are at the bottom of the path, and you’ll be on a new path underneath the slope with an HP Sphere and Lv. 4 Key Sphere. Time to continue up along the path and see another dead summoner’s place.
A Save Sphere, a precious save sphere. Get as many characters and Aeons in overdrive, you’re coming up to one of the hardest battles in Final Fantasy X. It’s a boss battle against Seymour Flux and Mortiorchis.
Of course, your summons at overdrive level are best. Seymour will still Banish your aeons, and the Mortiorchis will still take off 4000, 3000, 2000 and then 1000 on Seymour. Seymour will cast Protect and Reflect on himself. You can Dispel this with Yuna of course. Haste everyone you use as Seymour casts only the most powerful spells on you, although he tends to waste his turns putting up his boosters. Try to end it with Bahamut’s Mega Flare for an overkill. Seymour Flux is a bitch and if you aren’t leveled up he’ll prove it.
More talking after this. Continue on to the Save Point before you go on to the Mt. Gagazet Caves. Before the save point are a bunch of pillars, search in between two of them on the left side to find Kimahri’s Sun Crest.
You see some weird things in this area, and then Tidus has a dream. A weird dream. A long dream. Continue along this peculiar area and you’ll be in the Mt. Gagazet Caves.
 Mt. Gagazet Caves – The monsters around here are the same as on the mountain. Make your way to a Save point and a hole in the ground just north of that. Take the west route and you’ll end up in the water with your usual water group, Tidus Rikku and Wakka.
Swim straight north and go up the stairs. Be sure to Catch the Splasher, Maelspike and Achelous here with Wakka and Tidus or whoever you bought the weapons for. As you continue north you’ll see a ball. Wakka comes out and you have to hit it with him – you have as many tries as you want, you just have to time it perfectly to dodge both contraptions blocking the ball. You get an Lv.1 Key Sphere and then go back to your party and the save point to see you can continue on now.
First take the right path for a Recovery Ring and Return Sphere. Then, take the northwest path at the fork and then continue north veering right and going down the hill to the water. At the end you’ll have three colors to match with your characters – have Rikku pick Green, Tidus Blue and Wakka Red. Take the Fortune Sphere and swim back. Take the west path this time that leads up. You’ll find a save point.
Up the path and you’ll see the Sanctuary Keeper. This can be a damn tough boss battle. It’ll use Photon Wings early to curse you and do about 1000 damage and other side effects. Mana Beam will kill a character easily and it’s Tailsweep counter can be bothersome as well. Be sure to Dispel it’s Protect buff when it casts that and use Armor Break to make this battle easier for your attackers. Your aeons can be useful for an overdrive but they’ll be destroyed quickly.
Your party has a scene and then Yuna drops a Sphere. Watch it and then continue onward. You’ll be in…Zanarkand.
 Zanarkand
Your party is now at a campfire, the scene in the opening. Save and start going through Zanarkand. You’ll come across a Fortune Sphere first. Tidus will hear lots of souls moaning a little farther ahead. Grab the Spiritual Targe you see and then get back on the path. Soon you’ll be at the Zanarkand Dome, with new monsters.
Okay, in this new area just continue along until you see a path to the east on your minimap that is darkened. Just stick to the right and you’ll eventually go up it, it leads to 10,000 Gil. Back down and further along to a Save Point.
You’ll see a young Seymour scene, and then take the east path on this four-way fork. Grab the Friend Sphere and then take the north path (northwest sort of). You’ll get to a Braska scene, after this go south and left a little (again look at the minimap) and get the Lv. 3 Key Sphere. Go north and inside the building. Grab the Luck Sphere, go north, Save, and go in.
 Zanarkand Cloister of Trials – Yet another of these annoying trials. Step on the green square and then see what happens.
Step on the correct floor switches to reveal the shapes on the screen. After this happens, a bunch of shit opens up. Move just one of those pedestals in from where they were not the middle pedestals but the other four), and then go to the other room.
You’ll have started up a new challenge. Complete this and go back and push the other three pedestals in one by one, doing the floor challenges as you go. Once you are done, grab the Kilika Sphere on the left and bring it to the first room and put it on the left pedestal, and then put the Besaid Sphere on the right pedestal. All the glyphs are lit now in the second room. Save, prepare yourself and go in.
A battle against the Spectral Keeper looms. Hopefully you have your overdrives up especially the aeons (they won’t last long though so you may want to save them for the upcoming battle). As you can see the Spectral Keeper counter attacks the three spots that it is facing, so if you maneuver yourself behind it you’ll be less apt to be hit (use the trigger command of course). Because of all the moving this battle might take a while. After the boss, the fayth starts singing and you can ride the elevator south with your fellow guardians. Save and go forth.
You are where Lord Zaon’s remains are. You’ll have a long scene and then go into the room with Yunalesca. More scenes and more scenes. Just keep following and eventually you’ll be battling Lady Yunalesca. Try not to waste too many overdrives if any in her first form. She’s pretty easy but counters by blinding you if you attack and silencing if you use magic.
The second form will use Hellbiter which will make you a Zombie so use Holy Water. It uses this ability like crazy in her second form. Try to keep at least one character in Zombie mode when she dies in this form as she’ll use Mega Death to start off her third form and that could kill you outright otherwise.
Lady Yunalesca’s third form has 60,000 HP. It’ll use Mind Blast, absorb, etc. Bust out all of your aeons and overdrives. Bahamut’s Mega Flare should be saved for last to take off about 150,000 or so.
After the battle grab the Sun Crest and then leave. More scenes outside of the palace and then the airship will get you.
AirshipYou can play Blitzball again now. It’s about time to start doing that a lot if you want to do some of the tougher coliseum fights, because you’ll need Wakka’s Attack Reels Status Reels and Auroch Reels.
Talk to everyone on the Al Bhed Airship, including Kimahri and Yuna at the bridge. Go back and more scenes, and then talk to Cid. He can transpot you anywhere, including the Highbridge but this is the end of the game and we don’t want to do that. There are tons of sidequests, from the aforementioned Blitzball to the monster arena, new aeons, celestial weapons, etc.
Final Fantasy X 10 Sidequests – Whatever you choose to do first I suggest having Tidus, Wakka and Auron have capture weapons so you can get started on the Monster Arena if you so desire. You’ll have to catch up to ten of each monster to complete it so might as well start while you’re going through other things.
Final Fantasy Blitzball
I basically didn’t touch Blitzball until the end, or at least until I got Brother. Brother is my favorite, as his speed can run around any team save for the Guado Glories (who are weak and easy anyway). First piece of business though was that I transported to Djose and walked through the Moonflow in search of a new goalie with a higher CA than Keepa. There is a Jecht Sphere in the Moonflow that gives the Banishing Blade overdrive, I must have missed this earlier. Miyu on the other side of the Moonflow (in the red garb) has a little better CA than Keepa so she was worth signing (the best is the Al Bhed keeper but he has a long contract).
Fortunately for me the first Tournament had the Attack Reels as the top prize. You are to collect all of Wakka’s Reels and then you have a chance at getting his Sigil, for his final weapon. More on this later but that’s more or less the entire point of you doing all this Blitzball.
Tidus and his Jecht Shot can dominate any match. Brother has the speed to swim around the entire area with entire enemy teams making futile chases towards him. Incase you missed it, Brother is the pilot on your airship. I happen to have Rin at my other forward slot and the original Auroch defenders along with Miyu in net at this point.
Biggs and Wedge are in Luca and you may wish to add them to the equation. Either way your offense will be predicated on Brother and Tidus likely. The best guy at CA is the Al Bhed Psyches Goalie (who is in your airship) Nimrook. He has a 24 game contract unfortunately so you’ll have to weather the storm as the Al Bhed Psyches have the best team and you need to save right before Nimrook’s contract runs out. Make sure he doesn’t resign, and then sign him up for as long as you can.
Jassu and the other Auroch defenders won’t really cut it so getting Naida and Berrik as defenders might be a smarter idea (or someone else that has a good attack and block).
The team that is sure to trouble you the most early on is the Al Bhed Psyches. Overall they are a good team and Nimrook makes scoring goals rare. You need to be in a good position with few defenders around unless you’re Tidus and the Jecht Shot. Try to pick at their team when their contracts run out and again, save before that 24th game runs out for Nimrook.
The Ronsos, Guados and Beasts are pretty generic teams. The Ronsos are slow that you really have no excuse not to run circles around them and score at will. Getting the ball might be difficult as they are tough at the point of attack, but rarely will they catch you when they are on defense. Zamzi Ronso isn’t anything to brag about and considering you should have open shots anytime you want against him it will make it that much easier. Kilika Beasts are the most generic team in the game. Strangely enough they get really good if you play past level 50 but why would you? They’re the worst until that point. The Guado Glories are a weak team but one that is extremely fast even for Brother who can swim around any other team. Luca Goers aren’t as good as their reputation would lead you to believe. They have some high level characters to start off with but in reality you should be able to dominate them with Jecht Shot and Brother’s speed.
Just hope and pray that Wakka’s Overdrives and Jupiter Sigil come up quick. But, they won’t and you’ll be doing 100’s of blitzball games until you get all of the overdrives and the Sigil. Maybe not 100’s but a lot.
 Cloudy Mirror – Celestial Mirror
You have the Cloudy Mirror if you won the chocobo race at the Remiem Temple. Take the airship to Lake Macalania and then go southeast until you get onto the celestial path type area. Take this along (a path will be blocked by someone) and you’ll reach the beginning of the forest with a save point and a kid and mom. Talk to those two to learn about a husband who didn’t show up. Further east is a Jecht Sphere and then a fourway pass. Go north and talk to the husband and then go back there. Now the boy is gone, so go up the celestial path. Take the north fork to meet the boy and then use the Cloudy Mirror when prompted. It will become the Celestial Mirror.
Final Fantasy X 10 Legendary Weapon Guide
Now that you have the Celestial mirror you can start working on ultimate weapons. You need a Sigil, Crest and that characters weapon. Once you have all three for any given character then go to the same place that you upgraded the Cloudy Mirror (macalania forest) and then you’ll be able to power up your weapon.
Tidus – The Sun Crest is in a treasure after defeating Yunalesca. The Sun Sigil is the prize for the calm lands chocobo race if you get under 0.0 (you must get about 12 or more balloons and get hit by 0-2 birds to get this). Then, race the trainer and beat her and then walk to the northwest part of the Calm Lands. The guy who stopped you prior to this isn’t there and you can activate the glyph to get the Cadalbolg for Tidus.
Yuna – To get her Moon Crest is easy. You can get this when you get to Besaid, swimming east of where Tidus ends up when he gets there. The Moon Sigil is in Belgemine’s hands at the Remiem Temple. You must defeat all the aeons there including the Magus Sisters. This is one of the easier Sigil’s to be honest. Her Nirvana Rod is given to you when you capture all 9 species of enemies in the Calm Lands.
Wakka – You are going to spend days getting Wakka’s stuff. His Jupiter Crest is in an empty locker in the Luca locker room. You can get this early. Then there is his weapon the World Champion. Some say you only need a few victories to get this while other say it is up to 20 wins. Regardless, you can’t use it’s full power until many blitzball games are played so just grab the World Champion at the Luca Bar from the bartender. You then need to get the Attack Reels, Status Reels and Auroch’s Reels through League and Tournament matches. After you get all of those the Jupiter Sigil will be available in league play.
Auron – Auron’s Masamune and Mars stuff isn’t that bad and if you’re a completionist you’re going to get his easily. First of all, his katana is the Rusty Sword east of the Cavern of the Fayth, or the Sunken Cave. The Mars Crest is along the Mi’ihen Highroad and you can get this early. The Mars Sigil however requires you to unlock 10 Species or 10 area conquests for the Monster Arena at the Calm Lands. This is why I suggested buying the Capture weapons immediately so you could get started early. It’ll already take a long time trecking through the old areas killing easy monsters time after time.
While you’re at it, collect the Jecht Sphere’s around Spira. Get all ten spheres and you can get his final overdrive, Tornado.
Auron’s Sphere Locations– 1 – After the Spherimorph battle (This is always first) – 2 – East of the Besaid Temple – 3 – Take the S.S. Liki, go in captain’s room – 4 – Basement of Luca Stadium – 5 – Mi ‘hen Highroad along the old road – 6 – Mushroom Rock Road in the Precipice area, just a little south of the platform that rises – 7 – Moonflow South Wharf, in a side area by the Shoopuf’s dock – 8 – Thunder Plains near an eastern lightning rod in the first area – 9 – Macalania Forest take a right upon entering – 10 – Mt. Gagazet along the mountain road you will find a side road.
Lulu – Getting Lulu’s Onion Knight can be a nuisance, or at least the Venus Sigil to power it up. The actual Onion Knight weapon can be found in Baaj Temple on the opposite end of where you enter to get Anima. Dive and search around, if you have the Celestial Mirror you’ll find it and open it. The Venus Crest is found in a treasure chest on the Farplane in Guadosalam. Easy so far. Of course the Sigil has to be a complete annoyance. At the Thunder Plains, you have to dodge 200 Lightning Bolts consecutively and then return to the Travel Agency to get the Venus Sigil. It’s not as hard as you think but if you mess up in the 100’s you’ll be pissed, I assure you. I like going in the north area of Thunder Plains where there is a hill sloping north and a lot of lightning bolts striking. Sit down and be patient and Lulu’s Venus Sigil can be yours.
Kimahri – Not so difficult but as usual the Sigil will prove tedious. You have to go to Macalania Forest and beat both of the races. There are more butterflies now. It can be done though and really you just need a few test runs to figure out the perfect way to approach each turn and whatnot. Careful not to run out of the screen after the last butterfly on the one farther from Lake Macalania, this happened to me and I had to re-race. A Saturn Sigil is your reward.
Rikku –
Recruiting the Aeon Anima
First off you need to have gotten every Cloister of Trial item in the game. These includes one in Zanarkand that you must get after going through the area once and returning.
Save and in the first Zanarkand Cloister of Trials room, hit the lower left, middle and upper right switches for three 2 x 2 white blocks. Go to the second room now.
From the start of the upper right corner, don’t hit the floor switch immediately near you but the one that is two to the left and four spaces down. Then, go east a few squares and then south 4 or 5 for another white block. Now from the upper left corner, go right seven times and 4 down for the third white square in this room. Lastly, go to the southwest corner and go 2 squares east and six up for the last one. Some patterns will ensue and then the destruction sphere is opened up in the first room.
Go to the second room and put the Destruction Sphere in the right slot (where the Besaid Sphere was) and a treasure opens, the Magistral Rod (half MP use!). More importantly you should have every Cloister of Trial reward from the Destruction Sphere. If not search the Cloisters and see which one you missed because you can’t get the next Aeon, Anima, if you didn’t get them all.
Baaj Temple – Go to Cid and do search – 12 x and 57 y. You’ll find the Baaj Temple. Save and run forward to jump in the water. Swim to the northwest to illicit a battle with Geosgaeno the boss that almost killed Tidus early in the game. This battle will be extremely difficult. Hopefully you have armor that prevents Stone / Petrification. Quick Hit is a must for Tidus although he’ll run out of MP fast. Wakka’s Attack Reels can do a number on him if you get 2x x 2x x 2x. Hastega should be used also. If Geosgaeno swallows a character they can struggle and take off damage.
After the battle you can go towards the green block on the minimap to enter. You’ll be on land soon enough and in a new room. In the southeast is a Megalixir and the southwest four Mega Phoenix. Touch all six statues and then go in the Chamber of Fayth. Yuna will acquire the power of the summon Anima, the most powerful aeon in the game (in my opinion at least).
Anima is a great addition. If you can give it Haste, Lancet, Dispel, Protect, Shell, Slow and Curaga, it can defeat even some of the coliseum monsters by itself.
 Cavern of the Stolen Fayth
Fly to the Calm Lands and go northeast towards Gagazet. Go under the bridge though to the stolen fayth cave. First, go east instead of west in the save sphere area to find some crusaders. See the sword sticking out of the ground? Search it, it’s the Rusty Sword and it’ll be Auron’s Ultimate Weapon later.
The cave of the Stolen Fayth has an Aeon. It is difficult here though, as Lulu suggests. Have 200,000 Gil ready, just saying.
Follow the path that goes right and then right again when you get in. Grab the Megalixir and go up until you get to a t intersection. Right has an Lv2. Key Sphere and the left way continues. Take it straight north for a Fortune Sphere. Go back and take the path west and north this time until it ends at Mega Potion x 2 and Al Bhed Primer XXV. Save and go ahead for a scene.
Lulu will see Lady Ginnem. She summons the aeon Yojimbe. Yojimbe is an aeon that fights with his dog. Defeat him easily with Hastega and the other stuff you do that makes battles easy and then step on the teleport switch. Take it to the chamber of the fayth. Yuna will do some praying and then Yojimbe shows up. Barter with him until he offers around 200,000. I got it to 214 and he would not go any lower. This is the cheapest it’ll get so buy him. He is a powerful aeon but one that you cannot control that well, limiting his usefulness.
If you take the right and left paths on the teleport (both leading to ???) you will find a Flexible Arm, X Potion x 2 and an MP Sphere. That’s it for the Cavern of the Stolen Fayth. Note for you monster collectors that the Cavern of Stolen Fayth has unique monsters like the Tonberry who is very hard to find. Check the green room (the room that is green, take the east fork early on and you’ll see it) for more tonberry’s.

Omega Ruins
To get here, search the coordinates X 71 Y 33 or around there to find the Omega Ruins. The monsters around here are terribly tough so this should be one of the last things you do (which, well, it is). Stick to the save point for a while to get used to the enemies, gain levels, and gradually explore the map. As you can see the map is revealed as you find places so that’ll make exploring a bit more difficult. If you see a Zaurus with a treasure be sure not to do anything to the treasure because it is a very very dangerous Mimic. They do yield a ton of gil.
When you are ready to continue take the right route for some treasures (always grab the left chest first here) and then left to continue on. The left path will veer north and then you should take the east path when you get to a fork. This leads to yet another fork, where you should go east for the Al Bhed Primer XXVI in the middle of the intersection. Ride up the elevator to the right and then heal yourself.
A battle with Ultima Weapon ensues. Ultima Weapon in FFX has about 70,000 HP. Steal as many Door to Tomorrow as you can, but watch out for it’s attacks and Shimmering Rain. Try to overkill him with Anima’s Oblivion so that you can get 6 Lv. 3 Key Spheres. Go onto the glyph after the battle and you’ll be in a new area.
The enemies here are tougher as you’ll find out. Many of these enemies can also be found in a later area, and do not belong in the Omega Ruins as far as capturing is concerned. One thing you absolutely want to do is have someone with First Strike with their weapon, which allows them to go first. This is because the Malboro’s you find in this area will ambush you every time and will kill you immediately if you don’t have First Strike. Use this to put Yuna in the party and call an aeon to take them out. Take the left path for a Friend Sphere after two enemies. Back north now. You’ll have to fight a ton of monsters and cover a lot of ground this route. At the end is a dense purple fog, I suggest healing before this.
Omega Weapon in Final Fantasy X isn’t like Omega Weapon in Final Fantasy 5 or even Final Fantasy 8. He’s easier, especially if you’ve built up a little and have a few Legendary Weapons. Tidus’ Catalbolg and Wakka’s World Champion are enough. With Attack Reels Wakka should be able to take off a ridiculous amount. Tidus should get Hastega up and then use Quick Hit. Don’t forget to steal Gambler’s Spirit x 30 from Omega Weapon with Rikku. Overkill him with Attack Reels or Yuna’s best aeons (like Anima) and you’ll get 6 Lv. 4 Key Spheres!
Final Fantasy X HD Update (PS3) – Omega Weapon gets a huge boost in the HD Remaster for the PS3. The original FFX Omega Weapon only has 99,999 HP. The Omega Weapon in FFX HD Remaster PS3 has 999,999. So you will need a more patient strategy to withstand this battle, not to mention building up levels / abilities. This is reasonable though, since many complained that he was too easy, which he was. It is too bad they left Ultima Weapon as a pushover that could be killed in one 99,999 hit by Anima (which does not take too long to build up Yuna/Anima for him to do that.)
After this, our party will automatically teleport back to the beginning of the Omega Ruins. If you want the Magic Sphere at the end you’ll have to go through again to get it.
Remiem Temple
There are a few things for you to do here, most of which deal with Yuna. You’ve likely already acquired the Cloudy Mirror here from the chocobo race.
You can get the Magus Sisters here. They are the final aeon that you can get, although you cannot control them. They are Cindy Mindy and Sandy from Final Fantasy IV Tower of Babel. You need the Blossom Crown (capturing all the Mt. Gagazet monsters) and the Flower Scepter (defeating Shiva or Bahamut against Belgemine below) to recruit the Magus Sisters. Go behind Belgemine and Yuna will go and get the Magus Sisters right away. They are a powerful group yet you never know which of their abilities that they will use. Mindy has Passado for example and that can be one of the best moves in the game, but it’s not for sure that she uses it. Also they will waste a lot of turns “taking a break”, which is the most annoying part. But try them out, they’ll be one of your best aeons for sure.
Belgemine inside the temple will challenge Yuna to fights against her Aeons. You have to start fighting Valefor and move your way all the way up to Yojimbo, Anima and the Magus Sisters. But you must have all these aeons to fight Belgemine’s versions. These can be done early but having Anima makes it easier. Belgemine rewards Yuna with items that are actually useful to you, mostly for getting abilities for your aeons.
The hardest battles are against Anima and The Magus Sisters. Anima is hard because, well, you can’t summon Anima. Bring in Shiva or someone quick, hopefully you have Yuna powered up enough to get through Belgemine’s Anima’s 60,000 or so HP.
Magus Sisters are last. I suggest saving up an Oblivion to take them out fast. If this doesn’t work just use the rest of your aeons to finish the job. After Belgemine’s last summon is defeated you will have the option to send her. Do so, in order to get the Moon Sigil. Along with Nirvana and the Moon Crest off the east shore of Besaid, you should be able to power up Yuna’s Nirvana Ultimate Weapon. Definitely one of the easiest Ultimate Weapons to get in the game.
HighbridgeWhen you are ready, go to Cid and choose the Highbridge. You can leave here so don’t be worried that you’ll be stuck forever.
As you run up you’ll see Shelinda and then Maester Mika. Some scenes occur and then Yuna and Tidus meet with The Fayth. They seem to have an idea for Sin, and you’ll be back on your airship soon.
 Sin – Save and talk to Cid, choosing Sin at the top of the list. Cid will play the hymn of the Fayth on the airship. When you have control, go to the deck by hitting the elevator.
It’ll be a while until you actually get in battle with Sin. Have Hastega up as fast as possible and use Armor Break to make the battle go a little faster. Don’t be afraid to use your aeons but of course you’ll have more battles ahead too so it would be wise to conserve. Having Cid pull closer will allow your short range characters to destroy Sin fast. Unfortunately Cid is pretty slow so you’ll have to make due.
After this Sin battle, you’ll be thrust into another one this time against Sin’s Right Fin. Same strategy, move in as fast as you can and use Wakka, Lulu and Yuna before that.
Once both wings are gone, you’ll find out from Brother that your main gun is gone as well. Tidus and friends then jump on Sin and engage in another battle against Sinspawn Genais and Sin Core. Ignore the Core for now and just work on killing the Genais as fast as you can with your highest powered attacks. They don’t really have a lot of HP so this can be a quick battle.
Sin will crash into the beach near Bevelle. Go on the bridge to see Yuna when you regain control, and then you’ll see Sin. You’ll be back inside your airship so go back to the bridge area outside yet again.
This time you are fighting Sin with an overdrive. As for the overdrive that Sin builds up, it’s obvious you’ll want to guard or use an Aeon to Shield the attack. If you’re strong enough and / or fast enough you may not even see the overdrive. Having your party unguarded would be fatal. Hastega and your best magic spells, and Armor Break him when he gets in close.

Sin – Sea of Sorrow
You’ll be at the bottom of the airship about to enter Sin. Save your game and head into Sin – Sea of Sorrow. Similar to the Omega Ruins, paths open up as you find them. As you enter, you’ll want to head north, veering left when you can. The Behemoth King has a devastating Meteor attack that takes off about 5000 to each character. It is used when he dies but be prepared for it with an Aeon, Shell or have full HP. This will make it difficult to capture these enemies.
If you continue to go left you’ll run into a waterfall that bars your way. You’ll need to head north and then left to get around it. Now you can go south and east a little for that treasure, a Special Sphere. Notice as you head back that there is a little curve to the west on the minimap, this leads to a Phantom Ring. Take that path all the way north now until you can go west a little again, this time for an Elixir. East to continue and then south all the way when you get a chance. Now you can get that other chest guarded by the waterfall, this is a Wizard Lance. Go back east into an area with a glyph, and you can see the northeast is the way to continue on. Before you do that check the southwest part of this area for a Lv 3 Key Sphere. Further northeast is a Save Point and some stairs.
At the top of the stairs is our old friend Seymour but now he’s Seymour Omnis. As you can see he has three wheels with the four elements spinning around. Your best options are just attacking him and forgetting his little elemental game, or use Holy. Armor Break him and then let your legendary weapons work him down. Seymour’s turns are pretty vicious as he casts Aga spells like mad. Having Shell might be wise. This time Seymour doesn’t escape as Yuna sends Seymour. Turn back and Save.
With Seymour out of the way you can now enter the Sin City of Dying Dreams. Some of the toughest monsters in the game are here, including Barbatos, as this is the only place you can find and capture him. Immediately to your right is a Lv. 4 Key Sphere. Further up you’ll see a path leading to the left, and up the elevator lies a Defending Bracer. Just a little before this Defending Bracer elevator is an elevator on the east side that goes to a Four on One for Wakka. Further north for an elevator going down and 20,000 Gil. A Megalixir is in the northwest corner of this room as well. East of the 20,000 gil chest is an elevator that takes you to an Hp Sphere and Defense Sphere. Head east and then take the lower east path and slide down for the Laevatein and then climb up the wall on the other side. You’ll work your way to a save point. This is your last chance to stop and do something else so you might want to do that now and Save.
As Tidus runs north past the save point a big pillar comes crashing down. Go up and touch it. Now you’ll be in an area with white prisms and icicles slashing up at you. Dodge the icicles and gather 10 items. You will probably get in lots of battles thanks to the stupid camerawork. After 10 you’ll be taken out of that area.
 Jecht – You’ll see Jecht now. After some talking he jumps in a pit and you will be in battle against Braska’s Final Aeon. Braskas Final Aeon has two Yu Pagoda next to him that you can attack. Once you defeat the first Braska’s Final Aeon it’ll change and pull out a sword. It has more HP and more powerful attacks but stay rested and Quick Hit him to death.
Jecht and the fayth tell you to destroy the aeons. More scenes and then you’ll get to choose and aeon with Yuna. Yu Yevon will possess all of the aeons as Yuna chooses them. There is no need for strategy, use your best moves and stay healed. The aeons can evade well but other than that they should be pushovers.
After all of your aeons are defeated in battle, there will be one more fight.
This is against Yu Yevon. Tidus explains that he’ll disappear after this battle. Continue your Quick Hit style against Yu Yevon and you should have no problem. As you can see you are Auto-Life-ed.
Enjoy
