Pau Prairie
Pau Prairie is like a trailer park that moves around the plains here. Lots of stuff to do and some valuable characters are here for you.
Meet with General Elliott in the south, and then check the southeast building for a Long Sword. This is useful for Max. You will meet Earnest in a train, a cool looking dude. A Bread of Life is west of him, and so is the weapon shop. Nothing really new here besides the Long Swords.
Head to the very northwest part, with the Priest in the building. Work your way to the northwest part of the house to see Jogurt fall down – you need to do this to Recruit Jogurt. Enter the northeast train and get the Legs of Haste. You will need to talk to Queen Koron a few times to get them to drive off.
Once the Pau trains have rode off, Kokichi should fly into the screen (only if you saw him fly in Bustoke!). He’ll join you and uses Power Spears and flies! One of my personal favorites and is the definition of versatile.
Northwest of where you start off you’ll see Vankar, another knight. He’s pretty generic but he’s closer to being a good knight as opposed to some of the worse ones.
Battle outside Pau Prairie Lots of new characters so if you wish to rotate them in, remember to do so before you leave Pau. Pelle especially should be put in and you may wish to rotate Vankar / Kokichi in too.
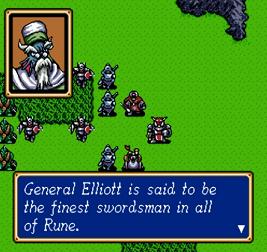
General Elliott is waiting for you outside – a LONG way east. The enemies that head your way at first are nothing new, but one of the Lizardmen has a Heat Axe, and he’ll drop it when he dies. But if he hits you with it, it’ll likely kill ya.
The Artillery is a new enemy, one that has some dangerous long range capabilities. It’s low HP allows it to be easily rushed and destroyed though. Careful with Elliott. He won’t move if you attack him from afar, but if you get right next to him he’ll begin hunting out Max. And his high attack usually either kills or mortally wounds any ally. Gang up on him to defeat him.
Pau Trains
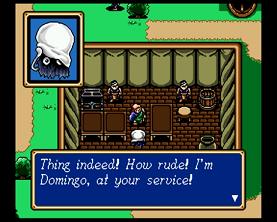
After the battle head into Pau. This visit nets you two of the best characters imo. Guntz might be my all time favorite. He has poor mobility but isn’t slowed by terrain. And he is a beast when he gets to the party, starting right away with the Power Spear. He is terrifying the pigs in the southeast. West of him is a guy with an incubator, and you have that Domingo Egg from Manarina so let him hatch it. Out pops Domingo, a flying creature that specializes in Freeze. You wouldn’t expect it but he’s a tremendous asset with his freeze / flying skills and his underrated defense.
You’ll hear about Earnest going in against Balbazak. Once you raise your characters and promote anyone (make sure you promote a Warrior at level 10 to make use of that Heat Axe).
Entering Uranbatol
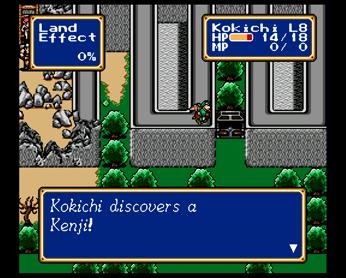
This is one of the easiest levels in the entire game, and a good one to level up in (though it’s a huge board so actually the next one might be a better bet). Anyway, you are introduced to Cerberus here – their regular attack is extremely weak but their fire attack can penetrate anyone for 10-15 damage. Search the spot in the east for a Kenji – a pointless item.
Make use of your new characters and get your recently promoted characters some quick experience to make up for their lost stats. The enemies are so spread out that they’ll be easy to kill – once you get there.
After the battle you can enter the lower door or the upper door. If you take the upper one you’ll see a scene with Earnest pummeling a Cerberus. If you take the lower door you’ll have to take the northwest stairs in Uranbatol to meet up and recruit Earnest. Not much to do in town besides rest up and promote characters.
Uranbatol Harbor
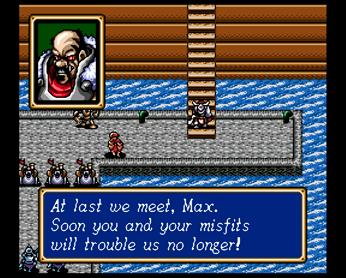
Balbazak is here to prevent you from using the ship. This battle is hard because the enemy is right on top of you, and the Seabats are new enemies that prevent a new, more annoying challenge. This is my favorite stage for leveling up your characters – the enemies (notably the Seabats) yield a lot of EXP and as stated above, you don’t have to move far to engage in battle. Just Egress before taking out Balbazak and repeat – I generally do this to get all the non promoted characters up to speed.
As for winning the battle, be patient and let the Seabats come to you – with your best defenders lined up in front. The northern enemies are a conglomeration of weaker ones you’ve fought in the past. The Cerberus are of course the most dangerous with their armor penetrating flame attacks.
Like most bosses you’ve fought recently, Balbazak doesn’t move. But he does restore HP each turn. Have your Power Spear users snipe at him and throw your Heat Axe user in front to do some damage too – you should be able to maul him especially if you spent some time leveling up.
Balbazak gives you the boat but Darksol kills him immediately for betraying them.
End of Chapter 4 – The Great Fortress of Balbazak
Start of Chapter 5 – Gateway to the Hidden Shrine
Battle at Sea I
You start off on your ship, but enemies are approaching it. Mostly Shellfish and Conch enemies, don’t underestimate them though because their status ailments can prove to be annoying. The Pegasus Knights aren’t really any more difficult than they were before, and it’s been a while since you’ve fought them.
The only real strategy is to let the flying enemies come to you and just absorb the hits with your highest leveled tank. This is another great battle for leveling up with no real dangerous enemy (just annoyances with status effects).
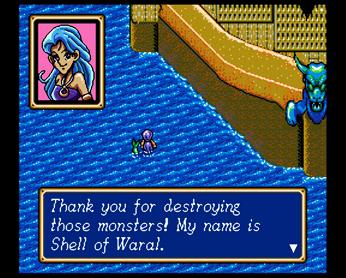
Waral Your ship is screwed after the battle but Shell of Waral tells you of her village and says you should go there until it is fixed.
This is a nice looking resort village. Notice the two empty stands to the west by the king’s palace – the king himself runs them. In fact the weapon shop has new weapons for basically everyone but your spellcasters. You’ll notice with the Elven Arrow that you can now attack from three spaces away (though you got one of those in the previous chapter). Also grab all the treasures in the king’s shops :). One is the Mobility Ring which you’ll grow to love – it makes any unit improve movement by 2. Imagine Guntz with 6 movement instead of 4? Makes a big difference.
As for your ship, you have to wait a bit so you might as well explore some more. Get in the boat and you can find the friar to save, etc. Further south past the buoies and your ship will get caught and sent to a new part of the island. Your party is good at ruining ships.
Talk to this other friar once you wake up, and then enter the blue crystally area. Follow the Skeleton and a battle starts.
 Path to Metapha There is a Master Mage here looking to enter the Path to Metapha. You must stop him.
Starting off, you may wish to split up to the left and right to mop up the Seabats and Skeleton / Cerberus combos. The center enemies are stationary. The Ice Worm is a new enemy here as well. Their attack / defense is poor, but they have the Cerberus like ability to spew stuff but they like to use Freeze.
Further to the north the Cerberus will charge you and the Skeletons fall back. Notice the Skeleton’s are a bit tougher with elevated defenses. The Master Mage can deal fatal damage with Freeze 2 but also are weak with defense.
After it is defeated, you’ll hear the voice from the Orb of Light pool. Unfortunately as you are about to investigate Metapha Path it is blocked off by the Master Mage.
Waral You will be back in Waral after this. Your boat is ready to leave if you are.
Battle on the Sea II
Another battle on your way to the land of Dragon’s. This time you are stuck with enemies that regenerate at the south part of the ship – making it a bit longer. Though the enemy tends to cluster up really bad down there so once you clear up the center, you should be able to put your frontline characters south fast enough to clog that part up.
The Gargoyle is the new enemy here but like the other foes, he has nothing really dangerous to fear. He can make a weird face to stun you but that’s about it. And remember, the Conch’s and Shellfish will reappear when defeated.
End of Chapter 5 – Gateway to the Hidden Shrine
Beginning of Chapter 6 – Descendent of the Sacred Dragons
Rudo
Your ship again goes off course and you wake up in Rudo. It is run by some red head ladies. Talk to the first one right by you, and then check out the building west of this for another one that knows about Darksol and dragons.
Not much at the weapon shop besides Guardian Staves. Buy everyone that can equip one a Guardian Staff because they can’t be purchased elsewhere.
Check for Lyle in the westmost building. He is a centaur / ranger type who can attack from long range but has the movement of a Knight. He may be worth a test run though the battle ahead will be tough for him.
Battle outside Rudo A Dullahan is at the end, ensuring you don’t enter the village. Only 8 enemies are fronting you here, so expect some ambush parties. In fact, you may wish to send someone fast like Zylo or a flying character far east to set off the ambushes.
The first group includes 3 Ice Worms and 3 Master Mages. This group can be dangerous especially the Mages since they’ll act right away. The next group includes 6 Golems. They have crazy defenses, even your toughest characters will have a hard time. Plan on using a lot of Blaze, if you have someone like that with.
The High Priest has Heal 4 (all cure basically) and a deceptively strong attack. The Dullahan has a similar defense to the Golems but a much more dangerous attack. The Master Mage of course can screw you over in such a clustered area.
Dragonia
Inside, head north for a Halberd chest. This is a great short range item for Paladins, but they are rare to find. Also a Broad Sword is in the northeast house.
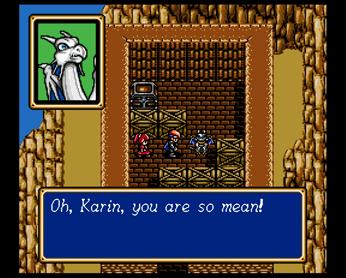
Check the northwest building and go through it to meet Bleu the dragon. He is timid and scared of you, but Karin comes to talk some sense into him. She leaves but then screams – an enemy has her! Bleu saves her and then joins.
Back in town you’ll see your nemesis Kane out there. Talk to him and he says to rest up and get ready for the showdown.
If you put Bleu in this battle, just let him build up with the Gargoyles to the north. Heading to the east is obviously more difficult, with Cain being able to instantly kill several of your characters. The Golem wall should not too be too much of an issue if you have a Blaze user around.
Try to snipe at the Dullahan and Master Mage protecting Cain’s south side. They won’t move until you move up the stairs. Cain can use Death on you and as stated before his physical attack is unstoppable. This is why you kill the lower two enemies first because you’ll need to gang up on him and kill off the High Priest too of course. About all else, keep Max protected!
After the battle, Kane comes to his senses. Try to enter the shrine, then come back and you’ll see Kane in the lower left corner. Talk to him and the two of you can open the door. Follow him in but Darksol will begin battle against him. Everyone will be gone, so head back to Rudo.
Rudo
At Rudo, speak to the sisters to find out you’re out of luck and Dark Dragon can be revived. Karin suggests you go to Prompt.
To Demon Castle Mishaela is outside and she informs you that you are going to die right now. This battle is definitely not for the Knights or Mages. The terrain has never been more brutal.
There are some annoying new enemies, like the Belials. They’ll cast Bolt and tend to get towards you when you’re clustered. So stay spaced out until you defeat them. Same with the Master Mages. A large portion of your party may fall behind and by the end it’ll likely be a worn out group of fliers that are killing the last Bowman and High Priest.

Demon Castle
Mishaela is here and so is the Sword of Light, something that you want. Also keep in mind that there are a ton of other treasures here, so get them all in battle, and Egress if you have to. The right treasure is a Power Potion, a White Ring, Shower of Cure, and Light Sword in the northeast, and Black Ring, Healing Seed and Evil Ring in the northwest. Of course you’ll want to get the Light Sword with a flying character and return it to Max. With the Sword of Light and White Ring, Max becomes extremely powerful.
Mishaela herself will retreat north to her den area. You’ll take care of her last of course, after acquiring the Sword of Light and other items. The Belials you should be careful with. You don’t want to waste heal spells early on because you’ll need them for Mishaela and her Bolt 2’s. A useful thing to do is use the Power Ring on Max when he has the Sword of Light. Sometimes he can get a double attack and kill Mishaela in one fell swoop!
End of Chapter 6 – Descendent of the Sacred Dragons
Beginning of Chapter 7 – The Lost Civilization

Prompt
You are in Prompt, the place you were looking for. You will spend a ton of cash buying weapons – this time everyone needs to get re-stocked save for the Healers. Don’t worry, this is one of the last times you’ll need to do this.
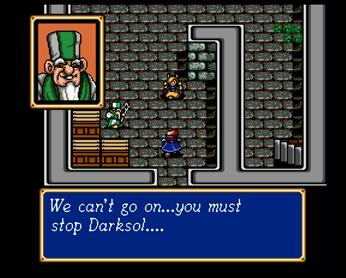
Head to the southwest and towards the king underground. For some reason he doesn’t trust you and immediately throws you in jail. Search the cell door and Boken lets you out. Go talk to the king…and it’s like he never even threw you in jail in the first place. He mentions Alef and Torasu at the tower fighting Darksol.
Search behind the King to find Kane in bed. Talk to him but he’ll be sleeping. As you leave, he tells the king to give you permission to go to the Tower of Ancients. So he lets you!
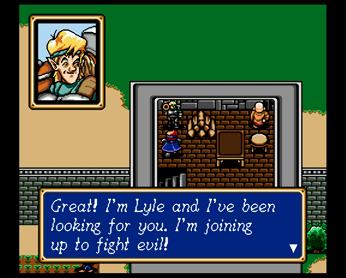
Leave the castle area of Prompt. Return north and to the hotel like house in the west with the little white north in the middle of it. Search that note…and it’s a note from Musashi the Samurai saying he’s going to join! This is good news because he’s one of the most powerful characters in the game – but slow and poor movement.
To Tower of Ancients Outside you’ll found yourself in another crappy terrain battle. And there are tough new enemies in this battle that you will get accustomed too. Fortunately, you got all of those new weapons – even with them though these new enemies (like the Jet) have good defenses still. The Torch Eyes are maybe the most annoying, doing a fixed 20 damage pretty much. Minotaurs are your typical brutes but can move fast through the terrain. Wyvern’s fly around and breath fire on you. Overall it’s a dangerous outfit so be careful and don’t stray to far ahead of the pack.
This is an underrated battle. The last few enemies really will push your team to the edge. Definitely don’t leave Max vulnerable because the Torch Eyes can do a static high-teens damage, and those Wyverns can do the same with their fire breath. And they will gang up on you.
After this battle, rest up at Prompt and then head to the Tower of Ancients.
Tower of Ancients
Enter the Tower of Ancients in the right part of the screen. Grab the Devil Lance on floor 1 and the Turbo Pepper on floor 2. Turbo Pepper ups your movement by 2 permanently! Use wisely…
A Demon Master is at the far north of this stage. They have Freeze 3, so be wary of these enemies. Try to snipe from afar at the enemies if you can (specifically the Steel Claw and Torch Eye). If you have a flying character you can just fly across to get the Valkrie, basically the best weapon for the Paladins (though this is the only one in the game :( ).
The group with two Torch Eyes in the northwest is best fought with a few flying characters to ambush the enemies from the sides. If you didn’t grab the Valkryie earlier do so now. The Demon Mage has Freeze 3 but it’s defense is as poor as it’s predecessors. It drops a Demon Rod (cursed).
As you reach the top of the tower, you’re late. And Darksol is ready to kill you. Fortunately Kane comes in to distract him but dies in the process. Return back to Prompt.
Prompt – to Metapha
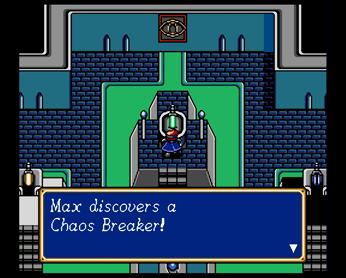
Go speak with the King. Otrant will come in and tell you of the Chaos Breaker. You’ll get the Sword of Darkness to match the Sword of Light – now go to the Path to Metapha in the basement.
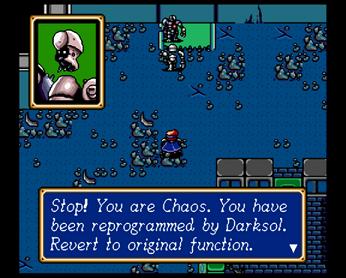
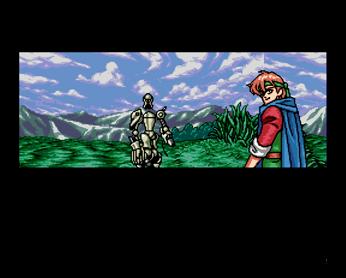
You’ll need the Orb of Light to continue forth to the path. Inside you will meet Adam the robot. He is a good guy and tells you to use the Orb of Light up ahead. Do so and you’ll eventually be led by Adam to where the Chaos Breaker is.
Unfortunately, a boss robot named Chaos is here to stop you! This battle is like the Balbazak one in that it is so small that the entire group of enemies will be bearing down on you after long. In turn it is a good one to build up in.
Have a good tank on the right side to deal with the Jets, and then kill the Demon Mages to the west as soon as possible. If you go too far north up that west path, Chaos and friends will just rush you. This is bad but even if it happens they’ll clutter up and will only be able to attack with a few units at a time. This is a wonderful battle for leveling up Alef, Torasu and Alex.
Up ahead you’ll place the Sword of Light and Sword of Darkness in the left and right altars respectively. Then you can get the Chaos Breaker up ahead. This has a higher attack and can use Freeze 3 is used in battle…but I miss the Bolt 2 of the Sword of Light. Anyway, go on and use the Orb of Light and return to the king in Prompt.
Road to Runefaust
As you exit outside, a battle to the Runefaust Gate begins. It is being blocked by an Armored Skeleton, an enemy with an extremely high attack. Also there are more new enemies, one being Horsemen who have the usual high attack / low defense combo. Then the Cerberus’ are here, and they are of course similar to Hellhounds. This is another crappy terrain battle unfortunately. You may even consider it too much of a hassle to kill the Skeletons far to the east.
The center is clearly the hardest part, with the Cerberus charging out at you and the Minotaurs not too far behind. Once you’ve cleared this area it should be easy to take out that last Armored Skeleton to end the chapter.
End of Chapter 7 – The Lost Civilization
Beginning of Chapter 8 – Rise of the Ancient Castle
Runefaust
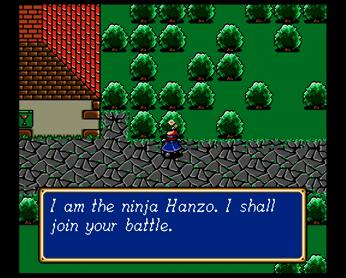
You’ll begin near Runefaust. Just as you enter Runefaust, look north. See that weird looking bush? Search it and you’ll find a note from Hanzo! Hanzo is a Ninja and is like Musashi in that they’re both extremely dominant characters.
Not much to buy here besides Buster Shots for your archer types. You’ll hear from everyone around here that King Ramladu has turned against you.
Enter the castle area and a battle will begin.
Battle versus King Ramladu King Ramladu taunts you here and sics some tough enemies on you. Chimaera’s are the hardest normal enemies imo because they dodge so many attacks and their attack is very high. Blue Dragon’s are very similar in a lot of those categories as well, but are a bit slower and don’t evade quite as well.
Grab the Atlas Axe and a Halberd in the southeast – both are extremely worth it considering they are rare items. You will get your first Chimaera test early on here, and make sure you can gang up them.
The enemies to the north are for the most part stationary. So, have everyone take out the group in the northwest corner, and then begin to work your way east. You can use the ice blocks in the center as a way to guard yourself and keep the weaker characters protected.
One of the Armored Skeletons drops another Atlus Axe. After defeating all of the enemies, the ice blocks melt and you now have to fight a ton of machines – and this time King Ramladu himself gets involved.
Ramladu is stationed to the north and won’t move, so focus on the 20 or so enemies below you. The Torch Eyes can kill several characters if they are all left alive so begin to whittle their forces down. You’ll have casualties either way with the amount of enemies near you. Using Egress first to revive those who died in the previous battle should be done immediately.
If you thought Kane had a good attack, wait until you see King Ramladu. Instant kills galore, and his attack looks pretty cool too. He has Aura 3 to heal, but that’s really not that effective since he’s just one person. As usual with bosses, you are best off rushing him and doing all the damage you can – he’ll knock out a few characters along the way surely.
Shortly after, Ramladu regains his senses and apologizes for fighting you. It’s too late though and he passes. Return to town one last time to rest and take the west stairs this time in the castle area.
When you get outside, head to the far west cape. Use the Chaos Breaker to get Dark Dragon’s castle to appear. Now enter that little gate area that looks like the place where you fought your very first battle.
Castle of Ancients – Colossus Trio
Enter the gate and then hit the teleport. You’ll be in the Castle of Ancients now, but the Colossus Trio is barring your path. You’ll see that one has Bolt 3, one has Blaze 3, and one has Freeze 3.
This battle is tough at the beginning. You’re going to get assaulted from both sides by Blue Dragons and Chimaera’s. Do whatever you have to do to kill them all, and you have no choice but to wait for them to come to you. The Horseman above should be easy kills and the once you finish off the Armored Skeletons you can start worrying about the eastern Chimaera’s because they’ll probably be on top of you.

By the time you clear everyone out in the center, the Freeze and Blaze Colossus’ will be upon you from the west and east respectively. They really aren’t that difficult though their evade rate can be annoying.
The Bolt 3 Colossus is at the top. Obviously that’s the toughest one but it should be by itself once you get there. It’s slow movement allows you to get in close enough to gang it up like usual.
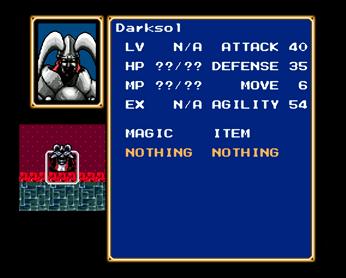
Darksol revives Dark Dragon
As you get to Darksol, he is meddling with Dark Dragon unsuccessfully. It looks like you can stop him after all! Darksol is at the top, protected by Steel Claws, Torch Eyes and Blue Dragons.
You’ll want to split your party in 2 likely, unless you are way overleveled in which case you can just head straight north. Otherwise though, head west / east with your party and mop up both sides. Destroy the four Torch Eyes in the middle at the same time, and the Blue Dragons will fly towards you once you get close to this area.
Darksol himself does not have that strong of a physical attack, but his Soul Blaze attack does about 30 damage on a group of characters. Not to mention over 100 HP. So you’ll want to spread out during this fight.
Unfortunately, with his last powers Darksol summons Dark Dragon! You must defeat it!
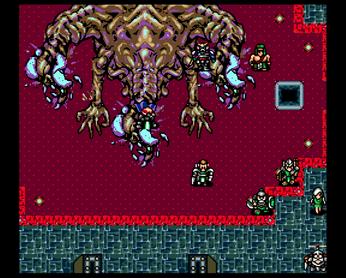
Dark Dragon
Dark Dragon has three heads. The center one likes to use Soul Blaze a lot, and it’s range is like Bolt 2 / Bolt 3, so if you gang up on him in any way you are in trouble. The side Dark Dragon’s can do that too but they seem to use weaker attacks like Blaze 3, Freeze 3, Desoul 2, etc. Dark Dragon also has a powerful physical attack, but it’s nothing compared to it Soul Blaze attack.
Also you’ll notice two areas where Armored Skeleton’s regenerate for a long while. There are about 20-25 Armored Skeleton’s on each renegeration spot. When you combine this with the fact that Dark Dragon doesn’t move, it’s a great spot to level your characters up to speed while Dark Dragon cannot attack.
You may wish to leave the center Dark Dragon alone until you defeat the other two. Having some flying characters allows you to attack Dark Dragon from all sides, which helps. Physical attacks seem to work best and have the ability to go twice. Freeze / Blaze / Bolt 4 aren’t bad either for quick damage. Torasu is a good one to have around with his Aura 4 incase things get messy.
The ending is sad :(
hi i would like to know how the hell your supposed to go to other casels and what not when there’s no where i can go, everything i tried is blocked, i left gurdania or whatever and fought in the next town after the king died but they say a person can help me in a city north east and i cant get to it at all, theres water, and when i go to the little house on the far east. theres a golfer who claims hes been waiting for me and then he turns away! How do i leave ?
Relax Anna :) So you are still in Chapter 1? The second castle here is Alterone. You need to talk to everyone with-in and you will then be able to get in the castle to the north. Talk to everyone in there including the King, and you will fight a battle against some enemies (after being thrown in jail for a bit).
I have the same problem as Anna. I don’t know where to go. I have been thrown in jail already, and have fought the enemies, but I can fiqure out how to get to where I’m supposed to go. Please help.
easy. a little bit under where the king sits, and then to the left you’ll see a dragon head. search it and it will open the door. then go through the door and you go to chapter 2
ok well im on chapter 6, and i cant beat the girl in the castle where u get the sword of light, any hints? my main character is lvl 5 if that makes a difference
Mishaela is tough. Her HP regenerates and you can only attack her with one character at a time.
What works best for me is sending out one character at a time at her, and when the character is dead, send in another warrior. This way she can’t use Bolt to attack multiple characters at once.
Another thing to keep in mind is if you have a flying character, you can have that character get the treasures. One of the treasures is the Sword of Light. You can then give this to the Hero to greatly increase his attack and you can send him in to do the killing blow (or hopefully not have to risk using him at all, but Mishaela might kill everyone else you have).
Level 5 for Max might be a little low at that point, not entirely sure. Probably good enough though.
nvm i finally got it! woohoo for me!
i need help how do you get the sword of light and darkness plus the chaos breaker at the same time? i make the chaos breaker after i get it plus before it won’t let me get the other swords. i saw someone on youtube had the three swords but never showed how he got it. please if you get the chance answer mw please. or if you can tell me a website that helps too. :D
Hey thomas. I’ve never done that. It must be a game hack, or a code or something. I would suggest GameFAQs, surely someone there has the answer.
Not sure what good it would do though. Only Hero can equip those swords so he can only equip one at a time (though I guess it would be nice to have Sword of Light to ‘Use’ it in battle for the Bolt spell).
its impossible to kill mishaela. i got her down to about 20hp but she just kept regenerating her health. i used ‘(max/hero)’ last with the sword of light but that just knocked off about 25hp n then she eventually killed me because of her F*****g health regenerating lol >:(
seen as though i have already fought her and been beaten – i’m guessing i should have all the treasures.
any tips on killing that b***h
lmao, that sucks man.
What level is your Max promoted? If you died and have to do the battle again, just have him kill off all the enemies and gain a level or two. That should help.
The key is bringing as many of your strongest fighters alive to the end. Like you say, she regenerates her HP so you have to bring in your best fighters so you don’t waste a turn. Then send them in and hopefully they can whittle her HP down to like 10-15 and then have the Hero finish her off.
Maybe do an in-battle save before each person attacks because if you send someone in there and they miss you might be screwed (not just because the character will die, but because she’ll regenerate a full slate of HP without you taking off any (not sure how much she regenerates per turn, probably 10-15 HP per turn? I should find that out…)
Mishaela is probably the hardest boss in the game, even harder than the final bosses (I mean considering when you fight them). We can only attack her with one person at a time or else she’ll pull Bolt 2 on us so it’s hard to beat her when you can only send one person in there (unless you have Kokichi / Amon / Balbaroy in your main party as they can fight from the sides of her).
Oh I almost forgot.
Who has your Power Ring?
Give it to someone other than the Hero, and then Use the Power Ring in battle on him. Preferably give it to a healer because your other strong warriors will be killed off by the time Max goes in to fight. This will make him take off like 30+ damage in one hit with Max having the Power Ring used on him. The attack power wears off after each turn so make sure you use it when you are close to Mishaela and Hero is read to swoop in.
Alright im at darksol’s castle ..I dont think my team is even close to being strong enough to defeat this place..i make it past the first swarm of blue dragons and chimera only to be smashed by the second wave..i dont get it.. through out the whole game i play each battle and win the first time..the last 2 battles before darksol im getting my tail kicked? What gives?Do i just have to egress after the first wave over and over again until my team is strong enough? Can’t you play the game through without having to beat the same battle over and over to build your team?? my zylo is lvl 27..hes prob the best i got and the dragon i kept trying to lvl but never did more than 1pt damage the whole time couldnt even promote it ..so he died repeatedly and got put on the bench..the rest of my team is all promoted .and up around lvl 12 now sept max who is like lvl 17 ..do i have to start all the way over ??? can i beat it with what i got?
Hmm, you should be good man. Only problem I would see is that in leveling Zylo up to level 27, you took a lot of EXP away from other characters which could be creating an imbalanced team though it’s hard to say without seeing all your characters.
Anyway, that battle is hard. Chimaera’s are damn near the hardest enemies on the game, because their evade rate is sick. I’m sure you missed them plenty of times. Blue Dragons are also very strong.
Best idea is to coax them out slowly so you minimize damage by fighting 1 or 2 enemies at a time (of course, you could say that about the entire game).
The dragon Bleu is actually really good, so is Adam. Problem is they are weak when you get them and take a lot of time / patience to build up. Great developmental characters because they have high upside but if you are just going through the game then yea, there are surely better characters that you could use right now.
How are your magicians? Blaze 4 can screw the Blue Dragons easily and use your highest level magic against the Chimaera’s because like I said their evade rate is off the charts and they dodge a ton of your attacks (in addition to being the strongest regular enemies in the game along with the blue dragons).
I remember playing this game as a kid and I was always too scared to use the hero character because I was afraid of him dying and it really messed me up when I got to Mishaela too. I recently played it again on the iPhone and now 20 some years older and smarter, the game is super easy. The trick is that you have to replay certain battles over and over again to level up your characters. I must of fought the Balbazak and Elliot battles 10 times each and by doing so my characters became way way overpowered. Pretty much 3/4 of my party could one shot most enemies and even bosses. Heck I soloed every boss starting with Elliot to Mishaela with the Hero and by the time I got to Darksol even my ranged guys were blowing guys away from 4 squares away. I think my Hero was level 32 promoted and a practically the rest of my party was in the upper 20s promoted as well. The hero, Musashi and Zylo pretty much owned everyone while the rest of my party tried to catch up. If your hero is still level 5 unpromoted by the time you get to Mishaela then you’re doing it wrong.
any of you guy though about using max escape spell to return to battle and lvling up your people so the future battles are easier?….. or am i the only one who had a lvl 13 team before even making it to pao? which all was premoted as well?
Hey Guyver, I think that’s what Hanzou was implying in the previous post. To both, I say, Shining Force is too easy to be doing that. Even if you don’t level up like that you should be okay in like 90% of the battles. If you just went through without leveling, I would think the only ones to give you real trouble would be Mishaela’s battle and Ramladu.
There are some spots where I will Egress / Escape and fight battles over. I use one that Hanzou does, Balbazak’s battle, because the enemies are right in front of you so grinding levels is easy. Then you Egress and repeat the process.
The only reason I would do it though is to ensure no one fell too far behind (ie I had to make sure everyone was promoted so they could be built up or used later on).